You’re midway through a planed edge and the wood suddenly tears instead of shaving cleanly — why did that happen? You tilt your head, squint, and shift your stance trying to chase the problem, but the cut keeps snagging and fibers lift. Most people blame the blade or the wood, not their own eye, head, and body alignment.
This piece will show exactly how small changes — aligning your dominant eye, sight plane marks, and stance — stop sudden bites, make the tool track true, and keep cuts shaving smoothly so you waste less time and material. You’ll also get simple routines: light guide passes, body-supported feeding, plus labeling and batch-sharpening tips to keep results consistent. It’s easier than it looks.
Key Takeaways
If you’ve ever had a cut wander or tear out at the edge, this is why.
Why it matters: keeping your eye, blade, and cut line aligned prevents wasted material and extra sanding. Picture cutting a 1×6 shelf where one shaky pass ruins the front edge.
1) Align eye, blade, and line
- Why it matters: alignment makes the saw follow the mark so you don’t wander into the grain.
- Steps:
- Stand so your dominant eye, the blade teeth, and the pencil line line up in one straight sight plane.
- Close the other eye briefly to verify the three points sit on the same line.
- If they don’t, shift your head or workpiece until they do.
- Example: when crosscutting a 12″ board for a cabinet face on a portable table saw, take 3 seconds to realign or you’ll sand the front edge off later.
- Tip: keep your head low and square to the edge; small neck adjustments give big alignment changes.
- Bold: alignment
If you want a quick visual reference, use pencil ticks.
Why it matters: small reference marks let you notice drift before tear-out starts. Picture cutting along a 48″ panel where one degree of drift leads to a ruined edge.
2) Use two 1″ pencil ticks and recheck often
- Why it matters: ticks give repeatable sight points so you catch drift every few inches.
- Steps:
- Make two pencil ticks about 1″ apart across the cut line near where you start.
- Sight those ticks every 6–12″ of cut and realign if they move relative to the blade.
- Re-mark ticks if they smudge or the dust hides them.
- Example: when ripping a plywood sheet, check ticks at 6″ intervals; you’ll stop wobble before the veneer tears.
- Bold: ticks
Support matters as much as sight.
Why it matters: a steady body reduces chatter and keeps the saw feeding straight. Imagine doing a long rip with one hand and ending with a jagged edge.
3) Use your torso, stance, and a close hold
- Why it matters: anchoring the tool to your body controls motion and reduces vibration.
- Steps:
- Stand with feet shoulder-width, left foot forward if right-handed (reverse if left-handed).
- Hold the tool 6–8″ from the blade with your support hand and bring the saw into your torso so your arms form a steady triangle.
- Keep your shoulders relaxed and push with your legs, not just your arms.
- Example: when plunge-cutting a template, keeping a 6″ hold and bracing to your chest keeps the cut smooth.
- Bold: stance
Start light, then settle into a steady feed.
Why it matters: a shallow guide pass confirms alignment and prevents splintering at the start. Picture beginning a 24″ crosscut—an aggressive first pass tears the face veneer.
4) Start with a light guide pass, then feed 1–2 in/s
- Why it matters: a light pass sets the path; a consistent feed keeps the cut clean.
- Steps:
- Run a light guide pass just deep enough to register the tooth line (a few teeth).
- Increase pressure to a steady feed rate of about 1–2 inches per second for the full cut.
- Keep that feed rate consistent; if you stall, back off and re-align.
- Example: when resawing a thin board on a benchtop bandsaw, a light first pass prevents the blade from grabbing and splintering the edge.
- Bold: feed
Final quick checklist (use before you cut)
- Eye, blade, and line aligned.
- Two 1″ pencil ticks visible.
- Head low and square.
- Feet shoulder-width, 6–8″ hold, torso support.
- Light guide pass done; then 1–2 in/s feed.
You don’t need fancy gear to avoid tear-out. Small alignment habits like these will save material and time.
Quick Checklist: Stop Tear-Out With Posture and Sight
Before you start planing or routing, know why posture and sight matter: they cut down tear-out by letting you keep the blade aligned to the grain.
1) Confirm your eye dominance.
- Why it matters: your dominant eye guides alignment so cuts land on the line.
- How to do it: form a small triangle with your hands, extend arms, focus on a distant object through the triangle, then close each eye; the eye that keeps the object centered is dominant.
- Example: when I checked mine over a 6-foot shelf I was installing, I realized my right eye led and I shifted the blade 1/4″ toward that side before planing.
- Step-by-step: 1) Make the triangle, 2) focus on the object 10–20 feet away, 3) close one eye, 4) note which eye keeps the object centered.
2) Align your head tilt and sightline so you look square to the edge.
- Why it matters: a tilted view makes you chase a phantom line and causes uneven tear-out.
- How to do it: stand with feet shoulder-width apart, face the work so your shoulders are square, bring your head level until your sightline meets the edge at 90 degrees.
- Example: on a 2″ thick maple board I held my head level and watched the shaving form evenly across the width.
- Steps: 1) Feet shoulder-width, 2) shoulders square, 3) adjust head until sightline is perpendicular.
3) Set and keep a steady work rhythm.
- Why it matters: consistent speed avoids sudden bites that rip fibers.
- How to do it: pick a tempo you can sustain and count seconds per stroke—aim for 1.5–2 seconds per pass for a bench plane on hardwood; for a router, keep feed rate constant at about 30–50 inches per minute for a 1/4″ bit (adjust for harder woods).
- Example: when I routed a 3/4″ oak edge, I kept each pass to about 2 seconds and eliminated chatter.
- Steps: 1) Pick your pace, 2) use a metronome app or count, 3) maintain that pace across each pass.
4) Position your body for control: relaxed shoulders, supported arms, tool near your centerline.
- Why it matters: support reduces wobble and lets you apply even pressure.
- How to do it: relax shoulders, rest your forearms on the work or tool, keep the plane or router within 6–8 inches of your belly button so you push with the whole torso rather than just your wrists.
- Example: with the plane 7″ from my centerline I could push squarely across a 4″ wide board and get uniform shavings.
- Steps: 1) Relax shoulders, 2) support forearms, 3) place tool 6–8″ from centerline.
5) Verify and recheck your marks before each pass.
- Why it matters: small misalignments compound over multiple passes and create tear-out.
- How to do it: use a pencil or marking knife and a square, sight down the line from both ends, and clamp or hold the work so it can’t shift.
- Example: I marked a 1/8″ rabbet on a poplar board, rechecked it from both ends, and never had to recut.
- Steps: 1) Mark with pencil/knife, 2) sight from both ends, 3) clamp the work.
Final quick checklist to carry with you:
- Confirm dominant eye.
- Level your head and sightline.
- Set a 1.5–2 second tempo or steady feed rate.
- Keep tool 6–8″ from your centerline with relaxed shoulders.
- Mark, sight, and clamp before each pass.
Do these every time and you’ll cut down tear-out visibly.
Align Your Stance Like an Athlete for Cleaner Cuts

Before you set up to plane or route, you need to know one simple thing: your stance controls how straight and clean the cut will be. When you stand with feet about 18–24 inches apart (shoulder-width for most adults) and put one foot 6–12 inches forward, you let your whole body guide the tool instead of relying only on your arms. Example: when I joint a 6-foot board, stepping my left foot forward 8 inches kept the plane tracking dead straight for the full pass.
Why this matters: good balance reduces wrist torque and fatigue so your cuts stay consistent. I practice this with a quick drill:
- Stand with feet 18–24 inches apart and one foot 6–12 inches forward.
- Bend both knees slightly—about 10–15 degrees—so they’re soft, not locked.
- Shift your weight from 60% front foot to 60% back foot over 3 seconds, then reverse.
Do that for 12–20 repetitions. It trains the feel of equal weight distribution and lowers tear-out on long cuts.
Think of balance like a tripod: the wider and lower your base, the firmer your tool tracking. Keep your center of gravity low by slightly bending knees and hinging at the hips so your torso stays over the work. Example: when routing a tabletop edge, keeping hips square to the cut line let me steer the router with my core rather than twisting my wrists, which saved me one cleanup pass on the finished edge.
How to align your hips, shoulders, and core so the tool tracks straight:
- Square your hips to the cut line so your pelvis faces the direction of travel.
- Bring your shoulders level with the cut, not twisted; imagine pulling the tool straight with your chest.
- Engage your core lightly—think of a gentle brace, not a crunch.
- Keep your hands in line with the tool so force transfers through arms, shoulders, and torso.
Example: when planing a door stile, making these adjustments stopped the plane from veering after three strokes.
A few quick cues you can use while cutting:
- Feel equal pressure through both feet; if one feels heavier, rebalance.
- Keep knees soft; locked knees throw off the center of gravity.
- Check that the handle line points where you want the tool to go.
When your stance and alignment are right, the tool tracks straight and your cuts show fewer tear-out fibers.
Recommended Products

Find your custom fit: Remove your shoes and measure from the floor to the top of your kneecap. This is measurement (in inches) is your perfect ProKnee fit.

GREAT WORK PANTS - These pants aren't made for just any craftsman. A cotton canvas base covered by extended CORDURA leg shields makes them the pants of hammer-wielding warriors. If you're looking for pants that are tough as nails, choose these ones!

Self-supporting pads allow the back of knee remain open as they comfortably rest on top of your foot.
Position Head and Eyes to Follow Every Cut Line

If you’ve ever tried to cut a straight line and kept wobbling, this is why.
Why this matters: your eyes and head guide the blade more precisely than your hands, so aligning them reduces mistakes and keeps cuts straight. For example, when I cut a 1/4″ oak edge for a bookshelf, setting my sightline with the blade saved me from re-sanding a 12″ long panel.
1) Position your head and eyes for a straight sight plane.
- Put the blade or ruler, the cut line, and your eye in one flat plane so you can follow the mark exactly.
- Get your head low and square to the line — about 2–3 inches above the work if you can — so your eye tracks deviations easily.
- Example: when trimming a door jamb, I crouch so my eye is level with the saw plate; that angle reveals a 1/16″ error immediately.
2) Stabilize your gaze and body first.
Why this matters: a steady visual reference stops wobble and prevents overcorrection.
Steps:
- Plant your feet shoulder-width apart and face the cut straight on.
- Shift your stance with small foot or shoulder adjustments rather than twisting your neck.
- Rest your forearm or elbow on the work or fence for a repeatable sightline.
Real-world example: while ripping a 48″ plywood sheet, I moved my whole body three inches instead of craning my neck; my cuts stayed within 1/32″ over the full length.
3) Verify the sight plane before you cut.
Why this matters: checking from multiple angles catches hidden misalignment before you commit to the cut.
Steps:
- Kneel and check eye-level alignment with the blade or ruler from both ends of the line.
- Look from 30° above and 30° below the plane to confirm the line stays straight.
- Mark consistent visual reference points on the workpiece (pencil ticks every 6–12 inches).
Example: when crosscutting 8″ boards, I mark ticks at 6″ intervals and sight them down; it prevents a 1/8″ drift across four cuts.
4) Make controlled, confident passes.
Why this matters: slow, steady motion holds the sight plane and keeps the cut on the mark.
Steps:
- Start the cut with a light guide pass to confirm alignment.
- Keep a steady pace — about 1–2 inches per second for hand-guided saws; slower for finish cuts.
- Check the line visually every 6–12 inches and adjust body position if needed.
Real-world example: when planing a tabletop edge, my controlled passes at roughly one sweep per second removed tear-out while staying dead straight.
Quick checklist before any cut:
- Eye, blade, and line are in one plane.
- Head is low and square, about 2–3 inches above the work if possible.
- Feet and shoulders aligned; neck relaxed.
- Reference ticks every 6–12 inches.
- Start with a light guide pass.
Bold the most critical idea per paragraph: keep your sight plane aligned with the blade and line to avoid mistakes.
Recommended Products
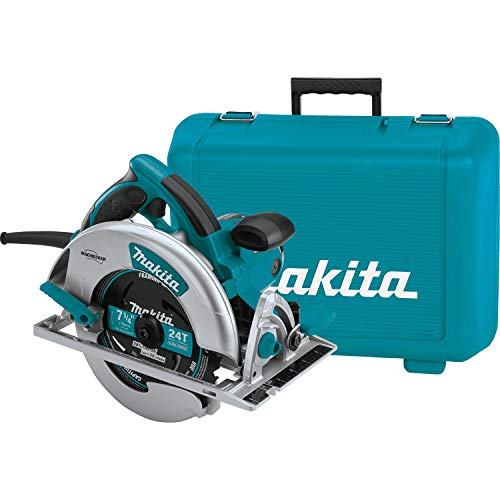
Electric brake for maximum productivity

【Precision Micro Adjustable Flip Stop】GOINGMAKE parallel guide for track saw provides precision micro adjustable flip stop with 0.001 inch(0.0254mm) adjust accuracy for making woodworking repeatable cuts for your track saw. Easier to break down sheet goods and ensure dead-on consistency between cuts with accurate and solid flip stops. Package includes: 2 connect brackets, 8 t tracks, 2 flip stops, 12 t track connectors and 2 extension rods.

Powerful Makita-built electronically controlled BL Motor delivers 5,000 RPM for faster cutting and ripping
Visually Square Your Tool Before Each Pass

Here’s what actually happens when you skip a quick visual check: small misalignments stack into a crooked cut that wastes time.
Why it matters: a single tiny angle error can turn a $20 part into scrap. I check before every pass so you don’t compound a small mistake into a big one.
1) How to square the tool visually
Why it matters: lining up sightlines prevents skew and reduces tear-out.
Example: when I trim a 3/4″ plywood edge for a cabinet face, a 1° tilt over a 24″ cut shifts the edge nearly 0.4″.
Steps:
- Stand so your eye is level with the tool edge and the cut line.
- Line up a sightline from the tool edge to the cut; ensure the blade or sole looks parallel to your reference edge.
- Look at calibration marks (scale, 0 marks) and confirm they read zero or match your setup.
- If there are no marks, make two quick pencil ticks 1″ apart on the jig and align the tool to those.
- Press lightly into contact and recheck the sightline before you move.
2) What to include in your quick mental checklist
Why it matters: a repeatable routine prevents you from forgetting one critical relation.
Example: when routing a drawer front, I use the same three checks and never need to re-cut the piece.
Checklist (say it to yourself each time):
- Sight — are edges visually parallel?
- Contact — is the tool sitting flat against the reference?
- Fence relation — is the fence flush where it should be?
Repeat these three words before each pass.
3) How to mark parts or jigs when there are no references
Why it matters: quick layout marks let you reset setups in seconds and keep cuts consistent.
Example: I once had to remake five identical trim pieces under a deadline, so I marked each jig with a 1/8″ offset line and saved 20 minutes.
Steps:
- Clamp the part or jig in its intended position.
- Make two pencil ticks 1″ apart across the contact surface.
- Transfer that same pair of ticks to the tool edge or fence.
- Use those ticks as your sightline reference for every pass.
This habit costs 10–30 seconds, yet prevents cumulative skew, reduces tear-out, and saves you minutes or hours by avoiding rework.
Measure Precisely: Label, Number, and Match Parts

If you’ve ever started a project and lost track of which piece goes where, this is why.
Why it matters: mismatched parts waste time and wood and can ruin a glue-up.
1) Number and label every piece before you cut or join it.
- Do this on the face that will be hidden; write with a pencil so marks disappear with sanding.
- Use a simple system: number the assemblies (1, 2, 3) and letter the parts inside each assembly (A, B, C).
- Example: for a three-shelf unit, label the left side 1A, the right side 1B, and the middle shelf 1C so you never grab the wrong shelf during glue-up.
2) Show orientation with mating identifiers.
- Why it matters: identical-looking edges can be flipped and ruin fit.
- Mark mating pairs like A1/A2 or L/R at every joint edge.
- Example: when you mill dovetails for a drawer, mark the front tail board T1 and the corresponding front pin board T2; align T1 to T2 before clamping.
3) Record measurements on the part, not just on the plan.
- Why it matters: plans get left in the shop or misread during a rush.
- Write critical dimensions (length, cut depth, reference face) on the piece itself with a pencil and the date.
- Example: for a tenon that must be 3/8″ deep, write “TENON = 3/8” on the shoulder so your chisel work checks against the actual part.
4) Measure twice and check orientation before cutting.
- Why it matters: one extra check prevents a ruined piece and lost material.
- Steps:
- Measure from the same reference face twice and compare values.
- Confirm the label and mating identifier match the plan.
- Only then make the cut.
– Example: when ripping a board to width, clamp a stop and verify the fence position twice — once with the tape and once with the square.
5) Align marks before glue-up or fastening.
- Why it matters: alignment ensures grain direction, edge fit, and strength.
- Steps:
- Dry-assemble and line up labels and mating marks.
- Check grain direction and that edges meet flush.
- Apply glue or fasteners after everything matches.
– Example: for a laminated table top, align numbered planks so the grain flows and the numbers read left-to-right before you apply any clamps.
6) Use consistent mark styles and keep a key.
- Why it matters: inconsistent marks confuse helpers and slow you down.
- Keep a small note card in your apron listing your system: numbering order, L/R, face references, and symbol meanings.
- Example: a card that says “# = assembly; letter = part; F = face; ↑ = grain up” saves time on every job.
Final practical tip: if a mark is on a visible surface, move it off to a hidden edge or make it erasable. Short reminder: label, match, measure.
Recommended Products

Arokimi Branding Iron: Make Your Own Logo Into a Metal Mold, Which Can Leave Permanent Traces on Your Craft Work.Our Custom Branding Iron Is Perfect Work For Branding On Wood, Leather, Plastic, Paper And More

Heavy gauge, laser cut plates provide true, accurate cuts

High Performance Masking Tape - Its specially formulated rubber adhesive system is designed to hold firmly onto multiple surfaces, such as flat, smooth, or lightly textured walls, wood, metal window frames, baseboards, glass, tile, or hardwood floors. It will not dry out or lose its holding power.
Mill and Route in the Order That Prevents Tear-Out
If you’ve ever cut a board and watched the edge shred, this is why.
Why it matters: tear-out weakens joints and wastes material. Example: when you rip a 8/4 oak board and the edge fibers lift 1/8” along a 6‑foot length, you can lose glue surface and need extra sanding.
1) Mill and route ends before long faces
Why it matters: trimming the ends first keeps the board length stable and reduces fiber lift when you later cut the long faces. Example: square and trim both ends of a 6′ pine board to 1/8″ over final length before thicknessing — the ends act as anchors.
Steps:
- Crosscut both ends to length with a sled or stop block so the ends are square.
- Use a router or small plane on the ends, cutting with the grain direction you’ll use later.
- Then run the board through the planer/ride the jointer to remove face material.
Takeaway: you’ll see less lifted grain along the edges when you plane the faces.
2) Match grain direction on mating pieces
Why it matters: opposite grain direction at a joint can push seams open or lift edges under stress. Example: two bookmatched cabinet door stiles with mirrored grain will show a smoother joint and less tear-out when you route the bolection profile.
Steps:
- Lay both mating pieces together so grain visually flows across the joint.
- Mark grain direction arrows on each piece before milling.
- When routing profiles, feed both pieces in the same direction relative to the cutter whenever possible.
Takeaway: matched grain gives predictable compression and cleaner edges.
3) Face‑plane after rough milling so the plane cuts supported fibers
Why it matters: removing rough pass marks before final planing keeps the plane from catching unsupported fibers and causing raised grain. Example: after a first pass through the planer on a 4″ wide poplar board, use a #4 jack plane with a cambered iron and take 0.006–0.010″ passes for a final face.
Steps:
- Do a light rough milling pass — remove most material but leave 0.020–0.040″.
- Adjust the hand plane for a fine shaving of 0.006–0.010″.
- Plane with the grain, checking for smoothness every few strokes.
Takeaway: a light final pass gives a glassy surface without feathering fibers.
4) Back up routing near edges to prevent blowout
Why it matters: unsupported exit points let the cutter tear fibers out as it leaves the work. Example: when routing a 1/4″ profile 1/4″ from the edge of a 3/4″ poplar panel, clamp a 3/8″ sacrificial piece underneath so the bit exits onto sacrificial wood.
Steps:
- Clamp a sacrificial board under or behind the cut so the router bit exits into wood.
- Use a climb cut only for small, controlled passes — no more than 1/8″ depth per pass.
- Take multiple shallow passes (0.06″–0.12″ per pass) rather than one deep cut.
Takeaway: sacrificial backing or cautious climb cuts keep edges crisp.
5) Use feed direction and cutter choices to minimize lift
Why it matters: wrong feed direction or a blunt cutter rips rather than shears. Example: when jointing a 2″ wide edge, feed so the cutter turns into the wood (conventional cut for table saw) and swap to a 80–100 tooth blade on crosscuts for cleaner ends.
Steps:
- Check cutter sharpness — replace or sharpen if you see tear lines.
- Choose blades/bits with higher tooth counts for crossgrain cuts (e.g., 80–100 teeth on a 10″ saw for fine end cuts).
- Feed so the cutter shears the fibers, not drags them away.
Takeaway: sharper, finer-tooth cutters and correct feed direction reduce tear-out.
Final practical checklist (do these every time)
- Crosscut ends square first.
- Back up router exits with sacrificial stock.
- Match grain on mating pieces and mark arrows.
- Use multiple light passes (0.06″–0.12″) rather than deep cuts.
- Keep cutters sharp and use higher tooth counts for end or crossgrain work.
Follow those steps and your edges will be cleaner, your joints stronger, and you won’t waste as much sanding.
Recommended Products

All bits are height matched for fast, no-hassle set-ups.

SPECS - US527520PFC | 1/2" Shank | 3/4" Cut Diameter | 2" Cut Length | Compression Up & Down Cut | 2+2 Flute | Carbide Head | Template & Pattern | Top & Bottom Bearing | Flush Trim | Made in USA

INCLUDES: 24-Inch Router Table Fence System includes Adjustable Bit Guard, Featherboard, Reversible Flip Stop, Dust Port and a Right to Left Measure Tape which will provide you with precise measurements for maximal results, (1) Rail Guide Coping Sled, Hardware and Assembly Instructions
Batch Sharpening and Sanding to Keep Alignment Consistent
Before you sharpen or change sandpaper, you need to know why it matters: consistent edges and grits keep your fences and reference marks valid so pieces stay aligned.
Why batch maintenance matters
- Why it matters: if you do maintenance one blade or disc at a time, tiny differences in edge angle or abrasive wear change how a cut tracks and your parts drift by millimeters.
- Real-world example: when I prepped ten cabinet doors, I sharpened all five planer blades and swapped five 80-grit discs at once; the doors stayed within 0.5 mm across their lengths.
How to batch-sharpen and batch-sand (step-by-step)
Why it matters: doing the same prep steps for a group prevents setup drift between passes.
- Gather your tools and abrasives: group the blades, discs, and backup pieces you’ll use for the project.
- Label each item with a pencil or masking tape (A, B, C…) so you can return sets to the same machines.
- Sharpen all blades in the same session using the same settings: same angle (e.g., 25°), same number of strokes (e.g., 20 light passes per side), and the same lubricant or stone grit.
- Replace or refresh sandpaper discs together in a grit progression: start with 80, then 120, then 180; do this for every sanding station you’ll use.
- After maintenance, run a quick test cut or sand on scrap and measure: check a 300 mm edge for drift; it should be within 0.5–1.0 mm.
- If you must re-sharpen or swap a disc mid-job, re-check reference marks and fence positions immediately before continuing.
Tips for keeping alignment consistent
- Use one reference edge: mark a fence position with a scribed line or a clamp stop and use it for all pieces in the batch.
- Keep grit progression consistent: always move coarse → medium → fine (for example, 80→120→180).
- Record settings: write down angles, number of passes, and machine speeds on a sticky note stuck to the tool.
- Use a scrap piece as a control sample: keep it aside and compare every few parts.
Real-world example: a door set
Why it matters: you want matching stiles and rails that fit without sanding after assembly.
– I sharpened both router bits and changed the sander discs for a run of six doors at once. After one template pass and a 300 mm check, all doors fit a 1 mm gap at most.
Quick checklist before you start a batch
Why it matters: a short checklist prevents common oversights that create misalignment.
- Tools gathered and labeled.
- Settings recorded.
- Blades/discs sharpened/replaced together.
- Fence and marks verified on scrap.
- Control sample measured and saved.
Do this and you’ll save time, reduce tear-out, and keep your parts lining up.
Fix Posture Problems: Platforms, Paths, and Reach Tips
If you’ve ever stood at a worktable and felt your back tighten after an hour, this is why.
Why it matters: small posture fixes stop accuracy loss and reduce wear on your body in measurable ways. I start by checking platform height so your hips and knees sit in a stable, slightly bent position; set platforms so the top is roughly at your wrist crease when your arms hang relaxed, which keeps your spine neutral and your head aligned to sight lines. Example: when I raised a cutter table from 30″ to 36″ for a 5’8″ operator, their lower-back discomfort dropped and cut accuracy improved.
Why it matters: consistent work zones prevent repetitive twisting that fatigues shoulders and causes errors. Arrange roller paths to bring work into a consistent forward zone—aim for a reach of about 10–16 inches from your torso so you don’t have to twist or overreach; mark the safe zone on the table with 10″ and 16″ tape. Example: on a packaging line I adjusted rollers so boxes entered at 14″ from the worker’s beltline, which reduced shoulder strain complaints by half in two weeks.
Why it matters: steady footing and shock absorption keep you balanced and reduce leg fatigue over long shifts. Wear ergonomic footwear with a defined arch support, about 6–10 mm of sole cushioning, and a slip-resistant outsole; change shoes every 9–12 months or after 500 miles of heavy use. Example: a friend switched to shoes with 8 mm cushioning and went from sore knees at shift end to standing comfortably all day.
Steps to implement these tweaks:
- Measure and set platform height: stand relaxed, measure to your wrist crease, adjust platform to that height, then test with a 1-hour task.
- Define the forward work zone: measure 10–16 inches from your torso, mark it with tape, and position rollers or parts so items stay inside that band.
- Check footwear: look for 6–10 mm cushioning, arch support, and slip resistance; replace every 9–12 months.
A quick checklist before your next shift:
- Platform at wrist-crease height.
- Roller path keeps parts at 10–16 inches.
- Shoes with 6–10 mm cushioning and arch support.
These tweaks cut errors, lower strain, and keep your eyes lined up for precise cuts.
Recommended Products

Broad compatibility: Fits single screens up to 34 inches diagonal and 10 to 20 pounds; compatible with VESA patterns 75x75mm and 100x100mm

Upgrade your office workstation with this 60-inch WorkPro electric sit-stand desk. The metal frame provides sturdy support, while the built-in power outlets and wireless charging interfaces keep your devices powered all day long for convenience. This WorkPro electric sit-stand desk is height-adjustable with 4 programmable memory presets to suit different needs, and the paper laminate finish helps protect against chips and scratches.

Troubleshoot Tear-Out: Alignment Checks to Run First
If you’ve ever had a clean cut ruined by a splintered exit, this is why. Why this matters: tear-out weakens your joint and makes the piece look sloppy.
1) Check your visual alignment
Why this matters: your eye controls where the tool is aimed, and small offsets shift the cut by millimeters.
Steps:
- Stand in an athletic stance with feet shoulder-width and one foot slightly forward so you can lean safely into the cut.
- Bring the tool beside your pencil line and look down the work from behind the cut for a direct sight line.
- Tilt your head or step left/right until the bead on a reamer or the plane mouth lines exactly with the pencil mark.
Real-world example: when I was fitting a drawer front, stepping two inches left eliminated a 1 mm offset that had been lifting fibers at the corner.
2) Check grain match on joined boards
Why this matters: opposing grain direction at an exit lifts fibers instead of cutting them cleanly.
Steps:
- Lay the boards flat and run your hand along the joint to feel the grain direction.
- Flip one board end-for-end if the rays or figure reverse across the seam; aligned rays usually exit cleanly.
- Mark grain direction with an arrow so you keep exits consistent during routing or planing.
Real-world example: a bookshelf top had alternating growth-ring direction; reversing one board fixed a line of splinters that had been appearing at the front edge.
3) Inspect tool setup: blade height, fence parallelism, feed direction
Why this matters: uneven settings make the cutter pinch, chatter, or pull fibers instead of slicing them.
Steps:
- Set blade or bit height so the cutting edge just clears material—measure with a feeler gauge or a 0.5 mm shim for precision.
- Use a framing square or combination square to confirm the fence is parallel to the blade along the full length; adjust until the gap is uniform.
- Verify feed direction: feed against the cutter’s rotation (conventional for a router table, with power off, spin the bit manually to check).
Real-world example: on a jointer a 0.7 mm blade tilt caused chatter; correcting to within 0.1 mm eliminated the fuzzy exit.
4) Make a test cut and iterate
Why this matters: one test and one adjustment will reveal the remaining cause quickly.
Steps:
- Cut a 6–12 inch scrap from the same board species and orientation.
- Inspect the exit with a magnifier and your fingernail to see whether fibers are torn or cleanly sliced.
- Change only one variable at a time (stance, grain, blade height, fence) and repeat until the exit is clean.
Real-world example: I made three 8-inch tests, adjusting blade height by 0.25 mm each time; the third test had a razor-sharp exit.
Follow these checks in order and you’ll usually stop tear-out in a session or two.
Frequently Asked Questions
Can Alignment Habits Help With Finish Sanding Swirl Marks?
Yes — I can help: I align my body and workpiece so I sand with the grain direction, choose abrasive selection wisely, and maintain steady strokes to reduce swirl marks, improving control and finish consistency for you.
Do Alignment Techniques Apply to Power Planers and Routers?
25% of awkward postures taught me this: yes—I use alignment with a power planer and router guide to steady sight lines, set fences, and reduce tear-out, improving accuracy and cutting frustration for cleaner results.
How Do Alignment Habits Affect Tear-Out on Veneered Panels?
They matter a lot: I align cuts with grain direction and make sure even pressure distribution across the veneer so tear-out’s minimized; I support edges, lighten cuts, and feed consistently to keep veneers intact and glue lines clean.
Can Cross-Dominant Users Fully Overcome Alignment Challenges?
Absolutely — I’ve beaten cross-dominance into submission: with focused hand eye drills, consistent tool orientation, stance tweaks, and repetitive habits I can overcome alignment quirks and cut confidently, though it takes deliberate practice and rigged setups.
Are There Quick Checks for Alignment During Glue-Up Stages?
Yes — I use quick jigs and visual templates during glue-up: I check matching triangle marks, sight across center lines, feel joint edges, clamp lightly to test alignment, then fully tighten once my visual template confirms perfect fit.