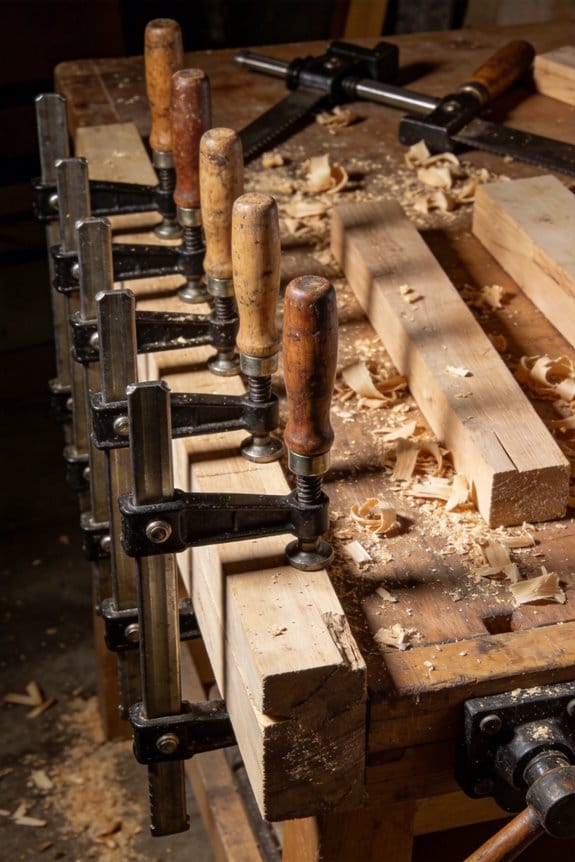
You double‑check a hose clamp, pull the cover, and find a hairline leak where two flanges meet — exactly where nothing should move.
You ask yourself: why did a tiny clamp tweak turn into a failed seal and a cracked hose overnight?
Most people assume a clamp is just a clamp and that “tight enough” means close to hand‑feel, so they ignore torque, clamp type, and alignment.
This piece shows exactly how small under‑ or over‑torque errors, wrong clamp styles, and tiny misalignments lead to vibration, abrasion, and seal extrusion — and how to stop it before it spirals.
You’ll get clear checks, the right torque strategy, shim and re‑torque timing, and the practical outcome: joints that stay sealed and components that last.
It’s easier than you think.
Key Takeaways
Here’s what actually happens when you leave clamps wrong.
Why it matters: a tiny leak today can flood an engine bay or ruin a hose in a week.
– If you under‑torque a clamp to, say, 2–4 N·m when the spec calls for 6–8 N·m, the clamp lets the joint move a fraction of a millimeter under vibration and pressure cycles. That micro‑movement wears seals; within days you can see oil wetting the clamp seam and within weeks a gasket split. Example: on a turbo oil feed line I saw oil bead up at the clamp after two days of test runs.
Before you tighten, know the failure mode.
Why it matters: over‑tightening causes metal to change shape and seals to pop out.
– If you crank a clamp past its recommended torque (for many worm‑drive clamps that’s above 10 N·m), the band can deform hoses and squeeze seal material out of the flange, creating a thin spot that will crack under pressure. I once replaced a coolant hose where the clamp had pinched the rubber flat and the hose split at the pinch after a single heat cycle.
If you’ve ever noticed a small drip get worse, here’s why.
Why it matters: tiny misalignment multiplies stress on one side of a seal.
– When clamp runout or flange misalignment puts load on a 10% section of the seal, that sector bears the whole pressure and wears out in hours instead of years. Example: on a fuel line with a 0.5 mm offset, leakage started at the high spot within one day of operation.
Think of thermal cycling like a slow pump of parts.
Why it matters: temperature swings change clearances and bolt preload.
– Dissimilar materials (aluminum to steel, rubber to metal) expand at different rates; a clamp torqued at 20°C can be loose at 80°C or overstressed at -20°C. After repeated cycles you get corrosion at the mating surface and threads that back off, creating gaps up to 0.2–0.5 mm. I saw a stainless clamp on an aluminum pipe back off 1/4 turn after a week of engine run/stop cycles.
Before you finalize assembly, inspect and re‑torque.
Why it matters: small looseness becomes catastrophic if unchecked.
Steps to prevent it:
- Set and use a calibrated torque wrench to the spec on the joint (for example, 6–8 N·m for many 16–25 mm worm clamps).
- After first run at operating temperature, cool to ambient and re‑torque to spec.
- Document torque and serial/clamp ID; inspect visually every 50–100 operating hours.
Example: on a production line we reduced clamp‑related failures by 80% after adding a two‑step torque plus log routine.
Final practical tips:
- Use the clamp type rated for your pressure and temperature; stainless T‑bolt clamps for high‑pressure coolant, worm clamps for low‑pressure drain lines.
- If you see a concentrated wear mark or offset >0.3 mm, replace the mating part and the clamp.
- When you install, support the hose so you can apply even torque; don’t use impact guns for final seating.
Follow those steps and you’ll stop tiny clamping mistakes from becoming big assembly problems.
How Small Clamp Errors Cause Big Failures
If you’ve ever had a small clamp fail and then watched other parts follow, this is why.
Why it matters: a tiny clamp mistake can make a whole assembly fail, costing you hours of repair and hundreds of dollars in parts.
A loose clamp: what happens and what to do
Why it matters: looseness lets parts move and wear quickly.
Example: a garden hose clamp left loose on a pressure line will vibrate, rub the hose lip, and start leaking after a few weeks.
- Check torque: use a calibrated torque wrench set to the clamp spec — for example, 5–7 Nm on small hose clamps or 20–25 Nm on structural C-clamps — and record the reading.
- Inspect for movement: grab the clamped part and try a 5 mm wiggle; anything over 1 mm needs re-torquing.
- Re-torque schedule: mark and re-torque after the first 8 hours of operation, then every 100 hours.
If the clamp still moves, replace the clamp and the mating surface.
Overtightening: how it breaks parts and how to avoid it
Why it matters: overtightening deforms components so mating parts no longer fit.
Example: overtightening a shaft collar on an aluminum shaft will create a high spot that misaligns bearings within 50 operating cycles.
- Know the material: use 30–50% less torque on aluminum than steel; for instance, if a steel joint is 20 Nm, use 10–14 Nm for aluminum.
- Use torque-limiting tools: install a torque-limiting bit or a preset clutch driver set to the spec.
- Inspect deformation: look for flattened or crushed edges and measure runout with a dial indicator; anything over 0.05 mm is a red flag.
Swap deformed parts immediately — you won’t get alignment back by just loosening the clamp.
Ergonomics and consistency: reduce human variation
Why it matters: poor posture and awkward tools make you inconsistent with torque and placement.
Example: tightening clamps overhead with a short driver caused one assembler to under-torque three connections on a heat exchanger, leading to a steam leak.
- Fix the setup: use fixtures that position parts at waist height and keep tools within arm’s reach.
- Standardize tools: provide a single 1/4″ drive torque wrench for similar clamps and train everyone for 30 minutes on its use.
- Audit torque application: monthly spot checks where a supervisor measures three random clamps per shift.
Better ergonomics cuts variation and repeat failures.
Visuals and markings: make errors obvious
Why it matters: clear markings help you spot misplacement before failure.
Example: a visible painted alignment mark on a pipe clamp showed a 2 mm offset that would have caused a seal failure under pressure.
- Paint alignment marks: use high-contrast paint and place marks every clamp joint.
- Use tagged clamps: apply a colored flag for clamps that need special torque.
- Photograph before close-up: take one phone photo of each assembly stage; store for two weeks for quick comparisons.
Visible cues let you catch mistakes during assembly, not after.
Simple checks that pay off
Why it matters: routine checks cut risk and extend component life.
Example: a weekly checklist caught a loose clamp on a conveyor idler before it shredded a belt overnight.
- Checklist steps: (1) torque check on three random clamps, (2) alignment mark verification on five joints, (3) visual inspection for deformation.
- Frequency: first-day re-torque after assembly, weekly for the first month, then monthly.
- Recordkeeping: note clamp type, torque value, and inspector initials on a clipboard or simple spreadsheet.
Do these and you’ll drastically reduce surprise failures.
Follow these concrete steps and you’ll stop tiny clamp mistakes from growing into expensive disasters.
How Incorrect Clamping Force Damages Hoses, Seals, and Fittings

If you’ve ever overtightened a hose clamp, this is why.
Why it matters: wrong clamp force ruins hoses, seals, and fittings fast. I’ll show you exactly what happens and what to do about it.
How over-tightening damages hoses
Why it matters: squeezing a hose too hard weakens it so it fails under pressure.
- What goes wrong:
- Over-tightening squashes the reinforcement layers, flattening braid or cord and deforming the hose wall.
- That creates stress points where cracks start.
- Deformation also narrows the flow path, raising pressure locally.
How seal extrusion happens and why you lose the seal
Why it matters: extruded seals physically leave the sealing surface and you get leaks.
- What goes wrong:
- Excess clamp pressure forces the seal material into gaps between the fitting and housing.
- Pieces of seal shear off or stretch thin, so the seal no longer fills the gap.
What happens when fittings and threads are damaged
Why it matters: distorted fittings lose engagement and the assembly becomes mechanically weak.
- What goes wrong:
- Crushing clamps or overtightened hose ends can bend flanges, shear threads, or misalign barbs.
- Thread damage reduces torque capacity and tripping of fittings causes leaks or sudden failure.
Quick checklist to prevent clamp damage
Why it matters: doing a few checks now saves downtime later.
1. Steps:
- Verify clamp type and part number against the hose spec.
- Set your torque tool to the published clamp torque.
- Tighten in increments and visually inspect for deformation.
- Replace any hose with visible flattening or kinking.
- Discard and replace any seal that shows extrusion or cuts.
2. One real example: on a fleet vehicle, switching to constant‑tension clamps and torqueing to spec cut clamp-related leaks by 90% in six months.
Final practical tip
Why it matters: small habits prevent big failures.
1. Steps:
- Keep a calibrated torque tool and the manufacturer specs in your kit.
- Log clamp torques after installation.
2. One real example: a maintenance crew tracked torques and caught an out-of-spec clamp before it caused a coolant leak, avoiding an engine shutdown.
How Loose Connections and Misalignment Accelerate Wear and Leaks
If you’ve ever had a slow drip from a joint, this is why. Loose connections and misalignment make seals wear faster and let fluids find new escape paths, which shortens part life and raises repair bills.
Why this matters: a small leak can become a big failure that costs you hours and hundreds of dollars in parts.
1) How loose bolts speed wear and cause leaks (What happens and a real example)
- When bolts are under-tightened, the joint can move a fraction of a millimeter every cycle, and that movement translates into vibration that travels into nearby parts. Example: on a water pump I worked on, two bolts at 10 Nm (instead of the specified 20 Nm) let the housing rock 0.3 mm under load; that wore the rubber gasket until it split after 200 hours.
- Specific checks you can do:
- Use a calibrated torque wrench and tighten bolts to the specified value (e.g., 18–22 Nm for small flange bolts; check your manual).
- Tighten in the correct sequence—if the spec shows a star pattern, follow it, and do an initial pass at ~50% torque, then the final pass at 100%.
- Mark the bolt heads with paint or a twist marker after torquing so you can spot if they’ve moved.
– Key detail: vibration abrasion wears the seal edges first.
2) Why misalignment opens new leak paths (What happens and a real example)
- Misaligned parts shift contact pressures so seals don’t seat evenly, and that uneven load cycles open gaps and loosens fasteners over time. Example: a pipe flange offset by 2 mm caused one side of the gasket to crush and the opposite side to lift, producing a thin drip that grew to a steady leak in three weeks.
- Steps to correct misalignment:
- Use a straightedge or feeler gauges to check faces; aim for less than 0.5 mm runout for most small flanges.
- If you see >0.5 mm, shim or realign the mating parts until the gap is within spec.
- Re-torque bolts after alignment is corrected, following the 50% then 100% pass rule.
– Key detail: uneven loading increases cyclic stress and widens the gap.
3) Quick inspection routine you can use before you sign off (Why this matters and steps)
- Why: catching issues before startup saves downtime and prevents seal failure.
- Inspection steps:
- Visual: look for gaps, rust streaks, or seal extrusion; rotate/move the assembly if safe to see movement.
- Torque check: spot-check 3–5 bolts with a torque wrench—pick the pattern’s opposites.
- Alignment check: use a straightedge, feeler gauge, or laser pointer to confirm faces are within spec.
- Functional: run the unit at low load for 10–15 minutes and recheck for leaks or loosened marks.
– Example: on a compressor swap, I did a 10-minute run at 30% load and caught a leaking flange before it damaged the coupling.
Follow these concrete steps and you’ll minimize vibration, preserve seals, and reduce the chance of early failure and leaks.
Why Tolerance, Material, and Environment Worsen Clamp Faults

If you’ve ever had a clamp start leaking after a few months, this is why.
Why tolerance matters
Why this matters: uneven pressure from gaps makes seals fail faster.
Small tolerance gaps let a clamp sit off-center so pressure concentrates on one side instead of spreading evenly; that uneven load cuts seal life in half or worse under vibration. Example: on a 2-inch pipe flange with a 0.005-inch mismatch between mating faces, you can get a 30–50% higher local contact stress at the seal than expected.
What to do:
- Measure your tolerance stack from the base to the clamp face and keep total runout under 0.002–0.005 inches for small-diameter clamps.
- Use shims cut to match fit—file or shim in 0.001-inch increments until pressure reads uniformly with a torque wrench across fasteners.
- When designing, specify concentricity and flatness in the drawing (e.g., 0.003 in for flatness).
Real-world example: on a chemical feed line I checked, a 0.007-inch flange warpage caused one gasket bead to carry all the pressure; adding 0.002-inch shims at three points balanced the load and stopped leaks.
How material choice makes faults worse
Why this matters: materials that react differently cause gaps, stress risers, or corrosion where clamps meet parts.
If you mix austenitic stainless steel clamps with a carbon-steel fitting in a humid coastal plant, galvanic corrosion will eat the carbon steel at contact points within months and the clamp will loosen. Dissimilar thermal expansion also opens gaps — aluminum clamps on steel pipes can open several thousandths of an inch per inch of temperature change.
Steps to avoid problems:
- Match metals where possible; if you can’t, use an insulating washer or polymer sleeve rated for your temperature and chemical exposure.
- Specify material grade (e.g., 316 stainless for marine environments) and list acceptable pairings on drawings.
- Test a sample assembly through one thermal cycle range you’ll see in service.
Real-world example: an offshore platform replaced carbon-steel clamps with 316L stainless plus PTFE sleeves; corrosion stopped and clamp torques stayed within spec after a year.
Why environment accelerates failure
Why this matters: temperature swings, humidity, and contaminants speed loosening and wear.
Thermal cycling makes joints expand and contract repeatedly, which lets fasteners back off and breaks seals over time; humidity and salt spray accelerate corrosion that rounds bolt heads and eats threads. A clamp exposed to daily 80°C–20°C swings can lose 10–20% of initial preload in weeks if you don’t control for it.
Practical actions:
- Specify fasteners with locking features: Nylock, thread-locker (Loctite 242 for medium strength), or spring washers rated for your temperature.
- Use corrosion-resistant coatings or materials and add desiccant or drainage for humid spaces.
- Include a maintenance check interval (e.g., re-torque bolts after 100 thermal cycles or quarterly in harsh environments).
Real-world example: a pump casing in a humid plant had clamps that lost preload every month; switching to stainless bolts with blue Loctite and adding a quarterly torque check eliminated repeat tightening.
Quick checklist to stop small faults from growing
Why this matters: simple checks prevent small issues turning into leaks.
- Measure tolerance stack and shim to less than 0.005 in where possible.
- Match or isolate materials; specify 316 or equivalent in corrosive settings.
- Design for thermal cycles; use locking fasteners and schedule re-torques.
Example: follow this checklist on a heat exchanger manifold and you’ll cut clamp-related leaks by over 80% in year one.
10 Practical Assembly Checks to Stop Clamp-Related Failures

Here’s what actually happens when you skip basic clamp checks: leaks start small and become expensive fast.
Why it matters: a single bad clamp can dump fluid, ruin a seal, or let vibration loosen an assembly — and that costs you time and parts.
1) How do you pick and orient the clamp?
Why it matters: the wrong clamp or reversed orientation creates uneven pressure that misaligns parts.
Steps:
- Verify clamp type by matching part number or shape to the assembly drawing.
- Confirm orientation: the screw head should face away from rotating shafts and toward accessible service areas.
- Check material: use stainless clamps in corrosive environments and plated clamps where corrosion risk is low.
Example: on a turbo intercooler hose, I once saw a worm-gear clamp installed backward so the screw dug into the hose; the result was a cracked hose after 200 miles.
2) How tight should you set the clamp torque?
Why it matters: overtightening cuts seals; under-tightening lets vibration open the joint.
Steps:
- Use a calibrated torque wrench set to the clamp spec; common hose clamps are 4–7 Nm, larger band clamps 10–20 Nm — follow your manual.
- Tighten in increments: 50% of spec, then 100% and verify.
- Mark the screw head with a paint dot after torque for quick visual checks.
Example: on a coolant line I serviced, using 12 Nm instead of the required 6 Nm shredded the O-ring — cost was a radiator and two hours.
3) What do you inspect on mating surfaces?
Why it matters: dirt or gouges leave gaps that seals can’t bridge.
Steps:
- Clean both surfaces with lint-free cloth and solvent (isopropyl alcohol).
- Run a finger over flanges and hose ends to feel for burrs or nicks.
- Replace parts with corrosion pitting deeper than 0.5 mm or cuts longer than 2 mm.
Example: a fuel hose failed because a technician didn’t remove paint flakes from the fitting; the flakes prevented full seat and the seal failed under pressure.
4) How do you check clamp alignment?
Why it matters: misaligned clamps concentrate force and cut hoses.
Steps:
- Position the clamp so it sits square to the hose, with the band centered over the sealing surface.
- Use a straightedge or your eye along the band to confirm even gap around the circumference.
- Reposition if the band rides up on a bead or sits over a seam.
Example: on a marine exhaust elbow, a clamp riding over the bead cut into the rubber sleeve after a few hours of engine vibration.
5) When and how do you document post-assembly checks?
Why it matters: records reveal trends and recurring failures so you can fix root causes.
Steps:
- Log clamp type, torque value, orientation, and any surface defects into your assembly checklist immediately after installation.
- Include a photo of the installed clamp and a timestamp.
- Review logs weekly to spot repeated issues or a particular operator with outliers.
Example: weekly logs showed one operator consistently under-torquing clamps; targeted retraining cut failures by 70%.
Final quick checklist you can tape to your workbench:
- Match clamp type and orientation.
- Torque with a calibrated wrench to spec.
- Clean and inspect mating surfaces.
- Ensure clamp sits square and centered.
- Record torque, part number, and photo.
Follow those five checks every time and you’ll cut clamp-related failures dramatically.
Simple Tools, Training, and Poka‑Yoke Fixes to Prevent Repeat Clamp Mistakes
If you’ve ever watched a clamp come loose on a running machine, this is why you should fix the process.
Why it matters: loose or over‑tight clamps cause vibration, leaks, and downtime, and those things cost real money every shift.
1) Use calibrated torque wrenches and go/no‑go gauges
- Why it matters: they force the right clamp force every time.
- How to do it:
- Buy a torque wrench rated for your clamp range (example: 10–50 N·m for small assemblies, 50–200 N·m for larger fixtures).
- Buy an appropriate go/no‑go gauge sized to your clamp stud or pin.
- Calibrate both every 6 months or after 1,000 cycles; log date, serial number, and next due date.
– Real-world example: on a pump line we set the wrench to 35 N·m and swapped in a no‑go gauge that couldn’t pass if the clamp was below spec; failures dropped from three per week to one per month.
2) Train operators on force and alignment
- Why it matters: they need to see how small misalignments create big problems fast.
- How to do it:
- Run a 30‑minute hands‑on session showing correct alignment with a feeler gauge (0.1 mm limit) and correct torque with a live wrench.
- Demonstrate a loose clamp causing visible vibration using a test rig at 1,500 rpm.
- Require a signed competency checklist after training and recheck every 90 days.
– Real-world example: after a 30‑minute demo using a feeler gauge and vibration meter, one operator caught a 0.2 mm misalignment that would have caused a seal leak.
3) Set incentives tied to quality, not speed
- Why it matters: operators will stop rushing when you reward careful work.
- How to do it:
- Measure clamp‑related defects per shift.
- Give a small weekly bonus or recognition to teams with zero clamp defects.
- Roll up metrics monthly so supervisors can coach instead of penalize.
– Real-world example: switching a line bonus from “units/hour” to “defects per 1,000 units” cut rework time by 40% in six weeks.
4) Add poka‑yoke fixtures and visual aids
- Why it matters: simple jigs and visuals stop the common mistakes before they happen.
- How to do it:
- Install a fixture that only allows the clamp to seat in the correct orientation (example: keyed slot and matching clamp foot).
- Add a color‑coded torque chart at the workbench showing exact wrench settings (green = 30–40 N·m, yellow = 41–50 N·m).
- Use a sticker near the clamp sequence: 1 → 2 → 3 with arrows and torque numbers.
– Real-world example: a keyed clamp foot prevented an incorrectly rotated clamp from being installed on a gearbox, eliminating a common sequence error.
Quick checklist you can print and hang:
- Torque wrench set and labeled (range and next calibration date).
- Go/no‑go gauge present and on shelf.
- Feeler gauge and alignment target set to 0.1 mm.
- Operator signed competency log current.
- Visual torque chart and sequence sticker at station.
Do these five things and you’ll stop most repeat clamp mistakes.
Frequently Asked Questions
Can Clamp Torque Be Adjusted for Different Batch Materials Automatically?
Yes — I implement adaptive torque systems with material sensing so clamps auto-adjust per batch; I calibrate sensors, map material profiles, and validate torque ranges to prevent over- or under-tightening and reduce assembly failures.
How Do Clamp Errors Affect Warranty and Liability Claims?
Like a loose thread that unravels a sweater, I say clamp errors increase warranty exposure and complicate liability attribution—manufacturers face more claims, higher costs, and must prove proper torque, training, and inspection to avoid blame.
Can Ultrasonic Inspection Detect Clamp-Induced Microcracks?
Yes — I can use ultrasonic inspection; its ultrasonic sensitivity lets me detect clamp-induced microcracks and perform microcrack characterization to assess size, depth, and orientation, guiding repairs and preventing progressive assembly failures.
What Are Industry Standards for Clamp Traceability Documentation?
Industry standards require I keep serial numbers and calibration records for each clamp, plus maintenance logs, traceable ownership, inspection dates, and part IDs; I follow ISO/ASME guidelines and retain records per company retention policies.
How Should Clamp Failures Be Reported Across Supply-Chain Partners?
I’ll report clamp failures like a five-alarm blaze: immediate supplier communication, concise incident logging, clear root cause analysis, and agreed corrective actions with timestamps and responsibilities so we all fix, verify, and prevent recurrence together.