You’ve just tightened a row of clamps on a glued panel and still see gaps at the edges and skinny glue squeeze‑out in spots.
You’re asking why more clamps didn’t make a stronger, gap‑free joint.
Most people equate clamp count with clamping effectiveness and ignore where and how pressure actually transfers through the workpiece.
This article will show you how clamp pressure distributes, how to size clamps and pads for your span, and the exact tightening sequence that produces even squeeze‑out and eliminates hollow spots.
Follow these steps and your glue‑ups will close solidly and consistently.
It’s easier than it looks.
Key Takeaways
If you’ve ever grabbed clamps and wondered why joints still fail, this is why.
Why it matters: uneven pressure makes your glue weak and visible squeeze-out can lie. Beginners focus on clamp force numbers instead of pressure distribution and pad area, which actually determine PSI at the joint. For example, if you use a clamp rated 1,000 pounds with a 1 in² pad, you’re getting about 1,000 PSI at that spot; use a 4 in² pad and that same force drops to 250 PSI.
Why it matters: gaps block glue and let joints fail. Visible squeeze‑out is taken as proof of full contact, but it can miss isolated gaps and blocked glue paths. Picture a tabletop where squeeze‑out appears at the edges while a hairline gap runs down the center; the tabletop will flex and the glue there won’t cure solid.
Why it matters: high local pressure with poor coverage warps parts. Using too few small clamps produces high local PSI but uneven coverage, causing unbonded or bowed joints. Try this: instead of two clamps at the ends of a 36″ board, use four clamps spaced every 9″ to get more even pressure.
Why it matters: uneven tightening creates valleys and peaks under the glue line. Tightening one clamp fully before others creates uneven compression; incremental, center‑first tightening ensures uniform contact. Steps:
- Apply glue and align parts.
- Place clamps along the joint every 6–12 inches.
- Tighten the center clamp until you see light squeeze‑out.
- Move outward, tightening each clamp a quarter turn at a time until all are snug.
- Finalize by adding a half turn where needed.
Why it matters: without bearing surfaces, clamp forces don’t translate into even pressure. Neglecting cauls, pads, and overlap means clamp diamonds don’t meet, leaving gaps despite high clamp force. Use a caul: take a scrap board sized to cover the joint, add foam or cardboard to match thickness, and clamp; that caul spreads force so you get consistent contact across the whole glue line.
Quick Start: Clamp-and-Glue Checklist for Beginners
Before you clamp and glue, you need to know the payoff: a properly bonded joint lasts and won’t fail when you least expect it.
1) Why check surfaces first?
- Why it matters: gaps, dirt, or unevenness prevent the glue from making full contact, cutting bond strength dramatically.
- Steps:
- Lay the pieces flat on a workbench and look along the joint for gaps using a bright light.
- Sand any high spots with 120–150 grit until the faces sit flush.
- Wipe both surfaces with a lint-free rag dampened with denatured alcohol; let dry 60 seconds.
– Real example: when I glued a walnut tabletop, a single 0.5 mm chip under one corner caused a visible crack later; removing that chip and sanding fixed it.
If you’ve ever matched glue to material and still had a weak joint, this is why.
2) How to pick the right glue
- Why it matters: the wrong adhesive won’t cure or will remain brittle, so the joint will fail under stress.
- Steps:
- For most wood-to-wood, pick PVA wood glue (e.g., Titebond Original); set time ~30 minutes, clamp time 1–2 hours, full cure 24 hours.
- For porous-to-nonporous (wood to metal/plastic), use a polyurethane or epoxy; follow manufacturer mix ratios exactly (commonly 2:1 or 1:1 by volume).
- For outdoor projects, choose a waterproof rating like ANSI Type II or polyurethanes labeled “outdoor”.
– Real example: I bonded a steel bracket to oak using a two-part epoxy mixed 1:1 by syringe and clamped for 6 hours; after 48 hours it held 120 lb without movement.
Think of clamping sequence like pushing a zipper closed evenly across a jacket.
3) How to plan and apply clamps
- Why it matters: uneven pressure causes shifting or glue-starved areas, reducing joint strength.
- Steps:
- Plan clamps so pressure is even: start by placing a clamp at the center, then add clamps on either side at equal distances (every 6–8 inches for narrow boards, every 12–18 inches for panels).
- Use cauls (straight wood blocks) across the joint: wrap them in packing tape and place between clamp jaw and work to spread force.
- Tighten clamps incrementally — finger-tight all clamps, then add a half-turn to each in sequence until glue squeezes out uniformly.
– Real example: I glued a 24″ shelf and used three clamps spaced 12″ apart with two cauls; tightening center first then sides eliminated twisting.
The fastest way to avoid clamp dents is to protect contact points.
4) How to protect and size your clamps
- Why it matters: the wrong clamp or lack of protection will leave marks and fail to distribute pressure.
- Steps:
- Choose clamp length so it reaches past your stock with room to tighten; for a 12″ workpiece, use a 24″ bar clamp if you might glue thicker assemblies.
- Add pads: use scrap leather, thin rubber, or foam between clamp jaw and work to prevent indentation.
- For thin or delicate pieces, double caul them (one above, one below) to spread pressure.
– Real example: I clamped veneered plywood with soft rubber pads and avoided crush marks that showed under finish.
Before you squeeze glue on, apply only what you need.
5) How much glue and how to assemble
- Why it matters: too little glue leaves gaps; too much creates a mess and weakens some joints.
- Steps:
- Apply a continuous bead roughly 3–5 mm wide along one mating surface for boards under 1″ thick; for larger surfaces, spread a 0.5–1 mm wet film with a roller or a notched spreader.
- Mate the pieces quickly within the glue’s open time (PVA usually 5–10 minutes).
- When clamped properly, expect a thin, even squeeze-out along the joint; wipe excess with a damp cloth after 5–10 minutes.
– Real example: on a 3/4″ cabinet face, a 4 mm bead and a small roller gave full coverage and only a 1 mm squeeze-out that cleaned easily.
The difference between rushing and waiting comes down to cure time.
6) How long to wait before stressing the joint
- Why it matters: moving the work too soon breaks the bond before it reaches strength.
- Steps:
- Follow clamp time: PVA — clamp 1–2 hours for common joints, release carefully after 1 hour only for light handling.
- For epoxies, follow the manufacturer’s working and cure times; many epoxies reach handling strength in 6–8 hours and full cure in 24–72 hours.
- For extreme loads or outdoor pieces, wait the full 24–48 hours before putting weight on the joint.
– Real example: I removed clamps from a chair after two hours and let it sit 48 hours before use; after full cure it supported a 200 lb test load without creep.
Final practical checklist (numbered)
- Inspect and sand surfaces; wipe with alcohol and wait 60 seconds.
- Choose glue by materials and environment; have correct mix ratio ready.
- Plan clamps: center first, then equally spaced outward every 6–18 inches.
- Prepare cauls and pads to protect surfaces.
- Apply a 3–5 mm bead or 0.5–1 mm wet film, assemble within open time.
- Finger-tighten all clamps, then tighten each half-turn in sequence until even squeeze-out.
- Wipe excess after 5–10 minutes; let cure per glue instructions (1–2 hrs clamp, 24–72 hrs full cure).
Keep this list in your toolbox. It’ll save you a ruined joint and hours of frustration.
How Clamp Pressure Radiates (45° Rule) and Why It Matters
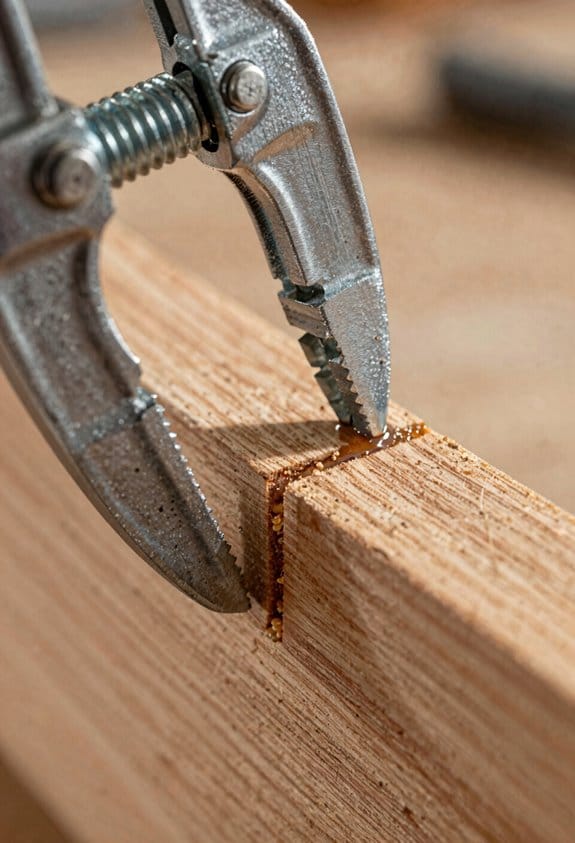
If you’ve ever tried to clamp a glued panel and found gaps after the clamps come off, this is why.
Why it matters: uneven pressure creates weak spots in the glue line, so your joint can fail even when you see squeeze-out.
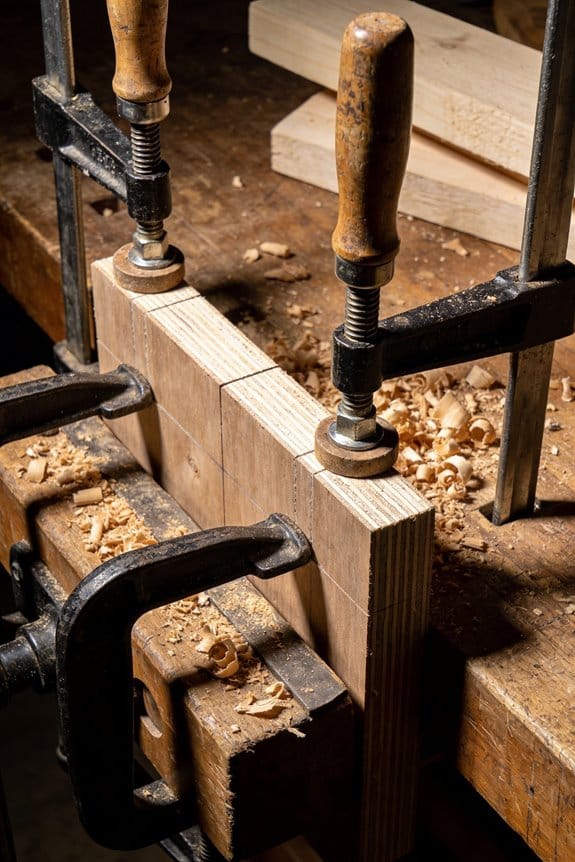
How the pressure spreads and what to do about it. The clamp squeezes most directly under its jaws, and the force radiates outward in a roughly diamond-shaped pattern at about 45° from the clamp face, so compression is highest beneath the clamp and drops off diagonally. For example, when you edge-joint two 6″ wide boards with a single bar clamp centered, you’ll get strong compression under the clamp but the outer 2″ on each side may be under-compressed and prone to gaps.
What to do, step by step:
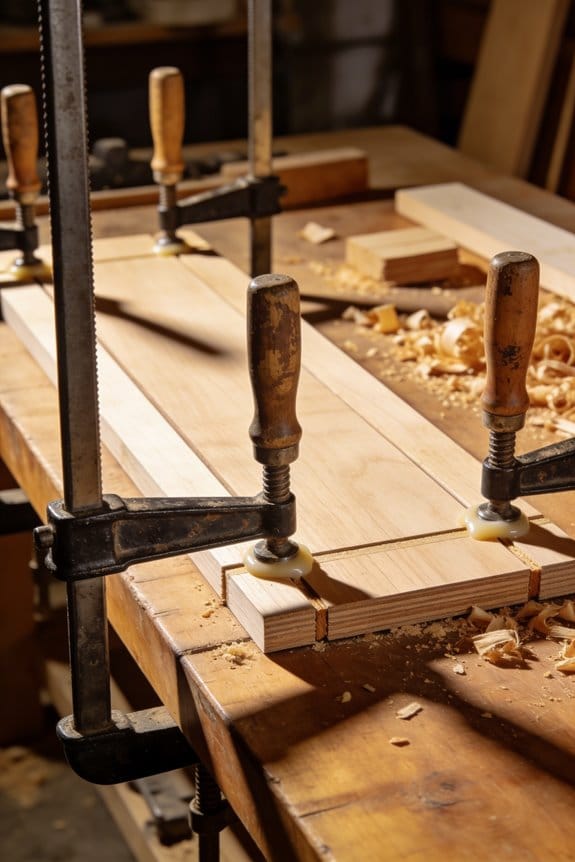
- Place clamps so their pressure footprints overlap by at least 1–2″ to get even compression across the joint. Example: when joining three 8″ boards into a 24″ panel, space clamps about every 6–8″ so the diamonds overlap.
- Use a 2″ thick caul under the clamp head to spread pressure more evenly when you have thin stock; clamp pressure under the caul will be flatter and cover a wider area.
- Stagger parallel clamps by 1–2″ on alternating sides of the joint to prevent a straight line of weak compression. Visual example: for a 36″ glued-up table top, run clamps on top and bottom in a checkerboard pattern every 6–8″.
- After the clamp time, open one clamp and inspect the joint for gaps or dry spots; re-clamp immediately if you find any problem area. A quick visual check and a thin feeler (0.005–0.010″) will tell you if the faces were under-compressed.
Practical numbers to remember: the 45° pattern means pressure effectively spreads about the same distance sideways as the thickness of the pieces being clamped, so thicker stock needs wider clamp spacing; aim for clamp centers no more than 6–8″ apart on common 3/4″ stock. For wide panels over 18″, add clamps or cauls every 6–8″ to avoid weak outer areas.
One final tip: if you only have a few clamps, focus them where the 45° diamonds would otherwise leave gaps—corners and ends—because those spots lose compression fastest.
How Many Clamps to Use: Placement, Overlap, and Pressure Diamonds

Before you clamp, you need to know why clamp placement matters: clamp pressure isn’t uniform, so wrong spacing leaves gaps in the glue line.
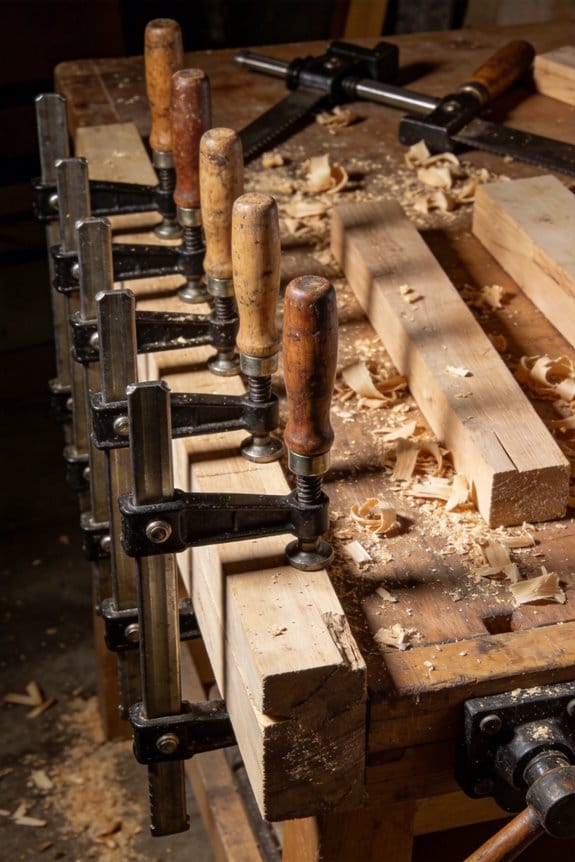
When you squeeze a clamp, most of the force sits directly under the jaws and spreads outward in a roughly 45° diamond; beyond that diamond the compression drops fast. For example, when you glue a 6″ wide tabletop panel and put clamps every 12“, you’ll see the surface between clamps lift slightly where diamonds don’t meet. Count clamps so the diamonds overlap at the seam; for a standard 3/4″ panel, aim for clamp centers about 6–8″ apart so the 45° pressure zones meet across the glue line.
Think of clamp diamonds like overlapping light cones: where they meet you get solid compression, where they don’t you get gaps. If you’re edge-gluing eight 3″ boards for a cutting board, offset the clamps on alternating joints so the pressure lines don’t all fall on one seam. That stagger keeps every seam under at least two overlapping diamonds.
Before you start tightening, sequence your clamps to avoid bowing and to align the panels. Example: for a 36″ long panel with five clamps, tighten the center clamp to about half-turn past snug, then tighten the clamps adjacent to it the same amount, and finish with the outer clamps, working from center outward in two passes. Do three passes total, increasing pressure slightly each pass until you see a thin, even bead of squeeze-out along the seams.
Steps to place and tighten clamps
- Lay the glued joint flat and put a clamp at each end about 1–2″ from the panel edge. This holds alignment.
- Add clamps so the distance between clamp centers is 6–8″ for 3/4″ stock, closer for thinner stock (4–6″) and a bit wider for thicker stock (8–10″).
- Stagger clamps on alternating seams when gluing multiple boards side-by-side so clamp jaws don’t align over the same line.
- Tighten in sequence: center first, then adjacent clamps, then outer ones, in three incremental passes.
- Check for even squeeze-out and straighten any bowing by slightly loosening and retightening the offending clamp.
If you follow those spacing and sequencing numbers you’ll avoid most glue-line gaps; for a 24″ wide panel using 3/4″ boards that means roughly 3–4 clamps spaced 6–8″ apart with staggered edges.
Recommended Products

Clamping force ranging up to 27,500 pounds
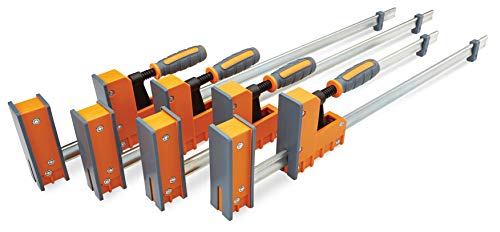
ULTIMATE WOOD WORKING CLAMP SET - This set includes two 24" Inch parallel clamps and two 31" parallel clamps covering a broad range of woodworking tasks from gluing, joinery, small frames, to larger case assemblies. Making them an essential addition to your wood working tools and accessories.
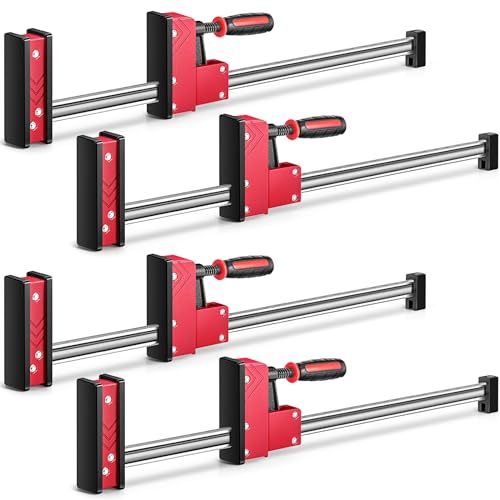
Quantity and Size: the set includes 4 heavy duty parallel clamps for woodworking, providing a sufficient quantity for various woodworking projects; With a size of about 32.09 x 5.91 x 1.77 inches, these parallel fixture are suitable for a wide range of woodworking applications, ensuring that you have the right tools for your projects
Which Clamps Need Tools : and Which You Can Install by Hand

If you’ve ever struggled with the wrong clamp, this is why.
Why it matters: using the right clamp and method prevents leaks and damaged hoses. Imagine replacing a radiator hose on your car and ending up with a coolant puddle under the engine bay—that’s what a bad clamp choice can cost you.
I’ll sort clamps into two clear groups so you can pick and install the right one.
1) Which clamps need tools?
Why it matters: tool-tightened clamps give consistent pressure and reduced leak risk on high-pressure or critical joints.
Real example: a heater hose on a 2008 Honda Civic where coolant pressure rises when the engine warms.
Steps:
- Identify the clamp type: look for screw-type worm clamps and Oetiker ear clamps.
- For worm clamps use a screwdriver or 7 mm nut driver and turn until the band is snug — typically 1/4 to 3/4 turn past initial contact depending on hose thickness. Tighten until the hose won’t twist on the fitting when you try to move it by hand.
- For Oetiker ear clamps use the correct crimping pincers designed for that size ear; place the ear perpendicular to the hose and squeeze the tool until the ear is visibly flattened and the clamp won’t slide.
- Check for leaks: run the system under normal pressure and inspect for drips or seepage for five minutes.
2) Which clamps you can install by hand?
Why it matters: hand-installable clamps let you work quickly on low-pressure or temporary joints without tools.
Real example: replacing a thin garden hose on a lawn sprinkler where water pressure is low.
Steps:
- Choose type: look for spring clamps, Kwik Clamp styles, and tool-free snap clamps.
- Install by hand: squeeze the spring clamp ends together with your thumb and forefinger, slide it over the hose, and release so the clamp grips the fitting. For snap clamps push the tabs until they click.
- Test fit: tug the hose gently—about 10–15 lbf of pull—and make sure it doesn’t pull off the fitting.
- Re-check after first use: after 10 minutes of running, confirm no slippage or leaks.
Quick practical tips:
- Match clamp width to hose: use 12–16 mm band clamps for small fuel lines, 20–30 mm for larger radiator hoses.
- Avoid over-tightening screw clamps; more than 1 to 1.5 turns past snug can cut into soft hoses.
- Replace one-time crimp clamps (like Oetiker) if you remove them; they deform and won’t re-seal reliably.
- When in doubt for pressure systems, choose the tool-tightened option.
Pick the right clamp, use the right tool or squeeze technique, and verify with a simple pull and pressure check.
How Clamp Size, Pads, and Cauls Change Effective Pressure
If you’ve ever tried to glue up a warped board and ended up with gaps, this is why.
Why this matters: uneven pressure lets glue starve parts of a joint, and that weakens the whole piece.
How clamp size changes force
Why it matters: bigger clamps can deliver more total force, so they can close larger gaps or bend parts slightly while clamping.
Real example: when you glue a 24″ edge joint of two boards, a 24″ bar clamp gives more closing force than a 12″ quick‑release clamp, so the boards pull together more reliably.
1) Choose clamp size to match span: use bar clamps at least as long as the joint plus 4″ of overhang to reach solid material.
2) Expect numbers: a typical 12″ hand‑squeezed bar clamp gives roughly 100–200 pounds of force, while a good 24″ screw clamp can give 500–1,000 pounds.
3) Use fewer large clamps rather than many tiny ones when you need true closing force.
Tip: if you need bending force (to flatten a bowed board), select clamps rated for 500+ lbs.
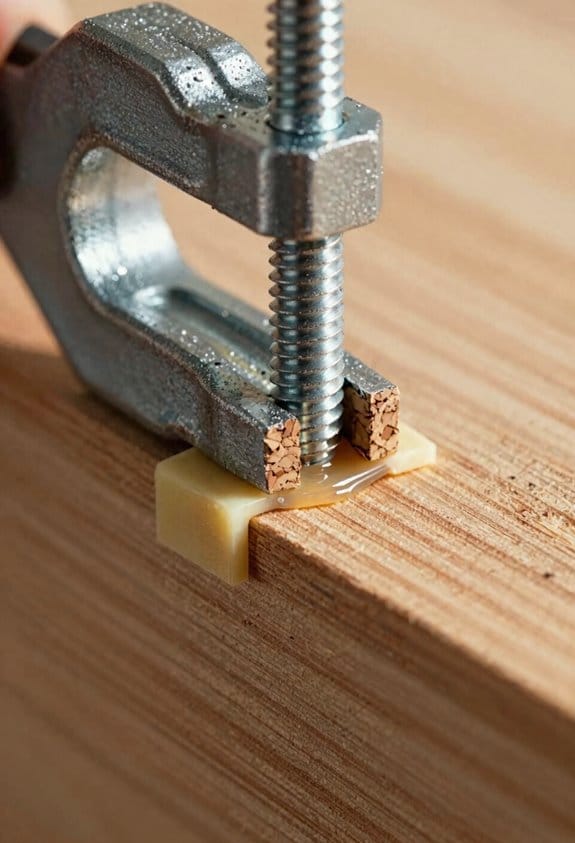
How pad thickness and area change pressure
Why it matters: the same force over a larger area gives lower PSI, so pad size controls how much squeeze the glue sees.
Real example: a 2″ diameter pad with 500 pounds of clamp force creates about 160 PSI, but a 4″ pad under the same force drops to about 40 PSI.
1) For thin veneers or tight joints: use thin, small pads (1–2″ diameter) to concentrate force and push glue into the joint.
2) For soft or finished faces: use large, padded cauls or 3–4″ pads to reduce surface dents (aim for 30–80 PSI depending on wood hardness).
3) If you need numbers: aim for 50–150 PSI for cabinet joints, and 150–300 PSI for end grain or structural laminations.
Warning: thin small pads will dent—use a sacrificial scrap under the pad if the face is visible.
How caul rigidity and shape affect pressure distribution
Why it matters: cauls bridge gaps and spread load; their stiffness decides whether pressure is even or concentrated.
Real example: using a stiff hardwood caul on an uneven glueup of a bookmatched panel produced a flat, uniform seam across 48″, whereas a flexible plywood caul left concentrated ribs near clamps.
1) Use stiff cauls (solid maple or thick aluminum) when you need even pressure across a long span.
2) Use slightly flexible cauls (thin plywood) when you want the caul to conform to mild surface irregularities.
3) For convex or concave surfaces, pre‑bend a caul to match the curve so pressure stays even.
Practical size guide: cauls should be at least 1.5–2 times the width of the joint and long enough to bridge multiple clamps for consistency.
Putting it together: match clamp, pad, and caul to the job
Why it matters: combining the right parts prevents gaps, dents, and weak glue lines.
Real example: for a 48″ dining tabletop you might use four 24″ screw clamps, 3–4″ soft pads on visible faces, and two 48″ stiff hardwood cauls under the assembly to get even pressure without marring.
Steps:
1) Inspect the work: measure gaps and note visible faces.
2) Pick clamp length and capacity to cover the span and provide required force (see earlier numbers).
3) Choose pad size based on desired PSI: small for high PSI, large/soft for low PSI.
4) Select caul rigidity to match surface profile, then position clamps so cauls bridge multiple clamp points.
Outcome: consistent bonding and fewer repair passes.
Recommended Products


Heavy-duty aluminum alloy construction^Ideally suited for fixed positions^Easily installed and relocated^Suitable for use with FallTech 4-Man temporary HLL's and PSR temporary HLL's

【Upgraded Points】1. The shoulder rig upgraded from gray to black. 2. Detachable rotary joint for use with your own accessories for ARRI. 3. Rear dual rods upgraded to standard threads for better compatibility with existing standard rods.4. Back support rotation switched to a damping shaft for stepless rotation, higher stability, plus a 90° limit pin.
Common Glue-Up Mistakes and Fast Checks for Adequate Pressure
Before you clamp, you need to know why pressure matters: uneven pressure or gaps make joints weak even if glue squeezes out.
I always start with a dry fit to confirm alignment, gap-free joints, and full face contact because misaligned parts will never clamp correctly. Do this as three numbered steps: 1) assemble the pieces without glue, 2) look for gaps along the joint and press each area by hand, 3) mark any high or low spots with a pencil. Example: when fitting a 24″ face frame to a cabinet carcass, you’ll spot a 1/16″ gap at one corner just by eye and touch — mark it and shim before gluing.
After applying glue, use squeeze-out inspection to spot areas with no squeeze‑out, but don’t rely on it alone; lack of squeeze‑out can mean blocked glue paths or uneven pressure. Tap the joint with a dead-blow hammer to hear hollow spots and listen for a dull, solid sound where contact is good. Example: on a 12″ laminated board, a hollow ring under the middle will sound different than the solid edge — that tells you to add a center clamp or caul.
Before tightening final clamps, feel for even resistance as you turn each clamp screw because consistent torque gives consistent pressure. Use a bench clamp or a torque-limited driver set to roughly 25–40 in·lb for small bar clamps; for pipe clamps on larger panels, tighten until the clamp feels firm but not over-stressed — about hand‑hard plus a quarter turn. Example: gluing a 36″ panel with three pipe clamps, tighten the end clamps first to hand-firm, then bring the middle clamp up to match the same feel.
If pressure seems concentrated, use cauls or additional clamps to spread it; place a caul with a wrapped towel to avoid marking and tighten until the caul shows even glue squeeze along its length. Steps: 1) cut a caul slightly longer than the joint, 2) wrap it in a soft towel, 3) place it across the joint and add clamps at 6–8″ spacing. Example: laminating narrow strips into a 6″ wide panel, use three cauls spaced 6″ apart to prevent edge bowing.
Quick checks to prevent weak joints: 1) dry-fit and mark high/low spots, 2) inspect squeeze-out for gaps, 3) tap for hollow sounds, 4) check clamp feel or use torque reference, 5) add cauls where pressure is uneven. One clear check: if any spot on the joint lacks squeeze‑out and sounds hollow when tapped, add pressure there.
Recommended Products

Industrial Sheet Metal Brake - W-10012 is a 100 in floor model straight brake for forming large sheet metal panels, ductwork, brackets, covers, architectural trim, cabinets, and fabrication components.
【Multi-Purpose】: Can achieve a variety of processing technology, with drilling, flat milling, groove milling, chamfering and other functions, whether it is a variety of metal or wood materials can be effectively fine processing, can achieve your various DIY needs

L06 is constructed of commercial steel for structural stability and durability. Dimensions - The footprint is 45.27 inches long x 57.38 inches wide x 85.58 inches high. Unit can be used with 1-inch and 2-inch barbell plates.
Frequently Asked Questions
Can Clamp Pressure Affect Wood Grain Compression and Final Finish Appearance?
Yes — I’ve seen clamp pressure cause grain crushing, which changes surface porosity and can lead to finish blotching; I’ll use cauls and even pressure to prevent crushed fibers and guarantee an even final appearance.
How Does Ambient Temperature Change Glue Viscosity and Clamp Time?
“Cold hands, warm glue”: I’ll tell you — ambient temperature lowers or raises ambient viscosity, so colder slows flow and lengthens temperature dependent potlife, hotter thins glue, speeds cure, and shortens clamp time markedly.
Can Uneven Clamp Pressure Cause Seasonal Movement Problems Later?
Yes — I’ve seen differential tightening cause seasonal warping: uneven clamp pressure locks joints asymmetrically, so moisture cycles make boards move differently, producing gaps or cupping unless you correct pressure and allow movement.
Are Barbed or Push-Fit Fittings Safe Without Clamps Under Heat Cycling?
I’ve seen a backyard irrigation loop fail after heat cycles, so no—I wouldn’t trust barbed reliability or push fit longevity without clamps for critical, hot-exposed runs; use clamps where thermal expansion and vibration occur.
How Do Corrosion and Clamp Wear Alter Long-Term Clamping Force?
Corrosion like bolt corrosion and clamp relaxation reduce long-term clamping force; I monitor both, replace rusted hardware, retension bolts, and swap fatigued clamps to restore preload and prevent slow loss of holding pressure over time.