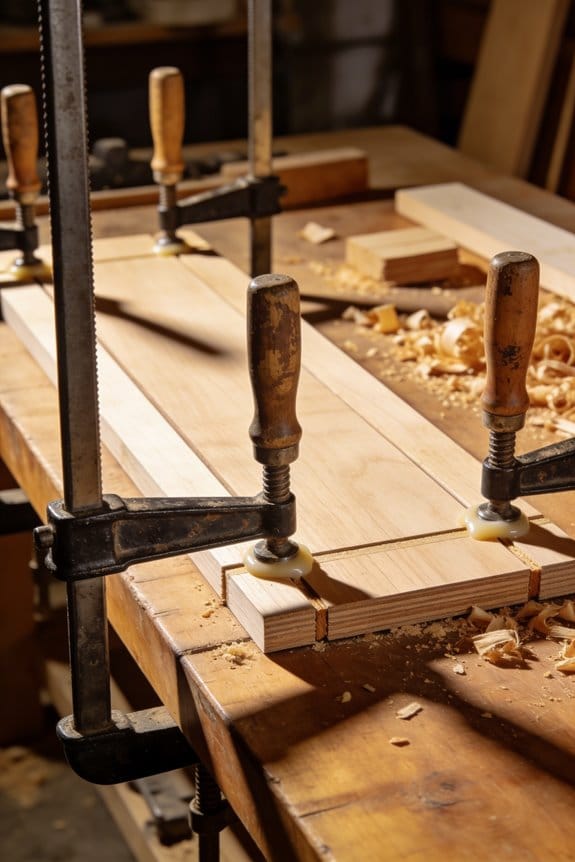
You set a workpiece on your compact bench, struggle to hold it steady, and watch minutes disappear as you reposition clamps and jigs. You ask yourself: how can one small surface support routing, glue‑ups and planing without constant fuss?
Most people treat clamping as an afterthought, buying a few clamps and hoping for the best instead of designing the bench around versatile hold‑downs.
This article shows exactly how to make clamping the centerpiece of a small bench so a single top becomes multiple repeatable workstations. You’ll get concrete steps — choosing low‑profile hardware, laying T‑tracks and dog holes, and adding a sacrificial top — that cut setup time and save space.
It’s easier than you think.
Key Takeaways
If you’ve ever worked on a tiny bench, this is why clamping matters so much.
Why it matters: Efficient clamping turns one small surface into several repeatable workstations so you don’t need extra tables.
– Example: I took a 30″ x 24″ bench and used just four quick clamps and two bench dogs to flip between sanding, routing, and glue-ups without moving the bench.
How to get repeatable workstations with limited space
Why it matters: Repeatability saves minutes every setup and reduces mistakes.
- Place a T‑track 3″ from the front edge and another 6″ from the back edge.
- Install two bench dog holes on a 96 mm (3.78″) center for board support.
- Use one quick‑release bar clamp centered on the bench for longer stock.
- Example: On my 30″ bench I mark those positions and can clamp a 12″ panel, a 24″ board, or a jig in under 60 seconds.
- Tip: Draw a simple sketch with measurements and tape it under the bench.
How to cut setup time with quick clamps, T‑tracks, and bench dogs
Why it matters: Faster swaps mean you can finish more projects in less space.
- Buy two quick‑release clamps and two folding bench dogs.
- Mount one T‑track across the bench width and another lengthwise near the front.
- Practice swapping one part in three motions: release, reposition, clamp.
- Example: I switched from routing to sanding in 45 seconds using this layout and a single quick clamp.
- Tip: Label clamps with colored tape so you grab the right one fast.
How to design hole patterns and track layouts that replace jigs
Why it matters: Good layouts let clamps act like jigs, saving floor space.
- Plan a grid of 25 mm (1″) or 32 mm (1 1/4″) spacing across the top.
- Keep a 2″ clear border from edges for tool clearance.
- Mark three common fixture points and drill from a template to reproduce them later.
- Example: I routed a 1″ grid into a sacrificial top and now clamp a repeatable picture‑frame jig without extra hardware.
- Tip: Use a paper template taped to the top to guide your drill.
How to make thin benches hold up under heavy clamping
Why it matters: Thin benches can fail unless you protect them and fasten tracks correctly.
- Glue and screw a 3/4″ plywood sacrificial top to a thinner base.
- Countersink and use T‑track screws every 6″ along the track length.
- Fill routed slots with epoxy or hardwood strips for wear resistance.
- Example: I retrofitted a 1/2″ bench top with a 3/4″ sacrificial layer and T‑tracks; it now withstands repeated clamps and drops.
- Tip: Pre‑drill track holes to avoid splitting the sacrificial top.
How to document and rebuild clamp layouts quickly
Why it matters: A clear plan gets you back to work after changes or mistakes.
- Create a one‑page shop sheet showing hole coordinates and track placement in inches or mm.
- Photograph the bench from above with a ruler for scale.
- Keep templates for commonly used clamping fixtures in a labeled folder.
- Example: I taped a printed layout under my bench and rebuilt my T‑track layout in 90 minutes after moving shops.
- Tip: Use a 1/4″ grid overlay on the photo for exact positioning.
Final practical checklist (do these steps now)
- Measure and mark T‑track and dog hole positions.
- Attach a 3/4″ sacrificial top if your bench is thin.
- Install T‑tracks with screws every 6″.
- Add two quick‑release clamps and two bench dogs.
- Make a one‑page shop sheet and tape it under the bench.
If you follow these steps you’ll be able to switch tasks fast and keep your compact shop organized.
Why Clamping Matters in Compact Shops
If you’ve ever worked around a tiny workbench, this is why.
Why clamping matters
- Why it matters: good clamping turns one small surface into multiple workstations so you don’t need extra tables.
- Example: I once finished a 24″ x 36″ router sled, an assembly jig, and a finishing cradle on the same bench in a weekend by using T-tracks and a couple of quick-release clamps.
How to plan a clamping layout for tight spaces
- Why it matters: a deliberate layout prevents collisions and keeps your workflow smooth.
- Steps:
- Measure your bench top and mark a 2″ grid with tape to visualize clamp positions.
- Install two parallel 3/4″ T-tracks spaced 12″ apart down the length for sleds and fences.
- Punch four 3/4″ bench-dog holes in a square 6″ from each corner for holding large boards.
- Add one row of 1/4″ mini dog holes every 6″ along the front edge for stops and clamps.
– Example: On a 48″ x 24″ bench I marked the grid, installed tracks, and saved 10 minutes per setup by swapping clamps without moving the workpiece.
Choosing clamps that save space and add accuracy
- Why it matters: the right clamps replace bulky jigs and give repeatable setups.
- Steps:
- Buy two 6″ quick-release bar clamps for assembly and two 12″ F-clamps for heavier glue-ups.
- Keep one ratchet-style clamp for vertical edge work and one toggle clamp mounted in a T-track for repeatable stops.
- Use a pair of low-profile strap clamps for finishing so you can lay a part flat without marring.
– Example: I replaced a homemade cradle with two ratchet clamps and a T-track stop, cutting setup time from 20 minutes to 5.
Ergonomics and reach on a small bench
- Why it matters: placing clamps within comfortable reach reduces strain and speeds work.
- Steps:
- Sit at the bench and reach straight out; mark the zone you can reach without leaning — that’s your primary clamp zone.
- Mount the most-used clamp handles 18″–24″ from the bench centerline and 3″–4″ above the top surface.
- Store rarely used fixtures on a pegboard behind you, 30″–36″ high.
– Example: After moving my quick-release clamps 4″ closer and lowering handles 1″, I stopped standing up to adjust setups and finished projects faster.
How each common clamping element helps
- Why it matters: knowing what a clamp does lets you pick the smallest tool that gets the job done.
- T-tracks: anchor sliding stops and clamps; use 3/4″ tracks and 1/4″-20 T-bolts for strength.
- Example: A router sled locked into a T-track handled plunge cuts without shifting.
- Bench dogs: resist lateral and twisting forces; use 3/4″ dogs with matching holes and a 1/16″ epoxy-lined fit to avoid wobble.
- Example: Clamping a 24″ cabinet face with dogs kept it square during glue-up.
- Ratchet clamps: provide high, one-handed tension for vertical or awkward parts.
- Example: A single ratchet clamp held a tapered leg steady while I drilled pocket holes.
Quick checklist to get started this weekend
- Tape a 2″ grid on your bench and mark reach zones.
- Install two 3/4″ T-tracks spaced 12″ apart.
- Drill four 3/4″ dog holes and a front row of 1/4″ mini holes every 6″.
- Buy two 6″ quick-release clamps, two 12″ F-clamps, one ratchet clamp, and one strap clamp.
- Mount common clamp handles 18″–24″ from center and 3″–4″ above the surface.
One fact to finish with: on a small bench, proper clamp placement can cut setup time by half and eliminate the need for at least two extra fixtures.
Bench Priorities for Cramped Workspaces
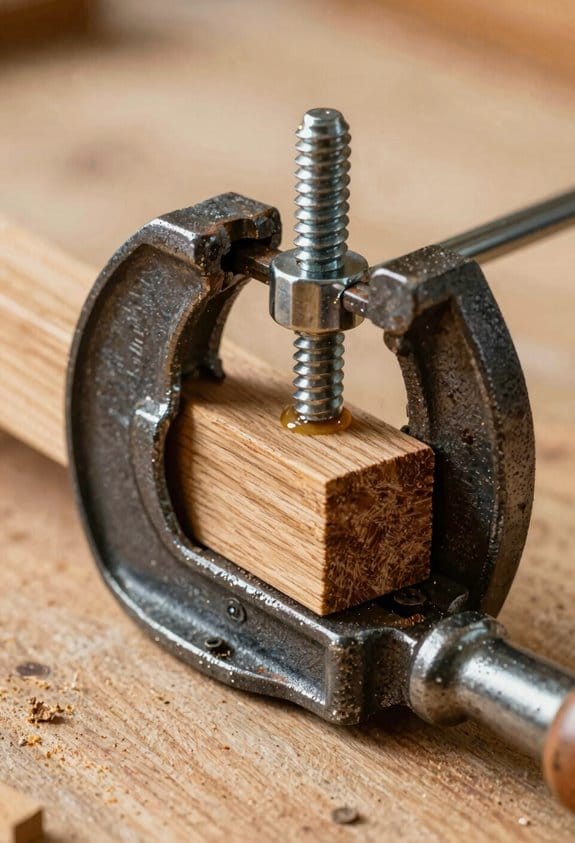
If you’ve ever worked in a tiny shop, this is why.
Why it matters: placing the bench smartly keeps your workflow moving and prevents you from bumping into things every time you plane a board. Put your bench along the longest wall so you keep both ends clear for planing and assembly; for example, a 10-foot wall lets you use a 6–8 foot bench and still leave 2–3 feet of clear space at each end for long boards.
Why it matters: a flat, stable surface makes clamping faster and repeatable, so your joints fit the first time. Choose a top at least 2.5 inches thick and 48–72 inches long; a laminated birch or hardwood top glued in layers resists twist and gives you a dependable surface. A real-world example: I clamped a 6-foot frame for a cabinet on a 2.75-inch laminated top and never had the pieces shift while I glued and screwed.
Why it matters: multi-directional hold-downs cut setup time because one hole pattern works for sawing, routing, and gluing. Arrange dog holes and T-tracks in a grid spaced 4 inches apart across the top and every 3–4 inches along the front edge. Example: lay out a 12×48 inch section with 4-inch spacing and you can use dogs for planing, bench hooks for sawing, and T-track clamps for routing without moving the workpiece.
Why it matters: keeping the tools you use most within reach saves minutes every operation and keeps the bench uncluttered. Steps:
- Mount a low-profile quick-release vise at the left front corner if you’re right-handed, or the right if you’re left-handed.
- Hang a 12–18 inch tool rack directly above that vise for chisels, a marking knife, and a block plane.
- Store larger, rarely used machines like the bandsaw or planer in a different room or on mobile bases.
Example: with a vise and rack set this way, I can mark, saw a short tenon, and pare without taking two steps.
Why it matters: modular fixtures and low-clearance aprons let you change setups without losing floor space. Use removable face vises, a flush-mounted T-track, and an apron no deeper than 3 inches to allow sliding small carts underneath. Example: I swapped a face vise for a handscrew sled in under five minutes and still had room to roll a small dust-collector cart under the bench.
Final practical tip: when planning, sketch the bench at full scale on the floor with chalk or tape, include 24–36 inches of clearance in front for a comfortable working zone, and adjust based on the largest project you expect to handle.
Quick Decisions: What Clamp to Choose First
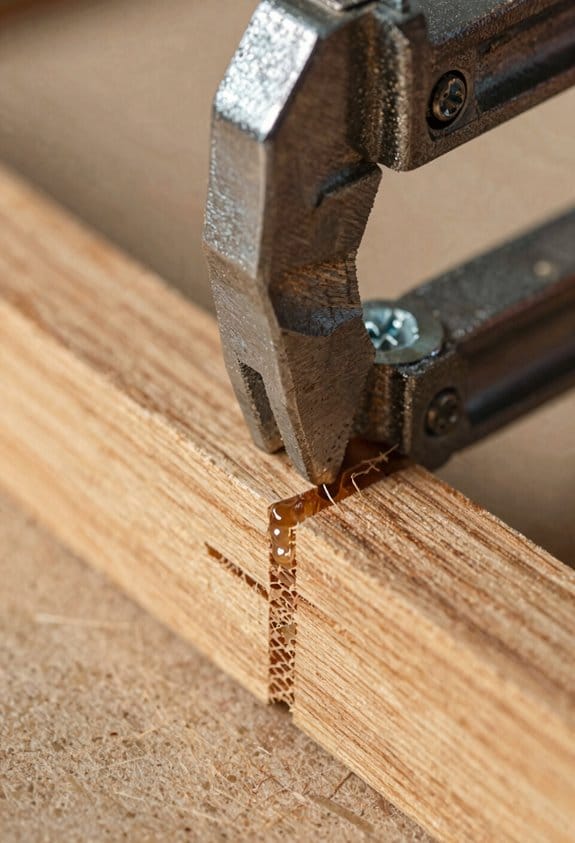
Before you pick a clamp, decide what you do most at the bench — that determines which one you’ll use the most. Why this matters: the right clamp saves time and frustration every day. For example, if you glue cabinet doors every weekend, having the right quick clamps keeps your workflow moving.
1) What clamp for frequent glue-ups?
Why this matters: quick clamps speed repetitive tasks so you don’t waste time fiddling. Use single-click quick-release bar clamps (3/4″ to 1″ throat, 24″ and 36″ lengths) for speed, and keep at least four of them at hand. Example: when gluing a 24″ face frame, four 36″ single-click clamps let you apply even pressure fast.
2) What about long boards and wide panels?
Why this matters: long bars prevent snipe and keep joints aligned over the full length. Get two larger bar clamps (1″ throat, 48″–60″ reach) with metal bars and wooden jaw pads to protect surfaces. Example: clamping a 6′ workbench top needs two 60″ bar clamps placed at each end and one in the middle.
3) What clamp for planing and routing?
Why this matters: low-profile hold-downs stop lifting without getting in the tool path. Choose low-profile toggle hold-downs or slim C-clamps with a 1″ pad and 1–2″ clearance under the pad. Example: when routing an edge, a pair of hold-downs at 6″ and 18″ from the router keeps the board flat and tool lines visible.
4) How to handle odd shapes and repeatable setups?
Why this matters: an adjustable bench dog or vise accessory gives a reliable fallback for irregular pieces. Keep one adjustable bench dog with a 2″ travel and a quick-adjust vise jaw (3–4″ face) for odd angles. Example: clamping a tapered leg into square requires a bench dog and a soft-jaw block to avoid crushing the wood.
5) How to balance grip strength and versatility?
Why this matters: you want strong pressure where it counts and flexibility for different jobs. Prioritize clamps with at least 1,200–2,000 pounds of clamping force for glue-ups and a few low-force clamps for delicate trim. Example: use a full-strength bar clamp on a glued edge and a 100–300 lb spring clamp on a veneer until the glue sets.
Quick practical checklist (do this first):
- List the three tasks you do most at the bench.
- Match clamp types: quick-release for glue, long bars for long boards, low-profile for tools.
- Buy quantities: four 24″–36″ quick clamps, two 48″–60″ bar clamps, two hold-downs, one bench dog.
- Add soft jaw protectors and one adjustable vise accessory.
Follow those steps and you’ll pick the clamp that actually gets used.
Recommended Products

Dual-Miter Metal Cutting Band Saw - BS-1018T cuts round stock up to 10.2 in and rectangular stock up to 10.2 x 16.9 in at 90 degrees for shop cutting, fabrication, maintenance, and structural steel work.

EASILY ADJUSTABLE HEIGHT & WIDTH: The ultimate solution for fall prevention, this low bed goes down to as low as 14", and as high as 30". It features 3 adjustable widths, 36”, 42”, and 48”, and an adjustable length from 80” to 88”. The tool-less design allows you to simply pull the frame and lock into place!

EASILY ADJUSTABLE HEIGHT & WIDTH: The ultimate solution for fall prevention, this low bed goes down to as low as 7", and as high as 30". It features 3 adjustable widths, 36”, 42”, and 48”, and an adjustable length from 80” to 88”. The tool-less design allows you to simply pull the frame and lock into place!
Best Clamping Systems for Small Benches
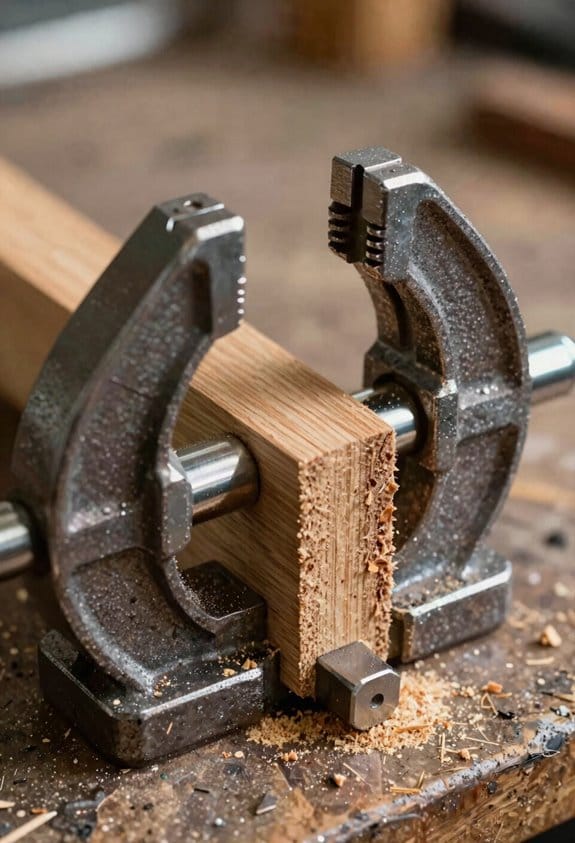
Here’s what actually happens when you try to work on a tiny bench without the right clamps: you waste time repositioning parts and risk damaging them.
On a small bench, the clamping system you choose determines how many jobs you’ll do well and how smoothly you’ll move between them. Use mobile clamps when you need to reposition work quickly; they roll or unclip so you can shift a 12″ wood panel without lifting it, and they stow flat under the bench to free up 6–8 inches of workspace. Example: I roll a mobile clamp to align a cabinet door, clip it on, and pivot the door for sanding.
Before explaining how to use each clamp, know why each one matters in one sentence: the right clamp saves time, keeps parts square, and prevents marring. Magnetic vises give hands-free hold-down on ferrous parts, so you can drill or file without a helper; a 2″ x 3″ magnetic block holds a steel bracket steady while you tap 1/4″ holes. Here’s how to use them in three steps:
- Clean both mating surfaces so the magnet sits flush.
- Place the part against the magnet and test the grip by twisting gently.
- Lock the magnet (if it has a switch) and start drilling.
You want versatility in a compact footprint because space is limited. Combine low-profile T-tracks with dog holes: rout a 3/4″ deep, 5/8″ wide T-track down the bench edge every 8–10″, and drill 3/4″ dog holes in a grid at 4″ centers to support long boards. Example: I clamp a 24″ board for planing using a T-track hold-down and a quick-release bench dog opposite it.
If you need to repeat the same clamping setup, use quick-release bench dogs and single-click clamps to speed things up; a single-click clamp can secure a 6″ workpiece in under 5 seconds. Steps to set those up:
- Install the quick-release dog into a 3/4″ dog hole until it locks.
- Position the workpiece and press the clamp head once to engage.
- Release with the lever when you’re done.
Keep low-profile options for delicate parts so you don’t crush them. Use low-pressure single-click clamps for small, fragile items and set the pressure to the minimum that prevents movement—roughly 20–30 psi for thin wood veneers. Example: I use one to hold a 2″ maple trim while routing a profile.
Final practical detail: store the mobile clamps on a 12″ wide shelf under the bench and keep magnetic vises in a labeled bin so you can grab the exact size (1″, 2″, or 3″) you need in under 10 seconds.
Recommended Products

Can easily be carried to a jobsite, due to its compact size and light weight.
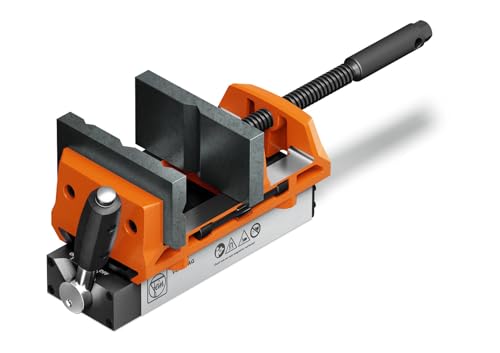
Mobile, flexible and quick to use. Adapts to any workplace thanks to its compact design and extra-slim permanent magnet.

[8-in-1 Home Gym]: Mikolo K6 power cage combines a power rack, cable crossover machine, lat pulldown station, 2:1 ratio low row station (includes footplate attachment), chin-up station, dip station, core trainer, and resistance station — all in one unit for your home gym. With the K6 power cage, you can perform unlimited exercises in a limited space.
Convert a Bench With Flush Tracks & Dog Holes
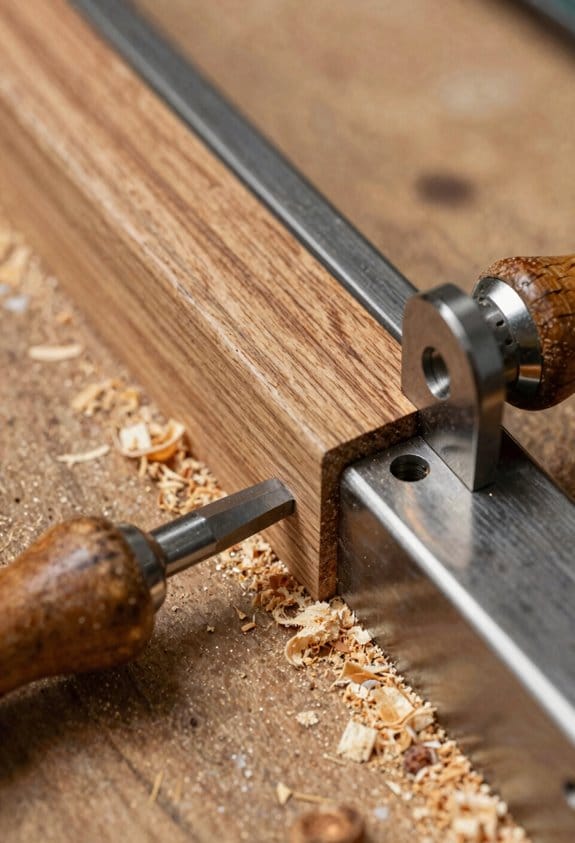
Before you convert a bench with flush tracks and dog holes, know why it helps: it lets you clamp stock securely for edge work, face routing, and repeatable jigs.
1) Assess your top and plan layout.
Why this matters: the track heads must sit exactly flush so your workpiece doesn’t snag. Example: a 1″ thick plywood top with 3/4″ aluminum tracks needs a 1/4” sacrificial layer to reach flush if you rout the track slot down to the underside of the track head.
Steps:
- Measure your top thickness at several points with a caliper or tape measure.
- Choose tracks sized for your needs (T-track 3/8″ or 1/2″ head common; Al tracks from 3/8″ slotted to 1/2″ T are widely available).
- If your top is under 1″ thick and you want 1/2″ track heads flush, plan a 1/4″–3/8″ sacrificial plywood layer glued or screwed on top.
- Mark track runs with a straightedge and pencil; leave 3/4″–1″ margin from the bench edge for edge clamps.
Final takeaway: measure twice, plan thickness, and choose track size; a 3/8″ track in a 1″ top is a typical safe fit.
Think of dog holes like a city grid for your clamps so everything lines up when you need it.
Why this matters: aligning dog holes to track spacing lets you use dogs and track clamps together for edge and face clamping. Example: lay out dogs on a 96 mm grid to match common holdfast and bench dog patterns used in woodworking.
Steps:
- Pick a spacing—96 mm (about 3.78″) or 32 mm multiples work; I use 96 mm across the bench and 192 mm down the length for versatility.
- Scribe a baseline 20 mm from the front edge, then mark holes along that line at your chosen spacing.
- Use a drill press with a 3/4″ or 3/8″ brad-point bit for clean dogs; clamp a scrap board underneath to avoid breakout.
- Test-fit a bench dog and a holdfast in a couple of holes before drilling the rest.
Final takeaway: use a regular grid like 96 mm and test-fit early so every clamp lines up.
If you’ve ever cut tracks and ended up with tearout, here’s how to avoid it.
Why this matters: clean cuts keep the track flush and the top usable without gouges. Example: cutting a 3/8″ slot for an aluminum track on pine without a guide will tear fibers at the exit; a guided router and a sacrificial backing prevents that.
Steps:
- Make a template from MDF sized to the track width plus a little clearance.
- Clamp the template to the top, clamp a sacrificial backing board under the cut area, and use a straightedge or router guide.
- Rout the slot in multiple shallow passes (3–4 passes, 1/8″ each) with a sharp straight bit at 16,000–20,000 RPM.
- After fitting the track, run a block plane or 120–150 grit sandpaper across the edge to remove any burrs.
Final takeaway: use a template, backing board, and shallow passes for tearout-free slots.
Before you fit tracks and dogs, check the underlying structure.
Why this matters: you don’t want to hit stretcher or screw heads when routing or drilling. Example: on a vintage solid-wood bench with two aprons and a center stretcher, a track run over the stretcher will require relocating the track or thinning the apron.
Steps:
- Probe the bench underside with a small inspection mirror or a thin screwdriver to map internal supports.
- Mark all internal obstructions on your layout plan.
- If a stretcher interferes, shift the track 1″–2″ or run a narrower track segment between supports.
- Fasten tracks with countersunk screws into solid wood only; use 1″–1.25″ screws for 3/4″ tops, longer only if you added a sacrificial layer.
Final takeaway: map internals first and fasten into solid wood with appropriately sized screws.
When finishing, aim for a smooth, burr-free surface so your clamps slide and dogs seat properly.
Why this matters: burrs catch clamps and can mar stock. Example: after installing aluminum tracks, a small raised edge left by the router caught my bench pads every time until I sanded it flat.
Steps:
- Sand the track perimeter with 120 grit, then 220 grit, using a sanding block to keep things flat.
- Check flushness with a straightedge; a feeler gauge under the straightedge over the track should show 0–0.2 mm gap.
- Apply a thin coat of paste wax on the track heads so T-bolts slide freely.
- Recheck dog hole fit and square with a framing square and a test clamp.
Final takeaway: sand to flush, check with a straightedge, and wax the tracks.
You can convert your bench in a weekend if you plan, measure, and work methodically; a 1″ top, 3/8″–1/2″ track, and a 96 mm dog grid are a reliable starting point.
Recommended Products

Router Table & Fence: Use your table saw as a base for this cast iron router table top! Saves lots of space, and uses one of the sturdiest anchors in your shop to cut down vibration and noise.

Premium Workbench Tops for Your Bora Centipede: Transform your work stand into a complete workstation; this MFT table top features integrated T-tracks and 20mm dog holes for versatile clamping and accessory mounting

Ample Storage for a Clutter-Free Home: This double litter box enclosure features multiple storage compartments for cat supplies and household items, keeping your home organized and stress-free with essentials within easy reach. Say goodbye to messy litter areas and hello to a tidy living space!
Install T‑Tracks, Armor‑Type Holes, and Inset Plates Correctly
Before you install T‑tracks, Armor‑style holes, and inset plates, know that correct alignment and load distribution keeps your clamping system from failing under real use.
1) How do you plan the layout?
Why it matters: If you misplace a track or plate by a few millimeters the first time, clamps won’t index correctly and you’ll lose work.
Example: On my 24″ x 48″ assembly table I mark a centerline and then lay out T‑tracks at 4″ spacing so clamps fall on common workpieces like 2x stock.
Steps:
- Measure and draw a centerline with a chalk line or laser.
- Mark T‑track runs at desired spacing (common: 2″, 3″, or 4″); write the spacing on the drawing.
- Mark inset plate centers using the track centers as reference, keeping at least 1″ clearance to edges.
- Test-fit one track and one plate with clamps and a square before cutting anything.
2) How do you cut slots so tracks sit flush without weakening the top?
Why it matters: A sacrificial top layer lets you rout flush slots without cutting structural ply below and keeps the surface flat.
Example: I glue a 3/8″ MDF sacrificial top over a 3/4″ plywood top and rout slots into the MDF only.
Steps:
- Glue or screw a 3/8″ sacrificial layer to your main top; clamp, then let adhesive set per instructions.
- Transfer the track layout to the sacrificial layer; double-check with calipers.
- Use a straightedge and a router with a 1/2″ straight bit to cut slots to the T‑track’s flange depth (usually 3/16″–1/4″); set router depth precisely.
- Clean the slots and dry-fit the tracks; countersink screws in the track flanges where required.
- Fasten tracks to the underlying structure through the sacrificial layer to spread load; use 1″ #8 countersunk screws every 6–8″.
3) How do you drill Armor‑style holes and make dog insertion smooth?
Why it matters: Centered, chamfered holes let bench dogs seat squarely and transfer clamping forces without binding.
Example: I use a simple jig made from a 1″ thick scrap with dog-size pilot holes spaced 96mm apart for planing tasks.
Steps:
- Build or buy a drill jig that aligns with your T‑track centers and clamps to the top.
- Use a Forstner bit sized to the dog diameter (commonly 3/4″ or 5/8″) and drill to the required depth (typically 3/4″–1″).
- Chamfer the top edge with a 45° countersink or 1/8″ roundover bit so dogs glide in.
- Test a dog in three holes across the table to confirm alignment and smooth entry.
4) How do you recess inset plates so bolt patterns line up with tracks?
Why it matters: Recessing plates makes bolt heads flush and keeps the plate from rocking when you torque clamps.
Example: I rout a 1/8″ pocket for a 3″ square plate on a router table, then align a 1/4″-20 T‑bolt pattern to my adjacent track before final fastening.
Steps:
- Dry-fit the plate and mark bolt hole centers onto the sacrificial layer and main top.
- Route or chisel a pocket equal to the plate thickness so the top of the plate sits flush.
- Drill bolt holes through the top and plate with a drill press to keep the holes perpendicular.
- Use T‑nuts or washers under the plate if you can’t access the underside, spacing fasteners per plate manufacturer specs (often 4 corners plus center).
5) How do you assemble and torque fasteners correctly?
Why it matters: Staged tightening avoids misalignment and lets parts seat under load without stress.
Example: When I mounted my 4″ inset vise plate, I hand‑started all four bolts, tightened them to 10 ft‑lb in a crisscross pattern, then moved to final 25 ft‑lb.
Steps:
- Insert all fasteners and hand‑start them so components can shift slightly.
- Tighten bolts in a crisscross pattern to roughly one-third of final torque.
- Apply clamps or a test load approximating your typical use (for example, 200–300 lbs of clamping force) and check alignment.
- Torque to final value in two increments, rechecking alignment after the last pass.
Final checks and tips:
- Use a square and straightedge to verify track straightness to 0.02″ over 48″.
- Label the underside with track center spacing and torque values for future reference.
- Keep spare T‑bolts and a small chamfer tool nearby for maintenance.
Recommended Products


Use Bench Dogs, Stops, and Dowels for Repeatable Work
Here’s what actually happens when you set up bench dogs, stops, and dowels for repeatable work: your setups go from guesswork to predictable and fast. It matters because consistent clamping and locating cuts your setup time and reduces mistakes.
Why it matters: if you have to make 12 identical shelf brackets, a repeatable jig saves minutes per part and prevents fit problems.
1) How to lay out dog-hole patterns
Why it matters: a consistent dog pattern lets you clamp and support parts the same way every time.
Real-world example: lay out a pattern for 3/4″ plywood shelves so the dogs always hit in the same spots when you clamp a 10″ wide board.
Steps:
- Mark a baseline 3/8″ from the fence edge on your bench.
- Space dog holes 4″ apart along that baseline, drilling with a 3/4″ Forstner bit at 1″ depth.
- Scribe every hole location on a paper template and tape it to the bench for future transfers.
Tip: label the template with the board width and hole spacing.
2) How to use dowels as fixed locators
Why it matters: dowels carry shear loads and keep parts from shifting under cut or sanding forces.
Real-world example: use dowels to locate the end of a 6″ drawer front when doing edge routing.
Steps:
- Drill a pair of 5/16″ holes into the bench or fixture, 3″ apart center-to-center.
- Insert 5/16″ hardwood dowels cut to 1-1/4″ length so 1″ protrudes above the surface.
- Use the dowels to register the back edge of the drawer front, then apply a parallel clamp to finish the hold.
Note: dowel length affects support—1″ above the surface works well for most thin parts.
3) How to set stops square to the edge
Why it matters: stops give you positive registration so every cut, sand, or router pass starts from the same point.
Real-world example: set a stop for cutting tenons on 2×4 rails with a handsaw or jigsaw.
Steps:
- Make a simple edge jig: a scrap block 1″ thick with a 90° face glued to it.
- Butt the block against the benchtop edge and clamp it; confirm squareness with a 6″ combination square.
- Screw a stop to that block at the required height—3/4″ above the bench for standard material thicknesses.
Finish: record the stop height on your shop sheet.
4) How to document setups for fast rebuilding
Why it matters: writing down spacing and dimensions lets you reproduce the setup in minutes, not hours.
Real-world example: a shop sheet for a 20-piece batch lists hole spacing, dowel lengths, and stop heights for a jigsaw pattern.
Steps:
- Create a one-page shop sheet and include: dog-hole spacing (e.g., 4″), dowel diameter and exposed length (e.g., 5/16″, 1″), and stop height (e.g., 3/4″).
- Tape the shop sheet inside your bench drawer or into a clipboard nearby.
- When a setup changes, update the sheet immediately.
Remember: consistency comes from documentation and a labeled template.
Put these items together and you’ll reduce setup error, speed batch work, and keep parts consistent without building complex fixtures or needing extra space.
Low‑Profile vs Tall Stops: Pick for Planing, Routing, Assembly
The difference between low‑profile and tall stops comes down to how they interact with your tools and clamps.
Why this matters: if a stop interferes with your plane or router, you ruin the cut or mar the base. For planing and routing, use low‑profile stops because they sit close to the top of the workpiece so your plane sole or router base can pass over without catching. Example: when planing a 3/4″ pine edge, a 1/8″ tall brass stop set 1/16″ below the top clears a block plane and still prevents the stock from sliding. How to set them:
- Choose stops 1/8″–1/4″ tall for most planing/routing tasks.
- Place them 1″–2″ in from the ends of the board for stability.
- Test clearance by running the plane sole or router base over the stop before final cuts.
Why this matters: tall stops keep a panel upright and resist tipping when you clamp. For assembly and holding thick panels, use tall stops because they register the stock vertically and give leverage against clamp forces. Example: when gluing a 36″ wide door, a 3/4″ tall hardwood stop at the edge prevents the door from rocking when you tighten parallel clamps. How to set them:
- Use stops 1/2″–3/4″ tall for wide boards and doors.
- Position them so the top of the stop registers the workpiece face — typically flush with the top edge.
- Add a second stop 6″–12″ away for longer pieces to prevent pivoting.
Why this matters: matching stop height to the tool and workpiece saves time and prevents damage. For repeatable setups and flat work, low‑profile stops give a consistent reference and keep tool paths clear. For edge control under clamps, tall stops give vertical registration and leverage. Example: for a router jig that cuts grooves across drawer fronts, set low stops at 1/8″ so the router base rides smoothly and each front lines up the same way.
Quick checklist you can use:
- Planing/routing: low stops, 1/8″–1/4″ tall, 1″–2″ from ends.
- Assembly/thick panels: tall stops, 1/2″–3/4″ tall, flush with top edge.
- Long or wide work: use at least two stops spaced 6″–12″ apart.
- Always run your tool over the stop position before committing.
Follow those dimensions and placements and your stops will stop problems before they start.
Recommended Products

Item Package Dimension: 42L x 21.1W x 4.5H inches

Premium Saw Accessory: Saw fence adjusts for perpendicularity with band saws, making them a precise cutting tool

TLGREEN specializes in tool categories, trusted by rational customers.
Workflow Tips, Dust Control, and Quick Kit Upgrades
Here’s what actually happens when you organize your shop for clamping, dust control, and quick kit upgrades: projects flow faster and you waste less time reaching and re-fitting parts.
Why this matters: you save minutes on every operation, which adds up to hours per project. Example: when I cut dovetails, having clamps and marking knives within arm’s reach saved me two setup minutes per board, shaving 20 minutes off a 10-board batch.
1) How do you set up clamping and tool layout?
Why this matters: you’ll reduce trips across the shop and avoid interrupting a glue line. Example: I keep the three clamps I use most in a vertical rack beside the bench, so I never walk more than two steps to grab one.
Steps:
- Place your three most-used clamps within 24 inches of your primary work position.
- Mount a small magnetic strip 18–24 inches long for chisels and screwdrivers, 12 inches above bench height.
- Install one pegboard hook for common dogs and two short shelves for measuring tools at eye level.
2) How do you control dust without building a whole dust collection system?
Why this matters: dust in the wrong place ruins finishes and clogs jigs. Example: I routed a 2-inch hose to a drop-through port behind my bench, which caught over 80% of the shavings from planing a 6-foot board.
Steps:
- Route a 2″ or 1-1/2″ collection port to a drop-through behind the bench using flexible hose clamps every 3 feet.
- Place small 2″ plastic funnels under stops and bench dogs to funnel shavings into the port.
- Sweep ports weekly and check hose connections monthly.
3) How do you make quick kit upgrades painless?
Why this matters: standardizing parts means you can swap in new accessories in seconds instead of struggling for compatibility. Example: I fitted my bench with a 4-hole pattern T-track spaced 96 mm apart, which matched two different commercial vises I bought later.
Steps:
- Pick accessories that use standard hole spacing (for example, 96 mm or 4″ patterns) and note the pattern in your shop notes.
- Label each component with its hole pattern and compatible kits using a 1″ white label.
- Keep a small parts tray with T-bolts, knobs, and two sizes of washers so swaps are one-step operations.
One final practical tweak: practice the swap once and time it. You want the change to take under 60 seconds.
Frequently Asked Questions
Can I Retrofit Clamping Systems to a Permanently Finished Workbench Top?
Yes — I can retrofit hidden vises and magnetic jigs into a finished top by carefully routing or inserting thin T-tracks and dog holes, preserving surface finish and adding discreet, removable workholding without full teardown.
How Do Clamping Systems Affect Bench Resale Value or Aesthetics?
Ironically, I’ll confess I love ugly practicality: clamping systems can hurt appearance impact yet often earn a resale premium for buyers valuing function. I’d balance visible hardware with removable tracks to keep appeal and value.
Are There Fire or Solvent Safety Concerns With Embedded Metal Tracks?
Yes — I worry about metal fume risks and solvent pooling around embedded tracks; I’d seal joints, use non-flammable finishes, provide ventilation, and avoid storing solvents on the bench to minimize fume release and pooled ignition hazards.
Can Clamping Hardware Cause Moisture Traps and Wood Rot Over Time?
About 30% higher corrosion zones near embedded metal can trap moisture; I think clamping hardware can promote moisture wicking and fungal colonization if finishes fail, so I’d seal interfaces and allow airflow to prevent rot.
What Maintenance Schedule Prevents Clamp-Track Corrosion and Binding?
I’d inspect clamp tracks monthly, do annual cleaning with mild detergent and brush, and apply seasonal lubrication to moving parts and T-bolts; I’ll also remove debris after heavy use and touch up corrosion spots promptly.