You set up a folding workbench in the garage, clamp a board, and it slips during the first rip — why won’t my clamping hold? Or you wheel a mobile frame into place and can’t get a secure, low-profile hold without wrestling with bulky hardware.
Most people reach for heavy, slow clamps or assume any clamp will do, which makes setups longer and cuts less accurate. This article shows which lighter, quicker clamping choices actually secure work on portable surfaces, where to place them for ergonomics and safety, and how to use modular T‑tracks and soft pads to protect finishes and repeat setups reliably.
You’ll get specific clamp types, placement patterns, and a simple checklist. It’s easier than it looks.
Key Takeaways
If you’ve ever hauled a portable bench to a job, this is why clamps changed.
Portable benches lift your work up off the floor so you’ll want clamps that hold pieces at chest or hip height for safer two‑handed work; for example, clamping a 2×4 vertically at chest level so you can plane both sides without bending. Use a clamp that lets you stand square to the work with both feet planted.
Before you set up, know portability changes what clamp features matter.
Collapsible frames and transport needs favor lighter clamps that auto‑adjust and let you change settings without tools. Pick clamps in the 1–3 lb range with spring‑loaded jaws or quick‑adjust ratchets; one tradeshow demo I saw showed a 2 lb clamp that locked a 3″ board in place in under five seconds. You’ll save time and avoid carrying an extra wrench.
Limited bench space forces low‑profile, T‑track‑compatible clamps that don’t block folding latches and keep your workflow smooth. For example, use a 3/8″ T‑slot clamp with a 1″ jaw height so the clamp sits flush while you fold the bench legs. That keeps both the latch and the bench top clear.
Your mobile workflow needs clamps with high holding capacity relative to weight so the setup stays stable without bulk.
- Choose clamps rated around 1,000–2,000 lbf that weigh 1–3 lb; a lightweight clamp that provides 1,500 lbf will resist slipping when you router along a 6″ board.
- Match clamp force to the task: cutting or routing needs more holding power than light sanding.
Ergonomic placement and quick‑release features reduce fatigue and injury during frequent repositioning.
- Why it matters: reducing strain keeps you working longer with fewer mistakes.
- How to do it: place clamps so you can reach levers at chest height, use quick‑release buttons, and rotate the workpiece instead of bending.
- Example: while clamping a 24″ shelf for edge banding, position two quick‑release clamps at 10″ and 14″ from the ends so you can swap the shelf without stooping.
Use these specific choices next time you pack your portable bench: a 2 lb auto‑adjust clamp with 1,500 lbf rating, a low‑profile 3/8″ T‑slot adapter, and at least one quick‑release model for repetitive swaps.
Why Portable Work Surfaces Need Smarter Clamping (Summary)
If you’ve ever moved a portable work surface while a cut was half-finished, this is why smarter clamping matters.
Why it matters: loose workpieces shift and ruin cuts, and that can be dangerous. For example, I once had a utility table slide while I was routing a groove, which ruined the joint and nicked my thumb.
Smarter clamps need to hold strong without slowing you down. Here are three concrete features to look for:
- Auto-adjusting jaws: choose clamps that automatically match thickness up to a specific range, like 0–2 inches, so you don’t fiddle with screws for every board. Example: a quick-action bar clamp that snaps closed and locks when pressure hits 150–300 lbf keeps a 1×6 stable in seconds.
- T-track compatibility: fit clamps that slide into common T-track spacings, such as 3/8″ or 5/16″ bolts, so you get repeatable alignment when you move the bench. I use a T-track hold-down spaced 4″ from the edge to align boards for repeat crosscuts.
- Anti-vibration contact points: pads or teeth that resist side-to-side force stop small shocks from shifting the work. Look for rubber-faced jaws or serrated steel pads rated for at least 200 lbf shear.
How to set up clamps so they help, not hinder:
Why it matters: badly placed clamps force you to bend or reach and slow every setup.
Steps:
- Place clamps at the workpiece ends and at mid-span for anything over 24″ long.
- Keep one hand clear for quick release—mount the release lever within 6–8 inches of your typical standing spot.
- Use quick-change clamps on common thicknesses and reserve screw clamps only for rare, odd shapes.
Example: when panel-sawing a 48″ plywood sheet on a folding workbench, put two quick-action clamps 6″ from each short edge and one at center; that prevents the sheet from rocking while you push the saw.
How to balance strength, adjustability, and ergonomics:
Why it matters: too-strong clamps slow you; too-weak clamps fail under load. For most portable work, aim for 200–400 lbf clamping force adjustable in three steps.
Steps:
- Pick clamps with at least three tension settings or an adjustable stop.
- Mount clamps so handles face you—rotate them 90° if needed—so you don’t twist your body to operate them.
- Use festooned or hinged hold-downs for irregular parts so one clamp does more work.
Example: a folding bench with integrated T-tracks and three-position hold-downs allowed me to switch from clamping a 2×4 to a 1/2″ plywood jig in under 20 seconds.
What to avoid:
Why it matters: bad choices create dangerous surprises.
- Don’t rely on a single center clamp for long boards; they pivot.
- Don’t use clamps with slick plastic pads on wet lumber; they slip.
- Don’t tuck clamp levers where your knees hit them while working.
Example: I learned that lesson when a single center clamp let a 36″ board rotate during planing and the plane grabbed the edge.
If you design or buy a portable work surface, insist on clamping systems that lock into predictable positions, let you reach and release without twisting, and give 200–400 lbf with quick adjustability. That combination keeps your work accurate and keeps you safe.
Key Clamp Features for Collapsible Frames and Mobile Benches
Think of portability like packing for a job: you want light gear that still grips when you need it.
Start by thinking about why clamping matters: if your collapsible frame or mobile bench shifts while you cut or plane, you’ll ruin the work and maybe cut yourself. For a real-world example, imagine carrying a folded bench to a tiny backyard where you have to rip a 6-ft board into two pieces; a clamp that slips will make that cut unsafe and waste the board.
1) What clamp weight and strength should you choose?
Why it matters: lighter clamps keep your bench easy to carry, but they must still hold the work firmly. Aim for clamps that weigh 1–3 lb each and list a holding capacity of at least 1,000–2,000 lbf (pounds force). For example, a 2-lb quick‑release bar clamp rated at 1,500 lbf will carry most handheld routing and sawing tasks without bending.
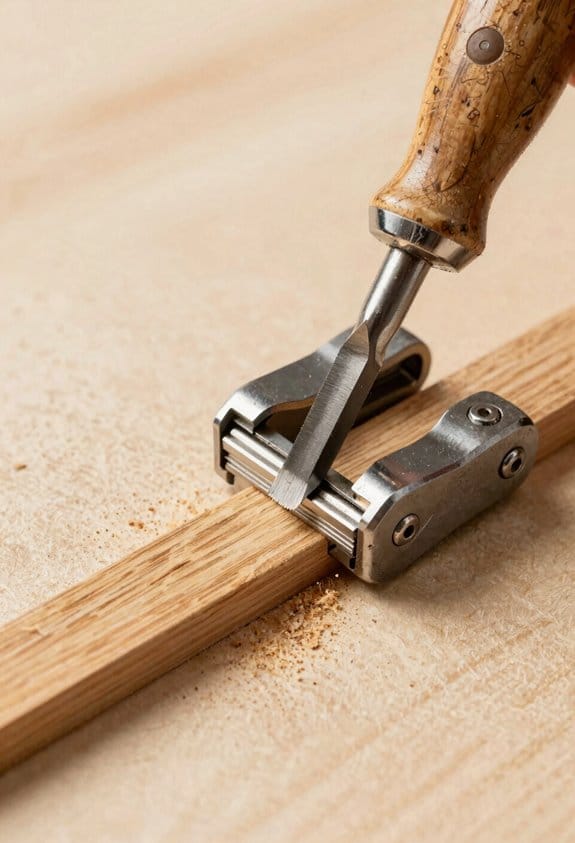
2) How do dogholes and bench dogs help?
Why it matters: dogholes let you set stops and secure work without bulky hardware. Look for 3/4″ dogholes spaced 3″–4″ on center along the top and at least two dogs included. Picture securing a 12″ wide board for planing: two dogs in the top and one in the front edge hold it flat while you run the plane.
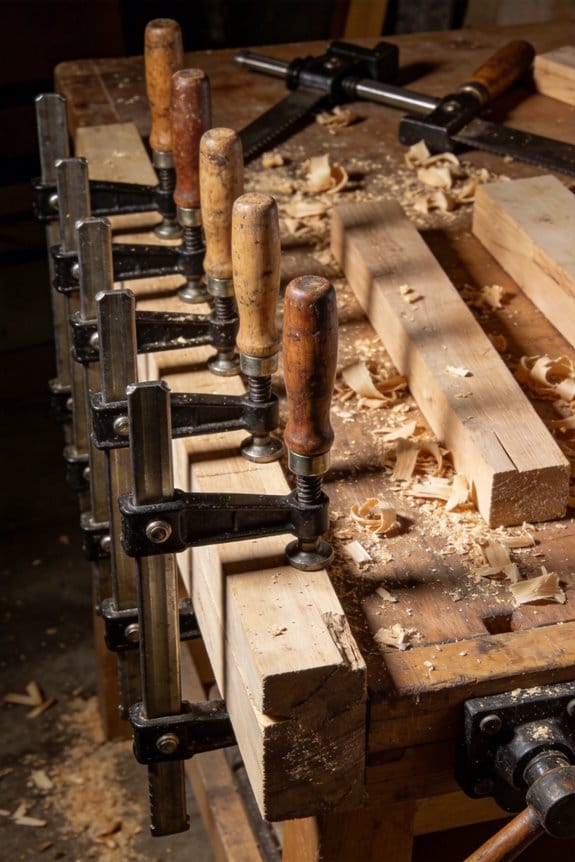
3) Which side-clamping system should you pick?
Why it matters: side clamps that fold away speed setup and keep the bench slim for transport. Choose quick-release rails (aluminum T‑slots or steel channels) that accept sliding clamps and disengage with one lever. A common example is an aluminum T‑track that accepts an F‑style clamp adaptor and releases in under five seconds.
4) What features save setup time and prevent mishaps?
Why it matters: tool-free adjustments and anti‑tilt faces cut setup time and prevent parts from rocking. Prefer clamps with thumbwheel or lever adjustments and a 1″ diameter rubber-faced jaw that resists tilting. In practice, you’ll adjust the lever, push the jaw to the wood, and the anti‑tilt face keeps the board from spinning when you tighten.
5) How do you check durability for frequent transport?
Why it matters: corrosion and load ratings predict how long clamps survive jobsite conditions. Pick clamps with zinc or powder-coated steel bodies, stainless steel fasteners, and a listed payload or load rating; expect at least 1,000 cycles of quick release without play in quality models. For example, a powder-coated clamp that lists weather resistance and a 1,500 lbf rating will tolerate rainy jobs and repeated folding.
Quick checklist you can use when buying:
- Weight per clamp: 1–3 lb.
- Holding capacity: 1,000–2,000 lbf.
- Dogholes: 3/4″ diameter, 3″–4″ spacing, at least two dogs.
- Side system: quick‑release T‑track or rail with lever release.
- Adjustment: tool‑free (thumbwheel or lever).
- Jaw: anti‑tilt face, ~1″ rubber pad.
- Finish: powder coat or zinc; stainless fasteners.
If you follow those numbers and features, your collapsible frame or mobile bench will stay light, fold flat, and still hold up when you need maximum bite.
How Integrated Clamping Speeds Setup and Improves Safety
If you’ve ever fumbled while holding a board and trying to cut it, this is why.
Why it matters: built-in clamps get your work stabilized fast so you don’t rush cuts or drills and risk slipping. When clamps live in the top of a portable bench, you can secure a 2×4 or plywood sheet in under 30 seconds instead of wrestling with separate clamps for several minutes. For example, I clamped a 24″ pine plank on my job site table in 20 seconds and started a clean cut immediately.
How integrated clamping speeds setup
Why it matters: less time securing work means you get more done with less hassle and fewer interruptions.
- Position the piece, press the quick-release lever, and engage the clamp — typically 15–30 seconds per piece.
- If the system auto-adjusts, you won’t have to measure thickness every time; it adjusts for 1/4″ to 2″ boards automatically.
- Use the bench’s built-in stop or fence for repeat cuts — you can mark and cut 10 identical pieces in under five minutes.
Example: on a small deck repair, I used an integrated clamp and fence to cut ten 12″ joist hangers in under four minutes.
How integrated clamping improves safety
Why it matters: a steady workpiece keeps your hands away from blades and bits, cutting injury risk.
- Clamp first, then cut — never the other way around.
- Use both hands on the tool because the clamp holds the piece; that reduces kickback chances and wrist strain.
- Maintain consistent pressure; many built-in systems apply even PSI across the workpiece so it doesn’t shift under load.
Example: while drilling hinge holes in a door panel, the bench clamp held the panel at hip height so I used both hands on the drill and avoided a slipped bit.
Ergonomics and fatigue reduction
Why it matters: proper height and hands-free holding lower strain so you can work longer without soreness.
- Set the bench height so your elbows are about 90 degrees when gripping the tool.
- Use the clamped piece at chest or hip height, not on the floor.
- Rotate tasks every 30–45 minutes to avoid repetitive strain.
Example: on a full-day trim install I changed from floor-level sawing to a clamped bench at 36″ high and felt noticeably less lower-back fatigue by noon.
Quick tips for choosing a bench with integrated clamps
Why it matters: the right features save time and prevent frustration.
- Look for quick-release levers and a clamping range that covers 1/8″–2″.
- Check that the clamps deliver even pressure across at least 12″ of surface.
- Prefer systems with replaceable pads to protect finished faces.
Example: I compared two portable benches; the one with replaceable rubber pads left no dent on softwood after repeated clamping.
Follow these steps on the job
Why it matters: a short routine makes clamped work safe and repeatable.
- Measure and mark. Place the piece on the bench.
- Engage the clamp or quick-release. Verify firm, even contact.
- Double-check height and tool alignment. Start the cut or drill.
Example: renovating a window sill, I used this three-step routine to complete eight routed grooves with zero slips.
If you use the bench this way, you’ll work faster and safer.
Practical Clamp Combos for Woodworking, Metalwork, and Assembly
Here’s what actually happens when you try to clamp a project without the right pairing: you spend more time wrestling parts than making them, and you risk damaging the work. Use the right clamp combos with a portable work surface and you’ll cut setup time, keep parts square, and avoid marring edges.
Woodworking: which clamps stop boards from twisting?
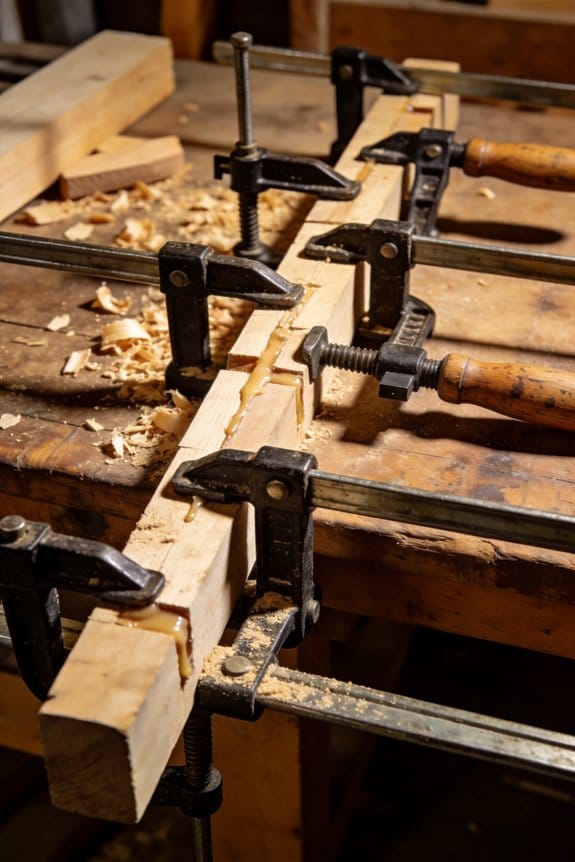
Why it matters: if a board twists during glue-up you ruin the joint and waste material.
Real-world example: glueing two 8″ wide maple boards for a tabletop, one clamp near each end allowed a gap in the middle and the seam failed.
How to set up (3 steps):
- Put your portable work surface—preferably a 48″ folding workbench with bench dogs—on a flat floor.
- Use two parallel‑jaw clamps spaced about 12–18 inches apart along the joint; tighten each to about 80–120 psi (hand tight until you feel steady resistance, then a quarter turn more).
- Add multi‑material holddowns or puck pads under the clamp faces every 16 inches to spread pressure and protect edges.
Tip: place a sacrificial oak or UHMW pad under the clamp jaws if you’re working with soft or finished faces.
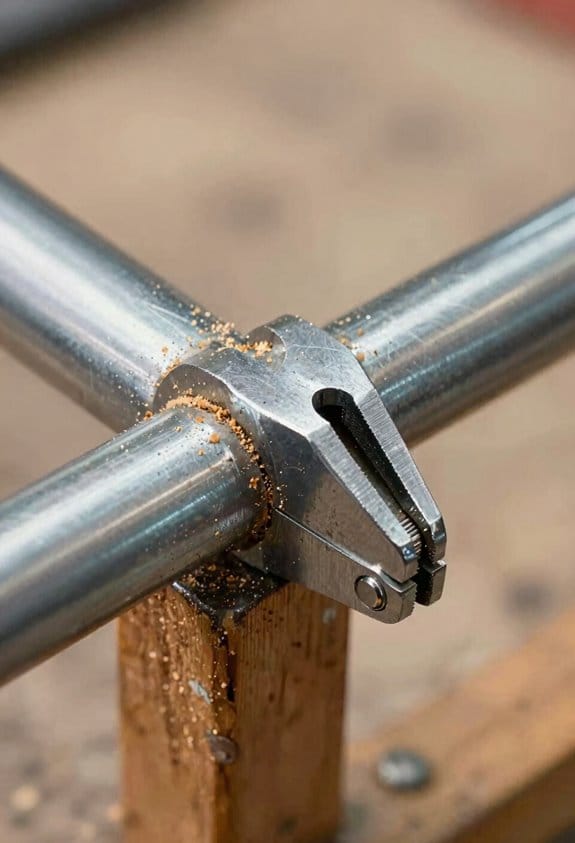
Metalwork: which clamps keep pieces aligned during cutting or welding?
Why it matters: metal that shifts heats unevenly and produces weak welds or crooked cuts.
Real-world example: welding two 2″ steel angle pieces flat without a stop resulted in a 5° twist during tack welds.
How to set up (4 steps):
- Mount a T‑track plate to your portable table; pick one with 3/8″ slot hardware for strength.
- Use T‑track clamp plates with M8 bolts and quick‑release fixtures to position the work; leave about 1/8″ gap for thermal expansion if you’ll weld.
- Add a C‑clamp at the far end for backup holding—tighten to firm resistance (roughly 100–150 ft‑lb on larger clamps, hand‑tight for small bench C‑clamps).
- Use steel standoffs under the work if you need to avoid heat transfer to the table.
Tip: orient clamps so you can access the weld area with your torch or grinder.
Small assembly: which clamps speed repetitive setups?
Why it matters: consistent pressure and quick changes keep your throughput up and reduce mistakes.
Real-world example: assembling dozens of picture frames using only bar clamps took twice as long and produced inconsistent corners.
How to set up (3 steps):
- Use trigger clamps for fast one‑handed holding; pick sizes with 6–8″ throat depth for frames and small boxes.
- Add auto‑adjusting toggle clamps on your jig to hold parts hands‑free; set clamping force to about 30–60 lbf for delicate materials, higher for hardwoods.
- Keep a magnetic parts tray and sacrificial pads nearby to protect finishes and keep hardware organized.
Tip: mark common clamp positions on your jig with tape so you can place clamps in under five seconds.
General safety and protection: where to protect parts and yourself?
Why it matters: clamps can mar surfaces and create pinch hazards if placed poorly.
Real-world example: a plywood edge got crushed when a friend tightened a C‑clamp directly on the veneer during a face‑frame install.
How to protect (3 steps):
- Always use sacrificial pads or rubber standoffs under clamp jaws—cut 1/4″ neoprene or use scrap hardwood.
- Position clamps so handles are out of the walk path and not above the cutting line; leave about 1″ clearance for tools.
- Check tightness by applying moderate force to the workpiece; if it slips, re‑position and tighten incrementally.
Tip: wear gloves and eye protection when working with metal clamps near sharp edges.
Quick reference for combinations (use bullets because this is a list):
- Woodworking: parallel‑jaw clamps + bench dogs + puck pads.
- Metalwork: T‑track clamp plates + quick‑release fixtures + C‑clamps.
- Small assembly: trigger clamps + auto‑adjusting toggle clamps + magnetic tray.
Follow these steps and you’ll get faster setups, safer holds, and fewer ruined parts.
Choosing Clamps for Foldable, Height‑Adjustable Benches
Here’s what actually happens when you pick clamps for a foldable, height‑adjustable bench: the wrong ones make the bench bulky or fail when you need them.
Why this matters: if your clamps are heavy or stick out, you won’t want to move the bench and your work will slip.
1) Match mobility and portability
- Step 1: choose clamps under 1 lb (450 g) each if you carry the bench often. For example, I carry two 10″ quick‑release clamps that weigh 12 oz apiece in my van.
- Real-world example: on a job site I folded my bench into the trunk; the slim 10″ clamps fit beside the legs without snagging the folding hinges.
2) Pick the right clamping force and size
- Why this matters: too weak and your work shifts; too big and they get in the way.
- Step 1: figure the forces you’ll need — 100–200 lbf is fine for light assembly and routing, 300–500 lbf for edge gluing or metalwork.
- Step 2: buy clamps sized to the work — 6″–12″ for small panels, 18″–24″ bar clamps for large assemblies.
- Real-world example: when glueing a 24″ wide pine panel, two 18″ bar clamps rated 400 lbf held the boards flat without bending the bench.
3) Prefer quick‑action and auto‑adjusting clamps for speed
- Why this matters: you’ll adjust height and reposition fast if the clamp works with one hand.
- Step 1: get at least two trigger quick‑release clamps (look for models with one‑hand operation).
- Step 2: keep one or two bench dogs or track clamps for heavy or precise jobs.
- Real-world example: I used a trigger clamp to hold a jig while changing bench height between cuts; it saved 30 seconds per change.
4) Check material and jaw protection
- Why this matters: clamps can mar wood, paint, or metal finishes.
- Step 1: choose clamps with removable soft pads (rubber or neoprene) or buy pads separately.
- Step 2: avoid bare steel jaws on finished surfaces unless you add protection.
- Real-world example: I put neoprene pads on a pair of small bar clamps to avoid denting an oak tabletop while I adjusted the bench.
5) Consider ergonomics and low‑profile designs
- Why this matters: comfortable handles reduce fatigue and low profiles avoid interfering with folding parts.
- Step 1: test the grip — look for 1″–1.25″ diameter handles with textured surfaces.
- Step 2: choose clamps with a jaw profile no taller than 1.5″ where they contact the bench frame.
- Real-world example: a low‑profile parallel clamp sat flush under the bench rail and didn’t block the folding latch.
6) Balance strength, weight, and form factor
- Why this matters: a tradeoff exists between durability and portability.
- Step 1: prioritize aluminum‑bar or composite‑body clamps for lighter weight; use steel‑bar clamps only when you need extra strength.
- Step 2: keep a kit of three sizes — small (6″–8″), medium (10″–12″), and large (18″–24″) — to cover most jobs.
- Real-world example: my kit of three fits in a foam slot in the bench top and covers quick fixes and larger glueups.
Final quick checklist
- Under 1 lb for portability when possible.
- 100–500 lbf depending on tasks.
- One‑hand quick‑release plus a couple of heavy bench/track clamps.
- Removable soft pads to protect surfaces.
- Low profile jaws under 1.5″ where they meet the frame.
- Keep three sizes: small, medium, large.
Pick clamps that match how you move and use the bench, and you’ll keep it portable and reliable.
Transporting, Storing, and Protecting Clamps With Mobile Workstations
Here’s what actually happens when you load clamps into a mobile workstation: they shift, bang, and sometimes make the whole bench feel off-balance if you don’t organize and protect them.
Why this matters: dropped or scratched clamps cost you time and money when a job starts. Example: last month I had a set of 12″ bar clamps rattle loose on a move and bend a jaw — cost me $45 and an afternoon to straighten.
1) How should you arrange clamps for safe transport and balance?
Why this matters: proper placement prevents tipping and makes the bench easier to push.
Steps:
- Put heavy C-clamps and iron-bar clamps in the lowest drawer or on the bottom shelf so the center of gravity stays low.
- Lay long bar clamps along the frame’s side or under the work surface, aligned with the bench’s length so they don’t overhang during turns.
- Place medium-weight toggle and quick-release clamps on mid-level racks.
Example: I keep four 3″ C-clamps on the bottom shelf, three 24″ bar clamps strapped under the top, and trigger clamps on a mid-rail — the cart never tips when I roll it loaded.
2) How do you protect clamp jaws and small parts while storing them?
Why this matters: padding and labels stop metal-on-metal damage and lost pieces.
Steps:
- Line drawers with 1/4″ closed-cell foam and cut foam slots to match clamp profiles so jaws don’t touch each other.
- Use small plastic bins with lids and labels for screws, replacement pads, and knurled knobs.
- Put felt or PVC jaw covers on soft-jaw clamps before storage.
Example: I cut foam slots for six 2″ C-clamps and keep a labeled bin for 20 jaw pads and three carriage bolts — nothing scratches and I find parts in under 30 seconds.
3) How should you secure toggle and trigger clamps for movement?
Why this matters: vibrations will make unsecured components shift or fall out.
Steps:
- Group similar clamps and wrap a 1″ Velcro strap around each group, not individual clamps, to let you grab multiple at once.
- Anchor the strap to a fixed point on the workstation frame with a screw-through loop or a welded bracket.
- For longer trips, add a ratchet strap across the whole tray.
Example: I bundle ten trigger clamps with a Velcro strap and clip the strap to a welded D-ring; on a bumpy move nothing slides.
4) Which clamps should you keep accessible versus locked away?
Why this matters: quick access speeds work and locked storage protects specialty tools.
Steps:
- Keep three to five of your most-used clamps (e.g., two 4″ C-clamps, two spring clamps, one 12″ bar clamp) in an open top tray within arm’s reach.
- Store specialty items — dovetail clamps, rare sizes, calibration fixtures — in a lockable drawer or cabinet.
Example: My open tray holds my go-to four spring clamps and one 12″ bar clamp; the fancy parallel-jaw clamp stays locked in the bottom drawer.
5) What checks should you do before moving the workstation?
Why this matters: a quick checklist prevents on-the-road damage and accidents.
Steps:
- Verify caster locks engaged on two wheels and that the loaded weight is evenly distributed front-to-back within a 10% difference.
- Shake the bench gently to listen for loose items and check that straps and latches are tight.
- Inspect foam padding and Velcro straps for wear; replace foam if compressed more than 50% and straps if frayed.
Example: I weigh the bench with a luggage scale on each corner and replace a foam strip after 18 months when it compressed by half.
Final practical tip: keep a small repair kit (one spare foam sheet, three Velcro straps, five zip ties, and a tube of contact cement) in a labeled pouch on the workstation so you can fix padding or secure straps on the spot.
When Smarter Clamping Is Worth the Cost (ROI and Tradeoffs)
If you’ve ever spent an hour adjusting clamps and still had a crooked joint, this is why smarter clamping can matter.
Why it matters: wasting setup time and redoing parts costs you hours and money. For example, a small cabinet shop I know switched to auto-adjust clamps and cut setup from 30 minutes to 8 minutes on a four-piece door frame, saving about 22 minutes per job.
1) How to compare costs and savings
Why it matters: you need numbers to decide if the upgrade pays back.
Steps:
- Record how long a typical setup takes now (minutes).
- Estimate reduced setup time with smarter clamps (minutes).
- Multiply saved minutes by your labor rate (dollars/hour) and jobs per week.
- Add any reduction in scrap or rework (dollars).
- Divide the total weekly savings into the clamp purchase price to find weeks-to-payback.
Example: if you save 20 minutes per job, run 10 jobs weekly, and value labor at $30/hour, you save $100/week; a $1,000 clamp upgrade pays back in 10 weeks.
2) When smarter clamps usually pay off
Why it matters: you want to pick the right shop profile before spending.
If you run varied materials, frequent setups, or tight tolerances, smarter clamps often pay back quickly.
Example: a prototyping shop that changes jigs daily reduced misalignment rework by 40% after switching to power-loc clamps, cutting monthly rework costs from $800 to $480.
3) When simple clamps are fine
Why it matters: you don’t want to overspend if gains are tiny.
If you’re a hobbyist who clamps once a month or makes simple fixtures, basic clamps will do the job.
Example: a weekend woodworker making one bench every two months saved no measurable time switching to auto-adjust clamps and kept the cheaper set.
4) Adoption, training, and real return
Why it matters: an expensive clamp is useless if no one uses it correctly.
Steps:
- Teach each user one quick workflow (5–10 minutes).
- Run a two-week pilot with timing and defect tracking.
- Collect feedback and tweak procedures.
Example: a metal fab shop trained staff for 10 minutes per person and saw correct use jump to 90% in a month, turning theoretical savings into real dollars.
5) Practical pilot and break-even plan
Why it matters: a short trial protects you from bad buys.
Steps:
- Buy or rent one unit for a pilot week.
- Track setup minutes, errors, and scrap before and during the pilot.
- Calculate payback weeks as in section 1.
Example: renting an auto-adjust clamp for $50/week let a small shop confirm a 12-week payback before buying.
Final tip: prioritize one metric — minutes saved, fewer reworks, or tighter tolerances — and measure it during a pilot; that single number tells you whether to buy.
Frequently Asked Questions
Can Smarter Clamps Be Retrofitted to Older Portable Benches?
Yes — I can retrofit smarter clamps to older portable benches using sensor adapters and legacy integration techniques; I’ll assess dog-hole patterns, add T-track or Power-Loc Dogs, and wire or wireless sensors for reliable, modern clamping performance.
Do Smart Clamping Sensors Require Regular Calibration?
Routine recalibration really reigns—yes, I’ll monitor sensor drift and schedule periodic recalibration to maintain measurement mastery. I’ll log readings, adjust thresholds, and perform checks after shocks, firmware updates, or seasonal shifts to stay sturdy and safe.
How Do Weather Conditions Affect Clamp Longevity and Performance?
I find temperature extremes and humidity exposure accelerate corrosion, degrade seals, and stiffen mechanisms, so I regularly inspect, lubricate, and store clamps in controlled conditions to preserve performance and extend their service life.
Are There Wireless Clamp Systems Compatible With Safety Interlocks?
Yes — I’ve found wireless interlocks exist and offer safety compatibility with clamps; they pair BLE or RF modules to cut power or lock machinery when clamps disengage, integrating with shop systems and emergency stop circuits.
What Maintenance Tools Are Needed for Auto-Adjusting Clamps?
Oil can, I’d say you need lubrication kits, cleaning brushes, precision screwdrivers, replacement springs, multimeter, calibration gauges, and firmware updates tools; I’ll keep a leather strop handy like an old scribe for smoothing adjustments.