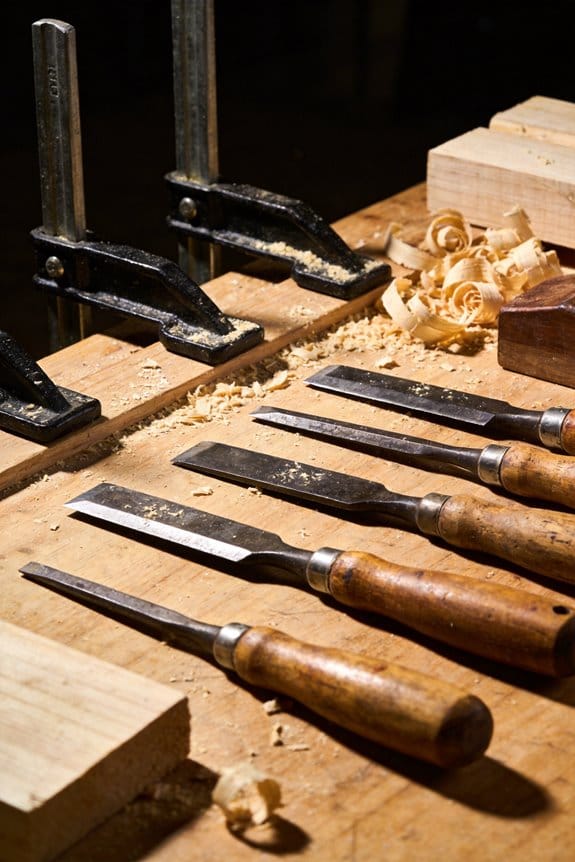
You stand over a partially assembled cabinet, its corners misaligned, glue starting to set, and you don’t know how to hold the pieces perfectly square while the clamps bite down. You’ve asked yourself whether you need extra hands or a complicated jig to get true 90° corners every time.
Most folks rely on eyeballing, temporary bracing, or wrestling with mismatched clamps that let parts shift under pressure. This piece will show you how a right-angle clamp instantly locks faces at a true 90°, prevents glue squeeze-out from moving joints, and keeps diagonals accurate so frames and cabinets come out square.
You’ll learn which jaw size, throat depth, and face material to pick, plus simple tightening and protection tips. It’s easier than it looks.
Key Takeaways
If you’ve ever tried to square a picture frame by eye, this is why.
They guarantee a true 90° corner so your frame doesn’t look crooked and your joints share load evenly. For example, when you glue a 12″ by 16″ frame, clamp both corners with right-angle clamps and let the glue cure 30–60 minutes; the corners stay square and the miters meet without gaps.
They keep parts aligned and stop glue-shift while adhesive cures, so joints stay tight instead of slipping apart. Use two clamps per corner—one on the face and one on the inside—while using a 10–15 minute open time PVA to prevent movement.
The clamps speed assembly by removing guesswork, letting you repeat the same squareness across multiple pieces. If you’re making ten identical 8″ box frames, set one clamped corner as your reference jig and copy it—each build will take the same 5–7 minutes for corner squaring.
They protect finished surfaces and thin stock when you add pads or cauls, minimizing marring so you don’t have to fill dents later. Clamp with 1/8″ cork pads or a 3/8″ scrap of hardwood under the clamp faces when working with veneer or thin plywood.
They convert into simple jigs or fixtures for repeatable setups, giving you stable clamping without fancy tools. Example: screw a pair of right-angle clamps to a scrap board spaced 6″ apart and you have a go-to corner assembly jig for small boxes.
How to Use Right-Angle Clamps for Perfect 90° Joints
Before you start, know that a true 90° corner keeps your project square and strong.
1) Why set up carefully?
- It prevents gaps that let glue shift pieces during curing.
- Real-world example: when I built a small pine picture frame, one misaligned corner made the whole frame look warped and the glass wouldn’t fit.
2) How do you position the pieces?
- Step 1: Lay both parts flat on a bench with their mating faces facing each other.
- Step 2: Butt the pieces together and slide them until edges meet.
- Step 3: Check with a carpenter’s square—place the square inside the corner and ensure both faces touch the square along at least 2 inches.
- If the square contacts only at a corner, shift one piece until it contacts along the face.
- Example: when joining a 2×4 corner for a small box, press the long edges against the square for 3 inches to confirm alignment.
3) How should you apply glue?
- Before explaining how, know that controlled glue application avoids squeeze-out mess and weak bonds.
- Step 1: Use a 3/8″ bead of PVA glue along the mating surface for softwoods, or a 1/8″ bead for hardwoods.
- Step 2: Spread the bead evenly with a plastic spreader so the glue layer is about 0.02–0.03 inches thick.
- Step 3: Assemble one joint at a time so you can set and clamp each corner before moving on.
- Example: I glued the edge of a 1/2″ plywood shelf with a thin spread so the adhesive didn’t bulge out when clamped.
It sounds obvious, but clamp placement and tightening matter.
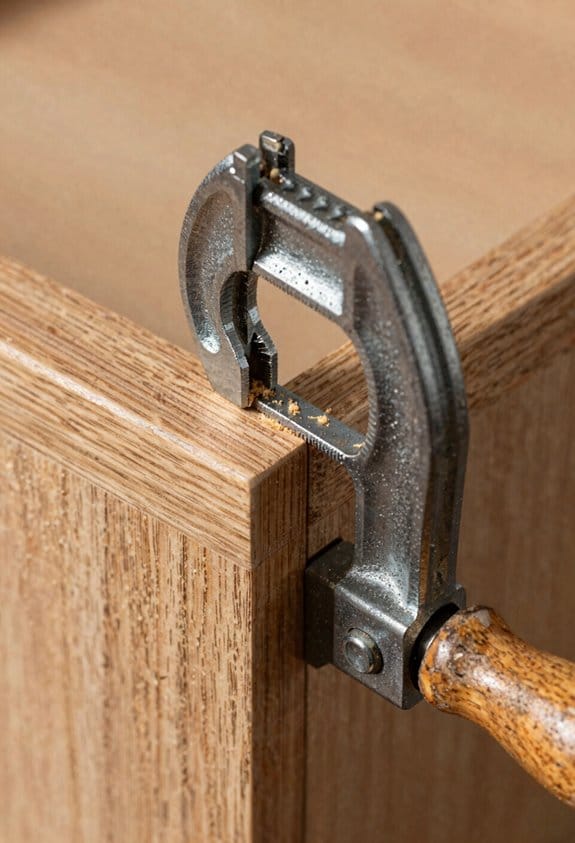
4) How do you use the right-angle clamp?
- Before tightening, place the clamp so its jaws contact both faces at the corner, centered about 1–2 inches from the joint.
- Step 1: Insert the corner into the clamp and hand-turn the screw until the faces just meet.
- Step 2: Tighten in 1/4-turn increments, checking the square after every two turns.
- Step 3: Stop when the clamp shows the faces are flush and the carpenter’s square reads true; that’s usually about 40–60 in-lbs for thin boards, and 80–120 in-lbs for 1″ stock.
- Do not overtighten; overtightening by more than 50% above those ranges can bow thin pieces.
- Real-world example: tightening a clamp on a 1/4″ panel past 60 in-lbs made the edge curve and ruined the joint.
5) How long should you leave the clamp on?
- Before explaining how long, understand that removing clamps too soon lets joints shift and weakens the bond.
- Step 1: Follow the glue manufacturer’s handling time—typically 30–60 minutes for PVA at room temperature (70°F / 21°C).
- Step 2: Wait for full cure before stressing the joint—usually 24 hours.
- Example: I left a pine box clamped for 45 minutes then waited 24 hours before sanding and it held perfectly.
Final practical tips
- Use cauls (1/2″ scrap pieces) inside the clamp to spread pressure if your pieces are thin.
- For mitered corners, pin with a 1″ brad after clamping if you need extra shear strength.
- If you get squeeze-out, wipe excess with a damp cloth within 5 minutes; cured glue is hard to remove.
With the right setup, measured tightening, and single-joint glue sequencing, your corners will register square and stay that way.
Recommended Products

High Efficiency. RCOG-25V multi-functional drilling and milling machine has rich functions, can meet the metal, wood, plastic, Buddha beads and other finishing, all copper brushless motor, strong power, simple operation, high processing accuracy, is the home DIY processing of various parts of the necessary machine.

Powered by an efficient 3/4 HP, 1Ph, 115V TEFC motor and poly-v belt drive system

ASMS-DEL-M - You will receive the AutoScale Miter Sled Deluxe Metric set which includes (1) Metric Left Side Sled, (1) Metric Right Side Sled, (1) Metric Drop Zone, (2) Hold Down Clamps, (2) Flip Stops
Right-Angle Clamp Buying Checklist: Materials, Size, and One-Hand Use

Before you pick a right-angle clamp, know why it matters: the wrong clamp can mar your work, fail to reach the joint, or slow you down while glue sets.
I check material compatibility first because surfaces and shop conditions change how clamps behave. Match the clamp face to your material: use rubber- or plastic-faced jaws for finished or soft wood to avoid marring, hardened-steel faces for metal, and stainless-steel bodies if you work in a humid garage to resist rust. Example: when I glued up walnut cutting boards, a clamp with soft PVC pads saved the finish while still holding square.
Size matters because pressure has to hit the joint, not the edge. Measure the thickest stock you use and pick a jaw opening at least 1/2 inch larger so the clamp clears glue and tabs, and choose a throat depth that reaches the joint — a 2–3 inch throat is fine for trim work, 6–8 inches for cabinet boxes. Example: for face-frame assembly I use clamps with a 3.5-inch throat so pressure sits on the stile, not the rail end.
Before you buy, test one-handed operation because you’ll often hold parts with your free hand. One-handed quick-release or trigger clamps let you align, squeeze, and lock without a second pair of hands; look for an ergonomic trigger and at least 200–300 pounds of clamping force for woodworking. Example: while assembling a plywood box alone, a trigger clamp held corner alignment so I could apply glue and push the screws without extra help.
Steps to pick the right clamp:
- Identify your material and typical finish.
- Measure max stock thickness and joint location for jaw opening and throat depth.
- Try one-handed action for feel and check the clamping force rating.
- Inspect faces and choose soft pads or metal based on surface sensitivity.
Test a clamp in person if you can: clamp a scrap of your material, apply glue or simulate pressure, and watch for slippage, mark transfer, or misalignment.
Recommended Products
Track saw with plunge action – provides fast, easy setup for one-step clean finish cuts in wood and wood-based sheet goods such as laminated particle boards and plywood

Powered by two LXT batteries; x2 LXT technology delivers more power, speed and run time without the hassles of a cord
ASMS-L - You will receive the AutoScale Miter Sled - Left Model which includes (1) Left Side Sled, (1) Hold Down Clamp, (1) Flip Stop. Right Side Sled (ASMS-R) and DropZone (ASMS-D) sold separately.
Design Advantages: Aluminum, Ribs, Slots, and Longer Lifespans

If you’ve ever clumsily held two boards at 90 degrees and wished your clamp did more, this will help.
Why it matters: lighter, stiffer clamps make repeatable right-angle joints faster and reduce how often you replace them.
I prefer aluminum bodies because you cut weight without sacrificing strength. Aluminum frames typically weigh 30–50% less than comparable steel ones, so you can clamp dozens of joints without tiring your hands or straining a workbench; watch for white corrosion in damp shops and wipe joints dry after use. Example: when I carried five 8″ corner clamps up a ladder to install trim, the aluminum ones felt like carrying two full-size clamps.
Ribbed frames stop the clamp from flexing when you crank the screw down, which keeps joint faces flush. Why it matters: less flex means fewer squeezed-out glue lines and tighter corners. You can spot ribs as raised ridges along the frame; count three ribs on the side of a 90-degree clamp and you’ll usually get noticeably higher stiffness than an un-ribbed model. Example: clamping a plywood box for a router template, a ribbed frame kept the lid perfectly aligned while the glue set, unlike a plain frame that bowed.
Built-in slots turn clamps into quick jigs so you can repeat the same setup without marking each workpiece. Why it matters: slots save setup time and improve accuracy when you’re doing batches of parts. How to use them:
- Slide a 1/4″ carriage bolt into the slot and lock it with a wing nut.
- Position the clamp on your worktable and square it with a speed square.
- Tighten the bolt to fix the clamp as a stop for every repeat piece.
Example: I set two clamps with bolts at 3″ and 9″ on a fence and produced ten identical frames in under 20 minutes.
Together, aluminum bodies, ribs, and slots extend service life, lower replacement frequency, and make your 90-degree joints more consistent. A practical metric: expect an aluminum ribbed clamp with slots to stay accurate under normal shop use for 3–5 years before any fit issues, compared with 1–2 years for cheap stamped models.
Recommended Products

TRANSFORM YOUR DRILL INTO A POWERFUL SHEAR: Quickly convert your corded or cordless drill into a high-speed metal-cutting tool. This lightweight, aluminum-cast attachment inserts directly into any standard 1/4" chuck, providing shop-level cutting power with the portability of a hand tool.

HIGH-QUALITY MATERIALS: Aluminum alloy right-angle clamps are processed by high-quality aluminum blocks, surface anodized treatment, precision workmanship, durable, corrosion-resistant, will not fade, black and red are available.
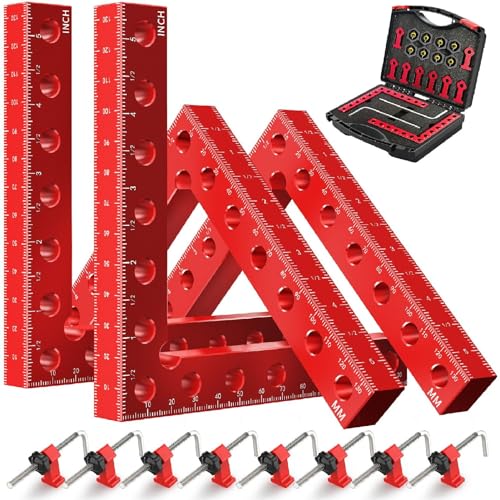
Stable and Consistent Right-Angle Control: CNC-machined from a single block of high-density aluminum alloy, these angle clamps for woodworking deliver strong structural stability during assembly. The anodized surface adds scratch and corrosion resistance. The rigid build helps workpieces stay accurately aligned at a true 90° without flexing or shifting
Real Projects: 2×3 Framing, Cabinet Corners, and Custom Furniture
If you’ve ever set two boards and wished they’d stay perfectly square, this explains why clamps matter.
Why it matters: consistent 90-degree alignment removes guesswork and speeds assembly. I use right-angle clamps to set up 2×3 framing, aligning grain so boards expand and contract uniformly and reducing warping over time. Example: when building a simple 2×3 door frame for a shed, clamp the two uprights and the top rail with a right-angle clamp, measure diagonals to within 1/16″, then drive the screws; the frame stays true through transport.
Before explaining how, here’s why you want clamps for cabinet corners in one sentence: they hold parts while you check squareness and dry-fit hardware so hinges and drawer slides sit flush. Steps:
- Dry-assemble the corner and clamp at 90° with a cabinet clamp.
- Measure diagonals; adjust until they’re equal within 1/16″.
- Mark hinge and slide locations, then unclamp and pre-drill pilot holes.
Real example: when I built a base cabinet, clamping the carcass while checking hinge placement kept the door gap at 1/8″ across the face.
The next part shows how clamps help with custom furniture and why that matters in one sentence: clamps free your hands so glue and fasteners go exactly where you planned, keeping surfaces level while joints cure. Steps:
- Apply glue to the joint and fit the pieces together.
- Use two clamps—one to square, one to hold pressure—tighten until glue squeezes slightly.
- Wipe squeeze-out with a damp rag and let cure per glue instructions (usually 24 hours for PVA).
Example: when gluing a tabletop, I use parallel clamps spaced every 12″ to keep the surface flat while the glue sets.
Practical tips before you start one action: check clamp faces for marring and use pads when needed. Why it matters: protecting your finish avoids repair work later. Example: for a stained shelf, I cut small blocks of scrap hardwood as pads and place them between the clamp jaws and the shelf — no dents, and stain goes on clean.
Quick checklist you can follow on the job:
- Choose the right clamp: right-angle for frames, cabinet clamps for carcasses, parallel clamps for panels.
- Inspect faces and use pads if surface is soft.
- Align grains for similar expansion when possible.
- Measure diagonals to 1/16″ for squareness.
- Tighten gradually, not all at once.
- Let glue cure fully before removing clamps.
One last specific detail: if you need repeatable assemblies, mark clamp positions on a jig or the workpiece with a pencil at 12″ intervals so you spend minutes instead of guessing during each repeat.
Troubleshooting: Common Corner-Clamping Problems and Quick Fixes
If you’ve ever struggled to get a tight corner clamp, this is why.
Why it matters: a gap or slip ruins the joint and wastes glue and time. I saw this when I glued a small cabinet corner and ended up sanding a 1/8″ gap away.
1) Why clamps misalign and how to stop it
Why it matters: alignment keeps glue surfaces flush so the joint gains full strength. When clamps are crooked you’ll see gaps on one side and excess squeeze-out on the other.
Steps:
- Sight along both faces before tightening; your eyes will catch a twist quicker than feel.
- Loosely tighten clamps, then check with a 12″ square or speed square against both faces.
- Tighten in 10–15 lb increments per clamp, alternating sides until firm.
Real example: with a 2″ pine box corner I left clamps loose, squared it, then added final 15 lb and the faces closed perfectly.
Tip: If a thin 1/32″ gap remains, slide a veneer shim into the gap and retighten.
2) What to do when clamps slip on smooth or tapered stock
Why it matters: slipping clamps let the joint shift during cure and leave you with a gap later. I once lost alignment on a tapered leg and had to re-glue the whole corner.
Steps:
- Wrap one layer of painter’s tape around the clamp jaws where they contact the wood.
- Or clamp with a 1/8″ leather pad or scrap hardwood clamp block to increase friction.
- For tapered work, lightly sand jaw faces with 120-grit to create bite.
Real example: on a tapered table apron I added a 1/8″ leather pad and the clamp held without marking the finish.
3) How to handle glue squeeze-out so it doesn’t stop full contact
Why it matters: excess glue between faces prevents solid contact and weakens the joint. During a cabinet face frame glue-up I scraped too late and ended up with a 0.02″ layer of hardened glue under the joint.
Steps:
- Use a 45° putty knife to remove squeeze-out immediately after first squeeze.
- Wipe remaining film with a damp cloth within 2–3 minutes if using PVA.
- Clamp briefly (5–10 minutes) to set joint, then recheck and finish cleanup before full cure.
Real example: gluing a drawer corner, I removed squeeze-out, clamped 8 minutes, then cleaned again — no dried glue under the face.
4) How to deal with uneven pressure across the corner
Why it matters: uneven force twists the joint so one corner bears load and the rest gaps. I once had a glued crate corner that opened at one end because the spread was off.
Steps:
- Use two clamps opposite each other and tighten in equal turns (half-turn on one, half-turn on the other).
- If the piece still rocks, add a 3–4″ spreader between clamps to push forces even.
- Check with a straightedge across both faces; where it rocks indicates where to add pressure.
Real example: a 12″ picture frame needed a small wooden spreader and balanced tightening to sit flat.
Regular inspection saves time and keeps corners true. Check alignment after the first clamp turn, use a square, and make small adjustments until everything sits flush.
Recommended Products

👍【Lightweight & Portable】- Weighing only 35 pounds, the Santana Master Massage Table is easy to transport and features double luggage-style portable massage table closure clasps. The portable spa bed measures 31" wide x 84" long and the portable spa table height can be easily adjusted between 24" and 34" for any setting.

Leather Strap Edger: Our Master Tool leather strap cutter is crafted for rounding or beveling the edges of leather straps for a smooth finish without decreasing their width; this equipment is built to effortlessly accommodate ½” to 3” strap width

Accepts 2", 3", 4" Webbing
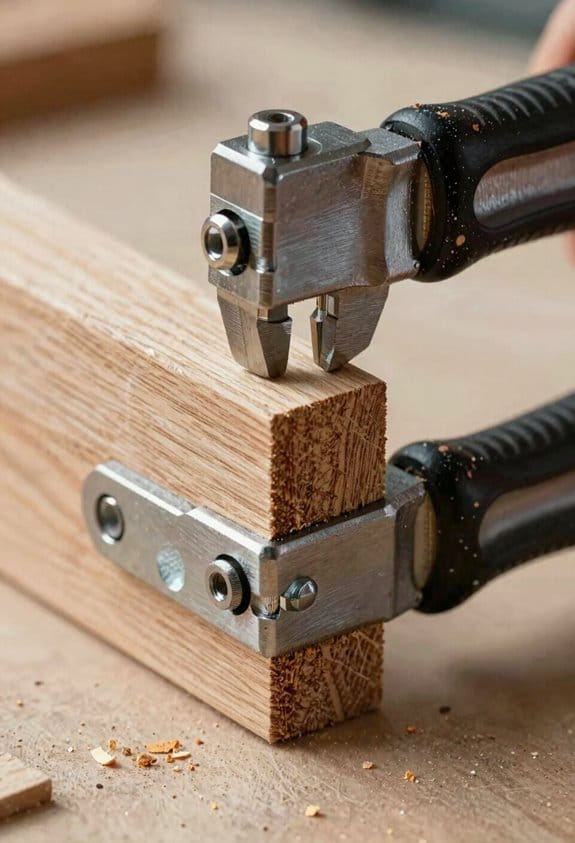
Make Them Permanent: Turning Clamps Into Jigs and Shop Fixtures
You don’t need expensive jigs if you can turn a clamp into a permanent fixture.
Why this matters: keeping a right-angle clamp permanently mounted saves you setup time and gives repeatable squareness every time.
Example: I mounted a quick-release right-angle clamp to a 12″ x 6″ hardwood block and used it to square dozens of 8″ shelf dividers while finishing a bookcase.
How to convert a clamp into a jig (steps):
- Choose your base: pick a hardwood block or 3/4″ plywood at least 12″ long to give you room to register parts.
- Square the clamp: place the clamp against a known-square reference (a true square or the edge of your jointer table) and align it so the jaws meet at 90°.
- Mark holes: with the clamp held in place, scribe or pencil-mark the mounting-hole locations through the clamp body.
- Countersink and fasten: drill pilot holes, countersink them for flat-head screws, and fasten with #10 screws or 1/4″ bolts with nuts and lock washers so the clamp can’t shift.
- Add registration: glue or screw on a 1″ x 1″ hardwood stop or a 3/4″ plywood fence at the jaw face for consistent part placement.
- Label it: write the intended use on the base (for example: “90° shelf divider — 3/4″ stock”) so you grab the right fixture.
Why each step matters: a square reference gives accuracy; countersinks prevent the clamp from lifting; a registration face places parts the same way every time.
Example: while assembling a toy chest, I used this fixture to square and glue twenty identical 3/4″ cleats, and each one seated against the stop in the exact same location.
Tips for durability and flexibility:
- Use hardwood blocks at least 3/4″ thick so screws don’t rip out under clamping force.
- If you want portability, use carriage bolts with wingnuts so you can remove the clamp quickly.
- For frequent angles, mount a second clamp at a different angle rather than moving one clamp back and forth.
- Add a thin strip of adhesive-backed rubber to the jaw face to protect finished parts.
Example: I bolted a second clamp at 45° on a 12″ board to miter small picture frames without re-setting the main 90° clamp.
What you’ll gain: faster setups, consistent joints, fewer measurements, and a safer workflow for beginners learning repeatable technique.
Recommended Products

Dock & Lock the included INCRA Miter Gauge in Seconds

Precision Joinery Made Easy – Create flawless box joints for drawers, boxes, and cabinetry with consistent, professional results.

1.【Precise Positioning】- The jig is equipped with four positioning pressure plates that can flexibly adjust the positioning slotting length and width, with a maximum slotting length of 18cm/7in.
Frequently Asked Questions
Can Right-Angle Clamps Be Used for Metal Welding Setups?
Yes — I use right-angle clamps for metal welding setups, often pairing magnetic fixtures for quick holds, but I’m careful about thermal isolation to avoid heat transfer to the clamp and protect alignment during tack and final welds.
Do These Clamps Interfere With Pocket-Hole Joinery?
Straight up: not usually — but it depends. I’ll tell you straight as an arrow: proper clamp placement avoids blocking screw clearance, so I position clamps to hold corners while leaving pocket-hole paths and access unobstructed for clean screw drives.
Are There Pediatric-Safe Versions for School Woodshops?
Yes — I’ve found child safe, small size right-angle clamps with rounded edges, locking mechanisms and non toxic coatings; I’d recommend those for school woodshops because they’re safer, easier for kids to handle and sturdier under use.
How Do Clamps Perform in High-Humidity Environments?
They hold up fairly well in high-humidity environments if I choose models with good corrosion resistance and durable coatings; that preserves grip longevity, though I still dry and store clamps promptly to avoid rust and sticky mechanisms.
Can I 3d-Print Compatible Clamp Accessories?
Yes — you can. Imagine a snug fit that clicks into place: I design 3D printed jigs to extend function, print durable parts, and craft custom mounting brackets so my clamp accessories align, hold, and keep projects perfectly square.