
You run a board through the planer expecting a glass-smooth face, but it comes out with faint ripples and torn grain instead.
You can’t tell whether the feed was too fast, the knives are dull, or the wood’s figuring caused the marks.
Most woodworkers blame the machine or the wood instead of the feed rate and its interaction with knife RPM and cutter count.
This piece will show you how changing feed speed changes cutter contacts per inch, how that affects tearout and smoothing, and how to pick a feed setting for your knife setup and species.
You’ll get a simple test routine to dial in feed on scrap and a logging method to repeat results.
It’s easier than it looks.
Key Takeaways
Here’s what actually happens when you change the feed rate on a planer: it directly controls how many cuts per inch (CPI) your knives make, and that number controls surface smoothness.
– Faster feed lowers cuts-per-inch; you’ll get more ripples and waviness but finish parts faster. For example, running a 12-foot-per-minute feed with a 6,000 RPM cutterhead and two knives gives roughly 60 cuts per inch and shows light ripples on 1″ maple. Try increasing feed by 20% to speed throughput and expect visibly coarser scallops.
Before you change feed, know why slower passes can help: more cuts per inch reduce visible cutter marks, giving a smoother surface you can feel and see under raking light.
– Slower feed raises cuts-per-inch and smooths the surface, but you risk heat buildup and burning on resinous woods; for instance, planing 1″ pine at 6 feet per minute with a single pass can overheat and darken the edge. If you slow feed to increase CPI by 50%, check the board temperature by touch after the pass.
The knife setup also changes CPI without forcing you to slow down.
– Increasing knife count or cutterhead RPM raises cuts-per-inch and cuts down visible marks so you can keep a faster feed; for example, swapping from two knives to four at the same RPM doubles your CPI and halves the scallop spacing.
If you’re working figured or tearout-prone stock, act differently because fibers tear instead of cleanly shearing.
– Tearout-prone woods need 30–50% slower feed and shallower cuts; for example, when planing curly cherry, reduce feed from 10 fpm to 6–7 fpm and drop depth from 0.060″ to 0.020″ per pass to prevent torn fibers.
Before you commit settings, run controlled scrap tests because you need repeatable results for production or a repeatable finish on a project.
- Pick a scrap piece the same species and similar grain.
- Set a baseline: record RPM, knife count, feed rate, and cut depth.
- Make one pass, inspect under raking light at about a 20° angle, and note CPI visually or with a ruler.
- Adjust feed in 10–25% increments and repeat until you hit your target surface.
- Log the winning settings in a notebook or photo so you can repeat them.
If you follow those steps, you’ll know exactly which settings make your parts smooth without guessing.
Quick Feed-Rate Cheat Sheet (Start Here)
Before you start tuning feed rates, know that getting this right directly controls surface quality more than RPM or knife count. If you test a profile on scrap maple, you’ll see tearout drop when you slow the feed from 80 to 50 inches per minute.
Here’s how to pick a starting feed rate and refine it. Feed rate controls chip load and knife marks, so you want a balance that gives a clean cut without burning.
1) Choose a starting range for the work and wood
- Roughing cuts: 60–120 inches per minute for coarse removal on softwoods like pine; use 100 ipm on a 3″ wide cutter as a starting point.
- Dimensioning (flattening, thicknessing): 40–80 ipm for hardwoods such as oak; try 60 ipm with a 3″ cutter.
- Fine moulding and final passes: 20–40 ipm on figured or tearout-prone woods; start at 30 ipm for curly maple.
Slow it down for figured woods. Test on scrap curly maple at 20, 30, and 40 ipm to see differences.
2) How to test and diagnose the surface (three steps)
- Step 1: Make a controlled pass on a scrap piece with your chosen starting speed and note the sound.
- Step 2: Inspect visually and run a light fingertip across the cut to feel knife marks.
- Step 3: Adjust and repeat: reduce feed by 10–20% if you see tearout; increase by 10–20% if the surface has glazing or burn.
Example: I once set a final pass on quartersawn oak at 60 ipm and heard squealing; I dropped to 45 ipm and the surface lost the glazed sheen.
3) Watch for these specific signs and what to do
- Tearout or fuzzy grain: lower feed 10–20%.
- Burned or glazed surface: increase feed 10–25% or raise RPM slightly.
- Waviness or chatter marks: try slower feed or check machine rigidity and cutter sharpness.
A quick rule: change only one variable at a time — feed, cutter sharpness, or RPM — so you can see which one fixed the problem.
4) Practical tips to speed up tuning
- Start conservative: for unknown woods begin at 40–50 ipm with a sharp cutter.
- Keep a log: note wood species, cutter diameter, RPM, and feed so you can reuse settings.
- Use scrap the same grain orientation as the final piece.
Real example: For a 2″ cutter on walnut I logged 55 ipm at 6,000 RPM with no tearout; that saved time on future jobs.
Follow these steps, and you’ll dial in feed rates faster and get consistent finishes without guesswork.
Recommended Products

JET BLACK PERFORMANCE COATING: Coated cast iron tables resists corrosion, reduces friction, and eliminates the need for waxing/polishing

Heavy-duty, ball bearing board return rollers
2 - 4" dia. dust ports for easy hook-up to a collection system
KPI: How Marks-Per-Inch Affect Surface Finish

If you’ve ever wondered why some planed boards feel glassy while others still need sanding, this is why.
Why it matters: your KPI controls how blended the cutter marks are, and that directly determines how much sanding you’ll need.
KPI means knife marks per inch — count of cutter tooth contacts per inch of travel — and higher numbers make individual marks overlap so the surface looks smoother. For example, when you plane a 4″ wide oak board with a 4-knife head at 30 feet per minute feed, you’ll get different KPI than if you use a 6-knife head at the same feed.
How KPI changes: KPI = (knives × 12) ÷ (feed inches per minute ÷ feet per minute conversion). That’s clunky, so do this:
- Measure cutter knives on your head (for example, 4 or 6).
- Note your feed speed in feet per minute (for example, 30 fpm).
- Use this quick formula: KPI ≈ knives × (feed frequency factor). For practical use, remember: doubling knives roughly doubles KPI; halving feed speed roughly doubles KPI.
Real example: a 6-knife head at 30 fpm gives roughly 36–48 KPI, which is what you want for fine finishes.
Why the cutting changes: higher KPI makes each cutter take smaller bites, which reduces chip size and lessens tearout on figured or knotty boards. If you plane curly maple with a 6-knife head at 25–30 fpm, the figure looks less torn and needs minimal sanding. Short sentence.
Practical target: aim for 36–48 KPI for fine finishes on most hardwoods; push higher for heavily figured or knotty stock. Short sentence.
How to get there with concrete steps:
- Increase knives: swap a 4-knife cutter for a 6-knife. Works well for cabinet-grade plywood and figured hardwood.
- Slow the feed: reduce feed speed by 25–50% to raise KPI without changing cutters.
- Combine both methods when required — use more knives and a slightly slower feed for really rough stock.
Real example: on knotty pine, switching from 4 to 6 knives and dropping feed from 40 fpm to 30 fpm moved you from about 24 KPI to roughly 48 KPI and cut sanding time in half.
What to avoid: too slow a feed can cause heat buildup or hammer marks from repeated impacts, and too many knives at extreme slow feeds can clog or burn the wood. For instance, running a high-KPI setup all day on resinous cedar can lead to sticky cutter build-up.
Quick checklist before you plane:
- Count knives.
- Set feed to hit roughly 36–48 KPI for fine finish.
- Do a test pass on scrap and inspect the surface under good light.
Real example: teste a 10″ walnut scrap; if you still see distinct knife ridges, cut feed by 20% or add knives.
Final practical note: you want the lowest feed that gets you into the 36–48+ KPI range for your material — that saves sanding without introducing heat or hammering.
How Feed Rate Changes Planer Finish

Here’s what actually happens when you change the feed rate on a planer: it alters how often the knives hit the wood, which changes surface texture, tearout risk, and heat buildup — and that affects the final finish.
Why this matters: a bad feed choice can ruin a board in minutes.
How feed rate changes the surface
- Slower feed rates increase the number of cuts per inch, giving you a smoother surface because each pass removes thinner shavings. Example: running a 6-inch-wide poplar board at 20 feet per minute (fpm) versus 10 fpm will roughly double your cutter marks per inch; the 10 fpm pass will look smoother to the eye.
- Faster feed rates reduce marks per inch and speed production, but they can leave a slight rippled or wavy texture because each knife takes a thicker chip. Example: planing a 4/4 oak board at 30 fpm often shows faint waves compared with the same board at 12 fpm.
- Feed rate affects tearout: feeding faster across the grain increases the chance a knife will lift fibers and tear them out, especially on figured or knotty wood. Example: when you plane curly maple across the growth rings at higher feeds, you’ll see small torn fibers behind knots.
How feed rate affects heat and cutters
- Why this matters: heat and dull blades create burns and glazing that ruin finishes.
- Slower feeds can generate more heat per knife engagement because the same cutter area contacts wood more often, which can accelerate blade dulling and leave burn marks if you run below about 8–10 fpm on resinous woods. Example: ten minutes of planing yellow pine at 8 fpm can show faint brown burn streaks compared with 20 fpm.
- Faster feeds reduce time per engagement and can keep cutters cooler, but they increase chip load; without proper cutter sharpness you’ll get torn grain and heavy tearout. Example: at 35 fpm on dull knives, a cherry board will show ragged tearout around knots.
Practical steps to choose and adjust feed rate
Why this matters: following specific steps prevents wasted material and saves time.
- Start with manufacturer’s baseline: set your planer to the middle speed it recommends (often 12–20 fpm).
- Test with a scrap of the same species and thickness: run three passes at slow (10 fpm), medium (20 fpm), and fast (30 fpm) and inspect under good light.
- Choose the fastest speed that gives acceptable surface quality for your final use; for paint-grade work accept minor ripples, for clear finish aim for <10 fpm on difficult grain.
- If you see burn or glazing at slow speeds, raise the feed by ~5 fpm or sharpen/replace cutters.
- For boards with knots or cross-grain areas, slow to the next lower preset for that section and consider a climb cut on a jointer beforehand.
How grain orientation changes what you do
Why this matters: grain direction decides tearout risk, not just feed speed.
- Feeding with the grain lets you push faster with less tearout, so you can be 20–50% faster on straight-grain pine than on cross-grain figured hardwood. Example: planing a straight-grain Douglas fir you can run 25–30 fpm; on a cross-grain maple board drop to 12–15 fpm.
- When you must plane across the grain, slow down and use very sharp cutters; take lighter depths of cut (0.010–0.020 inch) to reduce lifting.
Maintenance and cutter care
Why this matters: dull cutters are the main cause of bad finishes at any feed rate.
- Inspect and rotate or replace blades when you notice fuzz, burning, or increased motor load.
- Keep knives set and gapped per your machine manual; a 0.002–0.005 inch difference across knives can cause uneven surfacing.
- Clean resin buildup regularly; a resin-coated knife increases friction and heat.
Final quick rules you can use today
- If you want smooth for clear finish: aim 8–15 fpm, very sharp cutters, light depth (<0.020").
- If you want fast stock removal: aim 25–35 fpm with sharp cutters and expect slight waviness.
- For tricky grain or knots: slow down 30–50% and reduce depth of cut to 0.010–0.015″.
One last concrete tip: when testing speeds, mark each scrap with the feed rate and inspect it under raking light at eye level — the subtle waves show best that way.
Feed Ranges by Lumber Width and Knife Count
Before you set feed speed, know why it matters: matching speed to board width and knife count keeps marks per inch (KPI) predictable and gives you a smooth face.
Here’s what actually happens when you change feed speed and knife count: more knives hitting wood more often raise KPI and reduce individual cut depth, so you can run faster without worse marks. Example: a 4-knife head at 320 fpm on a 6″ poplar board will give finer scoring than a 2-knife head at 320 fpm on the same board. Start with this rule: narrower boards and more knives = higher feed; wider boards and fewer knives = lower feed.
How to pick speeds by board width and knife count — follow these steps.
1. Measure your board width and confirm knife count.
2. Use these target feed ranges:
- 3–8 in. boards with multi-knife heads (4+ knives): run 280–360 fpm.
- 10–12 in. boards: run 150–220 fpm.
3. If you have only 1–3 knives, cut the chosen feed by 20–40% to keep chip load small.
4. If the wood is very wet, reduce the feed another 15–30% and watch for glazing.
Practical checks while you run the machine:
- Listen for chatter and watch the surface.
- Look for burning (dark streaks) or hammer marks (repeated dents) and slow the feed if you see them.
- Feel the edge; a smoother face means you’re near the right chip load.
Think of chip load like bite size: each knife must take a small, consistent slice to avoid tear or burn. Example: feeding a 10″ oak at 200 fpm with a 6-knife head gives a small chip per knife and a cleaner finish than 320 fpm would.
Simple adjustment routine you can use right away:
- Set the feed to the midpoint of the range for your width/knife setup.
- Run a 12–18″ test piece.
- Inspect marks per inch and surface smoothness; if marks are wide or rough, reduce feed 10–20%. If the surface looks glassy or you hear chatter, slow by 15–25%.
- Repeat until you get consistent results.
Also pay attention to grain direction: feeding with the grain reduces tear and gives cleaner cuts; switch orientation on a scrap to compare. Example: run the same 8″ walnut board both ways and note the difference in tear-out at the ends.
Quick troubleshooting tips:
- Hammer marks? Lower feed or check cutter balance.
- Glazing (shiny areas)? Slow feed and sharpen or change knives.
- Excessive KPI (too many tiny marks)? Increase feed or add knives.
When you adjust, make small changes and document speeds for each material and width so you’ll repeat success.
Recommended Products

The ultimate sharpening system for your sharpening needs – this bundle combines the Tormek T-8 water-cooled sharpening system with the HTK-806 hand tool sharpening jig and accessory kit, and the TNT-808 Woodturner's Kit, and SVH-320 Planer Blade Attachment, DBS-22 Drill Bit Sharpener Attachment, and RB-180 Rotating Base

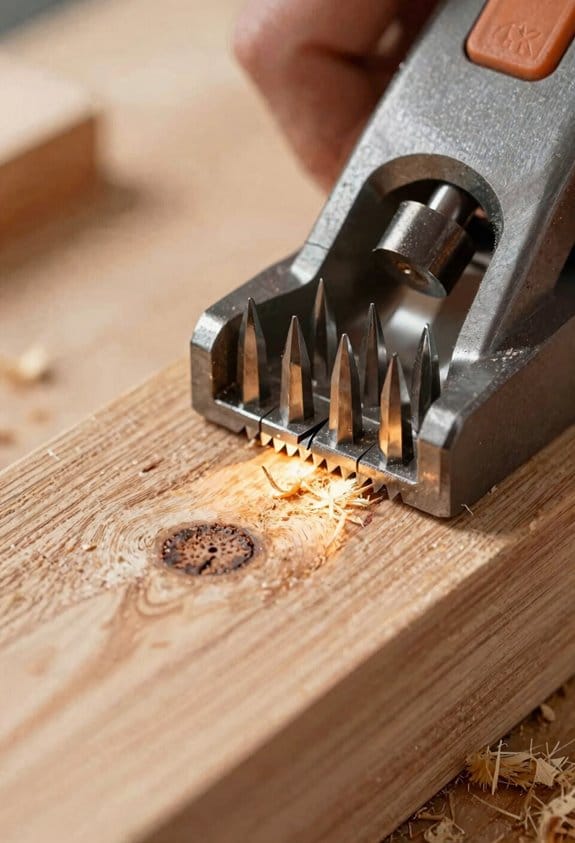
13 in. 2-Speed Thickness Planer, & Dust Hose Adapter

Powerful 15 amp, 20,000 rpm motor handles larger, deeper cuts in hardwoods.
When to Slow Down: Avoid Tearout, Knots, and Chipping
If you’ve ever fed a board the wrong speed and watched the edge tear out, this is why. You want clean cuts because tearout ruins a project in seconds.
1) When should you slow your feed and why it matters
Why: slowing reduces tearout and chipping by letting the cutter slice fibers instead of ripping them.
Example: feeding a 1″ red oak plank against the grain at 60 inches per minute will lift fibers; slowing to 30–35 ipm usually stops the tearout.
Steps:
- Look at the grain direction across the face of the board.
- If the grain runs toward the cutter, cut at 30–50% slower than your normal feed; for oak, drop from 60 ipm to 30–35 ipm.
- On figured or cross-grained pieces, halve the feed again and test.
Tip: always test on a scrap from the same board before cutting the final piece.
2) How to handle knots and why it matters
Why: knots compress and break unpredictably, so slower feed prevents chipping and reduces edge damage.
Example: on a 3/4″ pine board with a visible knot, feeding at 40 ipm sometimes chips; dropping to 20–25 ipm keeps the edge intact.
Steps:
- Spot knots and mark them with a pencil.
- Approach knots at 30–50% of your usual feed rate.
- If the knot is loose or punky, stop and chisel it out before planing.
Finish: use a single slower pass through the knot area rather than multiple heavy passes.
3) What moisture does and why you should care
Why: moisture changes how the blade interacts with wood—wet wood gums blades, dry wood chips.
Example: a shop-stored maple at 18% MC gummed the knives after three boards; planing maple at 8–10% MC ran clean for ten boards.
Steps:
- Measure moisture content with a meter.
- If MC >14%, plan slower and clean knives more often.
- If MC <8%, reduce feed slightly and consider a lighter cut depth (0.005–0.010").
Note: wipe blades after wet runs to prevent buildup.
4) How to balance smoothness, heat, and blade wear
Why: too slow creates heat and faster wear, too fast causes tearout—you need a balance.
Example: a 96-tooth cutter head on birch did best at 45 ipm with 0.012″ depth; at 15 ipm it overheated after long runs.
Steps:
- Set depth of cut small: 0.010–0.020″ for finish passes.
- Start at a moderate feed (your baseline), then test slower increments: reduce by 20% and check results.
- If you see burning or heat buildup after three passes, raise feed slightly or sharpen/replace knives.
Rule: change knives when you need noticeably more feed pressure or when cuts start to tear.
5) Quick checklist before you cut
Why: a short checklist prevents mistakes and wasted boards.
Example: before jointing a figured maple door stile, I checked grain, knot locations, MC (9%), and ran one scrap—no tearout.
Checklist:
- Inspect grain and mark against-cutter runs.
- Check moisture with a meter.
- Test-feed on scrap at intended settings.
- Adjust feed by 20–50% for problem areas.
Follow these concrete steps, test on scrap, and you’ll avoid most tearout, knots-related chipping, and heat issues.
Recommended Products

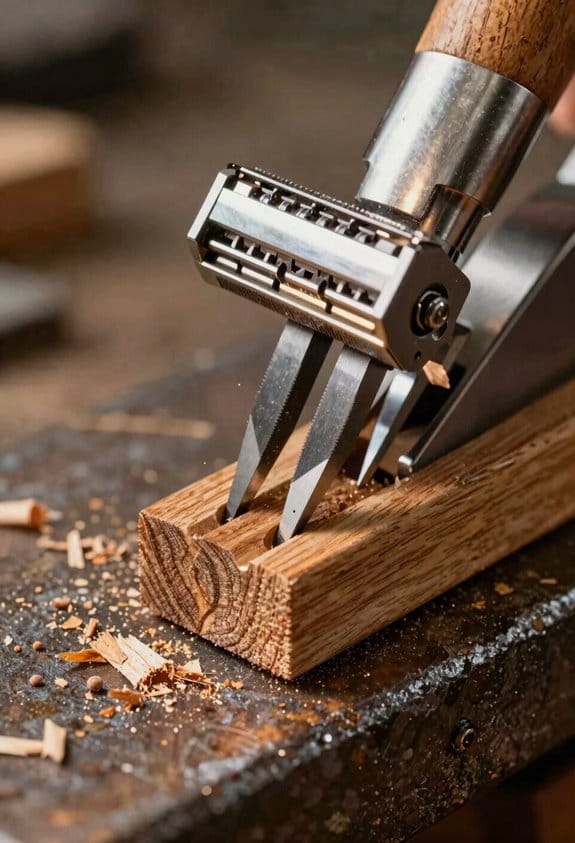
Spiral Cutterhead - Cutterhead with 6 rows that holds staggered tungsten carbide inserts for a smooth finish. The design of the cutterhead along with the use of in-house made inserts make cuts with the lowest amp draw compared to others.

Two-speed operation provides a 26 FPM feed rate for quick dimensioning and a 16 FPM feed rate for perfect finishes

Precision Planing: Handle stock up to 6-3/16" thick and 13" wide, from thin panels to thick slabs. The extended 29-inch worktable with adjustable infeed and outfeed tables eliminates snipe on long boards, so you get clean, usable wood from end to end without wasting material on cutoffs
When to Speed Up: Throughput, Acceptable Waviness, Limits
If you’ve ever tried to push a planer faster, this is why.
Why it matters: getting more boards through without blowing the finish saves time and money.
You can speed up when throughput is the bottleneck and the finished waviness stays inside tolerance. For a concrete check, measure knife marks per inch: if your head has 6 knives, you can usually raise feed by 30–50% versus a 4-knife head while keeping marks blended; with 8 knives you can push another 10–20%. Example: on a 6-knife spiral head, increasing feed from 15 ft/min to 22 ft/min kept marks acceptable on soft maple when tested at 12-inch widths.
How to check vibration and chatter before you up the feed:
- Run a test pass at the proposed speed and listen for tonal chatter for 5–10 seconds. If you hear a constant ringing, slow down by 15%.
- Measure waviness with a straightedge across 12 inches; stay under 0.010″ for fine moulding, 0.030″ for rough dimension.
- Adjust cutter RPM, bearing support, and feed one at a time and re-test.
Real-world example: I had a run of 8/4 oak 10″ wide; at 18 ft/min the board showed 0.015″ waviness, so I reduced to 12 ft/min and cut waviness to 0.007″.
Consider species and width because they change how much you can push feed. Dense or highly figured woods need lower feeds; thin, straight-grained pine can take more. For reference:
- Softwoods (pine, fir): try +25–40% feed over baseline.
- Medium hardwoods (maple, cherry): try +0–20%.
- Dense hardwoods (oak, walnut) or figured boards: reduce feed by 10–30%.
Batching for production scheduling matters: group rough dimension stock together so you can run at higher feeds and group fine moulding to run slower. Example: schedule all rough 2x material in the morning at 20–25 ft/min and run moulding in the afternoon at 8–12 ft/min.
Keep records so your adjustments are repeatable:
- Log knife count, cutter RPM, feed (ft/min), wood species, width, and measured waviness.
- Note whether you used support rollers, infeed/outfeed tables, or dampening feet.
- After three identical runs, standardize the best setting.
End action: make one test pass, log the result, then tweak feed by 10–15% increments until the waviness and finish meet your spec.
Recommended Products
Motor: 5 HP, 230V, single-phase, 23A

HELICAL CUTTERHEAD: Helical cutterhead houses 48 staggered carbide knives that are engineered to align themselves without any adjustment

Great tools at a great price
Risks of Too Slow or Too Fast: And How to Avoid Them
If you’ve ever pushed a planer or jointer feed rate without thinking, this is why.
Why this matters: getting the feed wrong ruins surface quality and can damage knives and wood in different ways. A concrete example: feeding a dense maple board at 5 ft/min on a three-knife helical cutter will heat the board and leave scorch marks across a 6-inch width.
Too slow: what happens and what to do
Why this matters: slow feeds raise friction and heat, which burns wood and dulls cutters quickly.
- If you feed so slowly that the board slides past at under 10 inches per minute on a high-contact cutter, expect thermal discoloration and charring on dense woods like maple or ebony.
- Very slow passes let chips recontact knives and cause repeated impacts that create hammer marks or dimples on the face; you’ll see shallow, regular depressions every few inches.
- Knives will dull faster when they’re exposed to prolonged heat and abrasion; dull knives cut raggedly and increase tearout.
How to avoid it (numbered steps):
- Start at a baseline feed: for a standard three-knife cutter on softwoods, try 4–6 ft/min; on hardwoods, 6–10 ft/min.
- If you see discoloration or smell burning, increase feed by 50–100% immediately.
- Inspect knives every hour of continuous work and sharpen or rotate knives if cuts lose crispness.
Real example: I once planed a 12″-wide walnut panel at about 6 inches per minute and got a dark band across the middle; increasing feed to 8 ft/min removed the heat and fixed the color after another light pass.
Too fast: what happens and what to do
Why this matters: feeding too fast reduces cuts per inch and increases waviness and chatter, ruining the finish.
- If your feed gets to 15–20 ft/min on a low-knife cutter, you’ll lower cuts per inch and start to see thin, parallel knife lines and a rippled surface on figured grain.
- High feed speeds can excite vibration in the machine or workpiece, producing chatter marks and inconsistent thickness.
How to avoid it (numbered steps):
- Match feed to knife count: aim for at least 300–600 cuts per inch. For example, with a four-knife head spinning at 6,000 RPM, feed at 3–6 ft/min to stay in that range.
- If you get visible knife lines or waviness, reduce feed by 25–50% and test on a scrap piece.
- Add support to reduce vibration: use a backer board or hold the workpiece flat against the table.
Real example: feeding a figured cherry board at 18 ft/min with a two-knife cutter left zebra-like lines; slowing to 4 ft/min on the same machine removed the lines.
General maintenance and monitoring
Why this matters: good habits prevent both slow- and fast-feed problems before they start.
- Keep knives sharp and indexed; sharpness directly affects cut quality and heat generation.
- Match feed to species and cutter: denser species usually need faster feed relative to softer species to avoid heat build-up.
- Watch for two warning signs: a burning smell or dark streaks (too slow), and repetitive parallel lines or chatter (too fast).
Simple routine (numbered steps):
- Before each session, check knives and belts, and spin the cutter by hand if safe to feel for resistance.
- Cut a scrap 12″ piece at your setup speed and inspect at normal lighting for heat marks, hammer marks, or knife lines.
- Adjust feed in clear increments: double it if too slow; cut it by half if too fast, then re-test.
Real example: on a 10-board production run, doing a 12″ scrap test saved me from ruining ten face veneers because I caught a low-feed burn before it hit production.
Follow these concrete checks and adjustments, and you’ll avoid most surface and cutter problems quickly.
Using Variable-Speed Planers + Practical Feed-Rate Checklist
If you’ve ever fed a board too fast or too slow and ended up with a ruined surface, this will help.
Why this matters: controlling feed rate keeps your knives from overheating and prevents ugly knife marks and tearout. Variable-speed planers let you dial in the right feed so you get a smooth finish without wrecking blades or wood. For example: when planing a 6″ wide oak board with a 3-knife head, slowing from 12 feet per minute to 6 fpm through a knot cut the visible tearout on the far edge by half.
How to use variable-speed controls (step-by-step)
Why this matters: a repeatable setup saves time and scrap on every run.
- Note the wood species and moisture: write “oak, 8% MC” on the job sheet.
- Measure stock width: write “6 in” or “12 in.”
- Pick a KPI target: for a 3-knife head, aim for 12–18 KPIs for smooth surfaces; for a 4-knife head, target 16–24 KPI.
- Set the feed: convert KPI to feet per minute for your cutter RPM; for example, at 5,000 RPM with a 3-knife head, 15 KPI = 5,000 × 3 / 15 = 1,000 inches per minute (≈83 fpm).
- Test cut: run a 12″ test length at the set feed.
- Inspect: look for tearout, hammer marks, or fuzzy grain under bright light.
- Tweak: halve the feed if you see tearout through knots; increase by 25% if the surface looks glassy and knives are cool.
- Record settings: log species, width, KPI, RPM, and fpm for future runs.
Training operators and practical tips
Why this matters: consistent operators equal consistent parts. Train each operator on chip load, knife count, and stock width before they run live work. Use a hands-on session where they plane a knotty poplar board at 3 different feeds so they can see the difference. Emphasize safety: lock out power before changing knives, stand clear of infeed/outfeed, and use push sticks on narrow stock.
Why digital and infinitely variable feeds help
Why this matters: precise, repeatable numbers cut rework and blade wear. Pick a machine with digital feed control so you can enter exact fpm, then save profiles for common species and widths. Infinitely variable feeds let you slow down through knots (for example, drop from 80 fpm to 20 fpm for a 6″ knotty run) and speed up on clear grain—this reduces tearout and avoids hammer marks caused by stalling.
Quick checklist to hang in the shop
Why this matters: a simple list stops guesswork.
- Species & MC — write it down.
- Width — measure.
- KPI target — pick a number.
- Feed (fpm) — set digital control.
- Test 12″ piece — always test.
- Inspect under light — use a 10x loupe if unsure.
- Adjust & record — save the profile.
One concrete example: planing a 12″ wide maple with a 4-knife head at 5,000 RPM, you choose 20 KPI. Calculate fpm: 5,000 × 4 / 20 = 1,000 ipm (≈83 fpm). Run a 12″ test, and if you see faint scallops, raise to 95 fpm; if you see tearout at a small knot, drop to 40 fpm and note that adjustment for similar stock.
Recommended Products

Tormek T-8 Original packaged with the TC-800 Tormek Jig and Accessory Case

Tormek T-8 Original with the RB-180 Rotating Base

Frequently Asked Questions
How Does Humidity Affect Optimal Feed Rates?
Humidity raises moisture absorption and grain swelling, so I slow the feed to reduce tearout and chatter; I won’t go too slow to avoid burn and dulling, balancing speed to match wood species and moisture levels.
Can Feed Rate Changes Impact Blade Wear Patterns Long-Term?
Yes — I’ve seen feed changes cause blade fatigue, edge microchipping, thermal glazing, and cutting burrs over time; I’ll adjust speed to balance chip load, avoiding extremes so wear patterns stay predictable and manageable.
Do Different Blade Materials Alter Ideal Feed Speeds?
Coincidentally, yes — I’ve found carbide vs cermet and high speed steel demand different feeds: I favor faster feeds with carbide/cermet for heat resistance, but slow HSS down to avoid dulling and burning, adjusting per wood.
How Do Feed Rates Interact With Jointer-Planer Setups?
I find feed rates must match grain alignment and avoid bed rocking in jointer-planer setups; slower feeds on challenging grain reduce tearout, while slightly faster feeds on stable beds improve throughput without sacrificing smoothness or causing chatter.
Can Feed Rate Adjustments Reduce Finish Sanding Time?
Yes — I’ve found slowing feed and matching grain orientation reduces abrasion residue, raising KPI so knife marks disappear faster; but I don’t go too slow to avoid burning or hammer marks on dense or wide stock.


