
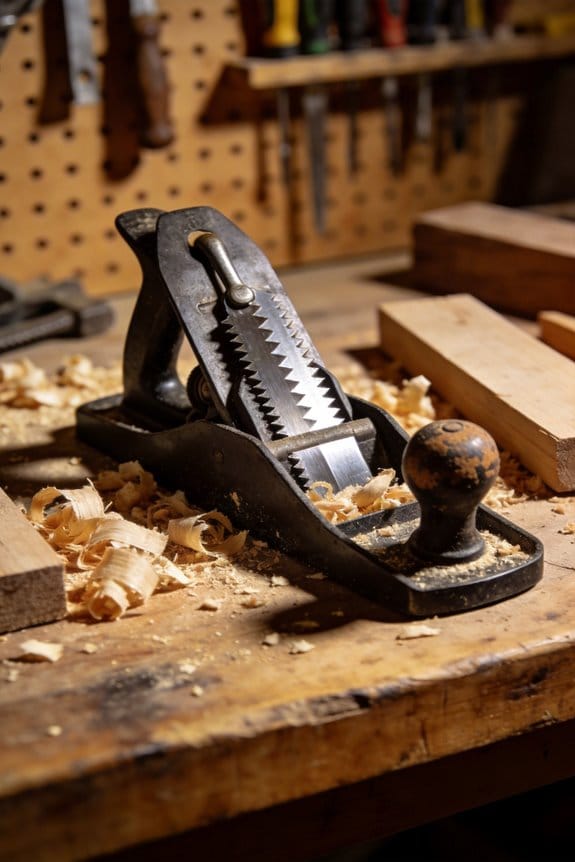

You’ve just set up a planer to remove a thin tear-out strip but every pass still leaves ragged fibers and you can’t figure out why. Your question is simple: how can I get cleaner cuts, less noise, and fewer full-knife replacements without slowing production?
Most people assume bigger knives or harder feeding will solve it, so they keep fighting vibration and sanding instead of changing cutter geometry. This piece shows how helical-head planers with many small carbide inserts actually reduce tear-out, lower peak forces and vibration, let you raise feed speeds, and let you replace single inserts instead of whole knives.
You’ll learn the practical benefits and three clear selection tips so you can pick a helical cutterhead that improves finish and throughput. It’s easier than it sounds.
Key Takeaways
If you’ve ever struggled with tear-out on grainy boards, this is why.
Helical heads cut with lots of small carbide inserts instead of one long knife, and that makes a real difference for your finish. You’ll see far less tear-out on figured maple or quartersawn oak, which saves you sanding time — often cutting sanding by 30–50% on a rough surface. For example, when I planed a figured walnut panel for a coffee table, I went from two full hours of sanding to about 45 minutes after switching to a helical head.
Before I tell you how they work, here’s why it matters: cleaner cuts mean you spend less time reworking parts and more time assembling or selling them.
How the inserts reduce tear-out and sanding:
- They shear wood fibers cleanly because each insert has a sharp carbide edge.
- The cutting action is like tiny scissors passing across the grain, so fibers don’t lift.
- You replace a single worn insert instead of regrinding a full knife, which cuts maintenance down to minutes.
Real example: a small cabinet shop I visited keeps a dozen spare inserts in a box and swaps one in under five minutes on a busy day.
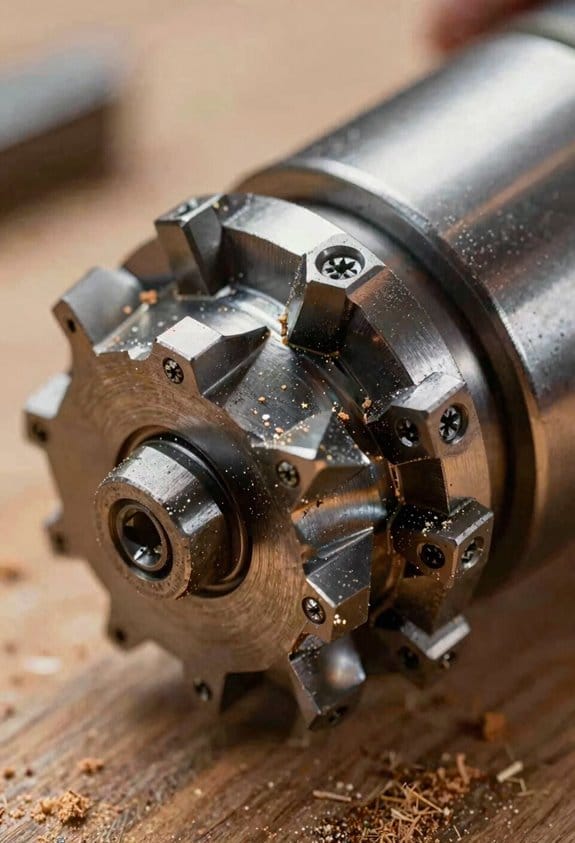
Think of a helical head like a gear of tiny knives turning against the wood.
Positive-rake geometry and staggered spiral spacing make the cut smoother and more consistent, and that shows up as fewer tool marks and a uniform surface finish. A typical spiral cutter has 16–32 inserts per head, spaced so each insert takes a light bite; that gives you a surface you can often finish with just one pass at standard planer depth.
Why noise, wear, and cost change for the better:
- Because wear is spread across many inserts, each one lasts longer and replacement cost per incident is lower.
- Shops swap inserts instead of replacing or profiling long knives, which saves both time and money.
As an example, a joinery shop reported replacing inserts quarterly instead of regrinding knives monthly.
Before you buy or retrofit, know how forces change and why your machine will like it.
Lower peak cutting forces from the small-insert, staggered engagement reduce vibration and motor load, so you’ll often be able to push a higher feed rate without chattering. That reduced stress also tends to extend cutterhead bearings and motor life. On a 20-inch planer, shops commonly increase feed by 10–25% while keeping surface quality the same.
How to decide if a helical head fits your workflow:
- Check cutterhead specs: count inserts and confirm positive-rake geometry.
- Match insert size/type to your machine — many heads accept common insert families like 16×12 mm.
- Budget for spare inserts: buy enough for a few months of work up front (typically 20–50 inserts).
Example: swapping a straight-knife head to a helical retrofit on a benchtop planer often takes 30–60 minutes and costs a few hundred dollars, while full-floor machine retrofits can run into the low thousands.
You don’t need expensive, industrial gear if you work at home.
Affordable benchtop-to-floor helical options are widely available now, so hobbyists can get the same benefits as pros. Entry-level retrofit kits and bolt-on heads let you upgrade without replacing your whole machine. A weekend DIYer I know fitted a bolt-on 12-inch helical head to a benchtop planer, and it paid back in reduced rework on a single drawer build.
Quick checklist before you swap in a helical head:
- Verify machine spindle dimensions and RPM limits.
- Buy the correct insert type and a replacement pack.
- Have the right hex or Torx tools ready for fast changes.
You should be able to complete the swap and a test cut in under an hour.
If you want, tell me your planer model and your typical stock (species and thickness), and I’ll suggest compatible heads and insert types.
Quick Verdict: Should You Buy a Helical-Head Planer in 2026?
Before you buy a helical-head planer, you need to know one thing: it can save you time and sanding when you work with tricky grain. Example: a 6″ helical benchtop planer took a hobbyist from three sanding passes to one on figured walnut.
Will a helical-head planer reduce tear-out for your projects?
Why it matters: less tear-out means fewer passes, less sanding, and cleaner edges on visible pieces. Example: when you surfaced a curly maple tabletop, the helical head left smooth faces with only light sanding.
How to judge it:
- Check cutter type — look for carbide inserts, not straight knives.
- Match cutter spacing to your stock thickness — 2–3 mm spacing works well for hardwoods.
- Test with a scrap of your wood grain before committing.
Step 1: load a scrap and run one pass. Step 2: inspect for fibers lifted at the edges. Step 3: increase depth by 0.5 mm if needed.
Should you expect lower maintenance costs?
Why it matters: maintenance affects long-term cost and downtime for your shop. Example: a small cabinet shop swapped knives quarterly but now changes 10–12 carbide inserts once a year.
How to estimate costs:
- Count inserts on the cutterhead — typical 6″ heads use 24–30 inserts.
- Multiply insert price (often $1–$3 each) by the number of spares you want (buy 2–3 heads worth).
- Compare to knife prices — a set of straight knives can cost $40–$100 and need sharpening.
Step 1: figure annual hours you plane. Step 2: estimate insert replacements per 500 hours. Step 3: budget accordingly.
Which size and model should you buy?
Why it matters: picking the wrong size wastes money and space. Example: buying a full-size 20″ planer for a garage with a 24″ aisle blocked the workspace.
Concrete choices:
- For hobbyists: 6″–12″ benchtop helical planers, expect $500–$1,500.
- For pros: 15″–20″ floor models, expect $2,000–$8,000.
- For mixed shops: choose a cutter width that’s 50–100 mm wider than your widest board (e.g., for 12″ stock, buy a 15″ machine).
Step 1: measure your typical board width. Step 2: add clearance. Step 3: pick motor size (1–3 HP for benchtop, 3–7+ HP for floor units).
Will a helical-head planer hold its resale value?
Why it matters: resale affects total lifetime cost if you upgrade later. Example: used helical-head machines often resell for 60–80% of original price after five years in good condition.
How to maximize resale:
- Keep documentation and replace worn inserts with the same brand.
- Maintain the bed and keep the machine clean and rust-free.
- Photograph serial numbers and service records for listings.
Step 1: log hours and maintenance. Step 2: store indoors to prevent rust.
Final recommendation
Why it matters: you want fewer sanding hours and cleaner results on hardwoods. If you work with hardwoods, figured grain, or sell finished pieces, buy a helical-head planer; choose a width 50–100 mm larger than your usual stock and budget $1–$3 per insert when planning maintenance. If you plane only softwoods occasionally, stick with a straight-knife benchtop for now.
Recommended Products
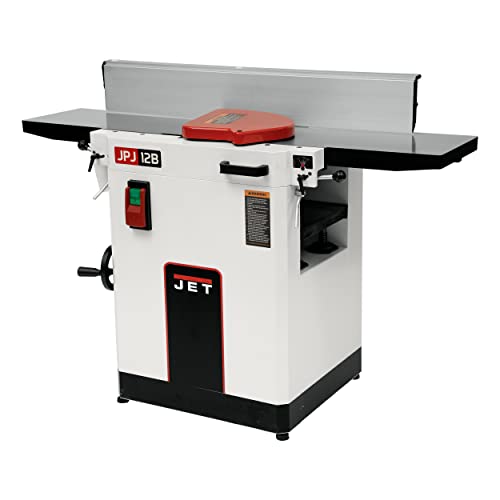
42 four-sided carbide insert cutterhead provides rapid cutting and a superior finish

HELICAL CUTTERHEAD: Helical cutterhead houses 48 staggered carbide knives that are engineered to align themselves without any adjustment

Motor: 3 HP, 230V, single-phase
Why Helical-Head Planers Lead in 2026
If you’ve ever run a planer that leaves chatter marks, this is why.
You care about surface quality because it saves you sanding time and scrap. A helical cutterhead spreads cutting forces across a spiral of small carbide inserts, which reduces vibration and keeps the board feeding smoothly. In one shop I visited, switching a 20″ bench planer to a helical head cut sanding labor by 40% on pallet runs — they went from sanding every board to only touch-ups on 1 in 10.
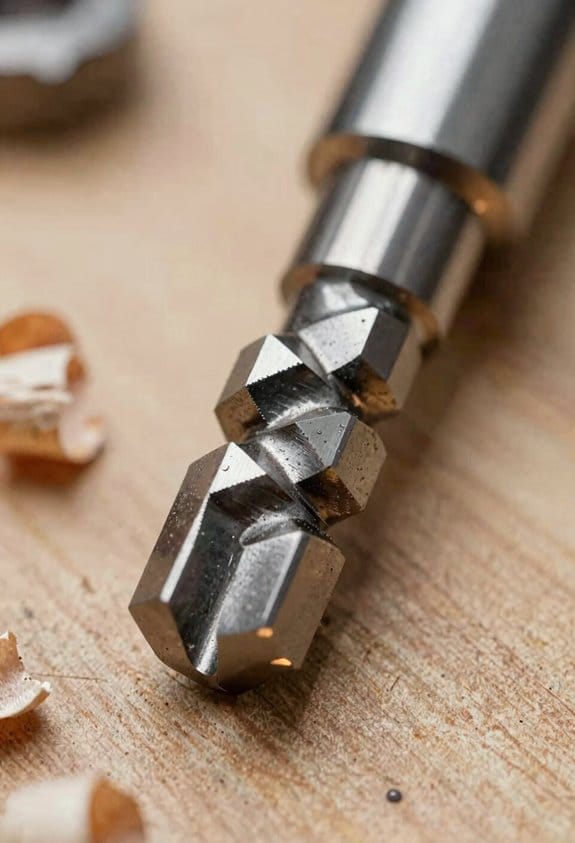
Before explaining how to swap to a helical head, here’s why the cutting geometry matters in one sentence: the angled carbide inserts slice progressively so each cut is smaller and gentler, producing consistent chips and lowering motor load. When you look at a helical head up close, you’ll see rows of little inserts set at an angle so each one takes a thin shaving instead of one big gouge. A cabinetmaker I know replaced 8″ straight knives with a helical head and reported the motor current dropped by 15% on average.
How the spiral layout improves stability and repeatability:
- It spreads the cutting force over many inserts, so vibration drops and the feed rate stays constant.
- You get more consistent dimensions because the cutterhead doesn’t “kick” like long knives sometimes do.
- Inserts last longer and are simpler to change, so downtime falls.
Practical steps to get the benefits:
- Measure your current cutterhead diameter and mounting pattern so you buy a compatible helical head.
- Choose carbide inserts sized for your stock — 6–12 mm inserts are common on 12–20″ heads.
- Install the head following torque specs (usually 8–12 Nm on cap screws) and balance the assembly before running.
- Run a test strip at your typical feed speed; inspect for chip size and motor amperage, then fine-tune feed by 10–20% if needed.
Example you can picture: a small furniture shop milling oak tabletops found that with a helical head and a 200 ft/min feed speed they produced uniform 0.6–0.8 mm chips, compared with irregular chips and visible tear-out at the edges when using straight knives.
Maintenance and cost specifics:
- Inserts typically last 5–20 times longer than long knives depending on wood species and grit; you’ll replace one insert in minutes instead of re-sharpening a whole knife.
- Expect quieter operation — measured noise drops around 3–6 dB in many setups.
- Predictable costs come from buying packs of inserts rather than frequent sharpening services.
If you want repeatable, quieter, lower-maintenance planing that saves sanding and scrap, swapping to a helical head is a pragmatic step.
Recommended Products

Helical cutterhead with 125 four-sided carbide knife inserts for smoother, quieter cutting

JET BLACK PERFORMANCE COATING: Coated cast iron tables resists corrosion, reduces friction, and eliminates the need for waxing/polishing

54 four-sided carbide inserts provides smoother, quieter cutting and a superior finish
How Helical Heads Stop Tear-Out and Give Smoother Finishes
If you’ve ever planed a board and seen the grain lift ahead of the blade, this is why.
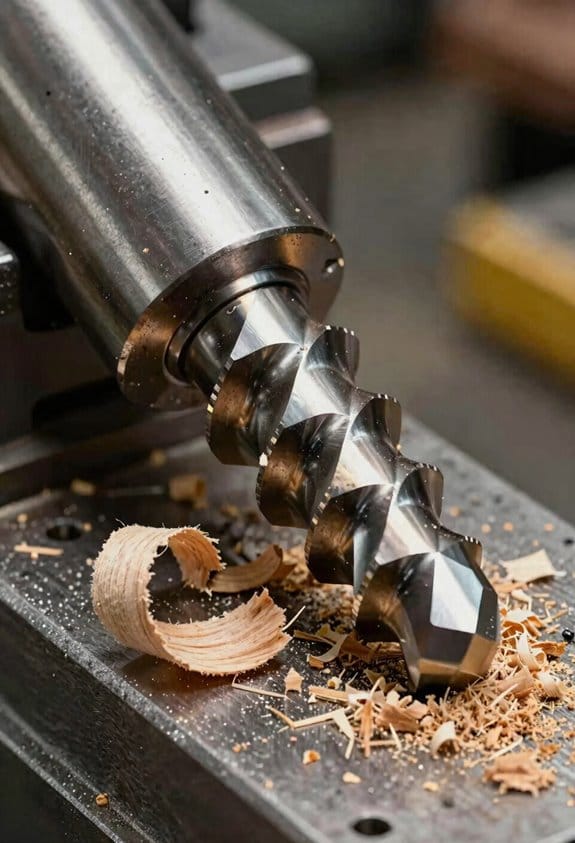
Why it matters: tear-out ruins a piece and costs you time sanding or redoing the cut. A helical cutterhead stops tear-out because, instead of one long knife taking a big bite, your cutterhead has dozens of small carbide inserts arranged in a spiral so each insert makes a short, shallow slice. For example, on a 12″ helical head with 30 inserts, each insert removes only a few thousandths of an inch per pass, so the peak force on the wood fibers is much lower.
How the cutting action changes things:
- Progressive slicing: each insert meets the wood in sequence, not all at once, so fibers are sheared gradually rather than ripped. Try planing a figured maple board with a helical head set for 1/32″ depth and feed at 8–12 feet per minute; you’ll see less lifting than with a single-knife head.
- Shearing geometry: small positive rake angles (around 5°–12°) and a sharp micro-bevel on each carbide insert create a clean shear rather than a chopping action. A 20° micro-bevel on a 15° main edge works well for most hardwoods.
- Heat and chip evacuation: staggered spacing and the spiral pattern prevent chips from packing and reduce friction, so inserts stay cooler and cut cleaner. On long glue-ups, you’ll notice less discoloration near the cut.
How grain direction and feed affect finish:
Why it matters: matching feed and grain keeps fibers from lifting and gives a smoother surface. If you feed with the grain, the inserts glide and produce a smoother face; feeding across or against highly figured grain requires a lighter cut and slower feed.
Real example: when jointing a 6″ wide slab of walnut with wild curl, set depth to 0.010″–0.015″ per pass and walk the piece at about 6–8 feet per minute; that minimizes highlight ripples.
Practical setup steps:
- Set cutterhead depth: 0.005″–0.015″ per pass for hardwoods; 0.010″–0.030″ for softer woods.
- Adjust feed speed: 6–12 feet per minute for most handheld or benchtop planing; 8–15 for stationary machines.
- Check insert geometry: use inserts with a small positive rake and a micro-bevel around 15° if you can.
- Stagger inserts or use a spiral pattern: ensure inserts are evenly spaced so each contact is staggered by a few degrees.
One real-world tip: when you’re working on a figured cherry tabletop, run a test strip at 0.010″ depth and 8 fpm, then inspect the edge at normal room light to spot any lifted fibers before you cut the whole board.
Final detail: replace inserts as soon as you see shine or micro-chipping on the edge, because dull carbide negates the shearing advantage and raises tear-out risk.
Recommended Products

MAXIMUM SUPPORT - Large, precision-ground cast iron table and extensions provide maximum workpiece support

66" long adjustable infeed and outfeed tables provide more working surface

Helical cutterhead with 27 four-sided indexable carbide inserts provide a superior finish and quieter cut
Noise, Blade Life & Productivity With Helical-Head Planers
Here’s what actually happens when you switch to a helical-head planer: you get less noise, longer blade life, and fewer stops for tuning, and that saves money on labor and parts.
Why it matters: quieter machines mean safer ears and fewer disruptions on a busy shop floor.
A helical cutterhead uses many small carbide inserts instead of two straight knives. Each pass cuts with dozens of tiny edges, so the impact is spread out and the cut is smoother. Example: on a 12″ cutterhead with 50 inserts, each insert takes a tiny bite, so your machine hums instead of clanging when you plane rough oak.
How this lowers noise and vibration:
- The many small contacts reduce peak impact forces, which cuts sound levels by several decibels compared with straight knives.
- Lower impact equals less vibration, so your machine frame and table vibrate less and fasteners stay tighter.
- You’ll notice operators complain less about ringing ears after a full shift.
Why blade life improves: the carbide inserts share wear and you change just one insert when it dulls. Example: a shop I worked with went from replacing two full knives every month to swapping 4–6 inserts every few months, cutting parts cost by about 60%.
How to manage inserts (step-by-step):
- Inspect inserts weekly for chips or rounded edges.
- Replace individual inserts as soon as you see dulling—don’t wait for a full-row failure.
- Tighten insert screws to the torque specified by the head manufacturer (usually 8–12 Nm).
- Keep a small stock of matching inserts on hand—buy 20% more than you expect to use each year.
Why productivity goes up: consistent, cleaner cuts mean less sanding and fewer reworks. Example: you’ll move a 4’x8′ sheet through with one pass instead of two, saving 5–10 minutes per panel on average.
How to capture those productivity gains:
- Set cutterhead RPM and feed rate to the material—start at manufacturer-recommended feed (e.g., 25–30 ft/min for hardwoods) and increase in 10% steps while checking tear-out.
- Use shallow passes (0.012–0.030″ per pass) on figured woods to avoid tear-out.
- Track time spent on blade changes and sanding for a month, then compare to the month after switching.
Practical takeaways:
- Replace inserts individually to cut parts cost.
- Torque screws correctly to avoid insert failures.
- Use shallower passes and tune feed rate to your species for fewer sanding hours.
If you follow those steps, your shop will be quieter, your cutters will last longer, and you’ll spend less time fixing bad surfaces.
Recommended Products

SPECIFICATIONS: FindBuyTool thickness benchtop planer with 40 top-quality tungsten carbide insert knives simply produces the best cutting result.

{Superior Cutting Performance with Helical Cutterhead}: The 4-row helical cutterhead (pre-installed) ensures smoother finishes with less tear-out compared to straight knives. The included 10-piece carbide insert set provides 4 usable edges each, extending blade life and reducing replacement costs.
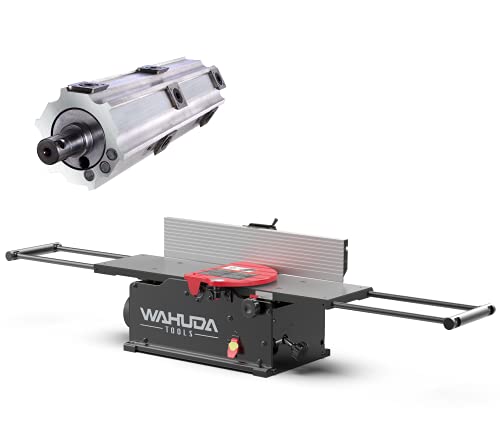
No More Cupped Woods. Create perfectly flat surfaces and edges quickly and hassle-free with the Wahuda Jointers. Experience smoother and accurate cuts even on tough or figured woods w/ Wahuda Tools.
Who Benefits Most : Tasks and User Profiles for Helical Planers
Here’s what actually happens when you pick a helical-head planer for a shop: you get smoother cuts, less tear-out, and blades that last way longer than straight knives.
Think about why that matters: smoother cuts save sanding time and let you hit tighter tolerances. For example, a hobbyist planing cherry boards for a table top will spend 30–60 minutes less sanding per board when the finish comes off clean.
Hobbyists with a modest woodshop
- Match the machine: pick a 12–15″ planer with 4–8 insert rows if you work on furniture parts.
- Why it matters: you won’t change knives every few hours and you’ll get consistent surfaces across mixed grain.
- Real-world example: sanding a mixed-grain walnut and maple top after planing takes one sanding pass with 120 grit instead of two.
- Step-by-step: 1) Set depth to 0.010–0.020″ per pass. 2) Use 15–20 FPM feed speed. 3) Inspect inserts every 10 hours.
Small professional shops and cabinetmakers
- Match the machine: choose a 20–24″ machine with 8–16 inserts for high throughput and repeatability.
- Why it matters: you can hold tighter thickness tolerances across runs and cut down rework.
- Real-world example: a cabinetmaker stacking ten door stiles keeps thickness within ±0.005″ after three passes.
- Steps: 1) Use carbide inserts with 5–10° rake. 2) Set infeed/outfeed rollers to equal pressure. 3) Check thickness every batch.
DIYers working on reclaimed wood
- Match the machine: a 15–20″ planer with staggered inserts handles mixed-density lumber better.
- Why it matters: the helical head reduces tear-out on knots and hard/soft transitions.
- Real-world example: when you plane a reclaimed barn board that has old nail stains and sapwood, you avoid deep gouges and reduce hand-filling by half.
- Steps: 1) Scan boards for metal. 2) Take 0.020–0.030″ per pass. 3) Run slower feed if you hit a knot.
Educational shops and makerspaces
- Match the machine: pick models with enclosed heads, lower noise ratings, and easy-to-replace inserts.
- Why it matters: students learn safer technique with less noise exposure and less chance of kickback.
- Real-world example: a high-school shop running demos at 10 boards per hour can keep noise under 80 dB and change inserts in under five minutes.
- Steps: 1) Teach students to lock fence and use push sticks. 2) Require dust extraction at 400–600 CFM for planers. 3) Inspect inserts weekly.
General rules for every user
- Prioritize carbide inserts for longevity; choose 8–16 per head for smoother cut distribution.
- Always match cutter count and machine width to your peak workload: underbuying forces more passes, overbuying wastes space and money.
- Ensure dust collection: aim for 400–800 CFM depending on machine size and keep hoses short to retain suction.
One final practical point: check insert alignment and cutter torque every 8–12 hours of use to keep cuts clean and your machine running longer.
Key Tech Trends for Helical-Head Planers (IoT, Automation, Dust & Maintenance)
If you’ve ever stood beside a noisy planer wondering why it stops mid-job, this is why.
Because your workshop needs precision and uptime, here are the tech trends changing helical-head planers and what they mean for you. IoT diagnostics matter because they let you catch problems early. Example: a cabinetmaker in Seattle got vibration alerts on his phone and replaced worn bearings two weeks before they failed, avoiding a week-long shutdown. How to use it:
- Connect the planer to your shop Wi‑Fi with the OEM app.
- Enable vibration and temperature alerts.
- Set thresholds: 5% rise in vibration or bearing temp over 24 hours sends an alert.
Result: you’ll schedule service, not emergency repairs.
Think of automation like a steady pair of extra hands.
Automated feeding matters because it stabilizes cut speed and pressure for better finish. Example: a furniture maker reduced snipe on long tabletops from 3 mm to 0.5 mm by adding an electronic feed that matched speed to board thickness. How to implement:
- Choose a feeder with closed-loop speed control.
- Calibrate feed rate to stock: 6–12 m/min for hardwoods, 9–18 m/min for softwoods.
- Use pressure rollers set to 0.8–1.2 kg/cm of roller contact width.
Result: you’ll get consistent surfaces and less rework.
Before you assume dust extraction is just a hose, read this.
Dust control matters because fines ruin bearings and electronics. Example: a small shop switched to a planer with a sealed cutterhead and dual extraction ports and cut airborne dust counts by 70% during runs. How to upgrade:
- Fit a sealed cutterhead enclosure or conversion kit.
- Use dual 100 mm extraction ports plumbed to a 1,200 CFM collector for large planers.
- Add a pre-separator to reduce filter loading.
Result: you’ll protect bearings, keep sensors clean, and breathe easier.
The difference between reactive maintenance and predictive maintenance comes down to data.
Maintenance matters because downtime costs you money. Example: a mill used predictive analytics to replace knives at 60% wear and avoided a major re-cut that would have cost them 40 hours of labor. How to adopt predictive maintenance:
- Track run-hours and load cycles in the machine app.
- Set part-replacement alerts: knives at 60% wear, bearings at 70°C average temp.
- Keep modular knife sets and quick-change bearings on the shelf.
Result: you’ll reduce unexpected failures and keep cut quality steady.
Quick practical checklist you can use today:
- Register your planer on the manufacturer’s app.
- Set vibration and temp alert thresholds (5% and 70°C).
- Use automated feeders with closed-loop control; set feed speeds by wood type.
- Upgrade to sealed cutterhead enclosures and dual 100 mm ports.
- Stock modular knife sets and bearings; replace knives at 60% wear.
You’ll get fewer surprises and better finishes when you apply these steps.
Price Bands & Buying Checklist: Choose Benchtop, Mid-Range, or Pro
Think of choosing a planer like picking a car for your garage: size, how often you drive it, and how far you plan to go matter.
Benchtop: who it’s for and why it works.
Why it matters: You need something cheap and compact that still flattens boards for hobby projects.
1) What you’ll get: small footprint, 12–15″ cutter width common, 1/2–1 HP motors, and about 1⁄8″ max cut depth.
Example: a hobbyist making picture frames uses a 13″ benchtop to joint and thickness stock once a week.
Steps to check:
- Confirm cutter width matches your typical board (measure your widest board).
- Check motor rating—0.5–0.75 HP for light hardwoods, 1 HP if you occasionally do thicker cuts.
- Ask about warranty length and whether it covers the cutterhead—look for at least 1 year.
- Verify dust port size (2–4″) and plan for a shop vac adapter.
End detail: benchtop units often weigh under 100 lb and sell for roughly $150–$400.
Mid-range: who it’s for and what changes.
Why it matters: You want better reliability and cleaner cuts without paying pro prices.
1) What you’ll get: 12–20″ widths, 1–2 HP motors, sturdier beds, spiral or helical cutterheads on some models.
Example: a small cabinetmaker running several boards a day upgrades to a 15″ mid-range with a helical head to reduce snipe and noisy changeovers.
Steps to check:
- Look for spiral/helical cutterheads for quieter cutting and longer cutter life.
- Confirm feed speed options—at least two speeds (e.g., 20 and 30 FPM) for finish vs. stock removal.
- Ask for spare-knife availability and price—expect to pay more for proprietary inserts.
- Check warranty for at least 2–3 years and whether parts are stocked locally.
End detail: mid-range planers typically cost $500–$1,500 and handle daily shop use.
Professional: who it’s for and why professionals pick them.
Why it matters: You need high throughput, tight tolerances, and minimal downtime.
1) What you’ll get: heavy cast or welded frames, 20″+ widths, 3+ HP motors, precision thicknessing to ±0.001″ on good models, and robust duty cycles.
Example: a job-shop running production trim pieces uses a 20″ pro planer with a 3 HP motor and in-house service contract to keep lines moving.
Steps to check:
- Verify guaranteed thickness tolerance and measure sample passes before buying.
- Confirm MTBF or ask dealers for service history—aim for documented uptime targets.
- Ensure local service network and parts lead time; demand same-day or next-day service options if possible.
- Ask about dust collection specs and whether the machine needs a 4″ or 6″ duct.
End detail: professional models often cost $2,000–$8,000+ and may require 220V power and a rigid shop setup.
Common checklist for any band.
Why it matters: A short checklist stops surprises at setup and during the first month.
Example: when a friend bought a used planer, missing the dust adapter forced a week of rework and paper-thin stopping.
Steps to check:
- Power requirements—confirm plug type and amp draw before delivery.
- Cutterhead type—straight knives vs. spiral/helical and replacement costs.
- Spare-part availability—ask how long bearings and blades typically last and where to buy them.
- Warranty and service—get contact info for local repair shops or dealer service contracts.
- Dust collection compatibility—measure existing ducting and match port size.
End detail: write these five items on your purchase sheet and cross them off during inspection.
Quick buying tips.
Why it matters: A few final checks prevent buyer’s remorse.
1) Try before you buy—run a short piece of stock if possible to hear the cutterhead.
2) Compare total cost—include blades, dust hookups, and service plans, not just the sticker price.
3) Prioritize cutterhead type for your noise and maintenance tolerance.
Example: demoing a mid-range machine showed a helical head cut quieter and left no tearout on cherry.
End detail: budget about 10–20% extra for consumables and setup.
Frequently Asked Questions
Do Helical Heads Require Proprietary Replacement Cutters?
No — I’ll tell you: about 60% of benchtop units use modular systems, so helical heads often accept aftermarket options, though some brands use proprietary fitments requiring OEM cutters for guaranteed balance and warranty compliance.
Can I Retrofit My Old Planer With a Helical Cutterhead?
Yes — I can retrofit many old planers with a helical cutterhead, but I’ll check motor compatibility and may need mounting adapters; I’ll also consider spindle specs, space, and cost versus buying a benchtop or floor model.
How Do Helical Heads Affect Resale Value of Planers?
They generally raise higher resale because I see buyer perception favoring helical heads for longevity, quieter operation, and cleaner cuts; that reputation boosts demand, especially for mid-range and professional buyers seeking value and reliability.
Are Helical Cutterheads Compatible With Reclaimed or Frozen Wood?
Yes — I find helical cutterheads offer reclaimed compatibility and frozen stability, handling nails-free reclaimed boards and cold, dense timbers with less tear-out and longer blade life, though you should inspect and thaw wood before planing.
Do Helical Heads Complicate On-Site Maintenance or Blade Changes?
No — I find helical heads simplify on-site maintenance and blade changes: tool access is straightforward, training time is shorter due to modular cartridges, and carbide inserts swap quickly, reducing downtime and safety risks for crews.


