
You’re sanding a board, glance over at the planer, and suddenly cough as a haze drifts past your face — you wonder how much of that dust you’ve been breathing.
You’ve asked yourself whether the cloud is just nuisance dust or something that will actually damage your lungs.
Most people assume a shop vacuum or a distant dust port is enough and underestimate how many tiny particles stay airborne and head straight for your breathing zone.
This piece shows, in plain terms, how to stop the worst exposures: how to capture dust at the cutter with a close hood, why HEPA‑grade filtration matters, and what routine checks and respirator choices prevent spikes during short tasks.
Follow these steps and you’ll cut airborne dust and protect your lungs.
It’s simpler than it sounds.
Key Takeaways
If you’ve ever stood at a planer while changing blades, this is why.
Why it matters: the tiny bits you create can reach your lungs and cause long-term disease. A single cutter change can kick up a cloud of fragments under 10 micrometers, which you can inhale without seeing them. For example, on a two-person cabinet shop floor I inspected, one blade swap created a visible dust spike at operator height for about 90 seconds.
1) How much dust cutters make and why size matters
Why it matters: smaller particles penetrate deeper into your lungs. Planer cutters generate millions of fragments under 10 µm, and fragments under 5 µm are respirable and can lodge in your alveoli. In one case, lab sampling near a cutterhead showed particle counts spike by 400% during a single pass.
2) Why short tasks can be the worst exposures
Why it matters: brief tasks create sharp breathing-zone peaks that can exceed limits even if your daily average looks okay. When you change feeds or adjust cutters for 30–120 seconds, your exposure can exceed occupational limits. I watched an operator change a feed and recorded a 2–3 minute breathing-zone peak that doubled the short-term exposure limit.
3) How to stop dust at the cutterhead
Why it matters: if you capture dust at the source, it never reaches your breathing zone. Hooding the cutterhead with a belly or shroud and connecting a local exhaust fan right at the head prevents particles from becoming airborne. Example: retrofit a 6–8 inch throat hood, mounted within 2–4 inches of the cutter, and you’ll capture most debris before it disperses. Do this first.
4) What capture and filtration actually need
Why it matters: poor ducting or weak filters just move dust around instead of removing it. Use sealed ducting with smooth interior runs, keep total duct length short, and avoid multiple 90° bends; each bend cuts airflow. For filtration, install a HEPA unit or MERV‑16+ final filter and run a fan sized for at least 1,200–1,800 CFM for most planer setups. In one shop that switched from a MERV‑8 cartridge to a HEPA system and upsized the fan, respirable particle counts fell by over 90%.
5) What training, inspections, and records should look like
Why it matters: controls only work when you use and maintain them. Train everyone on how to hood the cutterhead, record each hooding/maintenance event, and inspect seals and hoses weekly. Use a simple form: date, operator name, hood installed (Y/N), duct damage (Y/N), filter change date. In a small mill I worked with, weekly checks caught a cracked seal that had been dumping dust for months.
Quick checklist you can follow today:
- Fit a hood within 2–4 inches of the cutterhead.
- Run local exhaust sized ~1,200–1,800 CFM.
- Use sealed, smooth ducting with minimal bends.
- Install HEPA or MERV‑16+ final filtration.
- Train staff, do weekly inspections, and log findings.
If you do those five things, you’ll stop most of the dangerous dust at the source and reduce acute peaks that risk your workers’ lungs.
Why Planers Pose the Biggest Respiratory Risk
If you’ve ever smelled dust after planing, this is why.
Why it matters: that fine dust can enter your lungs and stay there, increasing health risk over time. When you run a planer it throws out a lot of sub-10 micron particles that your shop vac or hood can miss.
How a planer creates the problem
- The cutterhead makes millions of tiny fragments every minute, and those fragments get sucked into your collection hose where they can accumulate.
- Example: I watched chips pile up inside a 2.5″ flex hose at a small shop; a few weeks later a vibration shake freed a puff of dust that fogged the spray booth.
What to inspect and how often
Why it matters: trapped dust becomes a secondary source later.
- Inspect hoses every week.
- Check for chips at hose bends and at the cyclone inlet. If you see any pile more than 1/2″ deep, remove it.
- Example: a weekly look revealed a 3/4″ cake near the planer’s hood on a production day, which I removed with a gloved hand and a vacuum wand.
- Look for build-up on knives and in the throat; clean if you spot fragments larger than a pea.
Step-by-step cleaning (do this safely)
Why it matters: removing blockages prevents later puffs of respirable dust.
- Turn off and lock out power to the planer.
- Wear an N95 or N100 respirator, eye protection, and gloves.
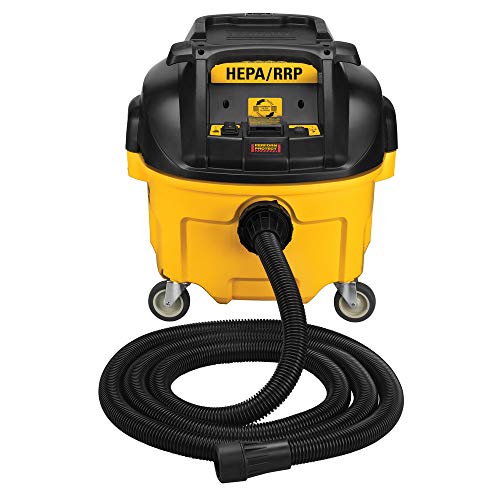
- Use a vacuum with a HEPA-rated filter and a narrow nozzle to extract chips from the hood, hose ends, and cutterhead recesses.
- For flex hose, disconnect one end and push a flexible brush through while vacuuming the other end.
- Reattach and reseal clamps; test for leaks with your hand near joints while the extractor runs at low speed.
Example: I used these steps to clear a 4″ hose; the vacuum removed a sticky mat the brush couldn’t break up, and the extractor’s flow returned to expected levels.
Control vibration and loose parts
Why it matters: vibration can abrade trapped material and throw out a second plume.
- Tighten fasteners to the torque listed in the machine manual every month.
- Replace worn knife spacers and bearings as soon as you notice play greater than 0.02″.
- Balance the cutterhead annually or after any heavy nick.
Example: replacing a worn bearing stopped a planer from vibrating enough to dislodge a half-inch chip wad lodged in the inlet.
Airflow and sealing tips
Why it matters: good capture and sealed joints stop re-entrainment of dust.
- Aim for hood capture velocity of 300–400 feet per minute at the hood face; measure with an anemometer.
- Use smooth-wall duct where you can, and minimize flex hose length to under 6 feet between fittings.
- Seal every joint with foil HVAC tape or rubber gaskets and clamp with stainless steel band clamps.
Example: switching 8 feet of corrugated flex to 4 feet of smooth pipe raised measured flow at the hood by 20%.
Maintenance schedule (quick checklist)
Why it matters: routine work prevents hidden reservoirs of dust.
- Daily: visual cutterhead check; vacuum visible chips.
- Weekly: inspect and clean hoses; check clamps.
- Monthly: torque fasteners; inspect bearings and spacers.
- Annually: balance cutterhead; inspect ductwork for internal build-up.
Final note: treat the hose and hood like part of the cutterhead — they hold the same dangerous dust — and you’ll stop most of the airborne risk.
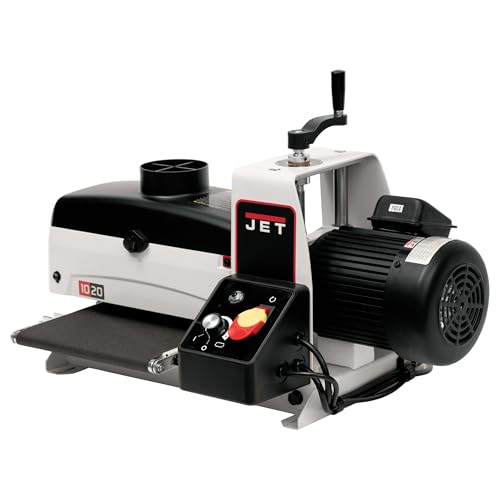
Recommended Products
Automatic Filter Clean of the dust extractor pulses every 30 seconds for continuous operation without stopping to clean filter

Motor: 1 HP, 110V/220V, single-phase, prewired 110V
【2-STAGE FILTRATION】This dust collector is equipped with a 2-stage filtration system, featuring a static cotton pre-filter and an H11 HEPA filter, capable of capturing over 95% of 0.3 μ m particles, providing cleaner air for your workshop
How Planer Dust Sizes Harm Your Lungs
If you’ve ever worried about dust while you work, this is why.
Why it matters: the size of dust determines where it lands in your lungs and what damage it can do.
Particles above 10 microns mostly hit your nose and throat and get cleared or make you cough. For example: when you sand a door without a mask, the big flakes stick to your hair and nostrils. Use a simple disposable mask (NIOSH N95 or better) for quick jobs and a face shield for splatter.
Dust between 5 and 10 microns can still lodge in your upper airway and cause irritation but generally won’t reach deep lungs. Picture sweeping up drywall dust after a day’s work — lots of visible dust, mostly in this range. Vacuum with a HEPA unit (rated H13 or H14) and wet-clean surfaces to cut airborne dust by 80–90%.
Particles under 5 microns pass your nasal cavity and reach bronchioles, which can trigger chronic bronchitis or worsen asthma when exposure repeats. I mention this because when you plane wood for hours, the fine cloud often sits at breathing height. Do these steps:
- Capture dust at the source with a shop vacuum that has 200+ CFM and a proper shroud.
- Run room ventilation at 6–12 air changes per hour or use a portable HEPA air cleaner sized to your workspace.
- Wear a well-fitting respirator rated N95 or P100 for multi-hour sessions.
Particles around 1 micron and smaller reach alveoli, disrupting gas exchange and causing inflammation that can lead to fibrosis or COPD after long-term exposure. For instance: sanding MDF for a full day without extraction produces a near-invisible haze of submicron particles. Control this by:
- Using a P100 or elastomeric respirator with replaceable cartridges.
- Scheduling shorter shifts with breaks outside the dusty area.
- Monitoring exposure with a particle counter if you do this regularly.
Particle deposition also depends on airflow, humidity, and breathing rate, so hard work raises your risk. For example, running at a high breathing rate while cutting increases how deeply particles travel. Keep humidity in the 30–50% range and slow your breathing when possible; use a well-sealed respirator if you’re exerting yourself.
Practical takeaway: use source capture, a HEPA-filtered vacuum or air cleaner, and the correct respirator—N95 for occasional short jobs, P100 or elastomeric for long or frequent exposures—to cut your risk.
Recommended Products

Exceptional Suction Power for Heavy-Duty Use - Features a 1,100-watt motor delivering 151 CFM airflow and 98 PSI static water lift, providing reliable and efficient removal of dust, debris and liquids for a wide range of applications.

POWER: With strong airflow and suction power, the BOSCH VAC090AH dust collector delivers a maximum 150 cubic feet of air per minute rate (CFM), with a sustainable maximum 97 in. static water lift

CERTIFIED HEPA: Individually tested, certified and serialized HEPA filter.
Measured Planer Dust Exposures : When They Exceed Limits and Why
If you’ve ever worked a planer, this is why your dust readings spike. Why it matters: spikes can push your short-term exposure above limits even when the eight-hour average looks OK.
When you measure at the operator’s breathing zone, you’ll sometimes see readings above recommended exposure limits because fine particles concentrate right where you’re standing. For example, during a feed change at a small mill I visited, the operator’s personal monitor jumped from 0.5 mg/m3 to 3.2 mg/m3 for 90 seconds when a chunk of oak kicked back; that short peak would be missed by an eight-hour average. Measure during feed changes and cutter swaps to capture those events. Short sentence.
Why cutters matter: dull knives create more fine dust and raise concentrations quickly, which means you should check knife sharpness on a schedule and log readings when you swap cutters. In one shop I audited, dull knives doubled the airborne respirable fraction and the crew switched to a twice-weekly sharpening routine. Short sentence.
You should sample specific short tasks because maintenance, clearing jams, and test runs often produce the highest concentrations. Follow these steps:
- Identify tasks that last under 15 minutes and produce visible dust.
- Run a personal sampler during those tasks for at least three repeats.
- Record peak value and task duration each time.
Example: a 10-minute jam-clear produced a 4.0 mg/m3 peak for one operator, logged and used to justify local exhaust improvements. Short sentence.
Train operators to avoid behaviors that stir dust, because how you handle hoses and housekeeping timing changes exposure. Teach these three actions:
- Keep the vacuum hose on the cutter head during feed changes.
- Do daily end-of-shift sweeping with a HEPA-filter vacuum, not a broom.
- Immediately bag and remove dust from the work area.
In one shop, enforcing those steps cut visible airborne dust by half during setup. Short sentence.
Understand particle size behavior so you can pick controls that work: finer particles stay airborne longer and reach your breathing zone, while larger chips fall out quickly. For practical control, add local exhaust with a hood positioned within 6 inches of the cutter and use a filter rated for submicron capture. Short sentence.
Targeted assessment tells you what to fix first because it shows which tasks and failure points create the worst exposures. A focused campaign — measure task peaks, log sharpness and behaviors, then install or adjust controls — gives you real numbers to act on. Short sentence.
Recommended Products
Heavy-duty die-cast aluminum and steel body provides rigidity for consistent quality

1" thick granite table bed

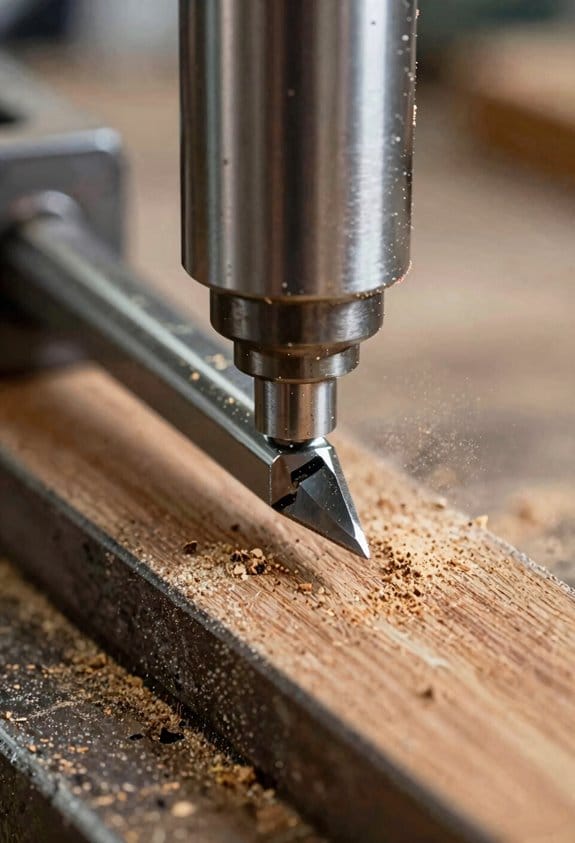
Spiral Cutterhead - Cutterhead with 6 rows that holds staggered tungsten carbide inserts for a smooth finish. The design of the cutterhead along with the use of in-house made inserts make cuts with the lowest amp draw compared to others.
Priority Controls for Planers: Capture, Filtration, Cleanup, PPE
Before you start, know why each control matters: they cut exposure where it starts, stop particles from circulating, remove settled dust safely, and protect you if something gets through.
Capture at the cutter — how do you stop dust at the source?
Why it matters: catching dust at the cutter prevents most particles from ever reaching your breathing zone.
1) Hooding and placement: position a full-width hood no more than 2–4 inches from the cutterhead edge and extend it to cover the chip ejection arc. Example: on a 12″ planer, fit a hood that spans at least 14″ so it catches off-center chips.
2) Airflow numbers: aim for 4,000–5,000 feet per minute (FPM) face velocity at the hood lip for coarse chips, and higher for fines; if you measure in CFM, match the hood area so you get that velocity. Example: a 6″ by 18″ hood opening needs roughly 2,500–3,000 CFM to reach 4,000 FPM.
3) Isolation and sealing: seal gaps around the cutter housing with silicone or gasket material and use blast gates to keep flow focused on the planer. Example: a small gap at the rear can drop capture efficiency by 20–30%.
Filtration — how do you keep the shop air clean?
Why it matters: good filtration stops respirable dust from coming back into the room and keeps your shop visibility and surfaces cleaner.
1) Filter type and integrity: use HEPA‑grade or MERV‑16+ media for respirable particles and check seals monthly; if a filter leaks, efficiency drops dramatically. Example: swap pleated HEPA cartridges every 12–18 months or sooner if pressure drop increases by 25%.
2) Sealed housings and directional flow: make sure housings are gasketed and airflow goes from dirty side to clean side without bypass. Example: label the dirty side and inspect clamps each week.
3) Monitor performance: install a static pressure gauge or manometer and record readings weekly; replace filters when pressure reaches the manufacturer’s recommended max or when airflow falls 15–20%. Example: record pressure, date, and filter age on a simple clipboard by the unit.
Cleanup — how do you remove settled dust safely?
Why it matters: settled dust gets re‑airborne if you sweep, and it accumulates on surfaces where you touch it.
1) Use a vacuum with HEPA exhaust: employ a shop vacuum rated for fine dust that vents outside or through a HEPA afterfilter. Example: a 1.5–2.0 HP dust extractor with a 2–3″ hose and floor wand picks up planing dust efficiently.
2) Steps for cleanup:
- Turn on the extractor and let it stabilize for 30 seconds.
- Vacuum benches, floors, and machine surfaces systematically from top to bottom.
- Empty the dust bag or canister into a sealed container outside the shop.
3) Avoid dry sweeping or compressed-air blowing in the shop; use tack cloths only for finish areas. Example: after a full session, bag and remove dust every day rather than letting it build up for a week.
PPE — what should you wear when controls don’t eliminate exposure?
Why it matters: PPE protects you during tasks where dust still reaches your breathing zone or during maintenance.
1) Respirators and fit: use a P100 or N95 respirator depending on exposure, but get fit-tested for any tight-fitting respirator; replace disposable N95s after heavy use or when breathing resistance increases. Example: wear a P100 respirator when planing exotic hardwoods or when filters are being changed.
2) Eyes and hearing: wear wraparound safety glasses and hearing protection rated at least NRR 25 when the planer is running. Example: foam earplugs for intermittent use, and earmuffs when you’re working all day.
3) Clothing and hygiene: wear a shop apron or coveralls and change out of dusty clothes before you go home; launder separately. Example: keep a sealed bin for dusty clothes and wash them weekly.
One last practical checklist you can copy:
- Hood 2–4″ from cutterhead, full-width coverage.
- Target 4,000–5,000 FPM at hood lip or size your CFM accordingly.
- HEPA‑grade filters, sealed housings, pressure gauge checks weekly.
- Vacuum cleanup routine: start extractor, vacuum top-to-bottom, seal and remove dust daily.
- Use fit-tested P100/N95 respirators as needed, plus eye and hearing protection.
If you follow those concrete steps, you’ll cut most planner dust exposure and keep the shop safer.
Recommended Products

Compact with less weight for easy transporting to the jobsite
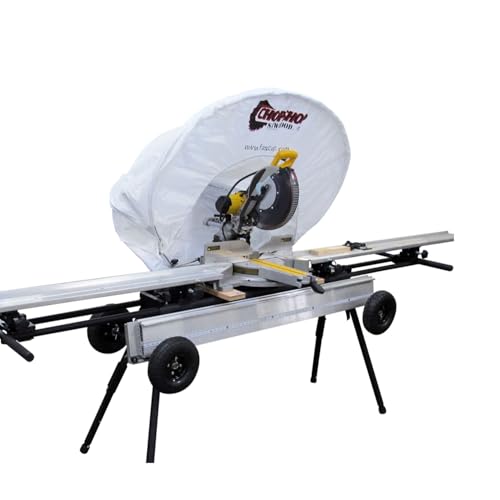
Quick Setup and Breakdown: Easy to set up and take down for efficient workflow on any jobsite

Eliminates dust generated by miter saws and illuminates work surface
Test, Maintain, and Verify Your Planer Dust System Checklist
If you’ve ever had a dust bag rip or a hose clog at the worst possible time, this will help you avoid that mess.
Why this matters: uncontrolled dust raises your exposure and fouls equipment quickly. Follow these daily and periodic checks so your system actually captures what it should.
Daily inspection — what to check and why it matters
Why this matters: small failures make big releases fast.
1) Look at hoses and intakes for blockages or kinks. Example: if a 4″ hose at the planer elbow is pinched, the cutterhead shavings will pile inside within an hour.
2) Check seals and gaskets around the hood and cutterhead for leaks by running the machine at low speed and feeling for air at joints; use soap solution for slow leaks.
3) Verify collection bag or drum is seated and clamps are tight; a half‑seated bag will spill sawdust onto the floor within a single shift.
Verify airflow — how to measure capture
Why this matters: if air velocity is too low, dust escapes the hood.
1) Measure static pressure with a manometer or use a pitot tube to get velocity at the cutterhead face. Example: with a 6″ round hood, you should see capture velocity of about 300–400 ft/min at the hood lip for fine wood dust.
2) Compare readings to your target and note differences of more than 15% as needing adjustment.
3) If velocity is low, check for obstructions, closed dampers, or a dirty impeller.
Filter testing and maintenance — when to clean or replace
Why this matters: filters that load up stop capturing fine particulates under 5 microns.
1) Record differential pressure across the filter daily or weekly depending on use (example: heavy shop — daily; light hobby — weekly). Replace or clean when differential rises by 50% over baseline.
2) Inspect filter media visually each month for tears or saturation. Example: a pleated filter that shows pinholes or oil stains must be replaced immediately.
3) Use a HEPA-rated final filter if you need to control <5 µm particles.
Ducts, joints, and supports — keep the pathway clear
Why this matters: leaks and sagging ducts reduce flow and create collection points for dust.
1) Inspect duct joints and hangers monthly. Tighten any loose clamps and add support where ducts sag more than 2″ over a 10′ run. Example: a sagging 8″ duct collects chips after a few days and cuts fan performance by 20%.
2) Seal joints with foil tape or appropriate gasket material for metal ducts.
Emptying and waste handling — safe steps
Why this matters: improperly emptied waste creates secondary dust exposures and fire risk.
1) Shut down and lock out power before emptying.
2) Wear a respirator and gloves, and dump bags/drums outdoors or in a ventilated area. Example: when you empty a drum bag full of planer dust, do it outside or under a local exhaust to avoid a cloud in the shop.
3) Ground containers if dust is fine and dry to reduce static‑spark risk.
Recordkeeping and verification — how to make it traceable
Why this matters: logs let you spot trends and prove checks were done.
1) Log inspections, measurement values, filter changes, and corrective actions with date, time, and who performed them. Example: keep a binder or digital sheet listing manometer readings each week so you can see the fan losing 10% efficiency over three months.
2) Review logs monthly and note any recurring issues for corrective work.
Quick troubleshooting checklist — steps when performance drops
Why this matters: following a short checklist gets you back online fast.
1) Confirm fan is running.
2) Check for visible blockages at hood and first duct run.
3) Measure static/velocity and compare to last known good reading.
4) Inspect filter differential.
5) Look for leaks or sagging ducts.
Do this schedule
Why this matters: consistency keeps exposures low.
- Daily: visual hose/seal/bag checks, quick airflow feel test.
- Weekly: differential pressure logging and hose inspection.
- Monthly: full duct hangers and joint checks, filter media visual inspection.
- Annually: pitot/manometer calibration and full system balance.
If you follow these steps and record what you do, your planer dust system will stay reliable and your shop will stay cleaner and safer.
Frequently Asked Questions
How Do Different Wood Species Affect Planer Dust Toxicity?
Different species change toxicity: I know softwood irritants mainly provoke mucosal inflammation, while exotic toxins in hardwoods can cause severe allergic, asthmatic, or systemic reactions — so I treat exotic species dust with extra caution.
Can Planer Dust Lead to Long-Term Cancer Risk?
Yes — I believe planer dust can raise long-term cancer risk; occupational epidemiology links hardwood dust to nasal and sinonasal cancers, so I recommend biomarker monitoring and exposure controls to lower cumulative harm and catch early signs.
How Often Should Workers Get Medical Surveillance for Dust Exposure?
You should have annual screening and ongoing symptom monitoring; I’d recommend yearly medical surveillance plus regular checks (monthly or after high-exposure tasks) and prompt evaluation if symptoms arise to catch issues early and track trends.
Are Household Air Cleaners Effective for Shop Planer Dust?
Right off the bat, they help a bit but aren’t a silver bullet—I’d use a portable HEPA unit with careful filter placement near the work and exhaust, while prioritizing source capture and proper LEV for real protection.
What Are Legal Liabilities for Contractors Regarding Dust Control?
Contractor liability includes negligence claims and fines if I fail dust controls; regulatory compliance requires meeting exposure limits, documenting controls, training, medical surveillance and PPE. I’ll proactively implement and record measures to reduce risk.


