You’re wiping paint flecks from your shirt after another evening of airbrushing and wondering why your throat feels scratchy the next day. You can’t tell if the smell is harmless or if those fine sanding dusts and solvent vapors are quietly building up in your lungs. Most people assume a bandanna or occasional fresh air fixes the problem and don’t realize particles and vapors need different protection.
This article will show you which masks and cartridges actually stop dust versus fumes, how to get a good fit, and when to use ventilation or a PAPR so you reduce exposure reliably. You’ll come away with a clear, practical plan to protect your breathing during common hobby tasks. It’s easier than you think.
Key Takeaways
If you’ve ever worked on a weekend project that made your eyes water, this is why.
– When you spray paint, sand, or work with resins, you breathe tiny particles and solvent vapors that can irritate your nose and throat right away and damage your lungs over years. For example, spraying enamel in a one-car garage can fill the space with fine mist in under 10 minutes, so wear a respirator rated for vapors and particulates.
Before you start a project, you need to know how masks and fit reduce exposure.
– After COVID more people noticed masks actually cut how much you inhale, and that matters for hobby work. Try a tight seal: do a quick user seal check each time you put on a half‑mask—cover the cartridge ports and inhale; the mask should collapse slightly. If it doesn’t, adjust straps or try a different size.
Think of airborne aerosols like smoke from a candle in your living room.
– Many hobby processes produce droplets and dust that drift and linger indoors, meaning others in the house can breathe them hours later. I once sanded MDF inside for 15 minutes without ventilation and the dust settled on the table two rooms away, so open a window and use a fan or local exhaust.
Before you begin, set up one affordable control.
– Use a proper respirator, add local exhaust, or point a box fan at a window; any of these cuts inhalation risks a lot. For example, put a box fan in a window set to blow air out and run it for 10 minutes before and during spray painting to clear airborne particles.
The difference between cheap masks and proper cartridges comes down to what they block.
– You can buy better options now—P100 filters stop 99.97% of particles, OV/P100 cartridges block organic vapors and particulates, and PAPRs add comfort for longer jobs. If you choose a cartridge, follow the manufacturer’s replacement schedule or swap them when you smell solvents, which indicates breakthrough.
How to pick and use a respirator.
– Why it matters: a poor fit or wrong cartridge won’t protect you. Steps:
- Pick the right type: half‑mask with P100 for dust, OV/P100 for solvents.
- Fit it: try different sizes; do a user seal check every wear.
- Maintain it: clean the facepiece with mild soap after each use.
- Replace filters: P100 every few months with regular use, or sooner if breathing gets harder; replace OV cartridges when you smell solvents.
Example: for a six‑hour resin build spread over weekends, use a PAPR or change cartridges weekly.
You don’t need expensive gear if you use the basics correctly.
– A well‑fitted half‑mask with the right cartridges, a window fan, and a small workbox with local exhaust will cut most risks from typical hobby projects. A concrete setup: half‑mask + OV/P100 cartridges (~$80), 20″ box fan (~$25), and a simple spray booth made from a plastic tote and a computer fan (~$15).
Why Hobbyists Care More About Respiratory Protection Now
If you’ve ever worked with sprays or sanding, this is why.
Why this matters: your lungs get tiny particles you can’t see, and those build up over years. For example, when you airbrush a model car in a garage without exhaust, a fine mist lingers for minutes and drifts across the room.
What to do about airbrush overspray
Why this matters: overspray stays airborne farther than you think and increases how much you inhale.
1) Use a local exhaust or spray booth that moves at least 100 feet per minute across the work opening (roughly 0.5–1 m/s).
2) Place the booth so the airflow pulls fumes away from your face.
3) Replace or clean the booth filter after 8–10 hours of heavy use.
Real example: I set up a DIY booth with a 120 mm computer fan and a MERV-13 filter; it cut visible mist and the room smelled less after one hour.
How to pick the right mask
Why this matters: if your mask doesn’t fit or filter the right size particles, you get less protection.
1) Match the filter rating to the hazard: use N95/P2 or P100 for dust and most paints (N95 stops ~95% of 0.3 µm particles; P100 stops ~99.97%).
2) Choose a shape that seals your face—cup or molded masks usually fit better than loose cloth.
3) Do a seal check each time: tighten straps, cover the filter area and breathe in; the mask should collapse slightly.
Real example: a friend switched from a cloth respirator to a half-face elastomeric mask with P100 cartridges and noticed no paint smell after an afternoon of spraying.
Why fit beats fashion
Why this matters: looks don’t stop particles—seal does.
– Test fit by moving your head and talking for 30 seconds; the mask must stay tight.
Real example: someone wore a trendy mask with a gap under the chin and still felt fine-grit sanding in their nose afterward.
Ventilation and room airflow basics
Why this matters: general ventilation lowers background exposure during long sessions.
1) Aim for 4–6 air changes per hour for a hobby workspace about 100 sq ft with 8 ft ceilings—so you need roughly 1,200–1,800 cubic feet per hour of fresh air exchange.
2) Use an exhaust fan or open a window plus a box fan to create crossflow; position fans so airflow pulls contaminants away from where you stand.
Real example: opening a window and pointing a box fan out reduced visible dust haze after 20 minutes compared with no airflow.
Maintenance and habits that protect you
Why this matters: filters and seals degrade, and small lapses cost you long-term.
1) Replace disposable masks after a full workday of heavy exposure or sooner if breathing becomes harder.
2) Clean re-usable cartridges per manufacturer rules; swap them after smell or taste of chemicals returns.
3) Wash hands and avoid touching your face immediately after handling powders or paints.
Real example: I swapped cartridges every 40 hours of use and tracked it on a sticky note; the new cartridges stopped paint odor instantly.
Quick checklist before you start a session
Why this matters: a short routine prevents accidental exposure.
1) Check mask seal.
2) Turn on local exhaust or position fans for crossflow.
3) Have spare filters and cartridges nearby.
Real example: doing this checklist once saved me from working two hours with a clogged booth filter.
If you follow these steps — match filters to hazards, check fit each session, maintain ventilation, and stick to the checklist — you’ll cut the tiny particles you inhale and protect your lungs over years.
Which Hobby Tasks Carry the Highest Inhalation Risks

Think of hobby work like cooking — small mistakes can burn your lungs the way hot oil burns skin.
You’ve already seen how fit, filtration, and airflow cut exposure during spraying and sanding, and here’s why that matters: inhaling fine particles and solvent vapors can cause immediate irritation and long-term lung damage. For example, when you spray a half-gallon of lacquer in your garage without a respirator, paint mist will hang in the air for 30–60 minutes and settle on surfaces you touch. Use a respirator with NIOSH-rated cartridges and a tight face seal.
1) Which hobby tasks release the most airborne particles?
- Spray painting: releases tiny paint droplets and solvent vapors that stay suspended; wear a respirator with P100 or organic vapor cartridges, and keep a box fan pushing air out at a window. (Example: spraying a model car with enamel for 10 minutes can create a visible haze across a 10-foot room.)
- Powder coating: creates very fine polymer or metallic powders that can become respirable; use a powered air-purifying respirator (PAPR) or supplied-air and a dedicated booth with 100+ feet/minute capture velocity. (Example: blasting powder into a 2×3-foot part can leave a visible cloud that takes minutes to clear.)
- Grinding and sanding metals: produces ultrafine metal dust; use a type fitted respirator and source-capture vacuum with HEPA filter rated H13/H14. (Example: grinding a stainless-steel bracket for five minutes produces sparks and a gray dust film over nearby surfaces.)
- Soldering and hot work with flux: emits acid and rosin fumes; use a fume extractor with at least 100 CFM at the solder joint and a respirator with organic vapor/acid gas cartridges if extraction isn’t possible. (Example: a 15-minute soldering session near a laptop can leave a sharp chemical smell and eye irritation.)
- Resin casting and 3D-print post-processing: releases volatile organic compounds (VOCs) and ultrafine particles; ventilate to outdoors and wear an organic vapor respirator plus nitrile gloves. (Example: curing 200 g of epoxy in a small shed can create a strong solvent odor for hours.)
Before you pick protection, you need to match it to the hazard because particle size and chemistry change the solution. Measure or estimate: particles <1 micrometer need P100/HEPA-level filtration; solvent vapors need organic-vapor cartridges; acid gases need specific acid cartridges. For mixed hazards, use a respirator rated for both particulates and gases or a PAPR with appropriate filters.
Steps to protect yourself (do these every time):
- Identify the task and dominant contaminant (particulate vs. vapor).
- Choose protection: P100 cartridge for dust/metal, organic-vapor for solvents, combined cartridges or PAPR for mixed hazards.
- Ensure fit: perform a fit check each session; a loose seal cuts protection drastically.
- Ventilate: provide cross-ventilation or a local exhaust at 50–200 CFM depending on task size.
- Clean up: HEPA-vacuum and wet-wipe surfaces; do not dry-sweep.
Soldering, resin work, and grinding also create fine dust and fumes that can pass through simple masks, so local ventilation and cartridges matter. For example, soldering a circuit board for 20 minutes without extraction will give you a throat scratch and airborne particles detectable on nearby glass.
If you practice these steps, you’ll cut inhalation risk dramatically, and you’ll keep your workspace safe for the next project.
How Post‑COVID Habits Changed Mask and Respirator Use

If you’ve ever worked next to someone sanding or painting, this is why.
You should keep wearing masks and checking fit because they actually cut your exposure by measurable amounts. For example, when a friend of mine sanded a small oak shelf in a garage, a well-fitted N95 stopped visible dust on his shirt while leaving the room air noticeably clearer.
How to store and clean masks properly — and why it matters.
Why this matters: good storage and cleaning prevent contamination and make masks last longer.
- After use, let disposable filters air-dry for at least 24 hours in a dry spot away from direct sunlight.
- Put filters or spare cartridges in a labeled, resealable bag so you know the install date.
- Wipe reusable masks with a damp cloth and mild soap after messy tasks, then air-dry on a hook.
Example: Sarah keeps a small plastic box on her workbench with three labeled filter bags dated by week; it cut her filter waste in half.
How to check fit quickly — and why it matters.
Why this matters: a poor seal drops your protection dramatically.
- Put the mask on and tighten the straps until it feels snug but not painful.
- Cover the front with both hands and breathe in; the mask should collapse slightly.
- Breathe out sharply; you should not feel strong leaks around the edges.
Example: At a community woodshop, a volunteer spent two minutes adjusting his straps and went from fogging his glasses to a secure seal.
How to practice polite mask etiquette in shared spaces — and why it matters.
Why this matters: clear signals prevent accidental exposure and make collaboration smoother.
- Tell people before you remove your mask and step back about 3 feet.
- Replace face shields or outer masks after heavy sanding or spraying.
- Keep a small spare filter or mask in your bag so you can swap one quickly.
Example: In a makerspace, someone always announces “mask off for a minute” before cleaning a table, and no one has complained about dust since.
How to use ventilation to lower inhalation risk — and why it matters.
Why this matters: moving air reduces particle concentration so you breathe less of them.
- Run a box fan in a window pointed outward to pull contaminated air out.
- Open a second window on the opposite side of the room by at least 2 feet to create cross-ventilation.
- For messy outdoor projects, work at least 6 feet from bystanders and position yourself so the wind blows away from people.
Example: A model-maker I know sets a fan in a sealed window and opens the garage door 3 feet; the dust clears in minutes instead of lingering.
Small habits that make safer hobbying practical — and why they matter.
Why this matters: tiny routines add up to consistent protection.
- Keep a checklist on your bench: mask, spare filter, wipes, fan on.
- Replace disposable filters after heavy use or when breathing feels harder.
- Mark reusable masks with rotation days so you don’t reuse a damp one.
Example: One weekend potter uses the same checklist and now spends less on filters and breathes easier during glazing sessions.
If you follow these steps, you’ll find respirators and masks become part of your routine without fuss.
Respiratory Protection Types Hobby Shops Should Stock

Before you stock respirators, you need to know what each type protects against and when you should use it. Why this matters: choosing the wrong respirator leaves you or your customers exposed to dust, fumes, or solvents. Example: a model builder sanding 3 hours straight with only a paper dust mask will still breathe fine particulates and get a cough; a reusable half‑mask with P100 filters would keep their air clear.
Which disposable masks should you sell? Answer: N95/FFP2. Why this matters: they’re cheap, light, and block at least 95% of airborne particles. Example: a teenager doing a 30‑minute resin sanding session can wear a disposable N95 and cut exposure dramatically. Steps to stock:
- Buy three sizes: small, medium, large.
- Keep packs of 10 and boxes of 50.
- Label boxes with “N95 / FFP2 — particles only”.
Tip: price packs at $1–$2 per mask retail.
When should customers use reusable half‑mask elastomerics? Why this matters: frequent or long sanding and dust work needs a better seal and replaceable filters. Example: a wood carver who spends 2–4 hours daily will prefer a half‑mask with P100 because it lasts longer and fits tighter. Steps to stock:
- Carry two face sizes (S/M and M/L) and 2 brands for fitting options.
- Stock P100 particulate filters and combined P100 prefilters (at least 20 of each).
- Include user cards showing a 15‑second seal check (cover filters, inhale, face should pull in).
Which cartridge respirators do hobby shops need? Why this matters: paints, solvents, and certain adhesives release gases that particulate filters won’t stop. Example: someone airbrushing enamel paints in a small garage needs organic vapor cartridges, not just a dust filter. Steps to stock:
- Stock organic vapor (OV) cartridges and OV + P100 combo cartridges.
- Maintain at least 30 OV cartridges and 20 combo cartridges.
- Color‑code or tag cartridges: black for OV, purple for P100 combos.
When are PAPRs the right choice? Why this matters: for long sessions or higher exposures, PAPRs reduce breathing effort and raise protection factors. Example: a restoration hobbyist doing a full car spray booth day will be far more comfortable and safer with a PAPR. Steps to stock:
- Offer one belt‑mounted PAPR kit and one hood style.
- Keep 2 spare HEPA filters and 2 spare batteries for each kit.
- Train staff to advise PAPR rental for day‑long spray work.
How should you handle maintenance and replacement items? Why this matters: expired or clogged filters and bad valves make respirators useless. Example: a customer using an old cartridge with a 3‑year service life left it in a damp shed and now the valve sticks — it won’t seal and won’t protect. Steps to stock:
- Sell valve kits, foam face seals, and cartridge caps — at least 10 of each.
- Display cartridge expiry stickers and multi‑color tags for filter types.
- Offer a one‑page care sheet with cleaning steps and replacement intervals.
What customer supports should you provide? Why this matters: customers will choose incorrectly or misuse gear without clear, simple guidance. Example: a new painter buying a respirator without knowing to swap to OV cartridges while using solvent thinners will be exposed. Steps to provide:
- Include a one‑page fitting guide in every respirator box.
- Offer a quick 5‑minute demo at the counter (show seal check and cartridge swap).
- Stock cleaning wipes, soft brushes, and mild detergent packets for mask care.
Final stocking checklist you can use today. Why this matters: it makes ordering and shelf layout fast for you. Example: order list filled out for a small shop that sells to modelers and painters.
- Disposable N95/FFP2: packs of 10 (3 sizes) — 150 total.
- Half‑mask kits: 2 sizes × 2 brands — 8 masks; P100 filters — 100.
- Cartridge respirators: 6 masks; OV cartridges — 30; OV+P100 — 20.
- PAPRs: 1 belt kit, 1 hood kit; spare batteries — 4; HEPA filters — 4.
- Maintenance parts: valves, seals, caps — 50 pieces total.
- Support materials: fitting guides, demo time signage, cleaning supplies — stocked.
One bold rule per paragraph: label filters clearly and train staff on cartridge types so customers get exactly the protection they need.
Recommended Products
Compact and lightweight: (< 1lb) - easy to don and doff

240 Count NIOSH APPROVED N95 MASK RESPIRATOR: Manufactured by Shawmut Corp, this mask meets NIOSH 42 CFR 84 N95 standards and provides respiratory protection with minimum 95% filtration efficiency of non-oil based particles 0.3 microns or larger. TC-84A-9295
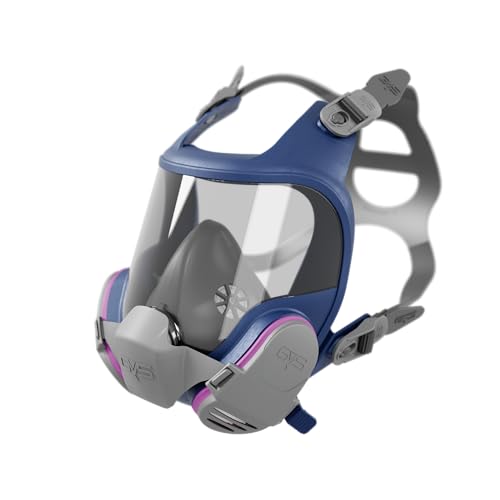
This Elipse Full Facepiece Respirator is designed for professionals who require top-tier protection and comfort in challenging environments. It is designed to be compatible with most safety helmets. Its visor is made of durable polycarbonate, overmolded with a silicone frame, providing exceptional clarity and protection while maintaining a lightweight feel.
Matching Respirators to Common Hobby Contaminants

Before you match respirators to a hobby task, know why it matters: using the wrong mask can let harmful dust or vapors reach your lungs.
For wood dust (sanding or cutting), pick a fitted N95 or P100 respirator because they filter particulates. Use these steps:
- Choose a NIOSH-certified N95 for general woodworking and a P100 if you’re working with very fine dust like MDF or hardwoods.
- Do a fit check each time: press the mask inward and exhale to check for leaks; if you feel air, adjust straps or try a different size.
- Replace disposable N95s after a full day of heavy sanding or when breathing gets harder; replace P100 cartridges per manufacturer guidance or when you detect odor or increased breathing resistance.
Real example: sanding a pine tabletop for two hours — wear an N95, check the seal before starting, and swap masks afterward.
If you’re working with powdered pigments (painting, ceramics), use a respirator with particulate cartridges rated for solids because cloth masks and loose coverings won’t seal or filter fine pigment. Steps:
- Use a half- or full-face respirator with P100 or particulate-only filters labeled for solids.
- Fit the mask and check for leaks; test by inhaling sharply and feeling for collapse against your face.
- Change filters after visible loading or after about 8–10 hours of heavy use.
Real example: mixing powdered ceramic glaze for 30 minutes — put on a P100-equipped half-face respirator and avoid dust clouds.
When solvents or organic vapors are present alongside dust or pigments, you need a combination cartridge that covers both particulates and organic vapors; otherwise vapors will pass through particulate-only filters. Steps:
- Buy cartridges labeled for organic vapors plus P100 (look for combined canister markings).
- Use a full-face respirator if splashes or high vapor levels are likely, since it also protects your eyes.
- Replace vapor cartridges when you first smell solvent or after the hours recommended by the manufacturer (often 4–8 hours in active use).
Real example: spray-painting a small metal shelf in a garage — use an organic-vapor/P100 combo cartridge and work with a window open and a fan.
Always confirm fit and follow maintenance guidance because leaks or clogged filters defeat protection. Steps:
- Perform a user seal check every time you put the respirator on.
- Store cartridges in airtight containers when not in use to extend life.
- Follow manufacturer instructions for cleaning and part replacement; keep a replacement set on hand.
Real example: swapping from sanding to solvent work in the same day — change to the appropriate cartridge and do a seal check before restarting.
Recommended Products
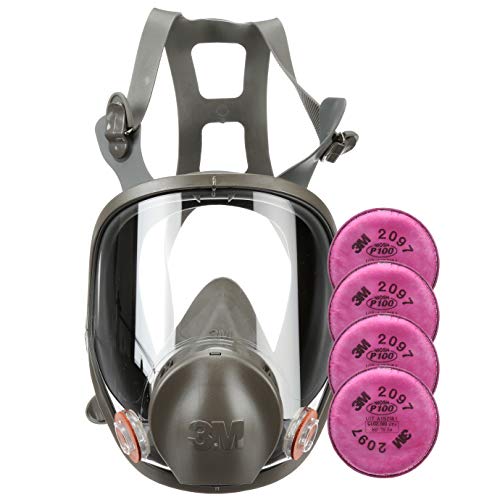
KIT INCLUDES: One 3M Full Face piece Reusable Respirator 6800, medium size, plus 2 pair (4 total) 3M Particulate Filters 2097 with 99. 97% filter efficiency meeting NIOSH P100-series test criteria.

NIOSH-APPROVED: NIOSH, a USA federal government regulatory agency, has tested and approved the 6900 with 3M cartridges, filters or supplied air systems to help reduce inhaling certain airborne contaminants

This Elipse Full Facepiece Respirator is designed for professionals who require top-tier protection and comfort in challenging environments. It is designed to be compatible with most safety helmets. Its visor is made of durable polycarbonate, overmolded with a silicone frame, providing exceptional clarity and protection while maintaining a lightweight feel.
Why Reusable Respirators and Filters Are Gaining Favor
If you’ve ever compared masks and cartridges, this is why reusable respirators and replaceable filters are becoming the go-to for hobbyists and small shops. It matters because you’ll save money and generate less waste over months of projects. For example, a woodworker who sands once a week will spend less on cartridges in a year by switching to a reusable facepiece with replaceable filters.
You should pick reusable respirators because they cut long-term cost and let you match protection to the task. Say you’re sanding oak for an hour: use a P2/P95 particulate cartridge; if you’re using solvent-based finishes, switch to a combined organic vapor and particulate cartridge (OV/P95). A reusable facepiece also molds to your face over time, which improves seal and comfort on multi-hour jobs.
Before you use cartridges, learn simple maintenance steps so they last and keep your breathing zone safer. Why it matters: bad seals or contaminated cartridges fail at the worst moments. Example: a painter who stored spare cartridges loose in a toolbox picked up solvent vapors and lost a cartridge’s effectiveness before their next job.
How to maintain cartridges and facepieces:
- Inspect every use. Look for cracks, warped seals, or saturated filters before you put the mask on.
- Replace on schedule. Write the install date on the cartridge with a permanent marker; for heavy use, change particulate filters every 40–80 hours or when breathing resistance increases.
- Store spares correctly. Put unused cartridges and filters in zip bags with silica packets, and seal them; label the bag with the date.
- Clean the facepiece weekly. Wipe down with warm water and mild soap, rinse, air-dry, and check the exhalation valve.
- Perform a user seal check each time you don the respirator: cover the cartridges and inhale gently—your facepiece should collapse slightly if the seal is good.
A few concrete numbers to keep in mind: expect particulate cartridges to last 40–160 hours depending on dust load, and replace organic vapor cartridges after 8–40 hours of heavy solvent exposure or when you smell odors through them. For a hobbyist who sands 2 hours per week, that means changing particulate filters roughly every 5–20 weeks.
Cartridge choice matters for safety and performance. Use P2/P95 for dusts and particulates, and OV/P95 or chemical-specific cartridges for solvents; never use a particulate-only cartridge when working with vapors. Example: using only a P95 while spraying lacquer will let solvent vapors through, so choose an OV/P95 instead.
Follow these steps and you’ll save money, reduce waste, and keep your shop’s air safer—plus, your respirator will fit better and be more comfortable the more you maintain it.
Recommended Products

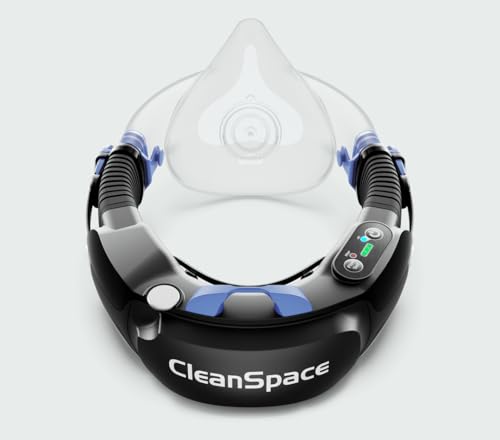
KIT INCLUDES: Disposable hood, PAPR unit, high capacity battery and charger, easy clean belt, high efficiency filter, spark arrestor, pre-filter, length adjusting breathing tube and cover, and airflow indicator

PROTECTION AGAINST dust, mist, fumes, radionuclides and radon daughter – ideal for lead, asbestos, mold and other hazardous particulates
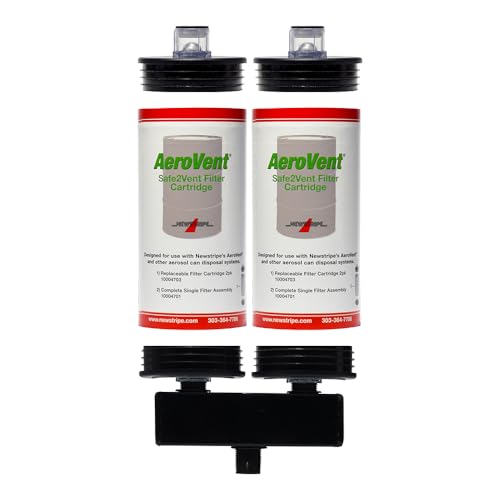
✔️ UNIVERSAL DESIGN - Fits all multi-can and single-can aerosol disposal systems, including AeroVent 3X, 1X, and Standard models. Ideal for high-volume aerosol can recycling. Reusable tops, bottoms, and manifold included.
What Safety Rules Mean for Hobby‑Shop Customers
Before you start buying gear, know that safety rules change what you should buy and how you use it.
Why this matters: following rules keeps you legal and keeps warranties valid. For example, if your local shop posts “PPE required: N95” for sanding, you need at least that protection to comply and to avoid voiding equipment warranties.
1) What gear should you buy?
Why this matters: the rule or sign tells you the protection level required.
Steps:
- Read the posted sign or the product spec that lists a standard (for example, NIOSH-approved N95, P100, or EN 149 FFP3).
- Match the protection factor to the task (light sanding = N95; heavy dust, fine particulates, or painting with solvents = P100 or a respirator with organic-vapor cartridges).
- Check the label for the standard referenced and the model number before purchase.
Example: a friend sanding drywall bought an N95 for $8 and replaced it every week; another friend spraying lacquer bought a reusable half-face respirator with P100 and organic cartridges for $120 and changed cartridges per the manufacturer schedule.
2) How do rules affect training and recordkeeping?
Why this matters: some rules require documented training before you can use certain tools or a respirator.
Steps:
- Ask what training is required—sometimes a short certified fit test is needed for tight-fitting respirators.
- Keep a one-page record: date, equipment, training completed, and any fit-test results.
- Store records with your user manuals or product pages for warranty proof.
Example: a local makerspace requires a fit test and a signed training sheet before members use the laser cutter; they keep the sheet in a binder next to the machine.
3) What happens if you ignore manufacturer instructions?
Why this matters: not following instructions can void the warranty and reduce protection.
Steps:
- Read the user manual and any stickered warnings before first use.
- Follow cleaning, storage, and replacement schedules (for example, replace disposable respirators after 8 hours of continuous use or per the manufacturer).
- If you modify equipment, keep photos and receipts showing the original condition and parts you replaced.
Example: someone ground on a bench grinder without the guard in place; the manufacturer denied a replacement part under warranty because the guard was removed.
4) How to check product pages and standards quickly?
Why this matters: knowing the referenced standard confirms performance.
Steps:
- Look for the standard name (NIOSH, EN, CSA) and the model on the product page.
- Note the assigned protection factor: for respirators, common labels are N95, P100, FFP2, FFP3.
- Save a screenshot or print the spec sheet and keep it with your records.
Example: before buying a respirator on Amazon, save the manufacturer PDF that shows NIOSH approval and the model number; this helped a hobbyist prove compliance after a local inspection.
Keep it simple: follow posted signs, match protection levels, read manuals, and keep one-page records.
Simple Fit, Care, and Replacement Rules Hobbyists Follow
Here’s what actually happens when you check and maintain a respirator: if the mask doesn’t seal, it won’t protect you.
Why it matters: a poor seal lets contaminated air bypass the filter and reach your lungs.
1) How to check the seal (step-by-step)
Why this matters: a quick user seal check tells you immediately if air is leaking.
– Step 1: put the respirator on and tighten the straps until the facepiece feels snug — tighten the bottom strap, then the top.
Example: when I put on an N95 before sanding a drywall patch, I tighten until the mask stops sliding when I nod.
– Step 2: perform an inhalation check: cover the filters or inhale sharply; the facepiece should collapse slightly toward your face and stay there for a second.
Example: at a woodworking shop I cover the cartridges with my palms and inhale; if I feel air at my cheeks, I adjust the straps.
– Step 3: perform an exhalation check: cover the exhalation valve or cup the mask and exhale; you should feel slight outward pressure with no leaks at the edges.
Example: after installing a new cartridge at a mechanic’s garage, I cup the mask and exhale — if air streams from the nose area I reseat the mask and try again.
If either check fails, reposition the mask, retighten, and repeat the two checks.
2) How to care for filters and cartridges
Why it matters: clogged or spent filters increase breathing resistance and won’t stop contaminants.
– Step 1: follow the manufacturer’s timetable or replace when breathing resistance increases noticeably — usually every 8–40 hours of heavy use depending on the contaminant and filter type.
Example: using an organic vapor cartridge while painting, I swapped cartridges after two full days (about 16 hours) because breathing felt heavier.
- Step 2: track hours or exposure with a log: write date, hours used, and task.
- Step 3: dispose of single-use filters after exposure to oils, heavy dust, or if they’re wet or soiled; replace reusable cartridges according to the chemical’s service life indicator or SDS guidance.
Example: I throw away N95s after a dusty bathroom demo and mark the box with the discard date.
3) How to clean and store reusable respirators
Why it matters: storing a dirty respirator lets contaminants degrade parts and transfer to your face.
– Step 1: after each use, remove filters/cartridges and wipe the facepiece and straps with a mild detergent and warm water, then rinse and air-dry in a clean area.
Example: after a day of spraying stain, I remove cartridges, wash the facepiece at the sink, and hang it on a peg to dry overnight.
- Step 2: store the dry respirator in a sealed, clean container or bag away from sunlight, solvents, and high heat (keep below 30°C / 86°F).
- Step 3: keep cartridges in their original bags until use and label the container with the last cleaning date.
4) When to inspect and replace parts or the whole unit
Why it matters: damaged straps, valves, or facepieces break the seal or allow contaminants through.
– Step 1: inspect before each use: look for cracks, torn straps, warped nose bridge, or sticky/warped valves.
Example: I found a cracked valve on a rental half-mask after a week; I swapped the whole unit because the valve housing was deformed.
- Step 2: replace straps, valves, or facepieces if you find damage; replace the entire respirator if repairs can’t restore a reliable seal or if your face shape changes (for example, after losing 15+ pounds or having facial surgery).
- Step 3: keep spare parts and one full spare respirator on hand for emergencies.
Final practical checks you can do right now:
- Do a quick inhalation and exhalation seal check before every use.
- Log filter hours and swap cartridges when breathing gets noticeably harder.
- Inspect straps and valves each time and replace the unit if you find cracking or warping.
If you follow these steps, your respirator will actually protect you when you need it.
Pricing and Product Positioning Without Scaring Customers
If you’ve ever picked a mask and wondered if you overpaid or underprotected, this will clear it up.
I’ll help you match masks and respirators to the exact hobby task so you know why the choice matters. For example: when sanding basswood for a model airplane, a basic disposable N95 will block most dust; when spraying lacquer on a cabinet, a reusable half‑face respirator with organic vapor cartridges is the right call. You’ll see specific protection, cost, and maintenance so you can choose with confidence.
Why this matters: picking the right gear keeps you safe without wasting money. For a real‑world picture, imagine you’re repainting a small dresser in your garage—light sanding, one coat of primer, two coats of water‑based paint. The total hazardous exposure is low and intermittent, so a disposable N95 for $2–$5 per mask is usually enough for a few hours of work.
How I’ll present options, step by step:
- Identify the task and contaminants.
- Match the protection level (disposable mask vs. reusable respirator).
- Calculate cost per use.
- Show replacement schedule and warranty differences.
I’ll describe options plainly, from basic disposables for light dust to reusable respirators with replaceable cartridges for paints and solvents. For example, a pack of 10 disposable N95s costing $20 gives you $2 per mask; if each mask lasts three sanding sessions, that’s about $0.67 per session.
Why bundling matters: bundling lowers your effective cost and makes maintenance simple. If you plan to spray finish twice a year, buying a kit with a half‑face respirator ($50), two pair of cartridges ($25 each), and spare filters ($15) upfront spreads the cost and reduces surprises. Picture this: you buy the kit, replace cartridges every 40 hours of use, and you know exactly when to swap parts.
Steps to calculate value clearly:
- Note initial price.
- Note estimated hours of filter life (e.g., 40 hours for organic vapor cartridges).
- Estimate your annual hours on that task (e.g., 8 hours/year).
- Divide to get annual cost and cost per session.
I’ll outline tiered warranties so you can factor longevity into the price. A reusable respirator often has a one‑ to five‑year manufacturer warranty on the facepiece; disposables typically have no warranty. If a $60 reusable facepiece lasts five years and you use it 20 hours a year, the facepiece cost is $0.60 per hour before filters.
Example comparison to make choices obvious:
- Disposable N95: $2 per mask; good for light dust; no maintenance; no warranty.
- Half‑face reusable with particulate filters: $50 facepiece + $12 filters (replace every 40–80 hours); facepiece warranty 2 years.
- Half‑face reusable with organic vapor cartridges: $50 facepiece + $25 cartridges (replace every 40 hours) for solvent work; seal check each use.
Maintenance and real costs matter, not just sticker price. For instance, if you sand 4 hours per month, particulate filters changed every 60 hours cost about $12 / 60 = $0.20 per hour. That’s a concrete number you can use when comparing to disposables.
Practical buying tips you can use right away:
- Match the contaminant: dust = particulate filters or N95; sprays/solvents = cartridges rated for organic vapors.
- Do a quick fit check each time: put on the respirator, cover cartridges or filter, breathe in, and feel for suction.
- Track hours on a sticker inside the box to know when to replace cartridges.
One final example: restoring a mid‑century chair involves lots of stripping and solvent use for five weekends (about 30 hours). Buying a reusable respirator ($50) and two sets of organic vapor cartridges ($50 total) gives you reliable protection for that project at roughly $3.33 per hour for the whole setup, not counting future reuse.
You won’t be surprised by costs anymore. You’ll know which mask to buy, how long it lasts, and how much it actually costs per use.
Recommended Products

3M recommended for relief against nuisance levels of organic vapor and acid gases (concentrations not exceeding OSHA PEL or applicable government occupational exposure limits, whichever is lower)

LOW COST OF OWNERSHIP: Mask reusability eliminates the costs of repair and replacement, all respirator components can be handled without special tools for quick maintenance and minimal downtime

The 3M 60923 Organic Vapor/Acid Gas Cartridge/Filter is a P100 approved filter that provides protection against certain organic vapors, acid gases, and particulates.
Quick In‑Store Displays and Staff Training Ideas
Here’s what actually happens when you set up quick displays: customers scan for one clear match and move on if they don’t see it fast.
Why it matters: showing one simple match stops confused shoppers from leaving without protection. Example: a weekend DIYer sees a small table with a sanding mask right by the door and buys it before grabbing lumber.
1) Design the displays
Why it matters: clear visuals make choices instant. Example: put a 2-foot table near the entrance with a single mannequin head wearing a respirator next to sanding discs.
Steps:
- Pick one hobby per display (sanding, painting, solvent use).
- Use a 24″x36″ sign with a bold photo and a 3‑word headline (e.g., “Sanding = Dust Mask”).
- Show one recommended product only, priced and front-facing.
- Add a short line: protection level (e.g., “P95 – fine dust”), filter type (e.g., “P95 cartridge”), and one use tip (e.g., “Replace after 40 hrs”).
- Keep technical terms to one short sentence explaining them.
Takeaway: shoppers decide in under 8 seconds when they see a match.
2) Positioning and signage
Why it matters: position makes risk visible before they wander. Example: a window sticker showing paint cans and a respirator lets painters spot the risk from the sidewalk.
Steps:
- Place displays within 5 feet of entrances and near paint and tool aisles.
- Use window signs that mention the specific work (e.g., “For spray painting: use a P100 respirator”).
- Keep signs at eye level (about 4–5 feet high).
Takeaway: customers notice risks while they’re still heading in.
3) Labeling products
Why it matters: concise labels cut hesitation and returns. Example: a masked respirator on a peg with a 3-line tag sells faster than one with a paragraph of specs.
Steps:
- Create a 3-line tag: product name, one-line protection level, one-line use tip.
- Use simple language: “Use for: sanding drywall; Change filter after heavy use or 40 hours.”
- Include one short explainer for any technical term used.
Takeaway: clear tags reduce questions at checkout.
4) Staff training basics
Why it matters: quick, consistent answers build trust and avoid mistakes. Example: a cashier who demonstrates a proper strap fit sold two respirators during a busy Saturday.
Steps:
- Run four 15‑minute training sessions covering the three display topics.
- Teach one roleplay per session: customer asks “Which mask for this paint?” and staff answers, fits mask, and shows filter change.
- Give each staff member a one‑page checklist with FAQs and the display script.
Takeaway: 15 minutes a week keeps staff competent.
5) Practice and follow-up
Why it matters: drills keep skills sharp and errors low. Example: weekly 5‑minute drills caught a common mistake where staff recommended a dust mask for solvent work.
Steps:
- Schedule 5‑minute refresher drills once a week.
- Track competency with a simple scorecard (pass/fail on three tasks: match product to task, fit demo, filter-change demo).
- Keep quick reference cards at every counter for immediate answers.
Takeaway: short, regular drills fix small issues before they become big ones.
Keep each display focused on one clear match, train your team with short roleplays, and use simple tags and drills to keep advice consistent and accurate.
Recommended Products

Leading Manufacturer Of High-Quality Products

NIOSH APPROVED: For at least 95% filtration efficiency against certain non-oil based particles like dust

NIOSH APPROVED: For at least 95 percent filtration efficiency against certain non-oil based particles like dust.
Frequently Asked Questions
Are NIOSH Certifications Needed for Hobbyist-Grade Respirators?
No, NIOSH relevance varies; I’ll say certified respirators offer proven protection, but for many hobbyist tasks NIOSH certification isn’t legally required—don’t fall for certification myths; pick quality fit, suitable filters, and proper use instead.
Can Cartridges Protect Against Volatile Solvents in Model Painting?
Yes — I recommend organic vapors cartridges; I’ll warn you they can still have solvent breakthrough over time, so I replace filters per manufacturer guidance, limit exposure, and use proper fit and ventilation while painting models.
How Often Should Filters Be Logged or Tracked for Reuse?
“Measure twice, cut once.” I recommend logging filter service life after every session and updating usage logs weekly; I’ll replace filters when service life indicators hit limits or whenever you notice breathing resistance, odors, or visible contamination.
Do Hobby Respirators Interfere With Eyewear or Protective Goggles?
Yes — I’ve noticed hobby respirators can cause fogging issues with glasses, so I make fit adjustments like tightening the nose bridge, using anti‑fog spray, or choosing goggles that seal over the respirator to prevent leaks and fog.
Are PAPRS Practical for Occasional Heavy Sanding Sessions?
I’d say yes — for example, I used a PAPR during a six-hour cabinet sanding day and avoided fatigue; compared to disposable respirators, PAPRs beat long sanding duration with better comfort, reusable filters, and consistent airflow.