You’re trimming a board and the blade grab jolts your push stick out of your hand — now what went wrong? You ask yourself whether a guard, a better push stick, or just faster hands would have prevented the kickback. Most people assume stronger guards and stricter PPE are the full answer, overlooking setup errors and workflow shortcuts.
This piece shows concrete fixes you can apply today: riving knives, featherboards, feed fixtures, simple 3″ rules, maintenance checklists, and brief drills that make those fixes stick. Follow them and you’ll cut down setup mistakes, bypasses, and alignment hazards. It’s simpler than it sounds.
Key Takeaways
If you’ve ever reached for a push stick and still felt uneasy, this explains why.
Why it matters: guards and push sticks don’t stop risky human habits or bad setups, so you need other controls to keep your hands safe. For example, on a carpentry jobsite I visited, workers repeatedly removed a guard because the jig didn’t fit, and someone cut their thumb trying to steady a board.
- Focus workflows on fewer awkward moves. Redesign the table layout or material flow so you don’t have to twist or reach across the blade. Example: move your outfeed roller 12–18 inches farther back so you can stand square to the saw and push straight through.
- Use fixtures and workpiece controls to hold stock instead of relying on your hands. Install a riving knife, a featherboard clamped 6–8 inches from the blade, or a jig with a hold-down screw that applies 20–30 psi. This keeps the board from kicking or shifting.
- Keep machines aligned and maintained to prevent guard removal. Why it matters: a misaligned guard sticks, so operators take it off. Example: checklist step — every morning, check blade parallelism and guard travel; tighten loose guard pivots to 10–12 ft-lb torque.
- Standardize setups so repeatable steps remove guesswork. Why it matters: people take shortcuts when setups are inconsistent. Example setup steps:
- Measure and mark stock, clamp a stop block at 0.125 inch for repeat cuts.
- Set featherboard at 6 inches and test with a scrap piece.
- Engage guard, run a trial cut, then start production.
– Train with drills and clear rules to prevent shortcuts. Why it matters: training changes behavior more than passive devices. Example drill: have each operator demonstrate the “three-inch rule” by showing how they keep fingers at least three inches from the blade while feeding a workpiece; repeat monthly.
You won’t solve every hazard with more barriers, but these steps—layout changes, fixtures, maintenance checklists, standardized setups, and hands-on drills—reduce the situations that make people remove or bypass guards.
Why Guards and Push Sticks Aren’t Enough Today
If you’ve ever worked a busy shop, this is why guards and push sticks fall short.
Why it matters: guards and push sticks only stop direct contact; they don’t fix workflow, training, or machine setup problems that cause accidents. I once watched a cabinetmaker reach over a table saw because the outfeed area was cluttered; the guard did nothing when his sleeve snagged.
Guards and push sticks are basic — use them — but they don’t cover hidden risks. Guards stop contact and push sticks keep hands away, yet these tools leave gaps when your layout forces awkward movements or when people rush. For example, a small shop I visited kept raw stock in the narrow aisle beside a planer; workers repeatedly carried long boards across the shop instead of using the infeed area, creating pinch and trip hazards nobody solved with a push stick.
Why it matters: people take small risks when shortcuts save time, and that behavior adds up. Behavioral habits form fast: if skipping a step saves 30 seconds and nothing bad happens ten times, people will skip it eleven times. I saw a crew form a habit of turning off a safety interlock because it delayed loading; it became standard practice.
Fix the system with these concrete steps:
- Map flows: walk the full workflow and draw a floor path to scale (use tape on the floor if needed). Do this for every main task.
- Reconfigure so 90% of material movement is straight-line, under 10 meters per operation.
- Add physical changes: install a 1.2 m wide clear aisle and move storage racks so long boards don’t cross tool zones.
Why it matters: machines need correct setup and maintenance or guards won’t save you. Sensors, alignment, and calibration stop failures before they start. At a metal shop, a misaligned blade guard kept rubbing and was wedged; operators eventually removed it to maintain throughput.
How to make machines safer (do this now):
- Create a simple checklist for each machine with 6 items: guard present, sensor test, blade alignment, lubrication, emergency-stop test, and clean workspace.
- Put the checklist on a clipboard at the machine and require a signature at shift change.
- Schedule one monthly maintenance block of 2 hours per machine for calibration and repairs.
Why it matters: training and incentives shape behavior more than signs. If your rules are unclear or penalties are inconsistent, workers default to shortcuts. I watched a new hire follow steps correctly until supervisors praised speed over process, then he copied them.
Practical training steps:
- Teach the exact sequence for each task in a 15-minute demo with three repetitions by the trainee.
- Use one short quiz (5 questions) and a signed competency card before independent work.
- Reward adherence: give a small weekly bonus or recognition for zero procedural shortcuts per crew.
Why it matters: data catches patterns you won’t see anecdotally. One injury often follows smaller near-misses you ignored. In one plant, logging near-misses revealed the same machine caused 70% of stops; a single design tweak fixed most issues.
Collect and use data with these actions:
- Log every near-miss and stop in a simple form (date, machine, short cause).
- Review entries weekly and act on any recurring cause with a targeted change within seven days.
- Track repeat issues; if one cause appears three times in a month, schedule a design or procedural change.
Put tools, design, and human factors together. Make workflow changes, enforce simple checklists, train with clear steps, and watch your data; those moves close the gaps guards and push sticks leave.
How to Use Guards and Push Tools: Quick Practical Guide

Before you start, know this matters because a misaligned blade or wrong push tool will injure you in seconds.
Here’s how I set up so you avoid slipping or grab: 1) Inspect the saw. 2) Check guards. 3) pick the right push device. Example: on a 10-inch table saw cutting a 3/4-inch plywood rip, I set the fence, run my hand (power off) along the blade guard to feel for looseness, and choose a push block sized to the board width.
1) How do you check blade alignment?
Why this matters: a crooked blade will grab stock and throw your cut off in one pass.
Steps:
- Turn the power off and unplug the saw.
- Use a 12-inch combination square or a machinist’s square to check that the blade is square to the fence; measure at two points around the blade—top and bottom.
- Spin the blade by hand to confirm it runs true with no wobble.
- If alignment is off by more than 1/32 inch at the fence, loosen the trunnion bolts and realign per the saw manual.
Example: On my jobsite saw the blade was 1/16 inch out; correcting it removed the blade grab I felt when feeding a 2×8.
2) How do you inspect and use guards?
Why this matters: guards stop fingers and keep dust out of your lungs and eyes.
Steps:
- Verify the guard is firmly attached and not cracked; tug it gently.
- Make sure visibility is clear—remove paint or resin with a plastic scraper if it’s cloudy.
- Test the guard’s movement so it covers the blade immediately when you back out stock.
Example: I once cut a strip of melamine with a sticky guard; clearing the buildup let the guard lower smoothly and kept chips off my hands.
3) Which push tool should you pick and when?
Why this matters: the right push tool keeps your hands at least 4 inches from the blade.
Steps:
- For boards wider than 6 inches, use a push stick; for narrow or short pieces under 12 inches, use a push block with rubber grip.
- For long, narrow stock—like a 1×3 trim stick—use two push blocks spaced about 12–18 inches apart.
- Make sure the push tool contacts the work so you apply steady forward and slight downward pressure.
Example: Ripping a 2-inch-wide strip of oak, I used two push blocks and never had my hands come within 6 inches of the blade.
4) How should you position your body and feed the stock?
Why this matters: good posture prevents slips and lets you control feed rate.
Steps:
- Stand with your feet shoulder-width apart and one foot slightly forward so you can move smoothly.
- Keep your shoulders relaxed and hands above the line of cut; don’t lean over the blade.
- Feed the stock at a consistent rate—about 1 foot per second for hardwoods; slower for hard maple or thick cuts.
Example: While crosscutting a 3/4-inch oak board, feeding at roughly one foot per second avoided burning and kept the cut square.
5) What do you do if the stock binds or kicks?
Why this matters: stopping prevents worse damage and injury.
Steps:
- Stop feeding immediately and turn the saw off.
- Wait for the blade to stop, then unplug the machine before clearing or adjusting.
- Re-check fence alignment, blade tilt, and debris; make corrections before restarting.
Example: A glued-up panel started to pinch the blade; I shut down, unclamped the piece, and trimmed a burr before finishing the cut.
Final safety checklist before every cut:
- Power off and unplug for adjustments.
- Blade square and true within 1/32 inch.
- Guard moves freely and is clean.
- Use the correct push tool (push block for narrow stock).
- Hands positioned above the cut line and feeding at a steady pace.
You’re set. Use these checks every time and keep a spare push block in your toolbox.
Recommended Products

Assembly includes: rt-c27 27" cast iron table, rt-f27 27" fence, rt-psw power switch, and rt-st2 support legs

Blade guard dimensions 3 1/2” x 18 1/2”

Powder coated steel construction
Machine Aids That Complement Push Sticks: Riving Knives, Featherboards, SawStop
If you’ve ever stood at a table saw and felt the cut tug the board away from you, this is why.
Why it matters: a push stick alone won’t stop kickback, keep stock perfectly aligned, or prevent a blade from contacting your skin.
Example: last month I cut a 4-ft maple board and the grain pinched; the riving knife held the kerf open and I fed the board with a featherboard and push stick — the cut finished cleanly.
How to use a riving knife
Why it matters: it prevents the gap behind the blade that lets the cut close and throw the work toward you.
Example: when ripping a 3/4″ oak plank, I keep the riving knife within 1/8” of the blade at all heights so the kerf doesn’t pinch.
Steps:
- Set blade height so teeth just clear the top of the workpiece.
- Align the riving knife so its back is no more than 1/8″ from the blade edge and centered on the blade’s pitch.
- Use the riving knife for through-cuts and avoid removing it for convenience; only remove it if a specific cut (like a dado) requires it and then use extra clamps and a jig.
How to place and use a featherboard
Why it matters: a featherboard keeps the board pressed to the fence so the cut stays straight and the blade stays under control.
Example: ripping a long 8-ft MDF sheet, I clamp a featherboard 6–10″ in front of the blade to stop the panel from twisting.
Steps:
- Position the featherboard on the table so the feathers contact the workpiece about 6–10 inches ahead of the blade.
- Clamp or use a T-slot so the feathers apply steady lateral pressure without binding the feed.
- Feed the board with even pressure against the fence; keep your hands behind the featherboard and use a push stick on the tail end.
How SawStop technology helps
Why it matters: SawStop actively prevents severe cuts by stopping the blade within milliseconds if it senses skin contact.
Example: a coworker grazed the tip of his finger on a spinning blade during a test cut and the SawStop cartridge engaged, stopping the blade almost instantly and causing only a superficial scrape.
What to expect:
- The system senses electrical conductivity and trips an arrestor that stops the blade in about 5 milliseconds.
- After activation you’ll replace the brake cartridge and possibly the blade; keep a spare cartridge on hand if you rely on this feature.
Quick checklist to combine these aids safely
Why it matters: combining them addresses different risks so you’re not relying on a single line of defense.
Example: before each rip of dimensional lumber I check the riving knife gap, clamp a featherboard 8″ ahead, set blade height, then position my push stick.
Checklist:
- Riving knife within 1/8″ of the blade.
- Featherboard clamped 6–10″ in front of the blade, pushing work to the fence.
- Blade height set so teeth clear the work by about 1/8″–1/4″.
- Push stick ready for the last 6″–8″ of the cut.
- If you have SawStop, keep a spare cartridge and the manual for reset instructions.
One last practical tip: always keep your hands at least 6–8 inches from the blade and never reach over the blade; measure that distance with a push stick so you get used to it.
Recommended Products

Includes (1) riving knife

The table saw can be installed with maximum saw blade of 110mm, and the maximum cutting depth is 33mm.

Compatible ONLY with SawStop table saw models: Industrial Cabinet Saw, Professional Cabinet Saw, and Contractor Saw
Designing Push Tools for Shops: DIY vs. Commercial Materials and Fixity Standards
Before you choose push tools, know that they keep your hands away from blades and reduce kickback risk.
Think of push tools like purpose-built safety devices rather than generic accessories, and choose materials and mounting methods accordingly. If you use scrap hardwood or 3/4″ plywood, cut a sole at least 12″ long so you get steady contact and room for a hooked heel; that’s how I made a stick for my table saw that rides flat and doesn’t tip. Commercial injection-molded tools give consistent rubber grips and molded heels that seat the work every time; for example, a JointerMate-style plastic push block saved a coworker from losing control on long hardwoods. Test any tool for rigidity by pressing down with 50–80 lb of force and looking for flex; discard or reinforce anything that bends more than 1/8“. When you mount fences or add auxiliary blocks, document fixity by writing the torque and fastener type on the mounting tag so you can verify later.
Why this matters: a shifting block or loose fence can create a seam that causes kickback. Use these steps to secure attachments:
- Measure clearances between tool and blade or cutterhead — leave 1/16″–1/8″ clearance on table saws and 1/8″–1/4″ on jointers.
- Check fasteners: use grade-5 or higher bolts, torque to 80–100 in·lbs for 1/4″ bolts, 150–180 in·lbs for 5/16″ bolts.
- Add non-marring pads like neoprene or cork where metal meets wood; glue with contact cement and clamp for 30 minutes.
Because you or someone else will use the tool repeatedly, train users to inspect and maintain them. Do this once a week or after any heavy cut:
- Look for wear on soles and heels; replace pads at 1/8″ wear depth.
- Wiggle fixtures and re-torque fasteners to the recorded values.
- Replace cracked or splintered wood pieces immediately; glue and screw repairs are fine for temporary fixes.
If you make DIY push sticks, follow these steps to build one that works:
- Choose hardwood like oak or maple, at least 3/4″ thick.
- Cut a 12″–16″ long sole with a 1″ wide contact area.
- Add a hooked heel 1″–1.5″ deep to catch the stock.
- Sand to 120 grit and add a 1/4″ rubber pad glued on the sole.
Example: I built a 14″ stick from a leftover oak stair tread and used a 1″ neoprene strip glued with contact cement; it lasted two years of weekly use.
If you buy commercial tools, do this before first use:
- Check for molded flash or burrs that could catch wood.
- Confirm the heel seats squarely against stock over a 1″ length.
- Apply a layer of non-slip tape if the grip feels slick.
Example: a coworker bought an injection-molded push block that had a small mold line preventing full contact; trimming that line fixed the issue.
Match the tool to the machine and the cut. For narrow rip cuts under 2″ use a push stick with a tall handle and short sole; for long planing or jointer passes use a long push block or push shoe with a 12″+ sole. Use the specific numbers above when you measure and fasten things, and document torque and clearance so anyone using the shop can verify fixity quickly.
Recommended Products

Includes; 2 GR-200 GRR-Rippers & GRR-Ripper DVD

Bundle and save! This kit includes the Microjig GR-200 + Handle Bridge Kit + Deflector/Connector.
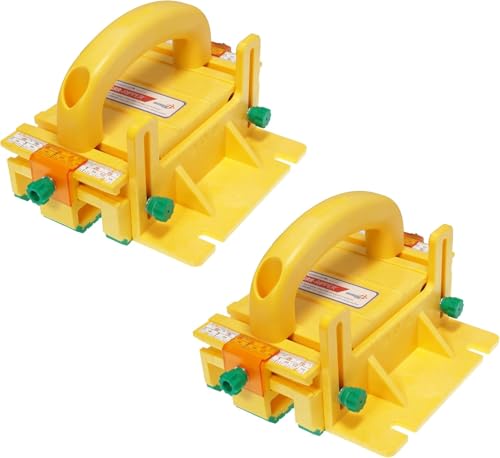
GRR-RIPER 3D PUSHBLOCK Features Include: 3-Directional Force to eliminate kickback and give you superior precision, control and safety over the workpiece
Human Factors: Workflows, Training, and the 3‑Inch Rule
Before you set up a table saw or jointer, know why human factors matter: they decide whether guards and push tools will actually stop injuries.
Organize your workflow so tasks follow predictable steps — this reduces rushed moves that bring your hands near blades. Example: when ripping a 4′ board, cut it into two 24″ pieces at the outfeed table first, then rip each piece at the saw; this keeps handling short and repeatable. Steps:
- Measure and mark.
- Crosscut to manageable length.
- Align and rip.
- Use push tools for the final inch.
Finish with a clean offcut on the floor.
If you’ve ever misjudged where your hand is, you’ll see why cognitive ergonomics matters: arranging tools and cues to match how you think lowers mistakes. Put the push stick on the left of your saw if you’re right-handed, tape a 3″ reference mark on the fence, and label the emergency stop in bright red. Real example: a cabinetmaker I worked with taped a 3″ template to the fence and cut near-zero finger incidents in a month.
Before you teach the 3‑inch rule, explain why it matters in plain terms: if stock comes within that distance your fingers are in the danger zone and reaction time isn’t enough. Teach the rule like this: hold your palm flat and measure three inches from the blade; when the stock crosses that line, stop and use a push stick or a hold‑down. Drill example: have trainees practice feeding a 2″×6″ until they stop at the 3″ line every time; repeat 20 times.
Train with focused, repeatable drills so habits form. Say why: habits beat memory under pressure. Steps:
- Demonstrate the correct feed and push‑stick use.
- Let each trainee do five supervised runs.
- Run a timed drill where accuracy matters more than speed.
- Use a checklist: PPE, blade guard down, push stick ready, 3″ mark visible.
Organize controls and visual cues to match how people remember things — that reduces slips. Tape a 3″ cardboard square near the fence, mount the push stick on a hook at elbow height, and keep commonly used switches under the same hand position. Example: a shop put a red square sticker exactly 3″ from their jointer knife and cut misfeeds by half.
Teach once, then reinforce quickly with short drills and a one‑page checklist so the behavior sticks. For example, a 5‑minute start‑of‑shift drill where everyone validates their 3″ marker and does three practice feeds will keep the rule active.
Ultimately, make procedures reliable and training focused: measure your success by fewer near‑miss reports and consistent checklist completion, not by how many tools you bought.
Prioritizing Safety Content: Procedures, PPE, Ergonomics, Training
If you’ve ever walked into a busy shop and felt unsure where to start, this will help.
Why this matters: clear priorities cut accidents and save time. Start with procedures that tell you exactly what to do and when to stop, because procedures remove guesswork and unsafe improvisation. Example: write a 6-step lockout/tagout procedure for the bench press—1) shut off power, 2) lock switch with keyed padlock, 3) verify zero energy with meter, 4) tag with date and name, 5) test controls, 6) sign-off before restarting. Steps:
- List sequence of actions with no more than 8 items.
- Include exact limits (e.g., torque ≤ 50 Nm, pressure ≤ 30 psi).
- Put “stop” criteria in bold at the end of each procedure.
A real-world image: a technician at a bench reading a laminated 6-step card before flipping the main switch.
Before you buy PPE, fit matters — here’s why: PPE that doesn’t fit creates hazards by making you adjust or remove it. Choose PPE using sizes and fit tests; that keeps you protected and mobile. Example: measure head circumference and try three helmet sizes, wear each for 15 minutes doing head turns and nods. Steps:
- Measure the body part (in cm or inches).
- Try at least two brands and three sizes.
- Record the size and model on the person’s file.
If a glove reduces finger dexterity by more than one second per task repetition, it’s the wrong glove.
Think of ergonomics like tuning tools to your body: you want neutral postures so you don’t wear out. Why this matters: poor ergonomics cause repetitive strain and more sick days. Rework tasks to reduce reach, force, and awkward angles — lower workbench heights by 10–15 cm for standing tasks, add adjustable supports, and swap heavy two-handed lifts for mechanical assists under 15 kg. Example: install a height-adjustable table and add a footrest so a machinist keeps wrists flat while using a handheld grinder. Steps:
- Measure task forces and repetition (count cycles per hour).
- Adjust height or add supports to keep joints within 10°–20° of neutral.
- Reassess after one week and record changes.
If you don’t train people the right way, procedures and PPE won’t stick. Why this matters: training turns rules into consistent habits you can measure. Build short, focused modules that combine a 10–15 minute demo, 20 minutes of hands-on practice, and a 5-question practical assessment. Example: a 45-minute session on safe pallet stacking where each person stacks three pallets to spec while an instructor times and checks angles. Steps:
- Create a 15-minute micro-lesson for each procedure.
- Follow with supervised practice (at least 3 repetitions).
- Test with a skills check and schedule a 6-month refresher.
Final practical tip: keep one visible checklist per workstation showing the procedure, approved PPE with sizes, the ergonomic adjustments used, and the last training date — update it whenever anything changes.
Recommended Products

1.Compliant to OSHA-compliant safe programs standards for lock Out Tag Out Stations and lockout tagout Devices

All unique lock with number 1-100 : 10,000 differet key cylinder, Ensures that the number of 100 locks is 1-100 and that the key of each lock is different.

Industrial Grade LOTO Station - 19 gauge powder-coated LOTO kit station with (12) firm ABS shackle holders, abrasion-resistant lockable cover with 2 keys, transparent acrylic window, keeps lock out tag out devices safe from loss and damage; each lockout station is keyed differently
Implementation Checklist: Next Steps for Shop Safety Upgrade
If you’ve ever walked into a shop and felt the gear looked halfway finished, this will fix that.
Why it matters: clear priorities stop tiny hazards from becoming accidents. Start by doing these concrete steps.
1) What policies should you review?
Why it matters: policies set the rules everyone follows.
Steps:
- Gather your local codes and the manufacturer’s safety sheets for each machine.
- Compare each machine to two items: required guards and required training.
- Note gaps in a spreadsheet with three columns: machine, missing item, deadline (example: Table saw — riving knife missing — 30 days).
Example: at my friend’s shop we found the band saw lacked a lower guard; noting it with a 14-day deadline got the part ordered that afternoon.
2) How do you inspect machines?
Why it matters: inspections show exactly what parts you need.
Steps:
- Walk each machine and list missing guards, riving knives, push devices, and lockout labels.
- Take a photo of the problem area and label it with the machine name and date.
- Estimate repair times: quick fix (≤2 hours), moderate (2–8 hours), major (>8 hours).
Example: I inspected a jointer and assigned “moderate” after seeing the outfeed guard needed rework; you’ll know when to bring in a tech.
3) How should you update signage?
Why it matters: good signs reduce mistakes during work.
Steps:
- Make a sign per station that shows safe distances, required PPE, and the emergency stop location.
- Use simple icons (gloves, eye protection, ear plugs) at 60 mm size and place signs at eye level, 1.6 m from the floor.
- Swap old signs within 7 days of the inspection.
Example: a drill press sign with a red arrow to the stop button cut down confusion during a busy class.
4) How to schedule hands-on training?
Why it matters: training proves people know how to stay safe.
Steps:
- Book 2-hour practical sessions for each machine type, limited to 6 people per session.
- Teach correct use of push blocks, push sticks, and safe homemade aids; show one bad example and one safe alternative.
- Test and document competency with a simple checklist and signatures.
Example: after a 90-minute table saw session, participants used a standardized push block and every one passed the cut-off test.
5) How to set audits, logs, and feedback?
Why it matters: routine checks keep improvements working.
Steps:
- Schedule monthly audits and record them in a maintenance log with date, person, and action taken.
- Create a quick feedback form (3 questions) for operators to report problems; check it weekly.
- Fix safety items based on severity within these targets: immediate (24 hours), short (7 days), long (30 days).
Example: weekly feedback caught a loose guard and the team fixed it within 24 hours.
6) Who takes responsibility and when do you review?
Why it matters: assigned owners make change happen.
Steps:
- Assign one owner per area (e.g., saw shop, metal bay) with backup contact.
- Set review meetings every 90 days and document progress in the same spreadsheet you used earlier.
- At each review, update deadlines and reassign tasks if needed.
Example: the saw shop owner met every 90 days and reduced outstanding safety items from 12 to 2 in six months.
Do this in the order above: review policies, inspect machines, update signage, train people, set audits, and assign owners. Start with the three highest-risk machines and complete their inspections within 14 days.
Recommended Products

Elevate your auto repair capabilities with WEIZE robust 2 post car lift, designed to handle vehicles up to 11,000 lbs. Crafted with heavy-duty steel construction, this lift ensures maximum strength and durability, enabling you to tackle even the most challenging automotive projects with confidence. With a lifting capacity of 11,000 lbs, this versatile lift accommodates a wide range of vehicles, from compact cars to full-size trucks. Its user-friendly design, featuring intuitive controls and safety mechanisms, ensures a smooth and secure lifting experience.

40 CAL ARC FLASH SUIT: Oberon’s 40 cal TCG Flash kit is worn by workers in industries that require electrical safety and covers a minimum of 40 calories where PPE is required. The kit is suitable for electricians and other electrical workers in industries such as utilities, manufacturing, construction, and maintenance. Kit includes hood, coat and bib suit.

Perfect Fit: Direct fit for 2019-2024 Ram 1500 (Exc 2019-2024 1500 Classic) (Exc Rebel, Warlock & TRX)
Frequently Asked Questions
How Do Insurance Policies View Homemade Safety Devices in Employee Shops?
About 60% of claims involve inadequate safeguards, so I’ll say insurers often view homemade liability skeptically; my insurer perception is they prefer certified, documented guards and may deny coverage or raise premiums for improvised devices in employee shops.
Can Push-Tool Designs Be Patented or Violate Existing IP?
Yes — I think push-tool designs can be patented, but patentability concerns and infringement risks matter: novel, nonobvious designs may qualify, yet you must search prior patents and avoid copying existing patented features to prevent liability.
What Are Recommended Inspection Intervals for Push Sticks and Guards?
Like a gardener checking each tool, I recommend an inspection schedule of weekly visual checks and monthly detailed inspections, with a replacement timeline of immediate for damage and routine replacement yearly or sooner if wear compromises safety.
How Do Liability Laws Change After a Recorded Safety Training Session?
Recorded trainings can strengthen training compliance evidence, but recorded admissions may increase liability if workers confess unsafe acts; I’d advise documenting sessions carefully, clarifying purpose, and consulting counsel to balance proof of compliance against admission risks.
Are There Grants or Rebates for Upgrading Shop Safety Equipment?
Yes — I’ve found grant programs and rebate incentives available; I’ll help you pursue public safety grants, utility rebates, and manufacturer incentives, guiding paperwork, eligibility checks, and local trade-association leads to maximize funding.