You just spent an hour trying to get a kitchen knife razor-sharp and still can’t hold a consistent angle; the edge chips after the first chop. The exact question nagging you is whether to DIY with a whetstone, buy a preset sharpener, or pay a pro so the blade lasts and stays safe.
Most people assume all sharpeners give the same angle control or that online reviews prove durability, which leads to wasted money and unsafe edges. This article shows step-by-step tests and simple setup checks that let you compare DIY, presets, and pro services side-by-side, with repeatable angle measurements, before/after photos, and real cost-per-year numbers. It’s easier than it looks.
Key Takeaways
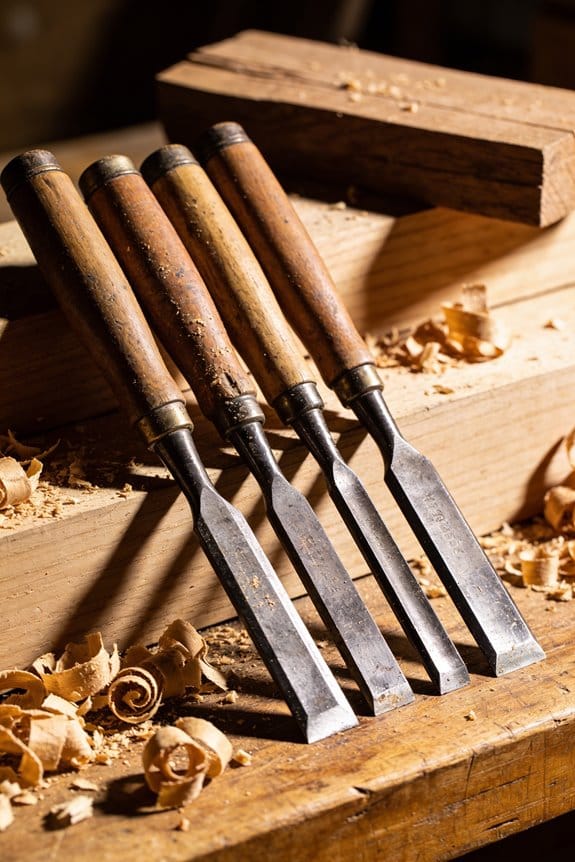
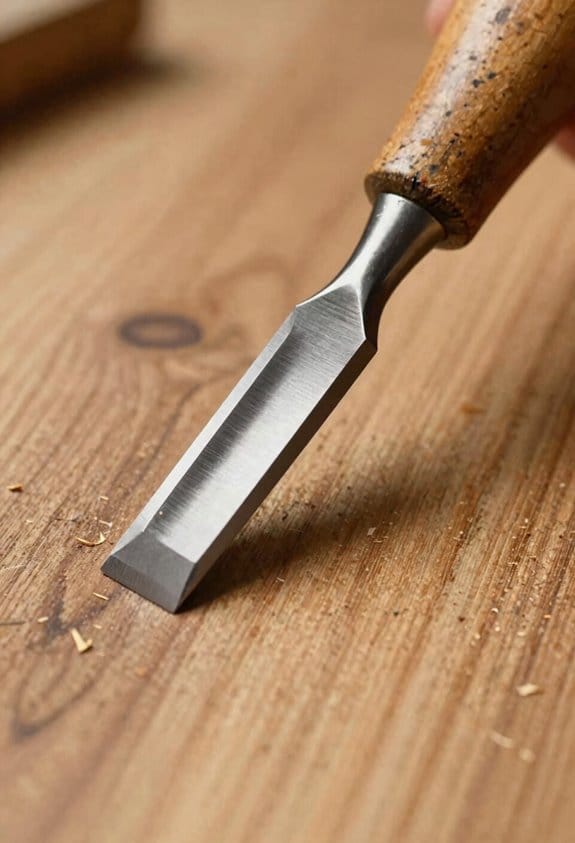
If you’ve ever bought a tool that didn’t work like the review said, this is why sharpening and setup content matters: it shows how to get reliable, repeatable results and stay safe. You want to know the correct edge angle, pressure, and sequence so you don’t cut yourself or ruin a blade; for example, learning to hold a chisel at 25° and make five controlled passes per side gives a predictable edge. Use a marker to check the bevel after each pass.
Before you buy or take a tool to a pro, you should know the real costs versus doing it yourself; explain the math so you can decide. Count the cost: a decent bench stone set ($40–$120), a leather strop ($15), and consumables like diamond paste ($10–$30) versus a one-time professional sharpening charge of $20–$50 per blade. If you sharpen a kitchen knife quarterly for a year, DIY pays off after 3–6 sharpenings.
The difference between a review that helps you and one that doesn’t comes down to measurable proof. Reviewers now compare angle, grit progression (e.g., 220 → 1,000 → 4,000), and repeatability, so you want before-and-after photos and a cut test: slice a tomato and photograph the peel-free result. Take a ruler shot of burr height or measure sharpness with a paper-slice test and record the number.
If you don’t follow safe speeds and techniques, you risk damage and voiding warranties; that’s why myth-busting matters. For example, most rotary tool users should run grinding wheels at the manufacturer’s RPM rating—running a 10,000 RPM wheel at 30,000 RPM will overheat and crack the wheel. Wear eye protection and a respirator when grinding metal.
Here’s what actually happens when you establish simple routines: your tools last longer and you spend less on replacements. Make these steps your routine:
- Inspect blades monthly for chips or rust.
- Hone every 2–4 uses with a 1,000–4,000 grit stone or ceramic rod.
- Resharpen when a paper-slice test fails (blade tears paper).
- Strop with leather and compound as the final step.
A real example: a friend who shaves wood for fine joinery sharpened and stropped his plane iron weekly and went two years without needing professional service.
If you’re new, practical how-tos and prep tips get you ready for service or DIY work and reduce surprises. Start by photographing the edge, measuring angle with an inexpensive digital angle finder, and labeling parts before disassembly; that makes reassembly obvious and reduces service time.
Why People Search Sharpening and Tool Reviews
If you’ve ever wondered whether to sharpen a blade yourself or pay a pro, this is why.
You want reliable results because a dull blade wastes time and can be dangerous, so knowing when to do it yourself matters. For example, I watched a neighbor ruin a chef’s knife by using a cheap electric sharpener; the edge rounded and the knife lost its bite within a week.
Why people search sharpening and tool reviews
You care about getting tools that work and last, and reviews help you pick the right gear rather than guess. For example, when you read side-by-side tests that show angle settings and abrasive grit, you can pick a sharpening system that keeps a chisel working for months instead of days.
Common maintenance myths and why they matter
Why this matters: false beliefs lead to broken tools or wasted cash. One homeowner thought a higher RPM bench grinder was always better and overheated their blade, which created microscopic cracks.
How to compare grinding versus honing — short, practical guide
Why this matters: choosing the wrong method shortens edge life and costs you. Steps:
- Identify the damage: straightening an edge needs honing; big chips need grinding.
- Pick grit: start with 220–400 grit for reshaping, move to 1000–3000 for finishing.
- Set angle: kitchen knives usually 15–20°, outdoor knives 20–25°.
Example: to fix a chisel with a nick, grind at 220 grit until the nick is gone, then hone at 1000–3000 grit for a polished edge.
How materials and angles affect edge life
Why this matters: material and angle determine how often you’ll re-sharpen. For example, a high-carbon steel knife at 15° will cut longer and need sharpening less often than the same knife at 25°, but that 15° edge chips more easily under hard use.
Purchase psychology: how you decide what to buy
Why this matters: warranties and reviews steer you toward tools that meet your use pattern. Look for:
- Verified reviews showing before/after photos.
- A warranty covering edge damage for at least 90 days.
Example: I chose a $120 guided sharpener because multiple reviewers posted test cuts and the maker offered a 6-month warranty, so I felt safer spending money.
When to get professional sharpening versus DIY
Why this matters: paying a pro can save money if you lack time or the right tools. Rules of thumb:
- If you use a tool daily, get a pro every 6–12 months.
- If you use a tool monthly, DIY touch-ups with a 1000–3000 stone are fine.
- If you need angle restoration or have chips, go pro.
Example: a woodworker whose plane irons see daily use pays $12 per iron twice a year and avoids downtime.
Simple home maintenance that extends tool life
Why this matters: a few habits cut sharpening frequency in half. Steps:
- Strop weekly with a leather strop loaded with 0.5–1 micron paste.
- Hone with a 1000-grit stone after heavy use.
- Clean and oil blades after wet work.
Example: after I began stropping a pocketknife weekly, I only needed a full sharpen every four months instead of every month.
Practical criteria to guide choices
Why this matters: specific criteria stop you guessing and spending wrong. Use frequency, material, and damage level:
- Frequent use + hard material = pro service every 6–12 months.
- Infrequent use + soft material = DIY with 1000–3000 grits.
- Visible nicks or angle loss = pro or 220–400 grit reshape, then finish.
If you follow these concrete steps and criteria, you’ll save money, avoid damaged tools, and keep your blades cutting the way you expect.
Recommended Products
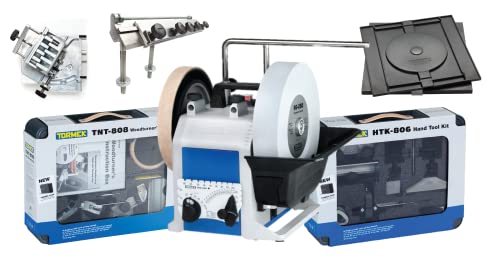
The ultimate sharpening system for your sharpening needs – this bundle combines the Tormek T-8 water-cooled sharpening system with the HTK-806 hand tool sharpening jig and accessory kit, and the TNT-808 Woodturner's Kit, and SVH-320 Planer Blade Attachment, DBS-22 Drill Bit Sharpener Attachment, and RB-180 Rotating Base
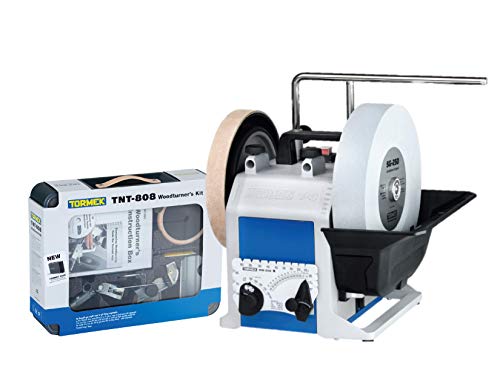
A complete sharpening system for wood turning tools – this bundle combines the Tormek T-8 water-cooled sharpening system with the TNT-808 Woodturner's Kit

Tormek T-8 Original packaged with the TC-800 Tormek Jig and Accessory Case
Quick Sharpening and Setup Steps

Before you sharpen, know why a quick routine saves you time and prevents bigger repairs later.
1) Inspect edge angles and alignment.
- Why this matters: consistent angles and correct alignment keep cuts clean and prevent dangerous kickback.
- Steps:
- Measure the bevel angle with a small angle gauge or digital protractor; common knife/plane bevels are 20°–25°, chisels often 25°–30°.
- Visually check alignment by sighting down the blade at eye level for gaps or twists.
– Example: on a bench plane, I like to confirm the iron is at 25° with a bevel gauge and that the chip breaker sits flush against the iron.
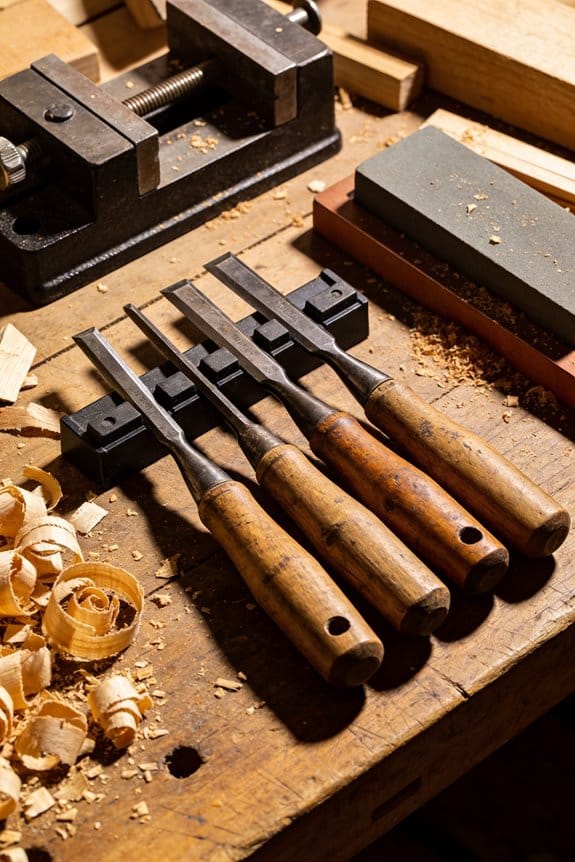
2) Clean and secure the tool before you touch the edge.
- Why this matters: debris or a loose blade ruins the angle and can hurt you.
- Steps:
- Wipe the blade and surrounding area with a rag and rubbing alcohol.
- Clamp the tool in a vise or use the tool’s locking mechanism so it doesn’t move while you sharpen.
– Example: when I sharpen a kitchen knife, I clamp a non-slip cutting board under the handle and wipe crumbs away so the blade sits steady.
3) Restore the bevel with a guided sharpener or honing rod.
- Why this matters: consistent contact restores the cutting surface quickly and repeats the same angle.
- Steps:
- If using a guided system, set it to your measured angle (e.g., 20°).
- If using a honing rod, hold the rod vertical and stroke the blade from heel to tip at the matching angle, five to ten strokes per side.
- Use a 1000–3000 grit stone for routine sharpening; move to 6000–8000 grit for a polished edge.
– Example: I run a 1000-grit stone with light oil for five passes per side, then finish with an 8000-grit strop for a razor edge.
4) Check and correct blade alignment.
- Why this matters: a sharp but misaligned blade still produces poor cuts and stresses mounts.
- Steps:
- Lay a straight edge or feeler shim along the blade to find gaps.
- Make small adjustments to centers, screws, or mounts—turn the mounting screw a quarter turn, then recheck—until the blade sits flush.
– Example: on a circular saw, a 0.5 mm gap at the flange meant I loosened the arbor slightly and nudged the blade until it sat true.
5) Test cut and record issues.
- Why this matters: a real cut proves the edge, and notes prevent repeat problems.
- Steps:
- Cut scrap material similar to what you use most, three passes at normal feed rate.
- Note any chipping, drift, or noise in a short log with date and what you adjusted.
– Example: I tested a chisel on a soft-pine scrap; the cut was smooth, so I wrote “chisel: 25° bevel, strop finish, no chatter” in my tool log.
Do each step in order and you’ll keep tools reliable between pro services.
Recommended Products

11-amp 1 HP motor creates cuts up to 6 inches deep and 13.5 inches wide

Product 1: Revolutionary, 3-Stage commercial sharpener with Edge Select lets you choose the edge to match the cutting task

Revolutionary, 3-Stage commercial sharpener with Edge Select lets you choose the edge to match the cutting task
When to Choose Professional Sharpening or Repair

Before you send a blade out for professional sharpening or repair, know why it matters: professionals can fix geometry and deep damage that home sharpening can’t, restoring performance and safety.
If you see chips, warping, or uneven bevels, bring the tool in. Take a clear photo of the edge and measure the blade thickness where the damage is; for example, a 3 mm kitchen knife with a 1 mm chip needs pro work. A real-world example: I once had a 240 mm chef’s knife with a 4 mm chip near the tip — the shop ground it back 15 mm of length and reprofiling at 20° per side restored the cutting feel.
Expect technicians to do three main checks when you hand over a blade:
- Inspect edge angle and bevel symmetry with calipers and magnification.
- Check substrate damage and warping with straightedges and flat lapping plates.
- Test heat treatment effects by assessing hardness (HRC) with a tester if available.
If they find structural problems they’ll recommend reprofiling, welding, or a full regrind based on the steel and use-case.
Why warranty matters: sending gear away can void coverage, or the maker may cover repairs. Take this practical step before booking: call the manufacturer, give the serial number, and ask whether third-party repairs are allowed or if they offer authorized service. For example, a $1,200 outdoor saw I owned required authorized service to keep its warranty; I saved two weeks by confirming that first.
Plan timing so you don’t miss a project deadline: busy seasons (spring for lawn tools, fall for hunting knives) can mean 2–6 week waits. If you need a tool in ten days, book a shop during their slower months or look for express service (expect a 20–50% surcharge).
If you decide to leave the blade with a pro, prepare it this way:
- Remove debris, oils, and accessories.
- Photograph the entire tool, front and back.
- Note how you use it (example: “I butcher deer twice a year; mainly bone and sinew”).
- Ask for a written estimate with projected time and the exact final edge angle you want.
One concrete expectation: a shop should return a knife with a measured bevel angle, a before-and-after photo, and a hardness reading if they adjusted heat treatment. If they can’t provide those, get a second quote.
Recommended Products

【Alloy Steel Blade】The cutter is made of special stainless steel, which is extremely sharp and durable. The cutter gap is adjustable, and the blade can be disassembled and polished after it becomes dull.

Order Requirement: Please note there is a minimum order requirement of $110 from this manufacturer

【WIDE APPLICATION】It is a machine used for grinding. Suitable for different kind of cutters, such as drill bit, lathe bit,end mill by using different accessories.(The package included accessories for end mill,lathe,drill bit)
Compare Sharpening Services, Tools, and Subscriptions
If you’ve ever tried to keep knives sharp and felt confused about your options, this will help.
Why it matters: a sharp blade is safer and lasts longer, so your choice affects cost and performance. Example: a home cook with eight chef’s knives noticed stalling dinner prep when edges dulled; switching methods cut prep time in half.
Start by listing your needs. Say you use knives weekly, own both Japanese and Western blades, and travel for work one week a month. Write these three specifics down:
- Frequency: daily, weekly, or monthly.
- Blade types: thin-beveled Japanese, thicker Western, serrated.
- Constraints: travel, storage space, and time per session.
Compare professional one-off services vs. mobile or subscription services. Why it matters: the provider you choose determines cost per visit and turnaround. Example: a freelance caterer paid $30 per knife for one-off sharpening and switched to a $60/month mobile subscription that included two visits and emergency pickup.
Steps to compare:
- Get prices: ask for per-knife rates and any minimums.
- Check turnaround: same-day, 48 hours, or a week.
- Ask about fees: pickup/drop-off, travel, or blade inspection charges.
- Verify guarantees: edge angle, repair limits, and warranty.
- Compare annual cost: multiply visits per year by per-visit price, then add extras.
Evaluate DIY tools if you want hands-on control. Why it matters: tools change how consistent your edges are and how much skill you need. Example: a weekend hobbyist bought a $60 whetstone kit and used it once monthly to keep a single santoku sharp for two years.
Steps to choose tools:
- Pick your type: whetstone ($40–$120), guided benchtop sharpener ($80–$300), or electric sharpener ($100–$400).
- Match to skill: whetstones need practice; guided systems need basic setup; electric units are fastest with little technique.
- Estimate time: 10–30 minutes per knife for stones, 2–5 minutes for benchtop or electric.
- Factor extra costs: lapping stones, honing oil, or replacement wheels.
Compare entry-level DIY vs. benchtop systems. Why it matters: cost and consistency affect long-term blade life. Example: a homeowner who sharpened with a $50 kit got uneven edges, then switched to a $200 guided system and reduced rework by half.
Quick bullets (three or more):
- Entry-level kits: $40–$120, teach fundamentals, good for occasional touch-ups.
- Benchtop systems: $80–$300, set and repeat angles, best if you sharpen monthly or more.
- Electric sharpeners: $100–$400, fastest, can remove more metal so use carefully.
Check professional skill and damage repair. Why it matters: severe chips or warped blades need pro work or risk ruin. Example: a hunter sent a chipped Bowie to a pro; the technician reprofiled the edge and charged $75, saving a $250 replacement.
Steps to vet pros:
- Ask for before/after photos of similar blades.
- Request references or online reviews.
- Confirm what damage they’ll repair and any extra charges.
If you’re considering subscriptions, confirm scope and replacement policies. Why it matters: subscriptions vary widely and affect long-term savings. Example: a small restaurant used a $120/month plan that included unlimited pickups and two full regrinds annually, which kept costs predictable.
Steps to evaluate subscriptions:
- List included services: pickups, visits, regrinds, and emergency repairs.
- Check replacement parts: do they replace handles or just edges?
- Calculate break-even: compare annual subscription cost to pay-per-visit costs.
Make the final choice balancing cost, convenience, and blade life. Why it matters: the right balance saves money and keeps your knives performing. Example: a busy parent chose a $15/month mobile service for quarterly visits plus one good guided sharpener for quick home touch-ups.
Steps to decide:
- Add up expected annual costs for each option.
- Match to your schedule and skill comfort.
- Choose the lowest-cost option that meets your travel and repair needs.
One last tip: keep a simple log. Note dates, provider or tool used, and edge angle saved per knife. This helps you spot patterns and choose better over time.
Recommended Products

Professional level sharpener with metal construction, Includes seven (10) abrasive grits: 220, 320, 400, 600, and 800 diamond, Fine Ceramic, 1200, 2000, & 3000 grit Resin Bonded Diamond Plates and a Premium Leather Strop.

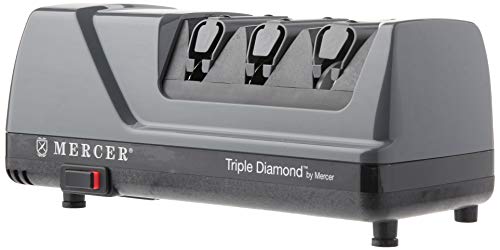
Commercial three-station knife sharpener with two grinding wheels and one stropping wheel that provides maximum sharpness and polish

Great for Gifting: The all-in-one sharpening kit for cooks who want sharp knives without the snobbery. The Tumbler Pro Starter Set delivers precision, polish, and pride of ownership—whether you’re slicing Wagyu or cutting lunch meat.
Sharpening Tech: Automation, Sensors, and Laser Guides

Before you buy a sharpening machine, you need to know why automation and sensing change results: they make edge angle and pressure repeatable so your knives last longer.
I’ll show you robotic honing in plain steps so you can tell if a system fits your needs. Robotic honing uses machine-controlled abrasives to follow precise angles, which cuts human error and makes every pass nearly identical. Example: a baker who sharpens 30 paring knives a week can set a 20° edge and expect each knife to hit that angle within ±0.5°. Steps:
- Set the target angle (for kitchen knives, 15°–25° is typical).
- Mount the blade in the jig so the heel lines up with the marker.
- Let the robot make X passes (start with 8–12 passes) and inspect the burr with a 10× loupe.
- Deburr by stropping once per side for 10–15 light strokes.
This process reduces variability and extends blade life by avoiding accidental over-grinding.
Sensors matter because they stop mistakes before they ruin an edge; you’ll see fewer ruined blades and more predictable wear rates. Sensors monitor pressure, vibration, and temperature and feed that data into the controller to prevent over-grinding. Real-world example: a landscaper using a belt sharpener fitted with a vibration sensor will get an alert when a loose belt causes chatter, so they can pause and fix it before the edge overheats. Look for systems that show pressure in psi or N (e.g., 2–6 lbf for delicate blades), vibration in g or mm/s, and temperature in °C so you can act on concrete numbers.
Laser calibration keeps setups consistent by giving you a visible reference for alignment rather than guessing by eye. A laser line projects a reference on the grind surface or measures the edge geometry to within 0.1–0.2 mm, so your set angle doesn’t drift between sessions. Example: a jeweler aligning a small shear will use the laser to center the cutting edge under the wheel, saving 5–10 minutes per setup. When you shop, test the laser by running two setups 10 minutes apart and measuring angle drift with a cheap digital protractor.
For buyers, focus on three practical things so you don’t pay for gimmicks:
- Clear readouts — the screen should show numbers (angle in degrees, pressure in psi, temp in °C) and let you log them.
- Reliable laser routines — look for repeatability specs like ±0.1° or ±0.2 mm and ask to see a demo cut.
- Serviceable parts — check that consumables (belts, wheels, sensors) are user-replaceable and priced reasonably.
A machine with solid specs but replaceable parts you can swap in 10–15 minutes will save you money over flashy, sealed units.
Quick checklist you can use in-store or on a demo:
- Ask for angle repeatability (target ± tolerance).
- Verify sensor units and thresholds (psi, °C, g).
- Run two calibration checks and measure drift.
- Confirm parts availability and turn-around for service.
If you follow those steps, you’ll pick a system that gives consistent edges without surprises.
Recommended Products
PROFESSIONAL KNIFE SHARPENING SYSTEM: A professional-level knife sharpener with metal construction that can be used for all knives at angles as low as 15 degrees and can even be used on small pen knives.
QUALITY CONSTRUCTION: Contains 100% diamond abrasives and ultra-fine stropping stage for an astonishingly sharp edge in seconds

Simple one-touch pre-programmed controls guide you through 3 sharpening stages without the guesswork
Why Cost, Downtime, and Safety Drive Sharpening Demand
If you’ve ever had a tool fail halfway through a job, this is why.
Why it matters: keeping blades sharp saves you money compared with frequent replacements. For example, a small woodworking shop that replaces a $120 saw blade every three months could instead sharpen it twice a year for about $30 each time and get the same life plus better cuts. Sharpening preserves tolerances, extends blade life, and cuts down on landfill waste.
How to compare costs:
- Add up replacement cost, shipping, and disposal fees.
- Add sharpening cost and shipping for the same interval.
- Compare labor lost to downtime (see next section).
Example: $120 blade replaced quarterly = $480/year. Two sharpenings at $30 each = $60/year, plus one replacement every 2–3 years.
Why it matters: downtime kills productivity and increases hidden costs. A sharp blade cuts faster, reduces feed force, and lowers machine stress so you finish jobs on schedule. In a print shop, a dull trim blade can slow a run by 30%, creating backlogs and rush fees.
Practical steps to reduce downtime:
- Track runtime hours for each blade with a simple log or sticker.
- Schedule sharpening when a blade hits a set hour threshold (e.g., 40–80 hours for common steels).
- Keep one spare blade ready for quick swap.
Example: label blades with the install date and hours, swap in a spare when one reaches your hour limit.
Why it matters: sharp edges are safer because they require less force and are less likely to slip. A dull plane or chisel needs extra pressure, which increases the chance of a hand slipping into the cut. I once saw a hobbyist with a dull chisel need two hands and still slip; he needed stitches.
How to improve safety:
- Inspect edge condition before each use: look for nicks, roll-over, or shiny facets.
- Replace or sharpen if you feel excessive resistance during a test cut.
- Use a push stick, guards, and PPE regardless of sharpness.
Example: give a 2×4 a test shave across a corner—if it tears instead of shaving, sharpen.
Why it matters: some steels and geometries are hard to sharpen and need a pro. If your blade is high-alloy or carbide-tipped, DIY sharpening can ruin the edge quickly. A local pro will hold angles and tolerances better.
How to decide pro vs DIY:
- If the edge is carbide or you need tolerance under 0.1 mm, go pro.
- If you can maintain a 15–25° bevel and the steel is basic high-carbon, DIY is fine.
- Factor in shipping time: pro service often takes 3–7 business days.
Example: a chef’s knife with a micro-bevel should go to a pro if you want mirror polish and long edge life.
Why it matters: choosing the right tools and automation reduces cost and risk over time. A quality sharpener or a simple jigs-and-guides setup costs more up front but cuts labor and error later. A $300 benchtop sharpener can replace repeated shop sharpening trips.
Steps to choose equipment:
- List your blade types and expected weekly hours.
- Match a sharpener that handles those materials and volumes.
- Check vendor specs for angle range, abrasive type, and duty cycle.
Example: for 10–20 knives per week, pick a 1,200–2,400 RPM bench grinder with diamond wheels and adjustable guides.
Quick checklist to balance cost, time, and risk:
- Track hours and edge condition. Mark blades at installation.
- Use a spare for fast swaps. Keep a schedule: sharpen at 40–80 hours for common steels.
- Send complex steels to pros. Expect 3–7 day turnaround.
- Invest in a sharpener when your weekly volume justifies the cost.
Follow those steps and you’ll cut costs, avoid late jobs, and reduce accidents.
Frequently Asked Questions
How Do Sharpening Services Handle Proprietary Blade Geometries?
I’ll tell you—sharpeners treat proprietary profiles like sacred maps: they reverse-engineer geometry, test material compatibility, create custom jigs and programmed passes, and document settings so your unique blades get precise, repeatable service every time.
Can Sharpening Affect Warranty Coverage on High-End Tools?
Yes — I’ve seen sharpening affect warranty coverage: unauthorized modifications can void warranties. I’ll check warranty implications first and guarantee manufacturer alignment, using approved services or documented procedures to protect coverage and avoid disputes.
What Environmental Impacts Do Sharpening Processes Have?
A stitch in time saves nine: I’ll tell you—sharpening creates abrasive runoff and waste, uses significant energy consumption for machines and drying, can release particles and oils, so I recommend containment, filtration, and efficient equipment.
How Do Sharpeners Measure and Document Blade Wear Over Time?
I track blade wear by periodic measurements: edge profiling with microscopes or scanners, hardness checks, and microchipping analysis via high‑res imaging; I log dimensions, edge radius, and chip locations in calibrated reports for trend charts.
Are There Insurance or Liability Considerations for Mobile Sharpening Services?
Yes — with the U.S. market hitting $135.9M by 2030, I recommend business insurance and liability waivers to cover damage or injury risks; I’d also advise certificates, proper training, and clear service contracts.