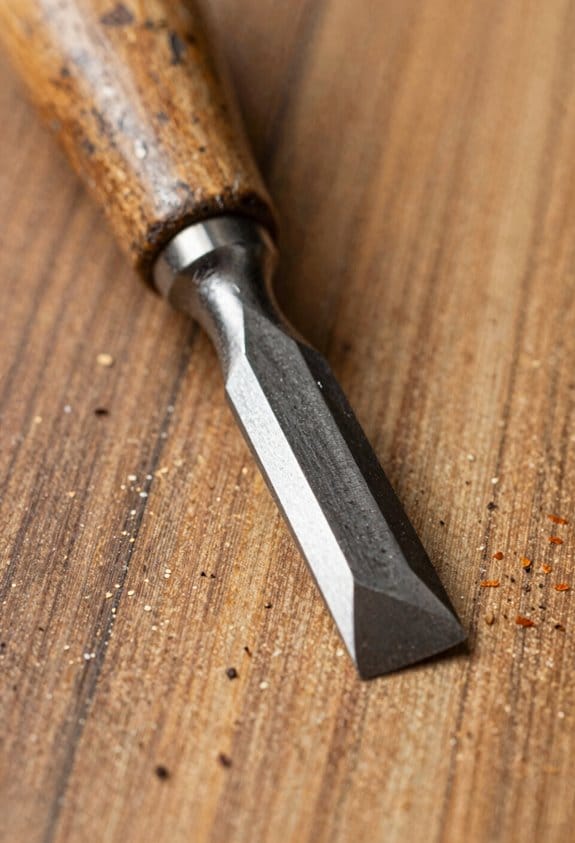
You’ve just sharpened a chisel, pushed it into a maple board, and found it either tears the grain or chips on a knot — so which bevel angle did you get wrong?
Or you’ve set a consistent grind and still wonder why some woods need almost no effort while others demand brutal push. Most woodworkers assume one “best” angle fits every timber and that sharper always means better.
This short piece will show which primary and micro‑bevel ranges work for soft, temperate hardwoods, figured or knotty woods, and dense or reclaimed timber, and how each choice affects cutting effort, chip resistance, and edge life.
You’ll learn exact angle ranges to try and how to match stones and stropping. It’s easier than it sounds.
Key Takeaways
If you’ve ever pushed a dull chisel and watched it tear the wood, this is why.
Lower bevel angles (15°–20° per side) matter because they slice with very little force, giving you razor-sharp cuts that leave smooth surfaces; use them on soft, straight-grained woods only. Example: when paring a pine door stile for a hinge, set 20° per side and take long, continuous shavings; the blade will slice cleanly but will chip quickly on maple or figured oak. Tip: keep a strop nearby and touch up after every 10–15 minutes of heavy use.
Higher bevel angles (25°–35° per side) matter because they make the edge last and resist chipping when you hit tough grain or knots. Example: when cleaning up a cherry mortise with interlocked grain, use 30° per side so the edge doesn’t roll; you’ll push harder, but the edge stays intact for longer. If you need extra toughness for hammering, raise to 35° per side.
Why these ranges? Because they balance sharpness and strength so your chisel performs predictably across woods. Example: on cedar trim work, a 22° primary bevel gives you clean, thin shavings and less tearout than a 30° bevel.
How to set practical bevels (steps):
- Decide the wood: soft (pine, cedar), medium (oak, walnut), or hard/interlocked (hickory, elm).
- For soft to medium woods: grind a primary bevel of 20°–25° per side.
- For everyday hardwood use: grind 30° per side; for dense or interlocked grain, grind 35°.
- If you’ll use a mallet, add a 1°–2° back bevel to protect the primary edge.
- Finish with a micro‑bevel of 1°–3° to make touch-ups fast and keep push effort lower.
Add a micro‑bevel because it keeps the main bevel intact while making sharpening quicker. Example: after regrinding a 30° primary on a beech chisel, put a 2° micro‑bevel on at the stones; you’ll restore a working edge in a minute or two instead of redoing the whole primary bevel.
One important detail: measure angles with a small bevel gauge or make a paper template; guessing leads to inconsistent edges.
Best Bevel Angles for Chisels: Quick Recommendations
Before you set a bevel, know why it matters: the angle changes how easily your chisel cuts and how often you’ll sharpen it. Think of planing a soft pine door panel on a weekend; a lower angle makes smooth passes but you’ll hone more.
I recommend 25 degrees as a baseline because it balances sharpness and durability for most tasks, and makes angle testing straightforward. For example, when paring a tenon shoulder on maple, a 25° bevel slices cleanly without chipping when you stop at the line.
Why you might change that baseline: softer woods need a lower angle and hardwoods need a higher one. If you work on a pine molding, drop to about 20–22° so the chisel cuts with less effort; expect to resharpen after a few hours of work. For oak or hickory, set the bevel to 30–35° so the edge resists rolling and chipping; you’ll feel more resistance but the edge will last much longer.
How to handle really difficult grain: it matters because a stronger edge survives tear-out. Use a small back bevel to create an effective angle around 50° for cross-grain chopping or when the timber has wild grain. For instance, when chopping dovetails out of figured walnut, add a 5–10° micro-bevel to reach that effective angle and you’ll avoid chipping.
When you test an angle, pay attention to two things: how the chisel slices thin shavings and how long the edge holds before you must rehone. A quick test you can do: pare a 0.5 mm shaving from a scrap, then do twenty more cuts and see if the shave lifts cleanly or tears.
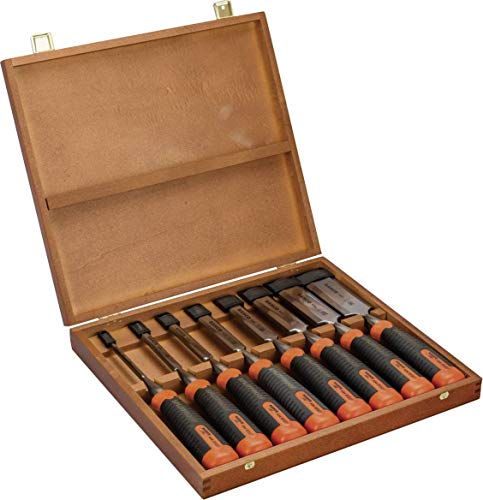
Recommended Products
Polished blade for increased rust resistance
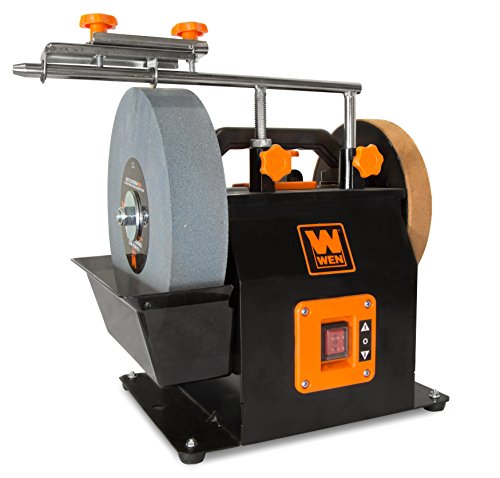
Features a 10-inch 220 grit sharpening stone and an 8-inch leather-stropping wheel

COMPLETE CHISEL SHARPENING SYSTEM: Full sharpening kit includes five diamond stones, deburring plate, leather strop and fitted storage case.
How Bevel Angle Affects Cutting Effort and Edge Geometry

Here’s what actually happens when you change the bevel angle on a cutting tool: the angle controls how much force you need and how the edge holds up.
Why this matters: the bevel angle determines whether your cuts are easy or whether you spend extra time sharpening.
- At 15° per side (30° inclusive) you’ll feel the blade slice with minimal push and less resistance, which is why a 15° chisel is common for fine paring. Example: when trimming a thin maple strip for a picture frame, a 15° bevel lets you pare paper-thin shavings with light pressure. That thin edge is very sharp but will dull or chip faster, especially on figured or hard oak.
- At 20° per side (40° inclusive) you balance cutting effort and durability; it’s a good compromise for general bench work. Example: a 20° plane iron will cut pine and birch cleanly for furniture parts and hold up through several shop sessions before you need to hone.
- At 25°+ per side (50° inclusive and above) you’ll push harder because the wedge is blunter, but the edge resists nicks and needs less frequent attention. Example: a 25–30° chisel used on reclaimed hardwood resists chipping when you hit a hidden nail or knot.
How to choose an angle for your work:
- Identify the wood and task (softwood paring vs. hardwood chopping).
- Pick a base angle: 15° per side for very fine paring, 20° for general use, 25–30° for heavy-duty or unpredictable materials.
- Add a micro-bevel of 1–3° on the very tip to tune cutting feel without changing the main grind. Use a honing guide and a 1–3° micro-bevel at the end. Simple.
Practical sharpening steps:
- Lay in the primary bevel at your chosen angle on a coarse stone or grinder.
- Flatten and polish the back of the blade on a flat stone.
- Hone a micro-bevel of 1–3° on a finer stone until you get a mirror or slight burr.
- Strop or touch up before each session.
Why micro-bevels help: they let you keep a stronger main grind for durability while giving you a fresh, sharp cutting face that reduces push effort by a measurable amount (about 10–30% less force compared with no micro-bevel on the same main angle). Example: switching a plane iron from only a 25° primary to 25° plus 1° micro-bevel noticeably smooths end-grain cuts on walnut.
Quick reference for common jobs:
- Trimming veneers or paring end grain: 15° per side + 1° micro-bevel.
- General furniture work: 20° per side + 1–2° micro-bevel.
- Working reclaimed or hard, knotty woods: 25–30° per side + 2–3° micro-bevel.
One final practical tip: when you find yourself re-honing every few boards, raise the primary angle by 5° rather than making the steel harder; that small change often doubles edge life without drastically increasing cutting effort.
Best Bevel Angles for Soft Woods (Pine) and Why

If you’ve ever tried to pare a piece of pine and ended up tearing the surface, this is why.
For soft woods like pine, you want a lower bevel angle because a shallower edge slices through the loose, springy grain with less effort and gives cleaner paring cuts without crushing the fibers. Use a primary bevel of 20–25 degrees for pine; that balance gives a sharp edge that still holds up for a reasonable time. Example: when trimming a door stop from a 1″ pine board, a 22° primary bevel will let you pare thin strips off cleanly without mushy edges.
Before you sharpen, understand why the micro‑bevel helps: it makes maintenance faster. Add a micro‑bevel of 1–2 degrees (so your final angle is 21–24°) and you’ll only need a few seconds on a stone or strop to refresh the edge. Visual example: after a weekend of easing pine trim, a quick 10–20 strokes on a micro‑bevel restores slicing performance.
Why the low angle matters for end grain: end grain fibers compress and tear easily, so a low angle slices them instead of crushing them, giving cleaner cuts. When cutting the end of a pine shelf tenon, use very light passes and a sharp 20–22° edge to avoid fuzzy ends.
Practical sharpening steps:
- Set your primary bevel to 20–25° on a bench plane or chisel.
- Hone the primary bevel until you have a uniform flat.
- Add a 1–2° micro‑bevel by raising the tool slightly and stropping or using a fine stone.
- Test on scrap pine with light strokes; you want long, continuous shavings.
Do this and you’ll get cleaner cuts and easier maintenance.
Expect to hone more often than with hardwoods, but you’ll get a better finish on pine.
Bevel Angles for Hardwoods and Heavy‑Duty Chopping

If you’ve ever struck a knife into a hardwood chopping block, this is why.
Why it matters: hardwoods and heavy chopping quickly wreck a thin edge, turning your favorite blade into a chipped mess.
I recommend these specific bevels and steps so your edge survives and still cuts well:
- Set the primary bevel to 30–35 degrees per side for hardwood work; for everyday chopping you can use 30°, and for very dense or interlocked grain push toward 35°.
- If you expect mallet chopping or levering, add a tiny back bevel of 1–2 degrees to the primary bevel.
- Keep the primary bevel flat and polished to a 1,000–3,000 grit finish so the higher angle still slices cleanly.
Example: when splitting dense oak baton pieces for joints, I use 35° primary and a 1° back bevel, and the edge takes dozens of strikes before any roll appears.
Why this helps: the extra metal behind the edge resists chipping and rolling during impacts.
How to do it, step by step:
- Clamp the blade or secure it in a vise with the edge exposed.
- Use a flat sharpening system or stones that let you set a repeatable angle (guided sharpener, jig, or marked bench stones).
- Establish a 30°–35° primary bevel on both sides with sweeping passes until you form a consistent burr; count 10–20 strokes per side on coarse stone depending on steel hardness.
- If you need the back bevel, raise the angle 1–2 degrees and make 6–12 light passes on each side to leave a thin micro-bevel.
- Progressively polish: finish on 1,000–3,000 grit, then strop with a compound for a mirror on the bevel face.
Example: sharpening a heavy cleaver for butcher work, I set a 32° primary and then strop for 50–100 strokes per side; the blade takes heavy bone contact without chipping.
Tips and tradeoffs: a 30–35° bevel lasts longer but needs more push when cutting dense wood; it’s not ideal for fine slicing.
Example: a 30° chisel will pare through maple with better edge life, but you’ll feel the extra resistance compared with a 20° chisel.
Keep these quick reminders in mind:
- Use 30° for most hardwood tasks, 35° for extreme abuse.
- Add 1–2° back bevel only when you expect levering or mallet blows.
- Polish the bevel to 1,000–3,000 grit and strop for the best real-world durability.
If you want, tell me the tool and wood you use and I’ll recommend an exact angle and grit progression.
Recommended Products

PRECISION MORTISES FOR FURNITURE & CABINETS - Cut tight, repeatable mortises for chairs, tables, doors, and frame-and-panel projects. The Mortising Jig turns your plunge router into a portable benchtop mortiser without the cost of a dedicated machine.

Ergonomic Hardwood Maple Handle: 18" Maple / Tool Bar: 1/2" x 8.5" / Overall length 24.5" / Max Reach: 4". Comes Mounted with a Ci0 Carbide Cutter

CLEVER AND UNIQUE LOCK - The Sliding T-Bevel Gauge features a locking knob that fits naturally between your thumb and finger and provides positive feedback for tension adjustment. Internally, a wedge multiplies your effort, exerting firm gripping pressure on the blade with only moderate finger pressure.
Sharpening Steps, Micro‑Bevels, and Jigs to Match the Wood Type
Before you sharpen, know why the sequence and small angle changes matter: they determine how long your edge will hold and how it will cut.
1) Choose stones for the wood you use.
- Why this matters: coarser stones remove metal faster on a hard edge so you can reprofile quickly.
- Example: when I reshaped a chisel for oak, I used a 220-grit India stone to remove the nick, then a 1,000-grit water stone to refine the bevel.
- Steps:
- Use 220–400 grit for reprofiling on hardwoods (oak, maple).
- Use 600–1,000 grit for routine sharpening on mixed woods.
- Use 3,000–8,000 grit for polishing edges on softwoods (pine, cedar).
I establish a flat primary bevel and then add a small micro‑bevel because that combo balances durability and slicing.
2) Set primary and micro‑bevel angles.
- Why this matters: your angle choice changes cutting performance and edge life.
- Example: for a bench plane used on walnut, I set the primary at 25° and added a 1.5° micro‑bevel to 26.5°, which kept the blade slicing without rolling on the end grain.
- Steps:
- Set primary bevel: 20°–25° for plane irons and chisels used on soft to medium woods; 25°–30° for hardwood work.
- Add micro‑bevel: 1°–2° for hardwoods, 0.5°–1° for softwoods.
- Record angles for each tool and wood type so you can repeat them.
You should use a jig when you need repeatable angles and fast setup.
3) Use jigs for consistency.
- Why this matters: a jig gives the same angle every time, so you stop wasting time guessing.
- Example: I clamped a chisel in an inexpensive honing guide when tuning a set of dovetail chisels; it let me put the same 30° primary and 1° micro‑bevel on five tools in under 20 minutes.
- Steps:
- Set the jig to the desired primary angle and hone the main bevel.
- Reset the jig (or tilt the blade slightly) to add the micro‑bevel.
- Check with a small angle gauge or digital protractor.
Finish by stropping to remove the burr and align the apex because this extends time between sharpenings.
4) Strop and test the edge.
- Why this matters: stropping cleans the edge and brings it to a hair‑splitting apex.
- Example: after sharpening a carving knife for basswood, I finished with 20 passes on leather charged with green compound and immediately saw smoother cuts.
- Steps:
- Use leather or a cloth strop charged with abrasive paste.
- Make 10–30 light strokes away from the edge on each side, maintaining the micro‑bevel angle.
- Test on scrap wood and a thumbnail for bite; adjust if the edge feels dull.
A quick checklist you can use:
- Primary angle recorded.
- Micro‑bevel set (0.5°–2° depending on wood).
- Stone grits selected (start coarse for reprofiling, finish fine for polishing).
- Jig used for repeatability when needed.
- Strop used to remove burrs and align the apex.
Frequently Asked Questions
Can Bevel Angle Affect the Lifespan of My Chisel Steel?
Yes — I think bevel angle influences steel fatigue and edge retention: lower angles cut easily but need frequent honing, raising fatigue cycles; higher angles trade ease for durability, reducing fatigue-related failures and improving sustained edge retention under tougher work.
Should I Change Angles for Carving Versus Joinery?
Yes — I’d use lower angles for carving in softer woods for easy slicing, and higher angles for joinery in harder woods to resist chipping; I’ll add micro‑bevels as needed for control and quicker resharpening.
Do Grain Orientation and Wood Moisture Change Optimal Angle?
Like a compass, yes — I adjust bevels: with grain direction I lower the angle for slicing with the grain, raise it against grain; higher moisture content softens wood so I usually use a slightly lower angle.
Can Back Bevels Damage Hollow-Ground Chisels?
No — I don’t think back bevels’ll damage hollow-ground chisels if done carefully; edge stability bevel backing can help, but avoid excessive hollow lathing pressure and keep minimal back-bevel thickness to preserve hollow geometry and cutting performance.
How Do Powered Sharpeners Impact Recommended Bevel Angles?
I think powered sharpeners speed angle setup using machine presets, but you’ve got to watch heat buildup—so I’d use lower RPMs, light passes, and finish by hand to avoid over-tempering and preserve recommended bevel angles.