You’re halfway through smoothing a drawer front when the chisel snags and lifts a long tear instead of slicing cleanly.
You pause, trying to judge whether you’re pressing too hard, angling the tool wrong, or simply blaming the wood. Most woodworkers assume more force or a different grip will fix it, when the real issue is edge sharpness and bevel geometry.
This short piece will show you how a truly sharp chisel changes every stroke, how to get a 15°–25° bevel with a felt burr, and how to maintain that edge with stropping and beaters so you pare reliably at 0.5–1.0 mm per pass.
You’ll end up with less wrist fatigue and nearly tear‑out‑free work. It’s easier than it looks.
Key Takeaways
If you’ve ever worked a dull chisel, this is why.
Why it matters in one sentence: a sharp chisel saves effort and prevents mistakes. Example: when you’re trimming a dovetail to fit, a sharp chisel lets you pare tiny amounts without crushing the tail. A sharp chisel cuts with far less force, so your wrist won’t tire after an hour of paring. Use a light, steady push of 5–10 N instead of pushing hard; you’ll feel the edge bite cleanly.
Why it matters in one sentence: clean cuts mean better surfaces and fewer repairs. Example: when removing waste from a mortise cheek, a keen edge gives a flat, glassy surface that needs no sanding. A keen edge severs fibers cleanly, which reduces tear-out along the grain. Aim for shavings 0.2–0.5 mm thick when paring across grain to see the smooth finish immediately.
Think of feel like your workshop’s sixth sense.
Why it matters in one sentence: fingertip feedback helps you follow the grain and avoid mistakes. Example: when you pare end grain on a box joint, subtle resistance changes tell you when you’re about to break through. Run your thumb along the tang and note small vibrations; they indicate how the edge is engaging the wood. That tactile clue helps you adjust angle and pressure before a tear-out happens.
Before you start paring, you need to know how to get fine shavings.
Why it matters in one sentence: thin, controlled strokes create consistent finishes without sanding. Example: when you want a satin finish on a drawer front, use paring strokes that remove 0.2–0.5 mm per pass to maintain control. Steps: 1) Position the chisel bevel-up for paring. 2) Set a 10–15° bevel angle against the work. 3) Take controlled strokes, each shaving about 0.2–0.5 mm thick. Small, repeated passes beat one deep cut.
It sounds obvious, but maintenance beats long regrinds.
Why it matters in one sentence: quick stropping keeps geometry and keeps you working. Example: after a session of chopping ten mortises, a 30–60 second strop restores the edge so you can continue without a full regrind. Strop on leather with fine abrasive for 30–60 seconds, then test on a piece of scrap by taking a 0.3 mm shaving. If the shaving is continuous and glassy, you’re done.
Why Sharp Chisels Matter
If you’ve ever spent hours carving and ended the day with sore hands, this is why.
Why it matters: a sharp chisel gives you control so your cuts are deliberate, not forced. When your edge is keen you use far less pressure — I mean 10–30% less force on typical paring cuts — so your hands stay comfortable during long sessions. Example: when you pare a dovetail cheek for 30 minutes, a sharp blade lets you hold the chisel with a lighter grip and finish the work without wrist pain.
How a sharp edge changes what you feel: a keen blade gives clear sensory feedback at your fingertips, so you can sense grain direction and tiny changes in resistance. That feedback helps you adjust angle and feed rate on the fly. Example: while trimming end grain on a maple rail, you’ll instantly feel the blade catch or slide, allowing you to stop before a tear-out.
How sharpness reduces effort and improves consistency: a sharp edge cuts with less force, which lets you use slow, controlled paring strokes rather than pushing hard or resorting to a mallet. Example: when cleaning a panel edge, a sharp chisel lets you take 0.2–0.5 mm slices consistently, producing uniform surfaces.
How to keep that reliable edge so you can rely on touch, not strength:
Why it matters: if you can restore minor dulling quickly, you keep your control strategy intact. Steps:
- After two hours of continuous use, strop the bevel on a leather strop charged with compound for 20–30 passes.
- If the chisel feels burred, lay it flat on a 1000-grit waterstone and do 10–15 light strokes, then strop.
- For full regrinds, use a 220–400 grit wheel to remove nicks, then progress through 1000–6000 grit for a mirror edge.
Real example: I once fixed a dull 1/2″ bench chisel between dovetail pins by stropping for one minute; the chisel went from needing a mallet to slicing shavings that curled like ribbons.
Control tip: test your edge on the corner of end grain — a sharp chisel will produce a thin, continuous shaving; a dull one will crumble the fiber. Use that tactile test before critical cuts.
Final practical note: when your chisel is sharp you plan each cut and restore the edge with short maintenance sessions, not long grinding marathons.
What “Sharp” Means: Grit, Burrs, and Angles

If you’ve ever picked up a dull chisel and wondered why it feels limp, this is why.
When I say a chisel is *sharp*, I’m talking about three measurable things that work together: grit, the burr, and bevel angle. Why this matters: each one changes how the chisel cuts and how much control you have in a single pass.
Grit controls the smoothness of the cutting edge and how the edge holds up.
- Practical example: when you move from a 400-grit stone to a 1000-grit stone, you’ll see the edge reflect light more and the chisel will slice cleaner through end grain, but it will dull faster under heavy chopping.
- Specific numbers: use 400–600 grit for shaping and removing nicks, 800–1200 grit for general sharpening, and 3000+ grit for polishing a razor edge.
The burr is a tiny lip of metal that tells you you’ve removed enough steel.
- Why it matters: if you don’t form and remove the burr correctly, the edge will feel blunt even if it looks sharp.
- Real example: when you stone the bevel of a chisel, run a fingertip gently across the opposite face; you’ll feel a faint wire-like edge when the burr is present.
- How to handle it, in steps:
- Hone the bevel until you can feel the burr along the entire length.
- Flip the chisel and lay it flat; strop the flat face once to remove the burr.
- Strop the bevel at your final angle for 10–20 passes to refine the edge.
Bevel angle determines how the edge contacts wood and how long it lasts.
- Why it matters: the angle trades off sharpness for durability.
- Real example: when paring end grain, a 20° bevel slices easily and gives fine control; when chopping mortises, a 30°–35° bevel resists rolling and lasts through more heavy contact.
- Specific guidance: use 20°–25° for paring chisels, 25°–30° for bench chisels, and 30°–35° for mortise or heavy-duty chisels.
Microstructure at the very edge affects how the metal fractures under load, which changes how the chisel feels when you cut.
- Why it matters: a poorly finished microstructure chips instead of slicing, and you’ll feel that as catches in the wood.
- Example: after hitting a hidden knot with a polished edge, you’ll sometimes notice small chips; a slightly coarser final grit or a higher bevel angle prevents that.
Quick how-to checklist you can use each time you sharpen:
- Choose a grit for the job (400–600 to fix, 800–1200 to sharpen, 3000+ to polish).
- Grind or stone the bevel to your target angle; use a guide if needed.
- Hone until you form a burr along the edge.
- Remove the burr by laying the chisel flat and stropping the face once.
- Strop the bevel for 10–20 passes to finish.
A final, concrete tip: if you want a repeatable 25° bevel, mark the spine with a felt pen, place the chisel on a 25° guide, and touch the marker until it wears off—then stone until you feel the burr.
How Bevel Angle (15°–25°) Changes Control

Here’s what actually happens when you change the bevel angle on a chisel: it directly alters how the tool bites, how much control you have, and how long the edge lasts.
Why this matters: the bevel angle determines whether your chisel slices like a scalpel or survives heavy cutting.
I prefer 15° for delicate paring because a lower angle bites easily and gives crisp edge feedback, but it dulls faster. For example, when trimming thin end grain on a dovetail, a 15° bevel lets you feel the fibers part and take nearly paper-thin shavings. Use these steps to set and use that angle:
- Hone the primary bevel to 15° on a waterstone or diamond stone.
- Test on scrap end grain, taking light passes (0.1–0.3 mm).
- Rehone after about 30 minutes of bench work or when the edge drags.
Higher angles near 25° resist rolling and last through heavier cuts, sacrificing some sensitivity. Picture chopping tenon shoulders with a mallet: a 25° edge survives the impact and keeps its shape. To prepare that edge:
- Grind the bevel to 25° with a bench grinder or coarse stone.
- Finish with finer grits and a strop to remove burrs.
- Expect to touch up only after hours of repetitive chopping.
Long bevels reduce chatter on slicing cuts, they guide the blade steadily and improve lateral control when you push sideways. For instance, using a long 30 mm bevel on a smoothing cut across a wide panel gives the blade a steady plane and fewer vibration marks. To get a long bevel:
- Extend the contact area by angling the chisel slightly flatter during honing.
- Work through progressively finer grits to keep the bevel consistent.
- Test by slicing across a large board; the cut should feel stable.
Adding micro bevels at the edge makes touch-ups quick, preserves the primary geometry, and balances keen bite with usable durability for most fine woodworking tasks. Try a 0.5°–2° micro bevel:
- After sharpening the main bevel, raise the angle by 0.5°–2°.
- Make 10–20 light strokes on the stone or strop.
- Check for a clean cutting edge on thin shavings.
Quick practical guide — choose your bevel:
- 15°: use for paring, delicate end-grain work, and when you want tactile feedback; resharpen often.
- 20°: a middle ground for general bench work; good balance of edge life and bite.
- 25°: use for heavy chopping, mortising, and when you need edge durability.
One critical tip: measure angles with a simple gauge or an angle guide; guessing will cost you edges.
Recommended Products
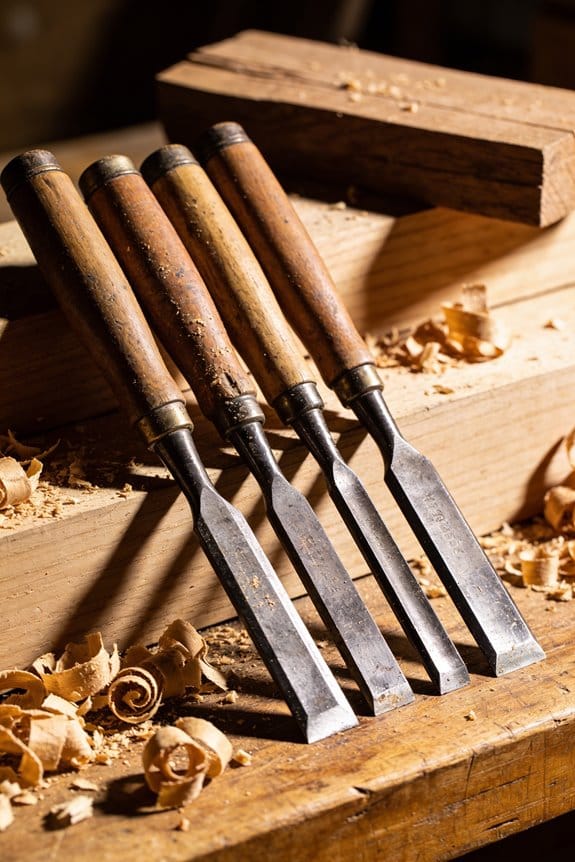
Polished blade for increased rust resistance

Blade width: 2 inches )50mm)
Sharpening Chisels: Step‑by‑Step Method
Before you prepare the edge, you need to know why sharpening matters: a sharp chisel cuts cleaner, reduces tear-out, and keeps you safer.
1) Flatten the back
Why this matters: a flat back gives you a true edge and helps the chisel bite evenly.
Steps:
- Place the chisel flat, bevel-up, on a coarse diamond plate or 220-grit waterstone.
- Push the back forward in controlled strokes, covering the whole length for 30–60 seconds, then flip and repeat.
- Check for a continuous mirror or a consistent scratch pattern; you should see shiny metal across the last 2–3 mm of the edge.
Example: when I fixed a warped 1″ bench chisel, flattening on a 220 diamond plate for a minute removed the high spot so the chisel sliced shavings instead of digging.
2) Establish the bevel angle
Why this matters: the angle determines cutting performance and edge life.
Steps:
- Choose an angle: 25° for general bench work, 30° for heavy chopping, 20° for paring only.
- Rest the chisel on its bevel against the stone and set that angle with a guide or by eye.
- Keep that angle consistent on every pass.
Example: I set a 25° bevel on a mortise chisel and it removed waste much faster than the prior 30° edge.
3) Remove metal with progressively finer grits
Why this matters: starting coarse removes damage quickly; finer grits make the edge keen and durable.
Steps:
- Start on 400 grit (or 220 if the edge is nicked) and do 15–30 controlled pushes, then check.
- Move to 1000 grit and do 30–50 passes, maintaining the angle.
- Finish on 4000–8000 grit (or a fine diamond plate) for 20–40 passes to polish the edge.
Short test.
Example: on a chisel with a small nick I used 220 for two minutes, then 1000 then 6000; the nick disappeared and the chisel cut long, clean shavings.
4) Watch for the burr
Why this matters: the burr proves you’ve removed metal right to the edge on the bevel side.
Steps:
- After each grit progression, run your thumb lightly across (not along) the bevel edge to feel a tiny wire burr on the flat side.
- When you feel a continuous burr for the full 2–3 mm, stop removing metal from the bevel.
Example: I sharpened a skew chisel and the burr formed after 40 passes on 1000 grit; that signaled I could move to deburring.
5) Remove the burr and flatten the final edge
Why this matters: removing the burr stops the edge from folding and gives true sharpness.
Steps:
- Lay the chisel flat, bevel-up, and push the back across the fine stone for 10–20 strokes to knock the burr off.
- Flip and drag the bevel lightly for 3–5 strokes to polish the junction.
- Wipe the edge and test by gently slicing a piece of paper or shaving end grain.
Example: after flattening the back on a 6000 stone and deburring, my 3/4″ chisel sliced a kitchen-paring test piece cleanly with one pass.
Final tips
Why this matters: small habits make your edge last longer.
- Keep stones wet or oiled per manufacturer directions; a dry stone wears faster.
- Use a honing guide if you want exact angles every time.
- Spend 5 minutes daily maintaining the edge rather than hours when it’s dull.
If you follow these numbered steps and feel for the burr, your chisels will cut cleaner and last much longer.
Maintain Sharp Chisels: Stropping & the Secondary Bevel

If you’ve ever pulled a chisel out of your toolbox and found the edge a little gummy, this is why. Why it matters: a quick strop brings the edge back so you can keep working without regrinding the bevel.
Stropping restores a chisel from a wire burr to a keen edge in seconds. Do this between sessions instead of regrinding the primary bevel. Example: after two hours of paring cherry, you can strop for 20–30 strokes per side and be cutting again.
1) Set a secondary bevel and why you use it.
- Why it matters: the tiny flat lets you restore geometry fast without regrinding the whole bevel.
- How: grind a secondary bevel about 0.5–1.0 mm wide at the cutting edge, at the same angle as your primary bevel.
- Example: if your primary is 25°, make the secondary about 25° too and keep it just a hair of flat at the tip.
2) Choose your leather and compound.
- Why it matters: the leather controls how the compound behaves and how the edge finishes.
- How: use a stitched, 3–4 mm thick leather strop when you want the compound to stay in place and cut a bit faster; use a softer, unstiff leather (thin paddle or suede) for the final 10–20 strokes to polish. Apply a pea-sized amount of medium-grade green chromium oxide paste and spread it evenly.
- Example: I keep a thick stitched strop with green paste for daily maintenance and a soft unstiff strop for the final polish.
3) Stropping pressure and technique.
- Why it matters: pressure determines whether you remove only the wire or start filing the bevel.
- Steps:
- Place the edge away from you on the strop and maintain your bevel angle.
- Use light, even pressure—about the squeeze of a handshake—so you remove the burr without rolling the edge.
- Do 10–20 strokes per side, alternating sides every stroke or every two strokes to keep the edge centered.
- Finish with 10 light strokes on the soft leather with no compound.
– Example: after shaping dovetail pins, I use 12 firm-but-light strokes per side, then 10 gentle strokes on clean leather.
4) Common mistakes and quick checks.
- Why it matters: avoiding these keeps you from shortening the edge life.
- How: don’t press hard—if you hear a scratchy noise you’re overworking the steel; don’t change the angle—if the chisel suddenly stops cutting cleanly, you’ve likely altered the bevel. Check the edge by slicing a thin shaving of paper; a clean, continuous shaving means you’re done.
- Example: someone pressed too hard and had to regrind after a week; keeping pressure light saved the next chisel.
Final practical tip: keep a small strop by your bench and strop for about 20–40 strokes total whenever you notice a tiny burr; you’ll avoid repeated grinding and keep your chisels working longer.
Recommended Products

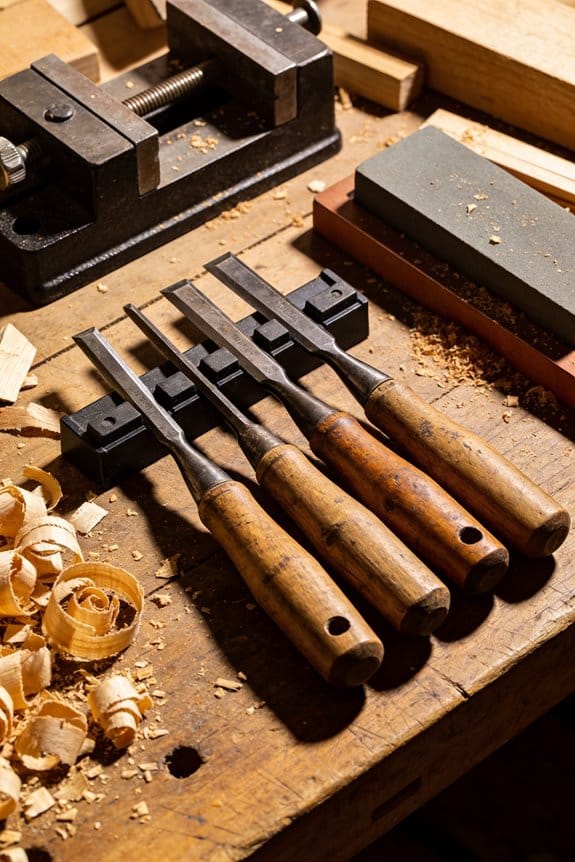
Lacquered 4-3/4” contoured handle for maximum control
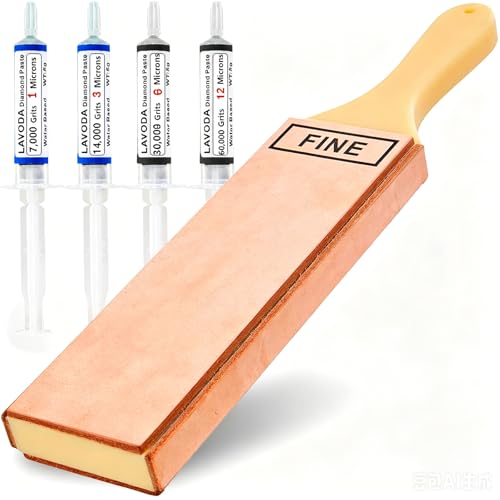
WARPROOF NYLON BASE: Ditch warping wood forever! Aerospace-grade engineering nylon (±0.1mm flatness) laughs at heat, moisture & aging. 10-Year Warp-Free Guarantee.

When Is 6000 Grit Enough?
If you’ve ever sharpened a chisel and wondered when to stop, this explains it.
Why it matters: stopping at the right grit saves you time and gives an edge that cuts cleanly without needing constant resharpening. For typical woodworking you can stop at 6000 grit and get a keen, long-lasting edge.
How to judge the edge:
- Look: under a bright lamp you should see the bevel uniformly polished with no visible scratches wider than 0.05 mm.
- Feel: hold the chisel and make a light paring stroke on end grain; you should feel a smooth bite, not a snag.
- Test: cut a thin shaving from soft maple across the grain — if the shaving stays intact and thin, the edge is good.
Real example: I stopped at 6000 grit on a 1/2″ bevel-angle chisel, then pared a leg of an oak chair; the shavings were thin and the surface was smooth with no torn fibers.
Why 6000 grit works: polishing to 6000 removes the coarse scratches from earlier grits and rounds the micro edge just enough so it slices wood cleanly while still keeping some edge bulk for durability. For most bench chisels you’ll get a good balance between sharpness and edge life.
How to get there (step-by-step):
- Flatten your back until you see a continuous mirror line — use 400–1,000 grit stones for this, 10–15 strokes.
- Set and refine the bevel on 1,000–3,000 grit until the burr disappears, about 20–30 passes.
- Move to 6,000 grit and polish the bevel with 30–60 light, even strokes at the same angle.
- Remove the burr by flipping to the back and doing 5 light strokes at the spine.
- Strop with a loaded leather for 20–40 passes if you want extra bite without going to higher stones.
Real example: on a plane iron I followed those steps and then planed pine; after 10 minutes of use the iron still produced satin-finish shavings.
When you might go past 6000 grit:
- If you do finishing work on very soft woods and want a razor mirror edge, go to 8–12k.
- If you carve at low bevel angles and you strop frequently, you don’t need higher stones.
Maintenance tips:
- Strop every 30–60 minutes of carving to keep the edge.
- Rehone on 1,000–3,000 grit when you feel drag.
- Don’t chase grit numbers; polish only when you need cleaner cuts.
Real example: a carving friend who stops at 6,000 and strops every 20 minutes gets smoother cuts and changes stones less often.
Bottom line: use 6000 grit for most chisels, follow the numbered steps above to reach it, and strop to maintain the edge so you don’t have to keep polishing higher grits.
Why Sharp Edges Reduce Force and Improve Paring
If you’ve ever tried paring with a dull chisel, this is why.
A sharp chisel matters because it takes far less force to cut cleanly. When the blade bites, you’ll use less wrist and forearm effort and you can work longer without tiring; try paring five minutes with a keen edge and compare that to five minutes with a rounded edge to feel the difference. The blade severs fibers instead of crushing them, so the cut is predictable and the tactile feedback through the handle is clearer; you can sense grain direction and subtle resistance as you move the tool.
Before I explain how to get that feeling, here’s what it looks like in practice: when I pare a ten-inch long bevel on a hardwood rail with a razor edge, I make smooth, even shavings and the waste comes off in thin ribbons instead of ragged chunks.
Why this matters: reduced cutting force gives you better control over depth and angle. Reduced force means you can take consistent, shallow passes—aim for 0.5–1.0 mm per stroke on final paring—so surfaces end up flatter and smoother.
How to exploit the advantage (steps):
- Keep the bevel sharp and square. Hone the bevel to 25–30° for a general bench chisel, then strop 10–20 light passes on a leather strop charged with compound. Do this before a session.
- Use slow, deliberate strokes. Move the chisel at roughly one to two inches per second on final passes; slow motion lets the blade sever fibers cleanly.
- Apply light pressure—hand and body, not arm. Rest your palm on the chisel butt and let your body weight help, using only a few pounds of force. Too much pressure masks the feedback.
- Check your shavings. If you’re getting continuous thin ribbons, you’re doing it right; if they’re torn or powdery, stop and hone.
Real-world example: paring a stopped groove into oak—set the bevel to 25°, strop, then take 0.8 mm passes. You’ll see long, thin shavings and the groove walls will be even instead of scalloped.
A final practical tip: when you start to feel the cut require more force or the shavings change texture, stop and touch up the edge with five to ten light strokes on a fine stone or a dozen strokes on a strop; that small maintenance keeps your paring efficient.
Caring for Carving Edges: Stropping Frequency & Fragility
If you’ve ever noticed your carving chisels go dull in one session, this is why.
Why it matters: a dull chisel gives rough cuts and forces you to overwork the wood. For example, carving a walnut spoon will tear the grain if your 12 mm chisel has a burr instead of a sharp edge.
1) How often should you strop during a session?
Why it matters: frequent stropping keeps the edge slicing cleanly so you don’t have to regrind. Strop every 10–20 minutes of active carving or after 10–20 passes where you feel the edge drag. That timing works well when shaping a spoon bowl with light cuts. Do short checks: 3 light strokes on the palm of your thumb to feel the burr — if the edge snags, strop.
2) How to prepare the strop and leather
Why it matters: a poorly prepared strop glazes and won’t remove the burr. Use a flat, taut leather about 3–4 mm thick. Apply a pea-sized amount of compound along the center and spread it with 6–8 light passes so it’s even and not shiny. For example, mount a 12″ leather strip on a wooden paddle with two screws and tension the ends so the surface doesn’t sag; that prevents micro-rolls.
3) Which compound to use
Why it matters: the wrong compound removes too much metal or rounds the bevel. Use a fine green (around 0.5–1 micron) or a fine yellow compound for finishing; avoid coarse pastes. If you’re working on a 6 mm detail chisel for chip carving, use yellow so you remove just the wire edge without changing the bevel radius.
4) How to strop without ruining the bevel
Why it matters: inconsistent angles create a secondary bevel and weaken the primary edge. Steps:
- Match the strop angle to your honed bevel — typically 5–10° lower than the sharpening angle.
- Lay the chisel flat on the leather with the bevel making full contact.
- Pull the tool away from the cutting edge, stroke 6–10 times on one side.
- Flip and repeat 6–10 times on the other side.
- Use alternating short strokes if you want quicker restoration: 3 on one side, 3 on the other, repeat twice.
If you’re flattening the palm of a spoon with a 20° bevel, set the strop angle about 10–15° so you don’t round it.
5) Leather care between passes
Why it matters: dry leather won’t hold compound and will glaze. Wipe the strop with a lint-free rag every 20–30 minutes of use, then refresh compound with a fingertip dab and spread with 4 light passes. For example, during a two-hour carve of a ladle, you’ll refresh the leather 3–4 times.
6) Mounting and avoiding micro-rolls
Why it matters: an uneven mount creates uneven wear and micro-rolls at the edge. Clamp the leather to a flat board and tension the ends; check with a ruler — there should be no visible dip over a 12″ length. If you’re using a hanging strop, make sure the leather is glued and nailed along the spine and is taut enough that a 0.5 mm feeler gauge can’t slip under the middle.
7) Quick check and maintenance routine
Why it matters: short, consistent checks save time and metal. Routine:
- After 15 minutes carving, do 6 pull strokes per side.
- Feel the edge on the thumb pad — no catching means you’re done.
- Every session end: clean strop, apply a fresh thin compound layer, and store flat.
When carving a small figurine for 90 minutes, this routine keeps you cutting without regrinds.
Final practical tip: if you ever feel the edge dragging after 20 stropping cycles, stop and rehone on a fine stone (1000–6000 grit) before continuing.
Protect Good Chisels: Beaters, Mortise Tools, and Use Cases
If you’ve ever hit a fine bench chisel with a mallet and watched the edge roll, this is why.
Why it matters: a rolled or chipped edge wastes hours of sharpening and can ruin a gouge or fine chisel beyond easy repair. Example: I once knocked the edge off a 1/4″ mortise chisel by using it like a cold chisel—failed edge, two hours of reshaping.
How to protect your good chisels (what to use and why)
Why it matters: using the right chisel for heavy work keeps your quality tools sharp longer. Example: keep a set of three purpose-made beaters—8mm heavy carbon chisel, 12mm mortise chisel, and a 20mm roughing beater—on a nearby pegboard so you grab the right one for the job.
1) Choose beaters and mortise chisels
- Use purpose-made mortise chisels with thicker webs and stronger backs; look for 3–4mm webs on 12–20mm sizes.
- For beaters, pick inexpensive, tough carbon-steel chisels or commercial striking tools of similar mass (200–400 g).
Example: a 12mm mortise chisel with a 3.5mm web absorbs impact; a 20mm beater at ~300 g does heavy chopping without stressing fine tools.
2) Match tool to task
Why it matters: matching prevents damage so you sharpen less often. Example: when chopping a through-mortise in oak, use the 12mm mortise chisel and the 300 g beater for 20–30 light strikes rather than hammering a bench chisel.
Steps:
- Mark the mortise and remove waste with a bradawl and coping saw if possible.
- Use the mortise chisel vertically, tapping with the beater for controlled blows.
- Pare and finish with a bench chisel only after most waste is removed.
3) Select beaters by steel and mass
Why it matters: cheap brittle steel chips; soft, tough steel deforms but protects. Example: choose a mass around 250–350 g and a simpler carbon-steel beater if you work hardwoods daily.
Steps:
- If the beater was hardened, test it on a scrap board—no chipping after 20 strikes.
- Prefer higher mass over extra hardness.
- Reserve hardened, sharp chisels for paring and fine cuts.
4) Store and transport quality chisels
Why it matters: knocks and moisture are more damaging than occasional use. Example: keep your 1/8″ to 1″ bench chisels in a leather roll inside a toolbox, not loose in a drawer.
Steps:
- Wrap each chisel in a cloth or use a roll with individual slots.
- Store in a dry cabinet at room humidity or with a silica pack if your shop gets damp.
- Hang beaters and mortise chisels on a pegboard, separate from fine chisels.
5) Routine care to extend edge life
Why it matters: small habits cut sharpening time drastically. Example: after a day of chopping, strop the edge on leather with a slurry for 20–30 passes before storage.
Steps:
- Hone daily with 6–8 light strokes on a fine stone or strop.
- Do heavy regrinds only when you must—look for chips bigger than 0.5 mm.
- Keep handles tight; a split handle can suddenly send a chisel flying into a door.
Quick reference (what to keep in your workbench)
- Beaters: one ~250–350 g beater plus an extra wide beater for long cuts.
- Mortise chisels: 6mm, 12mm, 20mm with 3–4mm webs.
- Bench chisels: a set from 1/8″ to 1″ kept dry and rolled.
Follow these steps and you’ll cut down sharpening time, protect expensive tools, and get cleaner cuts.
Recommended Products

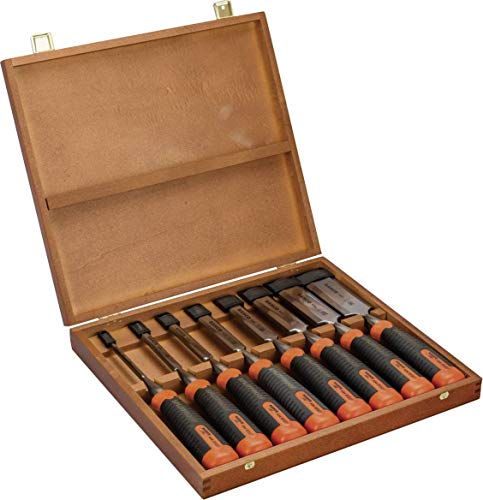
To commemorate its 100 anniversary, Narex developed a new line of Richter Extra Chisels named after their founder. The Richter Extra chisels are the finest chisels Narex has produced in its 100-year history. This line of chisels are made from the finest materials available, have undergone superior heat treatment and been manufactured using the most stringent manufacturing processes.

Set of 6 Narex Richter chisels by The Woodworking Club

Premium Quality Blades: Made from high-quality Chrome Vanadium (Cr-V) steel, cryogenically treated for enhanced strength and wear resistance.
Troubleshooting: Loses Bite, Rolls, or Chips – Quick Fixes
If you’ve ever had a chisel lose its edge, this is why.
Why it matters: a rolled or chipped edge ruins your cuts and wastes time unless you fix it correctly. For example, imagine paring a tenon cheek and the blade drags because the wire edge curled—your joint won’t seat and the glue-up is delayed.
1) How to diagnose the failure
Why it matters: identifying the problem saves you effort so you only do the repair that’s needed.
Steps:
- Sit at a bench with good light (a 60-watt equivalent LED or a daylight lamp). Hold the chisel at eye level, tilt it so the edge catches the light, and slowly rotate it.
- Look for a thin, shiny strip running along the edge — that’s a roll (a bent wire edge).
- Look for a missing section or jagged notch — that’s a chip (steel gone).
- If the edge just looks dull and even, it’s dulling only.
Real-world example: you examine a paring chisel under a desk lamp and see a tiny mirror-finished hook on the bevel — that tells you stropping will likely fix it.
2) Quick fix for a rolled edge
Why it matters: stropping realigns metal fast without reshaping the bevel.
Steps:
- Mount a leather strop or use a 3″ leather strip glued to wood.
- Apply a light abrasive paste — use 0.5–1.0 micron green chromium oxide or a light jeweler’s rouge.
- Lay the bevel flat against the strop and pull away from the edge (20–40 passes), then flip and strop the flat once (10 passes) to remove the burr.
- Test on scrap pine by slicing a shaving; you should get a clean curl.
Real-world example: after 30 passes on a strop with green paste, a rolled bench chisel that had been skipping now slices a 1/16″ shaving cleanly.
3) Quick repair for a small chip
Why it matters: removing the damaged steel and re-establishing an edge prevents the chip from catching and ruining your work.
Steps:
- Use a fine whetstone (400–1,000 grit) or a fine diamond plate to lift the chip. Work at your normal bevel angle.
- Remove metal only until the chip disappears — check frequently under light.
- If you removed more than 0.5 mm of steel, add a small secondary micro-bevel (1–2° steeper than your main bevel) on a 4,000–8,000 grit stone to speed reprofiling.
- Hone to polish and strop as above.
Real-world example: on a chisel with a 1 mm notch from dropping it, three minutes on a 600-grit stone removed the nick and a quick 1° micro-bevel on a 6,000-grit finished the edge.
4) When it’s just dull
Why it matters: routine honing keeps the edge sharp without wasting steel.
Steps:
- Start on a 1,000–2,000 grit stone if the edge is visibly rounded.
- Progress to 4,000–8,000 grit for polishing. Spend 10–20 strokes per level, keeping your bevel angle steady.
- Remove the burr by stropping: 20–40 light passes on leather with compound, then 10 passes on the flat.
- Test on scrap wood; a sharp chisel should pare a thin, continuous shaving.
Real-world example: a bench chisel that wouldn’t slice across end grain came back to life after 15 strokes on 4,000 grit and 25 passes on a strop.
Final tip: if you can’t see the defect under good light after your quick fix, the edge is likely acceptable for most tasks; save full reprofiling for when the chisel visibly needs it.
Recommended Products

FOUR PLATES: Ultra Fine Resin Bonded Diamond Plates in 1200, 2000, & 3000 grit. replacement plate kit for Professional Precision Adjust Elite Sharpener (sharpener sold separately.)


The Super Strop 8" Leather Honing Wheel is one of the fastest burr removal and polishing methods available.
Frequently Asked Questions
Can I Use Honing Oil Instead of Water on My Sharpening Stones?
Yes — I use honing oil on oil stones, but not on waterstones; honing vs.water matters because oil can ruin waterstone pores. Don’t mix oils with waterstones to avoid lubricant contamination and reduced cutting action.
How Do Chisels Behave on Figured or Oily Hardwoods?
Like skating on glass, I find figured or oily hardwoods increase grain tearout and cause sticky cutting; I’ll use keener edges, frequent stropping, low-angle paring, and lighter passes to avoid tearout and clear sticky shavings.
Are There Health Risks From Sharpening/Stoning Chisels Indoors?
Yes — I worry about respirable dust and metal particles; I wear dust masks and use simple ventilation setups like a window fan or shop vac with HEPA to keep air clear while I stone and sharpen.
Can Beginners Reliably Maintain a 15° Bevel Without Guides?
Yes — I can, but it’s tricky; without guides I use angle sensing by feel and eye, practicing edge alignment on stones, stropping often, and checking with light and shaving tests until 15° becomes consistent.
What Storage Environment Best Prevents Rust on High‑Carbon Chisels?
Think of chisels as sailors: I keep them in a dry environment, like a ship’s hold with silica desiccant packets tucked nearby, oiled lightly and wrapped in cloth so rust never boards the crew.