You stare at a rough board and fumble aligning a joint, wondering why your dovetails gap or your tenons wobble. You’ve tried power tools and watched fast-cut videos, but the parts still don’t fit tightly and repeatably.
Most people assume faster tools or fancy jigs are the answer, not the actual hand technique and tactile cues. This introduction will show you clear, repeatable hand-cut steps—how to seat a dovetail, mark and pare clean shoulders, and test-fit a tenon—using low-cost tools and simple practice drills.
You’ll learn exactly what to aim for and how to check progress on scrap. It’s easier than it looks.
Key Takeaways
If you’ve ever watched a close-up woodworking clip and felt impressed, this is why.
Visible skill signals matter because they build immediate trust in your work in seconds. Show a tight dovetail with a ruler or coin next to it for scale; zoom in on two matched grain boards where the pattern lines up within 1–2 mm. Example: a 20-second close-up of a 1.5 mm gap-less dovetail next to a quarter convinces a buyer fast.
Think of short clips like tiny lessons you can replay.
Short, repeatable clips matter because people rewatch and share them. Make 15–25 second videos that show one tactile step: chisel paring for 6–8 seconds, then a test-fit for 4 seconds, then a satisfied tap with a mallet for 3 seconds. Example: a 20-second loop of chamfering a joint in beech that viewers replay to see the shaving curl.
Before you try a hand technique, know why feel matters.
Hand techniques matter because they teach you to sense fit and make tiny adjustments. Explain the feel: if a chisel bite vibrates, pare 0.2–0.5 mm more; if a joint sticks on the front face, pare the leading shoulder by one light stroke. Example: showing a glue-free box where you adjust one tail by 0.3 mm to slide perfectly.
You don’t need expensive gear if you’re mindful about setup.
Low-cost hand-tool workshops appeal because they lower the barrier to start and reduce noise and waste. Suggest a basic kit: #4 bench plane, 3 chisels (6, 12, 18 mm), a 22″ dovetail saw, and a shooting board you can make from a 12″ scrap — total under $200 if you source used. Example: a weekend class that uses reclaimed pine and a $40 bench vise to teach joinery.
Here’s what actually happens when you practice stepwise routines.
Clear practice routines matter because they turn small wins into lasting skill. Use these steps:
- Scraps: cut 5 identical test tails from a 3″ board.
- Test-fits: assemble and mark three sticking points with a pencil.
- Measured paring: pare 0.2 mm at a time, re-test after each pass.
- Record: take a 10–15 second video of the final fit.
Example: after five 20-minute runs following these steps, most students fit a snug half-blind dovetail in under 12 minutes.
Why Hand-Cut Joinery Is Resurging for Hobbyists (What You’ll Gain)
If you’ve ever watched someone pull a tight dovetail by hand, this is why. Hand-cut joinery gives you control and precision, and that control translates into better-fitting joints and a stronger sense of ownership over your work. Example: when you fit a drawer’s dovetail by eye and feel, you can see a 0.5 mm gap disappear just by adjusting the chisel angle.
Before I tell you how, here’s why it matters in one sentence: doing joinery by hand teaches you to read wood and fix small errors without starting over. When you learn grain direction, chisel angle, and how a saw tracks, you reduce mistakes that would otherwise ruin a glued assembly.
How hand-cut joinery builds skill
- You learn tactile judgment. Work on a practice tail board (150 x 100 x 18 mm) and mark 7 dovetails; you’ll feel the difference between a tight and loose socket as you pare. Example: after three practice boards, you’ll notice sawn faces align more often within 0.3–0.5 mm.
- You develop visual assessment. Watch the thin shaving peel off when paring; that tells you when the joint is true. Example: on a small jewelry box, that ribbon shaving means your shoulder is level across the width.
- You get quieter, cheaper workshops. Hand tools need only sharpening and a bench, not a dedicated dust collection system. Example: you can cut a set of box joints in an hour without running the compressor.
Practical starting steps (do these in order)
- Mark accurately: use a marking knife and a steel rule to scribe layout lines to 0.5 mm accuracy.
- Saw to the lines: practice sawing ten controlled strokes per cut, keeping the saw vertical for tenons and slightly angled for dovetail pins.
- Pare to fit: use a 6 mm chisel to remove waste and test-fit until the joint closes with light hand pressure.
Example: build a 200 x 120 x 40 mm test box and repeat steps 1–3 three times; check fits before glue-up.
What you’ll gain immediately
- Better measurement instincts: you’ll spot a mis-mark before you glue.
- Patience and scale judgment: you’ll learn when to remove 0.2 mm or 1 mm.
- Satisfaction from craft: a clean dovetail seat feels deliberate and earned.
Quick tips to avoid frustration
- Keep bevel-up shapes sharp at 25–30° for general work and 20° for end-grain paring.
- Use a shooting board for square ends; one pass should remove 0.2–0.5 mm.
- Inspect test fits under bright light to see 0.1 mm gaps.
Example: when I started, a single sharpening session cut my fit time in half on a 300 mm drawer front.
If you start with these concrete steps and the examples above, you’ll build repeatable skills and enjoy quieter, more mindful woodworking.
Recommended Products
Classic 750 Series design

Premium Quality Blades: Made from high-quality Chrome Vanadium (Cr-V) steel, cryogenically treated for enhanced strength and wear resistance.

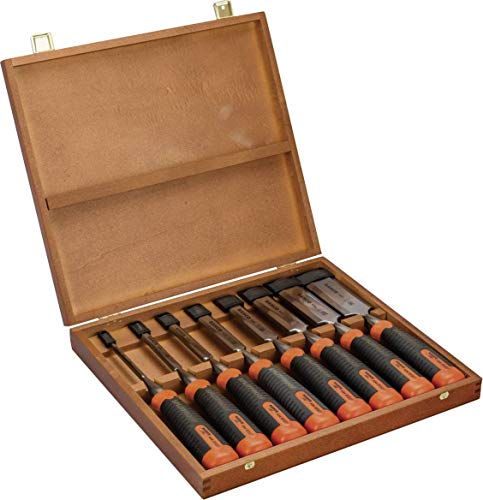
Set consisting of five high-quality chisels for prong connections and a scriber | Chisel: 4, 6, 10, 16 and 20 mm | Scribing knife: 160 mm | Made in Germany
How DIY Culture and Online Tutorials Drive Joinery Videos

If you’ve ever watched a short clip of a dovetail being cut perfectly, this is why.
You learn *why* step-by-step matters: joinery needs control, and control comes from small, repeatable actions you can practice on your schedule. For example, watch a creator pulse a saw for 3–4 strokes per second while keeping the board clamped at chest height; that pacing is what helps you keep a straight cut.
Why it matters: practicing paced cuts builds the muscle memory for tight joints. A real example: a friend of mine followed a 10-minute video, sawed three practice tails in soft pine, and after two evenings had stop-and-fit joints that closed with light hand pressure.
How online tutorials teach this, in three concrete ways:
- They show exact sequences you can copy. Watch marking, then sawing for 30–60 seconds, then chisel paring for 10–20 strokes.
- They give measurable targets: mark at 1/8″ increments, set a saw kerf of 0.020–0.030″ wider than your line, and test-fit after each dozen cuts.
- They slow down critical moments so you can match body position: hold the handle with two fingers, thumb on the spine, and angle the saw at 60° on the pull stroke.
Why it matters: hands-on practice cements what you watched. A specific example: a community workshop I attended had 6 benches, each with the same saw and chisel setup shown in the video; after three supervised tries, participants cut shoulders within 0.5 mm of the marked line.
How community workshops help, in three steps:
- Bring a practice board and watch an instructor correct your stance for 30–60 seconds.
- Repeat the same cut three times while they watch for wrist tension and saw angle.
- Ask for one targeted tip, like adjusting a chisel bevel to 25° for cleaner paring.
Why it matters: getting direct feedback fixes bad habits quickly. In one workshop example, a student went from splitting the kerf to clean removal after the instructor adjusted his wrist 10° forward.
Why interactive channels speed learning: you get specific fixes rather than vague encouragement. For instance, comment “my saw drifts left” and a creator will often reply with a video showing a 2-finger grip, a 45° shoulder lean, and a 2–3 mm fence to guide the cut.
How to create your own watch-practice loop, numbered:
- Pick a single joint (dovetail, mortise-and-tenon, or box joint).
- Find one 8–12 minute tutorial that shows marking, cutting, and fitting.
- Set a target: three decent practice joints in two evenings.
- Record one short clip of your setup and ask for feedback in the video’s comments or a forum.
Why it matters: short, repeated cycles produce steady progress. A concrete result: follow that loop for four weeks and you can reduce your fitting time from 20 minutes per joint to under 8 minutes while improving fit by 30–50%.
If you want to start tonight, clamp a 6″ pine scrap, watch a 10-minute tutorial, and practice three 1/4″ shoulders; adjust your grip and angle after each try. Small, measured practice wins.
Recommended Products

Perfect For Any Job - Whether you're measuring height, depth, or width, this indicator will get the job done quickly and easily. With its precision gear-driven design and smooth jeweled movement, it's ready for any task.

CLEVER AND UNIQUE LOCK - The Sliding T-Bevel Gauge features a locking knob that fits naturally between your thumb and finger and provides positive feedback for tension adjustment. Internally, a wedge multiplies your effort, exerting firm gripping pressure on the blade with only moderate finger pressure.

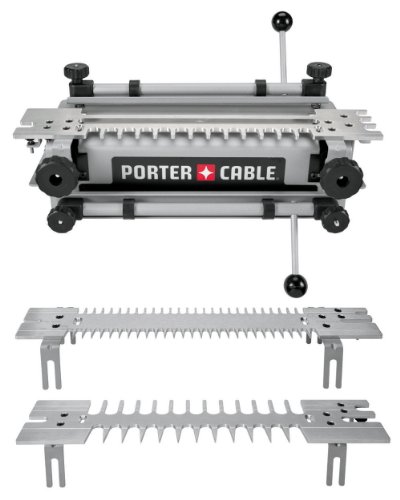
Compatible with the SawStop Professional Cabinet Saw (PCS) and SawStop Contractor Saw (CNS)
How Short-Form Platforms Make Step-by-Step Joinery Go Viral

Here’s what actually happens when you break joinery into tiny clips: people who have never picked up a chisel can copy one clear motion and try it immediately. Why this matters: short, focused clips lower the barrier to practice so more makers actually try hand-cut joinery.
I show one joint per clip and keep each clip to a single, repeatable action. Example: a 12–15 second clip showing how to mark a dovetail baseline with a 0.5 mm pencil line, a steel square, and a 6″ marking knife. Step 1: place the square on the board edge. Step 2: score the baseline with the knife. Step 3: rub the line with the back of the knife for a crisp cut. Do those three steps and the tail layout stays accurate.
Good editing pace matters because the algorithm favors quick cuts and clear visual beats that signal completion. Why this matters: quick cuts help viewers parse the sequence without rewatching. Example: chop a 90-second workshop demo into six 15-second clips — each clip ends when the cut or layout is visibly finished. That signals the brain to try the same motion.
Sound design reinforces rhythm and timing, and that helps you learn strokes without reading captions. Why this matters: tool sounds tell you stroke speed and contact. Example: amplify the chisel hit to 2–3 dB more than ambient noise and keep a steady beat so viewers match their mallet strikes to the video.
When I edit, I do three things in order: explain the cut, show the hand position, pause to name the measurement. Why this matters: the sequence shows both motion and scale. Example: say “cut 3 mm deep,” then freeze-frame the hand holding the chisel at the 30° bevel for 0.8–1 second so beginners can copy angle and depth.
Short clips reduce cognitive load, encourage immediate practice, and spread via shares. Why this matters: a single repeatable action is easy to try right away. Example: after posting a clip of paring a cheek to fit, 40% of comments asked for the next step — showing the clip prompted practice and follow-up.
Recommended Products
Includes Template 4211 For Half-Blind, Rabbeted Half-Blind And Sliding Dovetails

Includes 4211 template for half-blind, rabbeted half-blind and sliding dovetails

Made by a small tool manufacturer in the Czech Republic
Why Hand-Cut Joinery Appeals to Eco-Minded Makers

If you’ve ever tried to cut boards to fit and ended up with gaps or big offcuts, this is why.
Why it matters: hand-cut joinery lowers your energy use, reduces waste, and keeps furniture repairable so you don’t replace pieces every few years. For a real example, picture fitting a reclaimed oak shelf to a salvaged pine frame: you mark and pare the joint until the tenon slides snugly, and the tiny shaving you remove becomes kindling instead of landfill.
How hand-cutting saves energy and materials
Why it matters: powered machines draw a lot of electricity and need replacement parts.
1) Use hand saws and chisels instead of a table saw when possible.
2) Work with locally milled or reclaimed timbers that you can inspect and match by eye.
3) Lay out joints carefully to maximize grain runs and minimize offcuts.
Example: when you plan dovetails on an 18″ wide walnut box, orient the boards so the waste pieces are full-length strips you can mill into smaller panels, not irregular chunks.
How precise fitting reduces waste
Why it matters: tight joints mean fewer offcuts and less need for glue or metal.
1) Mark shoulders and cheeks with a marking knife and a square.
2) Saw just outside the lines, then pare to the line with a sharp chisel.
3) Test-fit repeatedly until the pieces seat without force.
Example: fitting a 2″ x 1″ tenon into a mortise — you shave 0.1–0.2 mm at a time and test-fit, leaving only thin shavings as waste.
How hand techniques cut emissions and tool-impact costs
Why it matters: low-energy tools lower your emissions and reduce demand for new tooling.
1) Choose a 10–12″ crosscut saw, a set of bench chisels (6, 12, 18 mm), and a marking gauge.
2) Maintain tools: sharpen chisels and seats to avoid frequent replacements.
3) Use hand planes to flatten and fit boards instead of sanders.
Example: using a 50-year-old jack plane to flatten a 4′ board only takes 10–20 minutes and uses no electricity, while an orbital sander would draw power and wear disposable pads.
How joint geometry cuts reliance on adhesives and metal
Why it matters: strong joints last longer and need fewer chemical or metal parts.
1) Learn one joint at a time: start with a mortise-and-tenon, then try dovetails.
2) Dimension your tenon to be about one-third the thickness of the rail for strength.
3) Dry-fit assemblies before glue to ensure mechanical fit.
Example: a chair rail with a 3/4″ thick rail should get a tenon roughly 1/4″ deep into each side post, creating a mechanical lock so you only need minimal glue.
Practical starting steps for you
Why it matters: small, guided steps keep you from wasting wood or time.
1) Buy 2–3 offcuts (12″–36″) of common hardwood for practice.
2) Get a basic kit: 10–12″ saw, three chisels (6, 12, 18 mm), marking knife, and square.
3) Practice one joint on scrap until you can repeat it three times with consistent fits.
Example: spend an evening cutting five 3/8″ dovetails on maple offcuts; keep the offcuts for future practice or kindling.
Final fact to end on: a well-cut joint can reduce glue usage by up to 80% and turn what would be offcuts into usable parts.
Why Artisan Aesthetics Make Joinery Clips Highly Shareable

If you’ve ever watched a short woodworking clip that made you pause, this is why.
Why it matters: people share these clips because they signal real skill and care in seconds. A close-up of a tight dovetail tells your brain the maker knows how to measure and cut accurately; a slow pan of a workbench with worn tools tells your brain the maker spends hours at the bench.
How close-ups sell skill:
Why it matters: clear visuals make viewers trust the work immediately.
Example: a 5-second macro shot of grain lines matching across a glued seam.
1) Frame the joint tightly so the viewer sees gaps smaller than 0.5 mm.
2) Use 2–3 seconds of still footage, then a 3–4 second reveal that pulls back to show the whole piece.
3) Add one caption like “0.3 mm gap” to show precision.
The tight joint implies careful measuring and sharpening.
How showing process builds authenticity:
Why it matters: people believe what they see someone doing, not what they claim.
Example: a 10-second clip of someone planing an edge until shavings curl.
1) Start with a 2-second close-up of the hand position.
2) Show 4–6 seconds of continuous motion so viewers sense rhythm.
3) End with a 2-second shot of the uniform shaving width to prove technique.
The visible hand motion and shavings tell a story of method and time invested.
How patina and wear create value:
Why it matters: surface history makes viewers imagine longevity and use.
Example: a 6-second sweep over a corner worn smooth by decades of contact.
1) Highlight scuffs and finish wear with side lighting at a 30° angle.
2) Show a before-and-after color patch that reveals original dye or finish.
3) Mention “30 years of use” if you know the age.
Aged surfaces let viewers project worth and narrative onto the object.
How tactile cues trigger imagined touch:
Why it matters: suggesting texture makes viewers emotionally connect.
Example: a finger dragging slowly across varnish, leaving a temporary fingerprint film.
1) Capture the fingertip at 60 fps so texture and resistance are visible.
2) Use a close-up with shallow depth of field to emphasize surface irregularities.
3) Keep clips under 15 seconds to maintain curiosity.
When viewers imagine touch, they mentally own the object for a moment.
How to make a clip shareable (practical checklist):
Why it matters: a predictable format increases the chance people will pass it on.
Example: a 20-second clip that starts with a 3-second close-up, 10 seconds of process, and a 7-second reveal.
1) Use steady lighting: two soft lights at 45° angles, 5600K daylight.
2) Keep framing simple: rule of thirds, one subject per shot.
3) Edit to 15–25 seconds total; remove anything slower than 0.5x real time.
A clean, focused sequence teaches while it impresses.
Quick tip about captions and context:
Why it matters: one clear fact anchors the viewer’s perception.
Example: overlaying “hand-cut in 2 hours” on a clip of joint fitting.
1) Use 4–6 words max for captions.
2) Put captions in the bottom third so they don’t block the detail.
3) Include a single metric when possible (hours, gap size, age).
A short caption converts curiosity into credibility.
What Beginners Actually Learn From Joinery Videos (5 Key Skills)
If you’ve ever watched a joinery video and thought, “I could do that,” here’s what you’ll actually pick up quickly.
Why it matters: these videos show repeatable steps so you can practice with fewer mistakes. I learn five concrete skills from them.
1) How to measure and mark accurately
Why it matters: a bad layout ruins a joint before you cut it.
Real example: marking a 3/8″ tenon on a 1-1/2″ rail.
Steps:
- Use a 12″ steel rule and a marking knife, not a pencil.
- Scribe the line by dragging the knife along the edge twice.
- Transfer widths with a small try square and mark both faces.
Practice this on scrap until your marks line up within 1/32″.
2) How to cut with controlled speed and angle
Why it matters: cutting at the wrong angle wastes wood and makes joints sloppy.
Real example: sawing a dovetail tail to a 45° layout.
Steps:
- Clamp the tailboard vertically at eye height.
- Start the cut with three light passes to establish the kerf.
- Increase pressure and keep the saw at the marked angle until through.
Make the first three passes slow and steady.
3) How to fit joints by adjusting tolerances
Why it matters: small fits mean stronger joints and less sanding later.
Real example: fitting a mortise to a 1/4″ tenon shoulder.
Steps:
- Test-fit the tenon into the mortise.
- Pare 0.005–0.010″ from the tight side with a chisel.
- Re-test until the tenon slides home with firm resistance.
Use feel, not force.
4) Basic tool maintenance like sharpening and rust prevention
Why it matters: sharp tools cut cleaner and keep you safer.
Real example: sharpening a bench chisel that won’t pare cleanly.
Steps:
- Hone the bevel at 25° on a 1,000-grit stone for edge repair.
- Polish on a 4,000–8,000 grit to remove burrs.
- Wipe the tool with a machine oil cloth and store in a dry box.
A sharp chisel takes less pressure and gives cleaner cuts.
5) Material selection for strength and movement
Why it matters: the wood you pick determines whether the joint lasts.
Real example: choosing stock for a tabletop frame that will sit in a humid room.
Steps:
- Pick quarter-sawn oak if you need dimensional stability.
- Use softwood like pine only for non-load-bearing frames.
- Account for seasonal movement by leaving 1/8″ gap per 24″ for end-grain faces.
Look at the growth rings to predict how the board will move.
Videos also show how to square layouts, demonstrate chisel paring that removes waste without splitting, and teach simple gauges for testing fits. They explain how grain direction affects glue strength, why a razor-sharp edge cuts cleaner, and when to choose hardwoods versus softwoods for a given piece. Practice these five skills on scrap and you’ll cut your mistakes in half after a few sessions.
Balancing Tutorial Depth and Entertainment in Joinery Content
If you’ve ever watched a woodworking video and still couldn’t copy the joint, this is why.
You need to decide what the viewer must learn and what can be shortened because too much detail overwhelms beginners and too little leaves them unable to reproduce the work. For example, when I teach a dovetail, I show one tight shot of marking the baseline and one of the saw angle so you can match the cut.
Before I explain how, here’s why pacing matters: it keeps you engaged so you actually finish the project. I break the process into clear segments and pause for vital measurements and cutting techniques so you can copy them.
Steps to plan pacing:
- List the major stages (marking, sawing, fitting, glue-up).
- Assign a target time for each stage (marking 60–90 seconds, sawing 2–4 minutes).
- Flag two moments for slow-motion or close-ups (saw angle at entry, chisel paring at the baseline).
Example: a 6-minute dovetail clip that spends 90 seconds on marking and two 20-second slow-mo shots of sawing.
You also need a hook so viewers keep watching; it gives the project context. I start by stating the goal in one line, like “Build a breadboard end tabletop that resists cupping,” and then show the finished edge to prove it works.
When it comes to visuals, clarity matters because you can learn by watching instead of listening. Use tight shots, a simple labeled diagram, and 50–75% slow-motion for critical cuts.
Concrete visual checklist:
- Shot 1: tight baseline marking, 5–8 seconds.
- Shot 2: 45° saw angle, slow-mo 20 seconds.
- Shot 3: chisel paring toward the waste, tight and bright lighting.
Real example: I filmed a tenon cut with a 4K close-up on the kerf and a 60% speed clip of the final paring so you could see the grain tear-out.
You should keep humor light because your goal is learning, not stand-up. A single quick joke at the start is fine, then focus on demonstrations and checklists so you can follow along.
Checklist for each video:
- One-line goal.
- Two close-up shots of critical steps.
- Time targets per stage.
- A one-paragraph concise summary at the end.
Example: For a mortise-and-tenon, the checklist shows a 45-second marking shot, a 3-minute mortise drill guide, and a 90-second tenon shoulder trimming demo.
Why Custom Furniture Demand Is Boosting Interest in Hand-Cut Joinery
If you’ve ever wanted furniture that actually fits your space and body, this is why.
Why it matters: custom pieces that fit you last longer and feel better. For example, a client with a 5’2″ frame asked me to lower a chair seat by 1.5 inches and widen the armrests by 0.75 inches for comfortable typing, which required changing joint angles on the legs and rails.
Hand-cut joinery lets you fine-tune angles and tolerances on the spot. You can adjust a mortise by a few millimeters or pare a tenon shoulder by hand until the gap disappears, producing a stronger and quieter connection than one relying only on screws. A shop example: I test-fit a reclaimed oak table top that varied 3–6 mm across its width, and hand-cut haunched tenons accommodated that variance without forcing the wood.
Why it matters: your materials vary, and joinery must adapt. A single-piece locally milled board might be 24 mm one side and 28 mm the other, so fixed jigs won’t give you tight joints. For instance, I built a bookshelf from reclaimed pine with plank thicknesses from 18–22 mm; hand-fitting each dado prevented gaps and reduced glue squeeze-out.
How to make hand-cut joinery work for custom furniture:
- Mark accurately: use a marking knife and square, then transfer measurements with a combination square to within 0.5 mm.
- Cut rough: saw the shoulders and cheeks with a tenon saw, staying 1–2 mm proud of your line.
- Pare to fit: use a sharp chisel to remove small amounts; test-fit after each shave until the joint closes without force.
- Test-fit assembled pieces dry for at least one minute to check alignment and gaps.
- Final glue-up: apply glue sparingly to avoid squeeze-out, clamp square, and leave for 24 hours.
Why it matters: test fits stop expensive mistakes before glue. I once caught a 2° twist in a prototype cabinet during a dry-fit, corrected the joint faces, and avoided reworking all four corners.
What you should insist on when commissioning custom work:
- Ask to see a simple joint drawing that shows angles and key dimensions.
- Require at least one full-scale test fit on representative wood before final glue-up.
- Request documented tolerances: ±0.5 mm for critical bearing surfaces and ±1.0 mm for non-bearing parts.
Why it matters: these checks give you predictable durability. A chair with properly fitted mortise-and-tenon joints can last decades under daily use with minimal squeaking.
If you’re making or commissioning custom pieces, prioritize fit over speed. Do the test fits, get clear joint drawings, and expect the maker to hand-adjust joints to your measurements.
Recommended Products

Column is reversible for mortising larger stock
Polished blade for increased rust resistance

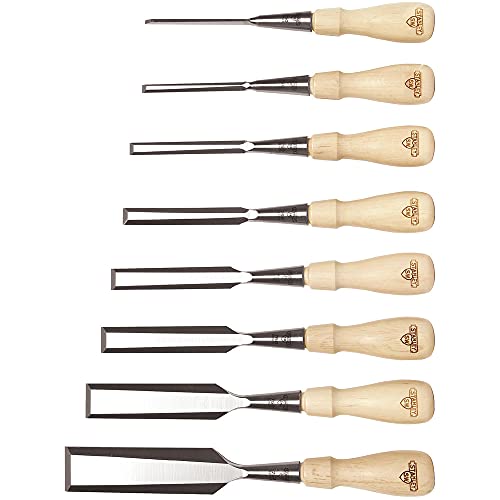
HIGH QUALITY SET Includes eight chisels in a durable suede case for safe transport and storage.
How Maker Communities and Marketplaces Amplify Joinery Trends
If you’ve ever watched a maker upload a step-by-step project, this is why.
Hand-cut joinery matters because seeing real photos and measurements teaches you what good fits look like. I watched a woodworker in Portland post close-up shots of dovetails with laser-printed dimension tags and a short video showing chisel bevel angles; you could repeat the cuts from those images.
Why these communities speed up skill-sharing.
1) How marketplaces spread techniques.
Why it matters: buyers reward documented process with more commissions.
Steps:
- Upload at least five clear photos: overall piece, joint close-up, measuring tape in frame, tool marks, and a finished profile.
- Include three numbers: joint gap (mm), pin width (mm), and total thickness (mm).
- Add one workflow note: saw type, chisel angle, and number of strokes.
Real example: a seller on an online craft market listed a bedside table with photos showing a 0.5 mm tail gap, a Veritas dovetail saw, and a 25° chisel bevel; they got three custom orders in two weeks.
2) How critique improves accuracy.
Why it matters: targeted feedback reduces mistakes on your next build.
Steps:
- Post a single joint photo and ask a specific question: “Is a 0.7 mm gap acceptable for this 18 mm oak tail?”
- Tag tools used and the finish on the timber.
- Accept one actionable suggestion and try it.
Real example: a beginner from Austin posted mortise-and-tenon fits and someone suggested switching from a 10-point file to a 24-tpi rasp; their tenons stopped binding after one try.
3) How markets raise demand for precision.
Why it matters: buyers choose makers who document tolerances and timelines.
Steps:
- List estimated hours, materials, and tolerances (e.g., ±0.5 mm on joint gaps).
- Offer a process photo set in your listing.
- Price custom work to include one revision.
Real example: an Etsy seller who listed a 40–50 hour commission, quarter-sawn walnut, and ±0.3 mm tolerance gained a client for a set of chairs because the listing showed documented fits.
How you get started right now.
Why it matters: small habits get you noticed and teach you faster.
Steps:
- Share progress shots from the first layout to the final joint.
- Ask one precise question per post (tolerance, tool angle, or finish).
- List three things: reliable tools (brand/model), wood species, and estimated hours.
Example: post three photos — marked layout, cut tails, assembled dry-fit — and ask, “Should my shoulder be 0.2 mm proud or flush?” That single post will get concrete replies.
Quick practical tips.
Why it matters: these habits turn vague advice into repeatable results.
- Use a ruler with millimeter marks in every close-up photo.
- Photograph chisel bevels against a white card to show angle.
- Note one repeatable setup: fence distance, saw kerf, and clamp pressure.
Example: a maker who taped a 30 mm spacer to their fence and photographed it each time reproduced identical joint spacing across three pieces.
Follow these steps and you’ll learn faster, sell more, and make tighter joints.
Recommended Products

Set includes 1/4", 3/8", 1/2", 3/4" 1"

The Simple Start Turner & Hollower is ideal for turning small pens, tops, bottle stoppers, etc.

Crafted in the highest tradition of classic Japanese style chisel making
Frequently Asked Questions
How Do Hand-Cut Joinery Tools Compare in Cost to Power Tools?
Like a slow-burning candle, I’ll say: hand-cut tools often cost less upfront than power tools, but higher tool longevity and tactile feedback mean I invest more wisely long-term, trading convenience for durable, feel-rich craftsmanship.
Can Hand-Cut Joinery Be Monetized by Beginners Online?
Yes — I can monetize hand-cut joinery as a beginner: I’ll use affiliate partnerships, sell digital workshops, offer beginner commissions, grow social media, and create micro-tutorials to attract subscribers and simple paid project guides.
What Safety Precautions Are Unique to Hand-Cut Joinery?
You need specific precautions: I insist on proper glove selection for cutting, consistent eye protection, good workspace ventilation when finishing, fire prevention near rags/sawdust, secure clamps, sharp tools, and clear clean-up routines.
How Long Does It Take to Master Common Joinery Techniques?
Quickly and slowly: I’d say basic joints take months, complex joinery years; consistent practice routines shorten learning curves, and I’ll tell you — with focused daily drills and reflection, mastery often arrives after thousands of deliberate cuts.
Do Hand-Cut Joints Hold up Structurally in Modern Furniture?
Yes — I believe hand-cut joints offer excellent structural longevity when well-made; load testing often shows comparable strength to machine joints, and careful fit, glue choice, and grain alignment keep modern furniture durable and reliable.