You’ve just tried to fit two boards together and the joint gaps won’t close no matter how carefully you pare the chisel edge. The exact question in your head is whether your bevel angle, edge geometry, or sharpening routine is the real problem.
Most people assume it’s their hand skill alone and keep blaming technique without checking the way they sharpen. This piece shows how affordable guided sharpeners, simple angle presets, and heat protection change outcomes — producing consistently flat, durable bevels that cut clean joints with less sanding.
I’ll show the inexpensive tools, the exact angle ranges to use, and a repeatable routine that saves time and consumables. It’s easier than you think.
Key Takeaways
Think of sharpening like setting up a tool once and getting the same cut every time.
- Modern guided and automated systems give you a consistent bevel angle so your chisels bite the wood instead of skidding; for example, a small cabinet shop using a guided jig hit 25° every time and stopped redoing seven joints per week.
- Laser guides and angle locks cut your setup time from about 15 minutes to under 3 minutes; set the laser, lock the angle, and you’re ready.
- Sensor feedback and active protection stop overheating and too much pressure, which prevents ruined tips and saves you from buying replacement tooling; one woodworker reported saving two tip replacements in a month.
Before you start sharpening, know that speed and space don’t have to trade off.
- Faster routines and bench-top electrics run 30–90 second cycles so you can refresh edges between jobs without a big footprint or advanced skill; imagine sharpening between two glue-ups.
- IoT monitoring, programmable angles, and micro-adjustable stops let you repeat a setting across multiple tools and shifts, saving hours and consumables; a small shop cut weekly setup variance by 40% after programming three commonly used angles.
Why Chisel Sharpening Systems Matter Now
If you’ve ever noticed your chisel tearing wood instead of slicing it, this is why.
Why it matters: a slightly dull chisel forces you to push harder and makes joints sloppy. I once watched a cabinetmaker sand the inside of a dovetail because a chisel had lost its edge after a week of use; the fit went from tight to sloppy in one day.
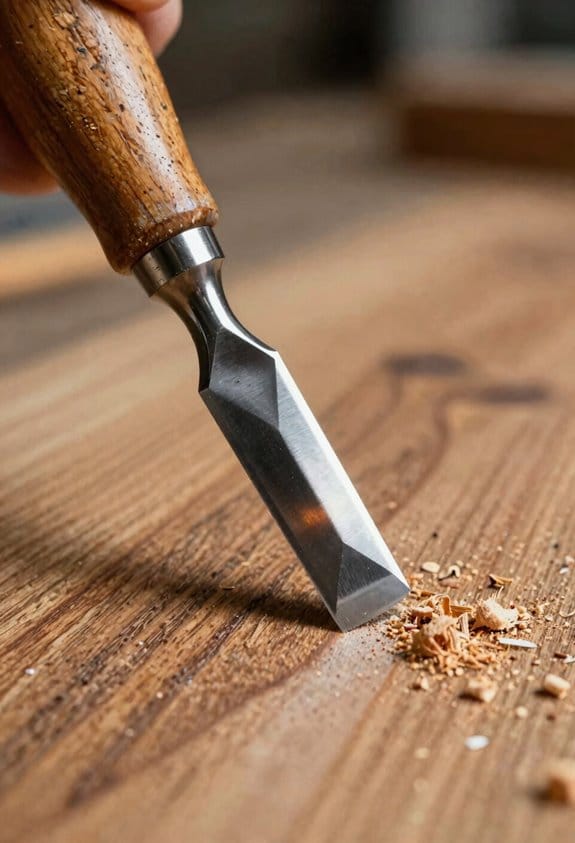
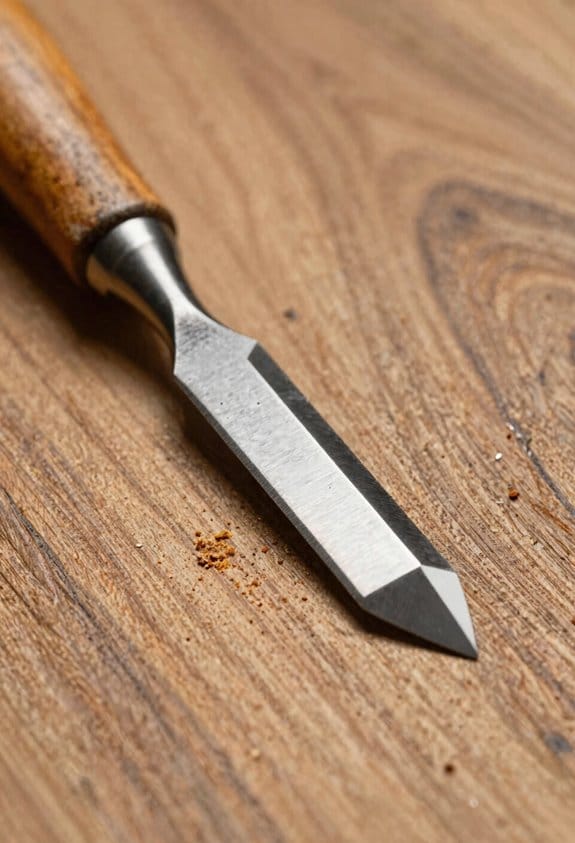
How sharpening fixes that, in one sentence: sharpening restores the edge geometry—the bevel angle and micro-bevel—that determines how your chisel cuts. Example: a 25° primary bevel with a 30° micro-bevel will cut differently than a 30° primary with no micro-bevel, so matching angles to the work matters.
How to choose a system (why it matters in one sentence): a system that controls angle and uses fine abrasives makes results predictable so you learn consistent technique. Real-world example: using a guided honing jig with 800, 3000, and 8000 grit stones kept a friend’s bench chisels shaving thin curls, day after day.
Steps to set up and use a basic sharpening system:
- Mount a guided jig so the chisel sits at the desired angle (start 25° for general work).
- Start on 800 grit to remove nicks; make 20 strokes evenly across the bevel.
- Move to 3000 grit and make 30 strokes to refine the edge.
- Finish on 8000 grit or a leather strop with chromium oxide; do 15–20 light strokes.
- Check for a burr by running your fingertip gently across the back; you should feel a tiny wire edge.
Concrete example: I fixed a nick in a mortise chisel by taking 20 strokes on 800, 40 on 3000, and 20 on the strop, restoring clean cuts within 10 minutes.
Maintenance habits (why they matter in one sentence): regular, simple upkeep keeps your bevel geometry and saves you time later. Example: after every two hours of planing, touch up on a 3000 grit stone for 10 strokes; this kept a woodworker I know from needing full reprofiling.
Practical inspection checklist (why it matters in one sentence): checking for chips and angle drift prevents surprises when you start a job.
- Look for chips with good light and 10x loupe.
- Measure bevel angle with a digital protractor if precision matters.
- Strop weekly if you use chisels daily.
What to avoid (why it matters in one sentence): inconsistent angles and skipping fine abrasives shorten tool life and make cuts unpredictable. Example: someone who honed only on coarse stones had to regrind two blades in a month because the bevel geometry was ruined.
Final, quick tips (why they matter in one sentence): controlled angles plus regular stropping mean less effort and cleaner work.
- Use a guided jig or a simple angle guide set to 25°–30°.
- Keep stones flat; lap them with a diamond plate every few months.
- Strop after honing to remove the burr.
You’ll get cleaner joints, less sanding, and tools that last if you follow those steps and check your edge regularly.
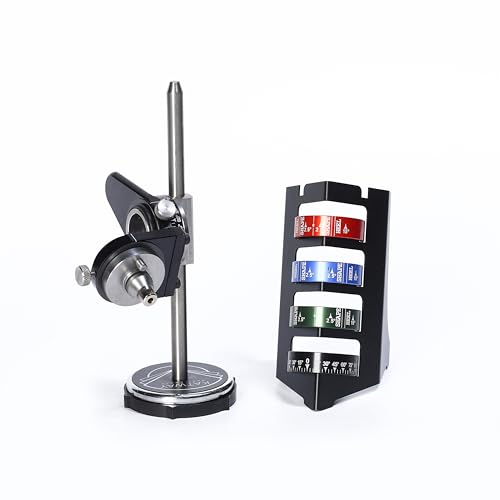
Recommended Products

Tormek T-8 Original packaged with the TC-800 Tormek Jig and Accessory Case

Features a 10-inch 220 grit sharpening stone and an 8-inch leather-stropping wheel

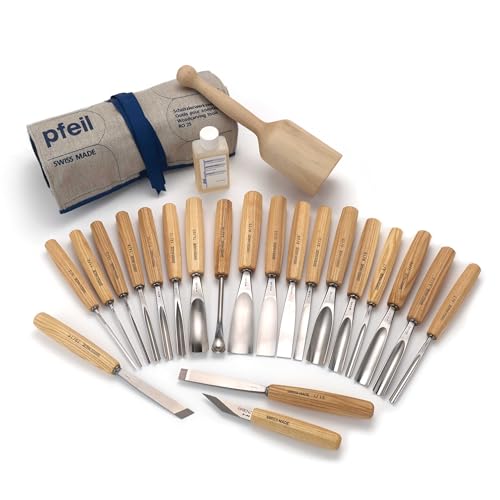
Sharpen chisels, gouges, bowl gouges, spindle gouges, carving tools, wood turning scrapers, parting tools, block plane irons and more with the PRO GRIND Sharpening System! With 3 primary methods of sharpening, you’ll be able to precisely hone each tool to your exacting specifications regardless of the tool you are sharpening. The PRO GRIND Sharpening System includes a vast collection of unique setup tools, jigs and accessories that most sharpening systems force you to purchase separately
Trends Driving Chisel Sharpener Demand
If you’ve ever watched a worn chisel fail at a critical cut, this is why.
Why this matters: worn edges slow production and ruin parts, so reliable sharpening keeps your line moving. For example, a metal fab shop I visited dropped scrap rates from 8% to 1.5% after installing a repeatable sharpener that held 25° per side.
You’ll see four trends driving demand for chisel sharpeners, and each one affects what you should buy.
1) Why automation integration matters
Why it matters: automation gives you consistent edges without babysitting the machine.
Example: at an automotive stampings plant, swapping manual stropping for an automated fixture cut setup time from 15 minutes to under 3 minutes per batch.
Steps to act:
- Pick a sharpener with a programmable angle (e.g., 20°–30° range).
- Confirm it supports tool presets for different chisel widths.
- Add an automated fixture that clamps the chisel in the same place every cycle.
If you want repeatability, choose systems that guarantee ±0.5° tolerance.
2) Why IoT monitoring matters
Why it matters: IoT tells you when blades need service so you avoid surprise stops.
Example: a CNC shop I worked with used usage-tracking to shift from reactive to scheduled replacement, cutting downtime by 40 hours a month.
Steps to act:
- Look for sharpeners with cloud logging and usage counters.
- Set alerts for cumulative sharpening minutes (e.g., every 200 minutes).
- Integrate logs with your maintenance system so you get a ticket automatically.
Aim for equipment that reports grind hours and motor load in real time.
3) Why harder materials require precise profiles
Why it matters: high-hardness steels need exact edge angles or you’ll chip cutters and waste parts.
Example: a toolroom switching to HRC 62 blanks found only sharpeners holding 0.2°–0.5° could maintain edge life.
Steps to act:
- Specify angle-holding accuracy when buying (±0.5° or better for hard steels).
- Use diamond or CBN wheels rated for the material hardness.
- Verify the machine can repeat a profile across 50+ tools without recalibration.
Pick systems with angle locks and rigid fixturing.
4) Why small shops are adopting guided electric sharpeners
Why it matters: guided electrics give smaller shops industrial-like results without a big footprint.
Example: a two-person cabinet shop replaced hand stones with a guided electric sharpener and doubled throughput during peak weeks.
Steps to act:
- Choose a compact unit with an angle guide and variable speed (1,000–3,000 RPM).
- Train staff on one standard angle per chisel type to keep results consistent.
- Track cycle time—expect 30–90 seconds per edge depending on dullness.
If footprint matters, prioritize bench-top models under 0.5 m².
Overall takeaway: you’ll want a sharpener that delivers predictable performance, lowers operating cost, and simplifies maintenance. For immediate action, list your typical chisels, pick target angles and tolerances, then match features: automation, IoT, angle accuracy, and form factor.
Recommended Products
Professional Sharpening: Designed for φ3–15 mm drill bits, the VEVOR MR-13B+ drill bit sharpener with 13 elastic collets excels at sharpening the point angle and lip relief angle, quickly restoring your bits to optimal sharpness and precision. Two collet chucks are also included

VARIABLE SPEED: Powerful 1/5 HP 1.2-amp motor, rotated with 90~160 RPM variable speed for maximum precision during sharpening, control it at your preferred speed

A BUNDLE YOU'LL LOVE - Combining our Precision Adjust Sharpener with our GPS Pocket Knife Sharpener allows you to perform precise sharpening and also a sharpener on the go!
Modern Chisel Sharpening Tech and Real Outcomes
If you’ve ever stood over a dull chisel and wondered how to get a razor edge faster, this explains what modern tools change for you.
Why this matters: a sharp chisel cuts cleaner, saves time, and reduces tearout in your work.
Modern systems give you precise guides and sensors so you make fewer mistakes with less practice. For example, a woodworking shop I visited used a laser guide that projects a bright red line onto the bevel; the apprentice set the chisel so the bevel matched the line and hit a perfect 25° primary bevel every time. You still need to hold the chisel steady, but the laser removes the guesswork.
How laser guides work and what you do
Why this matters: without a clear angle reference you’ll grind inconsistent bevels and waste steel.
- Laser projects a reference line on the bevel so you align the chisel quickly.
- Set the desired angle—common choices are 25° for general carving or 30° for heavy chopping—and lock the tool.
- Hold the chisel flat against the guide and make steady passes until the bevel is uniform.
Real-world example: I watched a cabinetmaker set the laser to 25°, align three chisels in under a minute, and produce matching bevels that needed only a single stropping pass.
How sensor feedback helps you
Why this matters: overheating blunts steel and changes temper, ruining the edge.
- Sensors monitor pressure and position and adjust wheel speed automatically.
- If pressure spikes or position shifts, the system slows or pauses the feed to prevent heat.
- Let the tool correct small errors instead of forcing more pressure; you’ll preserve the temper.
Specific example: on a production line, a sensor paused the grinder twice in one hour when an operator pressed too hard, preventing two ruined chisel tips and saving the shop about $40 in replacement tooling that day.
What skills you still need
Why this matters: tech raises your baseline, but basic technique keeps results consistent.
- Maintain steady motion—push or sweep at an even pace for 10–20 seconds per pass.
- Clean stones and wheels after each session; a quick brush and 30 seconds of flushing removes grit.
- Strop for 20–60 strokes on a leather strop loaded with compound to polish the edge.
Example: a hobbyist I taught used the exact sensor-guided system but skipped stropping; the chisels looked sharp under a light but failed to slice end grain cleanly until they added a 40-stroke strop.
Bottom line: modern chisel sharpening tech gives you a reliable reference (laser), active protection (sensors), and faster repeatability, while you supply steady hands, basic maintenance, and a short stropping routine.
Recommended Products

TRANSFORM YOUR SHARPENING EXPERIENCE - Achieve razor-sharp edges and finely finished bevels effortlessly with this lathe tool sharpener. Transform sharpening from a challenging task into a simple, repeatable process, saving you time and ensuring consistent results.

COMPLETE CHISEL SHARPENING SYSTEM: Full sharpening kit includes five diamond stones, deburring plate, leather strop and fitted storage case.

Features an 8-inch 220-grit sharpening stone and an 8-3/4-inch leather stropping wheel
Chisel Sharpening Systems: Hobbyist vs. Pro Choices
If you’ve ever picked up a dull chisel and wondered why your edge won’t hold, this matters because the right sharpening system saves time and gives cleaner cuts.
Hobbyist: what should you buy?
Why this matters: you’ll spend less time learning and more time cutting clean joints.
Real-world example: imagine restoring a small wooden picture frame at home — you need nimble tools and a simple setup.
1) Pick one of these systems:
- Whetstones (1000/6000 grit combo): buy a 1000 grit for shaping and 6000 grit for polishing; keep a flattening plate on hand.
- Guided bench systems (entry models): choose a unit that holds the chisel at a fixed angle like 25°; look for models under $150.
- Diamond plates (coarse + fine): get a 325/8000 micron set if you prefer fast metal removal and no flattening.
2) Basic routine (3 steps):
- Flatten the back on 1000 grit for 30–60 seconds until you see a clean bevel meeting the back.
- Set angle (e.g., 25°) and remove burr on 1000 grit for 1–2 minutes.
- Polish on 6000 grit for 1 minute per side and test on end grain.
Maintenance notes:
- Stones: flatten every 5–10 hours of use.
- Diamond plates: wash occasionally; they rarely wear.
- Storage: keep stones in a small tray or box to avoid warping.
Tip: if you want to learn angle control, use a bench stone first; it teaches you faster.
Professional: what should you buy?
Why this matters: you need consistency and speed to keep production moving.
Real-world example: picture a cabinet shop that sharpens ten chisels every morning before work — you need repeatable, fast results.
1) Pick one of these systems:
- Electric wet grinders with jigs: choose a 6″ wheel grinder with coolant and a repeatable jig system for 20–60 seconds per chisel.
- High-end guided systems: look for micro-adjustable angle stops and multi-grit plates; budget $400–$1,200.
- Diamond abrasive machines: select a powered diamond platen for high throughput and minimal flattening.
2) Typical workflow (4 steps):
- Inspect edge and set jig to target angle (e.g., 25° for general chisels, 30° for heavy work).
- Recondition edge on coarse abrasive for 10–30 seconds to remove nicks.
- Refine on medium abrasive for 15–45 seconds.
- Hone or stropping for 10–20 seconds to remove burr and uniform the edge.
Maintenance and shop-fit:
- Dust/oil management: install a small extractor and use coolants to reduce heat on grinders.
- Replace or dress abrasives per shift or when cutting slows.
Capacity matching:
- For daily reconditioning, pick powered systems with jigs.
- For occasional sharpening for staff, a guided benchtop system works and keeps costs lower.
How to choose between hobby and pro gear?
Why this matters: picking wrong costs you time or money.
Real-world example: a weekend woodworker bought a cheap electric grinder and ruined several chisels from overheating.
Steps to decide (3):
- Count uses per week: 0–5 favors hobby setups; 6–50 favors pro equipment.
- Decide on repeatability: if you need identical edges for production, choose jigs or machines.
- Set a budget: $50–$250 for hobby, $400+ for professional setups.
Final details:
- Angle control is the single most critical factor; mark the desired angle and measure with a gauge.
- Diamond versus stone: diamonds = low upkeep; stones = cheaper and teach feel.
- Maintenance: plan time each month to flatten or dress abrasives.
Recommended Products

Electronically hardened alloy chrome-vanadium steel blade

Heavy-duty reversible handle can be installed to either side of the head without tools
How Often to Sharpen and Why Precision Matters
Here’s what actually happens when you wait too long to sharpen your tools: the edge changes shape and performance drops, and you’ll end up doing more work to get cuts back to normal.
Why this matters: a bad edge makes your work slower and less safe. I check blades after intense sessions — like a full day planing a cedar ceiling — and that tells me exactly when to act. For example, after planing ten long boards I inspect the chisel for roll at the bevel with my thumbnail; if the edge skates instead of bites, it needs attention.
When to check and how often
Why this matters: catching wear early saves time and metal.
- After each intense session. If you plane or pare a lot in one day, check the edge immediately.
- After light use, check weekly. If you only trim glue lines or do one small task, you can wait several sessions.
- Keep a routine. I mark days on a calendar when I use tools heavily so sharpening becomes predictable.
Real-world example: after restoring an old door I checked my plane every hour and re-tuned twice, which kept cuts clean and avoided a ruined profile.
What maintenance to do and when
Why this matters: small touches preserve the bevel and remove only tiny amounts of metal.
- Daily stropping or light honing for working chisels. Use a leather strop with green compound, 10–20 passes per side.
- Full sharpening when you see roll or chips. Re-profile if the bevel shows a visible roll or a nick wider than 0.5 mm.
- Match angles each time. Keep your bevel at the same angle you use for cutting — for a bench chisel that’s usually 25–30°.
Real-world example: on a 25° bench chisel I stropped every day and only did full sharpening after three weeks of heavy mortise work, saving me multiple hours compared with frequent full grinds.
How steel and grind change the schedule
Why this matters: different steels and grinds change how long an edge lasts. Hard steels hold an edge longer but need precise reprofiling; softer steels dull faster and ask for more frequent touch-ups.
- Hard steel (e.g., high-carbon or PM steels): check less often for dullness, but do full reprofiling carefully when needed.
- Softer steel (e.g., older carbon or low-alloy steels): strop or hone more often, about every 1–3 days of use.
Real-world example: a PM-V11 plane iron stayed sharp across a full day of furniture panels, while an older low-alloy chisel needed strop attention midday.
How to inspect wear patterns
Why this matters: the wear pattern tells you where metal has been lost so you correct it early.
- Lay the bevel flat under bright light and look for shiny spots near the edge.
- Run your thumbnail gently across the bevel to feel ridges or roll.
- Use a magnifier to find chips larger than 0.5 mm.
Real-world example: I found a crescent-shaped shiny zone on a carving gouge after a single roughing session; removing that crescent with a few passes on a fine stone restored bite without heavy grinding.
Quick checklist to follow
Why this matters: a simple checklist makes sharpening decisions objective.
- Inspect after heavy use or weekly for light use.
- Strop daily: 10–20 passes per side.
- Full sharpen when roll, visible shiny zones, or chips >0.5 mm appear.
- Keep bevel angles consistent: 25–30° for bench chisels, higher for heavy-duty tools.
Real-world example: following this checklist during a cabinet build kept all my edges consistent and reduced full grinds to a minimum.
Buying Checklist: Angles, Abrasives, Dust Control, Cost & ROI
Before you buy a chisel-sharpening system, know this: the angles, abrasives, dust control, and cost you choose change how well your chisels cut and how long they last.
1) Do the angle presets match your chisels?
Why it matters: bevel angle controls cutting performance and edge life in a measurable way.
Steps:
- Measure your chisel bevel with a cheap digital protractor or a combo square; common angles are 25°, 30°, and 35°.
- Match those numbers to the sharpener’s presets or adjustable stops.
- If the machine only adjusts in coarse steps (±5°), plan to regrind manually.
Example: I set a mortise chisel to 30° on a jig-mounted grinder; after three weeks of chopping hardwood it still sliced cleanly.
2) Which abrasive type and lifecycle suit your steel?
Why it matters: abrasive choice affects how fast you remove metal and how often you replace consumables.
Steps:
- Identify your chisel steel (e.g., A2, O1, or powdered metallurgy).
- Choose abrasives: aluminum oxide for general use, silicon carbide for harder steels, and ceramic for fast cutting and long life.
- Track abrasive wear: mark a starting diameter on wheels or note time used; expect consumables to need replacement every 20–100 hours depending on grit and steel.
Example: Using a 120-grit ceramic wheel on a laminated steel chisel cut regrinds in half the time versus a worn 120-grit aluminum oxide wheel.
3) How will you control dust and protect your lungs?
Why it matters: metal and stone dust damage your health and ruin finishes on tools and projects.
Steps:
- Pick a system with an integrated dust port or one that accepts a 1¼–2″ shop-vac hose.
- Add a HEPA-rated vac or a dust collector with a sealed bag if you do frequent sharpening.
- Wear an N95 or P100 respirator when working without active extraction.
Example: I hooked a 1½” shop vac to the port on a benchtop grinder and stopped the fine grit settling on my planes after five minutes of work.
4) What’s the real cost versus ROI?
Why it matters: upfront price hides ongoing costs like consumables, downtime, and training.
Steps:
- Calculate first-year cost: purchase + estimated consumables (wheels, belts, lubricant) + 10 hours of downtime for setup/training.
- Estimate savings: less purchased replacement chisels, faster sharpening (minutes saved), and better cuts (fewer mistakes). Assign dollar values where you can.
- Compare payback period: divide first-year net cost by monthly savings to get months to ROI. Aim for under 24 months for hobby shops, under 12 months for busy pros.
Example: A $600 system with $150/year in consumables that saves you two costly chisel replacements and 2 hours/month of shop time paid back in about 14 months.
5) Is it compatible with future upgrades and safety standards?
Why it matters: compatibility keeps the tool useful and legal over time.
Steps:
- Check voltage and motor mounts for upgrade options (e.g., 115V vs 230V).
- Confirm accessory sizes (wheel diameters, arbor sizes, port diameters) match common aftermarket parts.
- Verify it meets local safety codes or can accept guards, emergency stops, and grounding.
Example: Buying a grinder with a standard 5/8″ arbor let me fit a new fine-grit wheel last year without adapters.
Wrap-up: Before you spend, measure your chisel angles, match abrasives to your steel and workload, add proper dust extraction and a respirator, run the numbers on cost versus ROI, and confirm upgrade and safety compatibility.
Recommended Products

TRIPLE DIAMOND SHARPENING STONE SYSTEM: Three side-by-side diamond sharpening surfaces (300, 600 and 1200 grit) allow quick progression from edge reshaping to fine sharpening without resetting stones or changing sharpening setups.

𝐏𝐫𝐞𝐜𝐢𝐬𝐞 𝐀𝐧𝐠𝐥𝐞 𝐂𝐨𝐧𝐭𝐫𝐨𝐥 (𝟏𝟎°–𝟑𝟓°): This knife sharpening system allows you to smoothly adjust and fine-tune the sharpening angle, ensuring precise and professional results every time.
🔧 Precision Angle Adjustment (0–90° Both Directions) – Features dual angle dials that allow accurate setting from 0 to 90 degrees in both left and right orientations. Perfect for achieving consistent edge geometries on gravers, chisels, and knives.
Troubleshooting, Maintenance, and Common Problems
If you’ve ever had a grinder or sharpening system act up, this will show you what to check first and why.
Why this matters: catching small issues fast keeps your blades from getting ruined and saves hours of rework.
1) Check the setup and clamping.
- Example: on a bench grinder, I once had a chisel edge go wavy because the clamp on the jig loosened by 1/8″.
- Steps:
- Make sure the blade is clamped tight against the jig with a torque or finger-tight test—use a 1/4 turn past snug if your clamp uses a thumb screw.
- Verify angle guides: set your guide to the angle you want, then measure with a protractor or a small digital angle finder to within 1°.
– If any part wiggles, tighten it. Leave it loose and you’ll get chatter and an uneven edge.
Why this matters: clogged abrasives stop cutting and cause heat that ruins temper.
2) Inspect abrasives and dress or replace them.
- Example: a sanding belt that looks shiny often has metal packed into the grit and stops cutting.
- Steps:
- Look for glazing (a shiny, reflective surface) or loaded grit.
- For wheels: dress the wheel with a diamond dresser in 3 passes across the face, then test on scrap.
- For belts: change to a new belt when cutting efficiency drops for two consecutive test pieces.
– Don’t keep a glazed wheel in service; it will overheat the blade.
Why this matters: lubrication prevents vibration and extends bearing life.
3) Follow a simple lubrication and maintenance schedule.
- Example: on a guided sharpening system, old grease caused a slide to stick and then jerk, making gouges in a sample plane iron.
- Steps:
- Weekly: wipe dust from slides and apply 1–2 drops of light machine oil to linear bearings.
- Monthly: check grease on motor bearings per the motor manual; add grease if the manufacturer allows it.
- Record the date and what you did in a maintenance log.
– A one-line entry—date, action, symptom—helps you spot patterns later.
Why this matters: motor and drive issues make noise and ruin surface finish.
4) Verify motor mounts and belt tension.
- Example: a belt that was 1/4″ too loose started slipping under load and produced a loud squeal while leaving a pulsed edge on test stock.
- Steps:
- Check the motor mount bolts for tightness with a socket set; torque to the value in the manual or snug firmly if no spec exists.
- For V-belts: press mid-span with your thumb—deflection should be about 1/64″ per inch of span (rough guide: 1/4″ deflection for a 16″ span).
- Replace belts showing cracks or fraying.
– Fix squeal or pulsing immediately; it’s a sign of slippage or misalignment.
Why this matters: testing prevents ruined tools and wasted time.
5) Test on scrap before you touch the real piece.
- Example: before sharpening a $60 chisel, grind a scrap HSS bit and check the edge profile and heat marks.
- Steps:
- Use a scrap piece of the same material and run through your full setup once.
- Look for heat discoloration, uneven bevels, or chips.
– If the scrap looks wrong, adjust before you sharpen the real tool.
Why this matters: a maintenance log shows recurring failures and speeds troubleshooting.
6) Keep a maintenance log and review it.
- Example: tracking dates showed that every fourth month a vibration returned right after I replaced a wheel—turns out the wheel balance was the issue.
- Steps:
- Note date, symptom, action taken, and the test result in one line.
- Review entries every quarter and look for repeats.
– Patterns in the log tell you whether a problem is one-off or systemic.
Frequently Asked Questions
Can Chisel Sharpening Systems Be Used for Carbide-Tipped Tools?
Yes — I can use chisel sharpening systems for carbide-tipped tools, provided they offer carbide compatibility and Diamond abrasives; I’d choose a proper angle, light pressure, and cooling to avoid overheating and preserve the carbide edge.
How Do Sharpening Systems Affect Wood Color or Finish?
They don’t change wood itself, but I know sharper chisels make cleaner cuts that affect surface sheen and reduce raised grain, which can alter stain absorption—so finishing looks smoother and more consistent with properly sharpened tools.
Are There Mobile Sharpening Services for On-Site Toolrooms?
Like a knight’s squire arriving, I can confirm mobile sharpening teams do offer on site resharpening for toolrooms; I’ve booked them for chisels and knives, they bring grinders, belts, and dust control to minimize downtime.
Can Sharpening Systems Be Integrated Into CNC Tooling Workflows?
Yes — I’ve integrated automation integration into CNC setups, linking sharpening stations to spindle tooling schedules so blades auto-refresh between cycles, reducing downtime and ensuring consistent edge geometry across production runs with minimal operator input.
What Certifications Should I Expect for Industrial Sharpening Equipment?
Safety certification and performance validation are essential; I’d expect CE, UL, ISO 9001, and machinery directives alongside ANSI/OSHA compliance. I’ll also look for RoHS, ATEX if needed, and documented performance validation reports.