
You’ve just run a router bit across a cherry edge and now the joint won’t close — what do you do to get a snug fit without ruining the piece?
You’ve asked yourself whether to clamp it, hog more material with a power tool, or slow down with a rasp and hope for the best.
Most people over-rely on power tools for speed and then blame themselves when fine adjustments are needed.
This piece shows you a clear workflow: where to use power for rough removal, when to leave a 2–3 mm margin, and how to finish by hand so joints fit perfectly every time.
I’ll also give repeatable settings and quick test-fit steps.
It’s easier than it looks.
Key Takeaways
If you’ve ever tried to fit two pieces together and ended up sanding forever, this matters because finishing by hand saves fragile edges from damage.
1) Use power tools for the heavy work, then finish by hand.
- Why: power tools save time on large cuts, and hand tools give the final fit and feel.
- How: cut rough with a table saw or circular saw, leaving 2–3 mm of extra material, then pare to final size with a chisel or shoulder plane.
- Real example: cut ten identical shelf boards on a table saw set with a 3 mm fence offset, then use a low-angle plane to shave each edge flush.
If you’ve ever sliced through a thin veneer, you’ll want tactile feedback to prevent wrecking it.
2) Reserve hand tools when small adjustments or fragile parts are involved.
- Why: your hands feel resistance and you can stop before tearing wood or denting metal.
- How: when trimming a glued veneer edge, score with a utility knife, then use a cabinet scraper and a card scraper to remove 0.5 mm per pass until smooth.
- Real example: repair a veneer corner by scoring a 1 mm bleed line, then scrape off three light passes to match the surrounding surface.
The difference between roughing and finishing is leaving a small margin to refine.
3) Combine workflows: rough first, finish last.
- Why: this reduces blowout and gives predictable final cuts.
- How (steps):
- Rough-cut with a power saw leaving 2–3 mm extra.
- Clamp the piece securely to a bench.
- Use a chisel, file, or plane to remove the leftover material in controlled passes.
– Real example: cut a tenon on a bandsaw leaving 2 mm, then pare to fit with a sharp chisel in 0.5 mm increments until the joint is snug.
Before you run a power tool, set up jigs and stops to minimize rework.
4) Employ jigs and stop blocks to make power-tool cuts repeatable.
- Why: consistent cuts mean less hand tweaking later.
- How: build a simple sled or use a sacrificial fence and set stop blocks for repeat cuts; verify one test piece, then run the rest.
- Real example: make a crosscut sled with a 10 mm stop block to cut twenty identical tenons without measuring each time.
You don’t need to guess about readiness; prioritize setup for faster, cleaner work.
5) Prioritize setup: sharp blades, firm clamping, good light, and PPE.
- Why: a sharp tool and proper clamping make both power and hand work safer and more accurate.
- How: sharpen blades to the manufacturer’s angle, tighten clamps so the workpiece doesn’t move, set a bench lamp for shadow-free light, and wear eye and hearing protection.
- Real example: before a day of dovetailing, hone chisels to 25° bevels, secure the tail board with two 120 mm clamps, and use a daylight work lamp at 60 cm.
Final practical tip: when you switch from power to hand tools, stop and clean the cut line; dust and swarf hide small gaps.
Which to Choose: Hand Tools or Power Tools for Precision?
The difference between hand tools and power tools comes down to one thing: control versus speed.
Because this matters when you risk damaging parts, here’s why: you need control to feel tension and avoid stripping threads. Use hand tools when you must sense resistance. Example: when you’re installing a delicate camera mount, use a 1/4″ drive torque wrench set to 6–8 in·lb and finish with a fingertip turn. Steps: 1) set the torque wrench, 2) snug until it clicks, 3) finish by hand until you feel resistance.
Hand tools give you direct feel and fine control.
Why this matters: your fingers and small wrenches let you prevent over-tightening that could crack plastic or deform soft metals. Example: replacing the hinge on a wooden jewelry box—use a #1 Phillips screwdriver and turn with your wrist, not your arm, stopping when the screw head sits flush and the wood compresses slightly. Steps: 1) choose a driver that fills the screw head, 2) apply steady pressure, 3) stop at flush contact.
Power tools trade some sensitivity for speed and repeatability.
Why this matters: they let you do repetitive cuts or large-volume work without getting tired. Example: cutting five identical 2″ maple strips for a shelf—use a miter saw set to 2″ and clamp a stop block; you’ll get consistent lengths within ±1/32″. Steps: 1) measure and mark one piece, 2) set stop block on the saw fence, 3) cut all pieces using the block.
When to combine both methods.
Why this matters: power tools handle rough shaping fast, and hand tools give the final fit. Example: shaping a drawer front—rip to size on the table saw, then plane the face to fit. Steps: 1) cut oversize by 1/8″, 2) clamp and plane in 1–2 passes, 3) test fit and adjust with a block plane until the drawer closes smoothly.
Safety, setup time, and material limits matter.
Why this matters: wrong choice increases risk and waste. Example: trying to sand thin veneer with a random-orbit sander can tear the veneer—hand sanding with a sanding block and 220 grit avoids that. Steps: 1) peel back a small edge, 2) test-sand a scrap, 3) proceed with the chosen method.
Quick checklist to decide in under a minute:
- Need feel or final fit? Pick hand tools.
- Need repeatable volume cuts or heavy material removal? Pick power tools.
- Both: rough with power, finish with hand.
You now have concrete steps and examples to choose the right tool every time.
Recommended Products

90-tooth gear delivers a 4° swing arc to turn a fastener in tight confines

2904-20 Hammer Drill: Only 6.9 in. L for access into tight spaces and reduced fatigue 2904-20 Hammer Drill: Auto-Stop Feature to prevent from over-rotation in a bind up for enhanced safety, equipped with a dedicated auto stop light on foot of tool to indicate a Auto Stop event 2953-20 impact driver: tri-LED Lighting for maximum workspace visibility

All our efforts have to date made us one of the biggest internationally operative tool manufacturers with customers in over 135 countries of the world.
Quick Decision Criteria for Accuracy and Control
If you’ve ever stood over a project and hesitated, this is why.
Why it matters: choosing the right tool prevents mistakes and saves hours. I use two quick questions to decide whether you need feel or speed, and a short setup checklist to make the choice reliable.
1) Ask these two questions
- Does the job need delicate force feedback or tiny adjustments (like shaving a 0.5 mm feather edge on a wooden dowel)?
- Will repeatability or bulk material removal dominate the work (for example, cutting ten identical 2″ boards)?
Example: when I trimmed a 0.5 mm burr off a guitar saddle, the first question told me to use a hand file so I could feel pressure changes.
2) Quick setup checklist (do this every time)
- Check tool sharpness — press a fingernail lightly to feel bite; replace or sharpen if dull.
- Verify fixture stability — clamp the workpiece with at least two clamps perpendicular to the cut.
- Confirm lighting — position a task lamp within 12 inches of the work area to eliminate shadow.
Example: for routing a groove, I clamp the board at both ends, set a 60W work lamp within a foot, and test the router bit on scrap for 5 seconds.
3) Tool choice rules
- If force feedback matters, pick hand tools so you can sense pressure changes and avoid gouging. Use a 6″ needle file, a 1″ chisel, or a palm sander set to low.
- If repeatability or bulk removal matters, use power tools with jigs or guides. Use a circular saw with a straightedge clamp, or a drill press with a fence.
- For mixed tasks, follow these steps:
- Use power tools for rough removal (leave ~2–3 mm of material).
- Switch to hand tools for fine tuning and finish.
- Re-check fit or flushness with a feeler gauge or by eye at arm’s length.
Example: when fitting a door, I cut the bulk with a circular saw guided by a straightedge, leave 2–3 mm, then pare with a bench plane until the door closes without binding.
Practical numbers and tips
- Clamp spacing: place clamps every 12–18 inches on a board under pressure.
- Hand-sanding: go 2–3 grits finer for each pass (120 → 180 → 220).
- Router depth control: make cuts in 1–2 mm passes rather than a single deep pass.
Example: I routed a hinge mortise by taking three 2 mm passes instead of one 6 mm pass; the hinge sat flush and the wood didn’t tear.
Follow this routine and you’ll reduce mistakes and match tools to the task.
Five Precision Tasks Best Done With Hand Tools
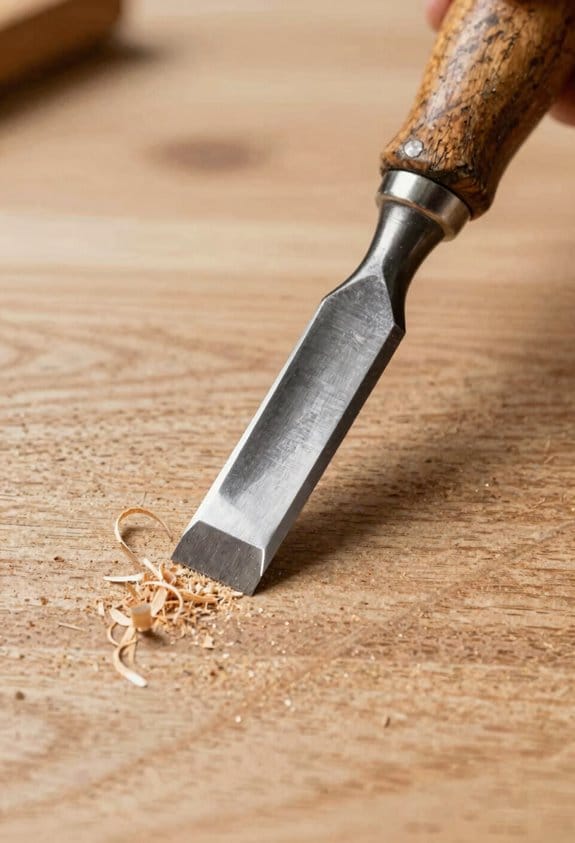
If you’ve ever struggled with tiny, fiddly work, this is why.
Though a drill or sander seems faster, you get much better control and feel with hand tools — and that matters when you’re removing millimeters, sensing resistance, or matching grain. Below I’ll explain five specific tasks, why hand tools matter for each, and exactly how to do them.
Micro carving — why use a hand chisel?
Why it matters: tiny mistakes ruin fine detail; a hand chisel lets you remove 0.5–2 mm at a time.
Example: carving a floral motif on a cherry cabinet door where a slip could ruin a petal.
How to do it:
- Use a 1–4 mm detail chisel or micro gouge, sharpened to a 25–30° bevel.
- Mark your cutting lines with a 0.3 mm mechanical pencil.
- Support the work with a bench pin and clamp; cut toward the support.
- Pare with light, controlled strokes and stop every 3–5 passes to check the profile.
Tip: if you hear chatter, dull the edge slightly or change your wrist angle.
Jewel repair — why use hand vises and files?
Why it matters: you need to feel tightness and alignment, down to fractions of a millimeter.
Example: straightening a slightly bent ring shank and re-flowing a bezel on a 18k gold setting under a 10x loupe.
How to do it:
- Secure the piece in a pin vise fitted with soft jaws.
- Use a 0.5–1 mm needle file to remove material in 0.1–0.2 mm increments.
- Burnish with a polished steel burnisher, working 5–10 seconds per stroke.
- Check fit and alignment under magnification after each adjustment.
Tip: keep a tray of clean water nearby to rinse filings and avoid scratching.
Fitting a tenon into a mortise — why pare with a chisel?
Why it matters: a too-tight tenon splits the mortise; a loose one weakens the joint.
Example: fitting an oak rail tenon 50 mm long and 12 mm thick into a mortise in a chair leg.
How to do it:
- Test-fit the tenon; mark high spots with a wax crayon.
- Clamp the tenon in a bench vise and pare off 0.2–0.5 mm per pass with a sharp 12–18 mm bevel-edged chisel.
- Try the joint after every 2–3 shavings; aim for a sliding fit that needs light tap with a mallet.
- When the shoulders seat fully with no gap, remove the tenon and chamfer edges 0.5 mm.
Tip: rotate the tenon 90° and re-check to avoid one-sided fits.
Delicate hinge mortising — why hand-route and knife first?
Why it matters: power routers can tear grain and remove too much in corners, ruining door fit.
Example: mortising a 75 mm x 20 mm hinge leaf into a softwood door edge for a bathroom door.
How to do it:
- Scribe the hinge perimeter with a sharp utility knife using the hinge as a template.
- Chop the waste with a 6–12 mm mortise chisel, taking 1–3 mm depths per pass.
- Clean corners and fine depths with a skew chisel or router plane for true flatness.
- Fit the hinge and drill screws in pilot holes sized to screw core diameter.
Tip: test the door swing before final screws; adjust depth by paring 0.2–0.5 mm.
Final surface smoothing with scrapers — why choose scrapers over sanders?
Why it matters: scrapers remove fine tearout and leave a glassy surface without clogging grain.
Example: smoothing a tabletop of maple after planing where the grain rises when sanded.
How to do it:
- Burnish a 50–80 mm card scraper to a 0.3–0.5 mm burr using a file and a burnisher.
- Hold the scraper at roughly 45° and take light passes of 0.1–0.2 mm across the grain.
- Keep strokes long and overlapping; stop when the surface reflects evenly.
- Follow with a 320–400 grit pad only if you want more gloss.
Tip: if the scraper gums, clean with solvent and re-sharpen the burr.
Final note: use the right tool, sharpen it, and remove tiny amounts slowly.
If you do that, your fit and finish will match what a power tool can’t deliver.
Recommended Products

Tormek T-8 Original with the RB-180 Rotating Base

Made in England

Includes three Micro Tools: Easy Rougher, Easy Finisher and Easy Detailer in an attractive and sturdy plastic tool case with foam liner
Set Up Hand Tools for Razor Accuracy
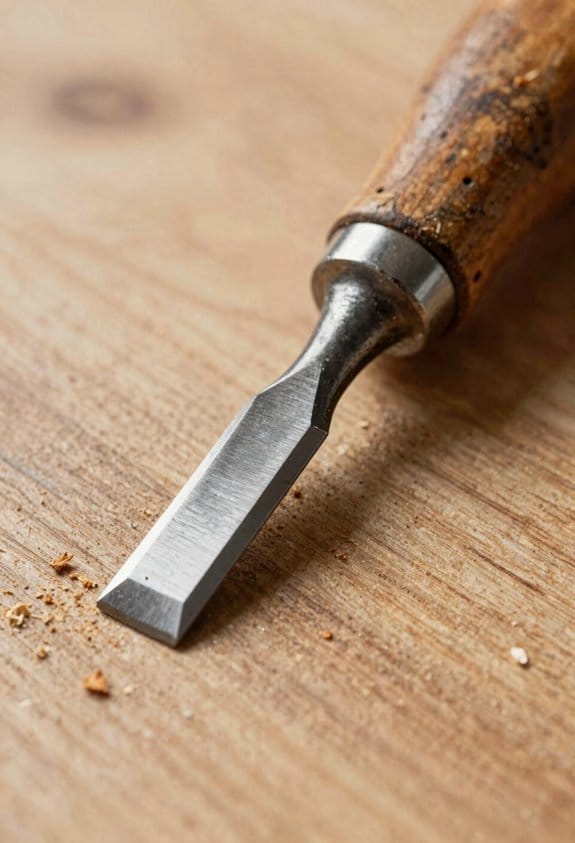
Before you tune your tools, know why it matters: a consistent setup saves you time and prevents gouges. I once ruined a quarter-sawn oak board because my plane mouth was too wide and the blade sat off-kilter.
1) How do you inspect blades, chisels, and planes?
Why: catching nicks and misalignment early avoids bad cuts.
Steps:
- Visually inspect the edge under a 10x loupe for nicks; rotate the blade to catch reflections.
- Lay the blade flat on a glass plate; any rocking means uneven bevels—mark high spots with a pencil.
- For planes, press the blade into the cap iron and look along the bed from the toe; the blade should be parallel to the sole within 0.1 mm.
Example: I checked a chisel under a loupe and found a 0.2 mm chip that caused tear-out in pine.
2) How do you set bevels and mouth openings to match the cut you need?
Why: matching bevel angle and mouth gap changes how the tool slices and how much tear-out you get.
Steps:
- Decide target bevel: use 25° for general planing, 30–35° for open-grain hardwoods, and 20° for softwoods you want fast cuts.
- Set the plane mouth: for fine shavings, close the mouth to 0.5–1.0 mm; for heavy stock removal, open to 2.0–3.5 mm.
- Test on scrap and adjust 0.1–0.2 mm at a time until shavings are continuous and curl predictably.
Example: On a maple tabletop I closed the mouth to 0.6 mm and switched the blade to 30° to stop chipping along the end grain.
3) How do you make repeatable micro-adjustments?
Why: repeatable tweaks keep your setup identical between sessions so you don’t rework the same mistakes.
Steps:
- Fit a micro-adjust jig or use a fine-pitch screw: aim for adjustments of 0.05–0.2 mm per turn.
- Mark a baseline setting on the jig with a Sharpie after you get the cut you want.
- When you change blades, return the screw to the mark and verify on scrap.
Example: I use a 0.5 mm-pitch screw on my honing guide and mark three common stops for rough, medium, and finish; switching takes under 30 seconds.
4) How do you hone for a predictable mirror edge?
Why: a consistent honing sequence creates an edge that holds and bites the same way every time.
Steps:
- Start with a 1,000-grit stone for profiling if the edge has chips; otherwise begin at 4,000 grit.
- Progress: 1,000 → 4,000 → 8,000 → 12,000, or use 3,000 → 6,000 → 10,000 if you prefer fewer steps. Spend 10–15 strokes per side at the coarse stages, 20–30 at fine grits.
- Finish with a leather strop charged with chromium oxide for 20–40 passes per side.
Example: For a straight-razor feel on a smoothing plane, I follow 4k→8k→12k and then strop; the plane slices hair-thin shavings from cherry.
5) How do you test and record settings before working on the final piece?
Why: testing prevents costly mistakes on the actual workpiece.
Steps:
- Plane or pare on a scrap from the same board or similar species and grain orientation.
- Feel for chatter by running your finger perpendicular to the cut and watch the shaving for consistent curl. If you feel vibration, adjust blade alignment 0.05–0.1 mm.
- Record settings: list bevel angle, mouth gap, screw turns from baseline, and stone sequence in a small notebook or phone note.
Example: I keep a notebook entry titled “Cherry panel—smoothing” with: 30° bevel, 0.6 mm mouth, +3 turns on micrometer; it saves me 10–15 minutes each time.
Keep your tools calibrated between sessions by checking the baseline items above in under five minutes. If you do that, your setup will stay steady and your cuts will be repeatable.
Recommended Products

Ideal for end grain work and single handed operation

Height Gage Scriber Clamp For Use with Digimatic Height Gages. Clamp For Use With: Linear Height Gages

Precision Wood Planing: Features a 2‑inch (51 mm) high‑quality steel blade and an adjustable mouth and depth gauge, allowing for accurate smoothing, trimming and finishing of wood surfaces.
Power-Tool Workflows That Need Hand Finishing
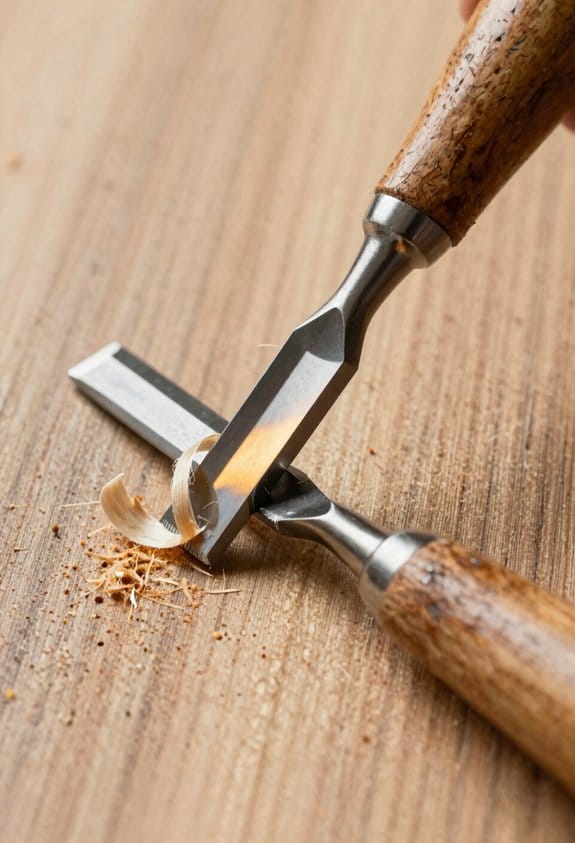
If you’ve ever finished a power-tool job and felt the edges still look off, this is why.
Why it matters: those small flaws are what give a piece a tired, machine-made feel instead of a handcrafted look.
1) What to use and when
Why it matters: using the right hand tool at the right time saves you sanding and rework later.
Example: after cutting a tabletop with a circular saw, you’ll have a nearly straight edge but a ragged corner near the start cut.
Steps:
- Use a block plane set to remove about 0.5–1 mm per pass to tidy the edge; aim for three to five passes.
- Follow with a cabinet file across the end grain to remove saw marks—use 6–8 strokes with moderate pressure.
- Finish with a 150-grit sanding block wrapped in 3M cloth for 10–15 strokes along the grain.
Tip: when planing, hold the board flat on the bench and pull the plane toward you. Quick test: run your fingertip along the edge; there’s no catch.
2) How to get crisp, smooth edges
Why it matters: a consistent radius looks and feels professional.
Example: you want a soft 1.5 mm radius on a shelf edge that will be handled daily.
Steps:
- Mark the 1.5 mm line with a caliper or ruler for a visual guide.
- Remove material with a low-angle block plane until the line disappears—expect 4–8 passes depending on hardwood.
- Round with a fine file (120–180 grit) using 6–10 strokes, then flush with a 220-grit sanding block for 12–20 passes.
Check: the edge should feel smooth with no sharp corners under light pressure from your thumb.
3) Fixing micro-gaps in joinery after routing
Why it matters: tiny gaps are obvious once glue and finish are applied.
Example: after routing an oak mortise, the tenon shows a 0.5–1 mm gap along one side.
Steps:
- Lightly pare the tenon with a shoulder plane, taking off 0.2–0.4 mm per pass until the gap closes.
- If the gap is uneven, use a card scraper to level high spots—10–15 controlled strokes.
- For gaps under 0.5 mm, inject thinned glue and sawdust as a filler, then sand flush after it cures (30–60 minutes).
Result: joints that close tightly and take stain evenly.
4) How to check surfaces by touch
Why it matters: machines can’t tell you what your fingertips can.
Example: a tabletop feels flat to the eye but has a high ridge you can only detect by touch.
Steps:
- Run your fingertips and thumb across the surface at low angle lighting to feel for ridges and hollows—spend 30 seconds per side.
- Mark high spots with a pencil.
- Use a card scraper for ridges (20–30 strokes) and a random-orbit sander at 120 grit for low spots until the pencil marks disappear.
Verification: the surface should feel uniformly smooth under a fingertip with no directional bumps.
5) Workflow sequence that saves time
Why it matters: a consistent order prevents rework and preserves accuracy.
Example: making a small cabinet door.
Steps:
- Cut rough to size with a power saw, leaving 2–3 mm excess per edge.
- Glue and clamp panels while still oversized.
- Trim to final size with a track saw or hand plane for accuracy—take 1–2 mm off each edge.
- Fine-tune joints and edges with planes, files, and sanding blocks before final sanding and finishing.
Outcome: you spend less time sanding and more time getting fit right.
Final practical rule: always finish edges and joints by feel, not just by sight. Short check: pick up the piece and run your hand along every seam and edge—if anything snags, address it with a single focused tool and a small number of passes.
Workflow Examples: Small Projects vs. Large Builds
Think of scale like dialing a radio: small turns change the station, big turns move the whole room.
Why this matters: your workflow changes because tools, time, and error costs scale with size. For a small project, like a jewelry-box prototype that sits on your bench (8″ × 5″ × 3″), you want precision over speed so you can test fits quickly.
1) Small projects — step-by-step workflow and example
Why this matters: precise handwork catches fit issues you can’t see in CAD.
Example: making a 8″ × 5″ jewelry box with simple finger joints and a sliding lid.
Steps:
- Layout: mark boards with a marking gauge at 1/16″ increments for finger-joint spacing, and scribe joinery lines from the outside edge.
- Cut: rip stock with a handsaw or a small table saw using a zero-clearance throat to prevent tearout.
- Machine minimal parts: remove most waste with a 1/8″ wide chisel and coping saw rather than power carving.
- Fit and refine: use a sharp #4 plane to flatten mating surfaces, then pare tight spots with a 1/8″ chisel; test-assemble without glue.
- Final: sand with 180 then 220 grit, apply a thin coat of linseed oil, and clamp for 30–60 minutes with cauls to avoid crush marks.
Tip: keep clamps small (3″–6″) to avoid over-driving joints.
For a small build you’ll often use micro-joinery, hand-planed surfaces, and minimal setup because each part is quick to handle. Precision matters more than speed for these sizes.
The difference between small and large builds comes down to how you trade time for accuracy.
2) Large builds — step-by-step workflow and example
Why this matters: mistakes cost more time and material on large pieces, so you need a mix of machine roughing and hand finishing.
Example: building an 8′ dining table with 3″ thick legs and a 48″ × 96″ top.
Steps:
- Layout and milling: flatten faces with a jointer, then rip boards to width on a table saw; batch the same thickness to ±0.5 mm.
- Rough cut: use a track saw or bandsaw to cut roughly to shape, leaving 1/8″–1/4″ for final trimming.
- Dry-assemble: clamp subassemblies on sawhorses and check squareness with a 4′ level and a diagonal measurement (corner-to-corner).
- Refine critical joints: remove small amounts with a chisel and scrub plane until joints close without forcing.
- Final surfacing: plane the final faces with a hand plane or wide belt sander set to remove no more than 0.5 mm per pass, then sand 120 → 220 grit.
- Assembly and finish: use larger clamps (12″–36″) and allow glue to cure 24 hours for solid wood joints; apply finish in two thin coats and sand between coats with 320 grit.
Tip: batch similar cuts at each machine step to reduce setup time and cumulative error.
For a large build you’ll use power tools for rough cutting and layout, then come back with chisels and planes on the joints that matter most. You plan to minimize repetition: run all matching parts through the same setup, then finish by hand where tactile feedback prevents errors.
How to decide what to machine versus hand-finish
Why this matters: choosing correctly saves hours and prevents rework.
Steps:
- Ask: will a 0.5 mm error ruin the project? If yes, plan to hand-finish that interface.
- Batch: if you have 4–8 identical parts, machine them together to the nearest 0.5 mm, then hand-tune one test piece.
- Reserve hand tools for the last 1/8″ of material removal on joints and mating surfaces.
Example: when making dovetails for a 12″ drawer, cut tails by router jig for speed, then pare pins by hand to fit.
Keep your workflow predictable: batch rough cuts, then switch to hand tools for the final fit. That simple rule will save you clamps, time, and frustration.
Safety, Cost, and Portability: Hand vs. Power Tools
The difference between hand and power tools comes down to how you balance safety, cost, and portability.
Why this matters: choosing the wrong tool can slow you down or put you at risk. Hand tools are usually safer because they don’t have spinning parts or high-speed motors. For example, using a 12-inch hand saw on a fence post lets you control the cut without worrying about kickback or blade guards. Hand tools are quieter — under 70 dB typically — so you can work in a shared space without ear protection. They cost less up front: expect to pay $10–$50 for a good screwdriver or handsaw, and replacement parts are rare. They also travel easily; a small foam-lined case with a hammer, tape measure, and multi-bit screwdriver fits in checked luggage.
Before you pick a power tool, know why you might need one. Power tools save time on repetitive or heavy work. For example, cutting ten 2x4s for rafters with a circular saw at 3,200 rpm takes minutes versus an hour by hand. Because they can kick back and throw chips, you need guards, eye protection, and hearing protection — use safety glasses rated Z87.1 and ear plugs for noise above 85 dB. Set up a work clamp or sawhorse to stabilize material, and test cut scrap wood to confirm depth and alignment. Count on paying $60–$300 for a decent corded or cordless saw; batteries add another $50–$150.
How to choose between them and combine both: explain why this matters — matching tool to task saves time and money. Steps:
- Identify the task: list cuts, holes, or fastening you’ll do and how many.
- Estimate time: if a job takes more than 30 minutes by hand, consider power.
- Check environment: if you’re in a bedroom or traveling, prefer hand tools.
- Plan safety gear: for power work, add clamps, eye and hearing protection, and a dust mask.
Real example: building a 6-ft workbench top. Clamp boards and use a cordless drill with a countersink bit for the screws (fast), then use a block plane by hand to remove 1–2 mm of high spots for a flat finish (precise).
Practical tip: buy one mid-range power tool you’ll use most (drill or circular saw) and a small kit of hand tools — a good tape measure, chisel, block plane, and adjustable wrench — for accuracy and travel.
Recommended Products

【Expanded Power System with Two Batteries】This bundle includes the AFERIY P310 Portable Power Station along with two compatible Expansion Battery Packs, configured to significantly increase your total energy storage capacity. The power station and expansion batteries are shipped in three separate packages.

Replaceable Ball-Bearing Drawer Slides

This beefy two-handed folding saw is Silky's answer to the "man-powered chain saw" 19.7" Cut Capacity, 2.6mm Blade Thickness
Practice Drills to Sharpen Hand-Tool Precision
Before you start a hand-tool practice session, know this: focused repetition trains your hands and eyes to coordinate so you waste less effort and get cleaner cuts.
1) Stroke control: why it matters — You need steady strokes to make predictable cuts.
Example: when planing a 12″ board for a furniture leg, a wandering stroke leaves ridges you must sand away.
Steps:
- Clamp a 12″ scrap hardwood, mark a 1/16″ high line along the edge.
- Make 20 continuous strokes with a plane or chisel, keeping your hands in the same positions.
- Check the line after each set of 5 strokes and adjust pressure.
Keep your strokes even and stop when you can remove a 1/64″ shaving predictably.
2) Cutting straight lines: why it matters — Straight cuts make joints fit and surfaces align.
Example: if you cut a tenon cheek off-square by 1/16″, the joint will rock and need reworking.
Steps:
- Mark your line with a 0.5mm mechanical pencil or a marking knife.
- Set a bench hook or guide clamped to the board.
- Make 10 single-pass cuts with a saw, aiming to stay on the waste side of the line.
If you miss more than twice, reduce saw speed and focus on the line.
3) Accuracy trimming: why it matters — Small adjustments give a tight fit without removals.
Example: fitting a door rebate where 0.02″ too tight stops the door from closing smoothly.
Steps:
- Cut to within 0.05″ of your reference line.
- Use a shoulder plane or block plane to pare toward the line in 10 strokes or fewer.
- Test fit after each pass and stop when the piece slides in with light resistance.
Trust small, measured shavings to control the final fit.
4) Edge preservation: why it matters — Keeping bevels and sharpness saves time and gives cleaner surfaces.
Example: sharpening a plane iron once per week instead of twice a day keeps edges crisp for long chair legs.
Steps:
- Check bevel angle with a 30°/25° gauge and note it.
- Hone on a 1000-grit stone for 10 strokes, then 5 strokes on 4000-grit.
- Strop 10 times on leather with compound before using.
Record how many passes you get before the edge dulls — aim for at least three work sessions per sharpening.
5) Timed routines and repetition: why it matters — Timing trains consistency and reveals where you falter.
Example: set a 15-minute routine to produce ten identical dovetails; the clock shows when you rush or jab.
Steps:
- Set a 15-minute timer for a focused drill: ten cuts, ten shaves, or ten parings.
- Repeat the routine three times with a one-minute break between sets.
- Log completion time and error type after each set.
If your accuracy drops in set three, your focus or setup is slipping.
Finish each session by noting one specific metric: shaving thickness, number of off-line cuts, time per joint, or strokes to sharpen. That single number tells you what to work on next.
Build a Hybrid Toolbox: Must-Have Hand Tools to Complement Power
Think of a hybrid toolbox like a deliberate pairing of hand tools with your power lineup.
Why this matters: having the right hand tools saves you time by preventing mistakes that power tools can make. For example, when you fit a door hinge, a sharp chisel lets you pare the mortise walls by millimeters so the hinge sits flush.
1) What hand tools should you keep for fine shaving and fitting?
Why this matters: chisels and planes let you remove tiny amounts of wood without splintering or overcutting.
Steps:
- Get a set of bevel-edge chisels (1/4″, 1/2″, 3/4″, 1″) — these sizes cover most tasks.
- Keep them at a 25–30° bevel for general work; hone to a 20° micro-bevel for fine paring.
- Work on mallet strikes or push-paring with the chisel held flush to the guideline.
Real-world example: when trimming a glued tenon shoulder on an oak table, use the 3/4″ chisel to pare a few strokes until the joint closes without gaps.
2) Which planes do you need for trimming and end grain?
Why this matters: planes control fit and finish in ways a circular saw can’t.
Steps:
- Buy a small block plane (low-angle for end grain) and a bench trimming plane (4–7″ long) for joint work.
- Set mouth opening to about 0.005–0.010″ for fine shavings; test on scrap until you get continuous, thin curls.
Real-world example: to clean up a tenon shoulder after a saw cut, take light passes with the bench plane across the shoulder until it sits perfectly against the mortise.
3) Which cutting saw for clean shoulders?
Why this matters: a backsaw gives you a straight, clean edge where a power saw burns or chips.
Steps:
- Choose a dovetail/tenon backsaw with 13–15 TPI for crosscuts and shoulders.
- Use a miter box or clamp the work to keep the saw line true.
Real-world example: when cutting tenon shoulders for a chair rail, the backsaw produces a crisp line you can register your chisel against.
4) When do you use micro-adjust wrenches and hardened-tip screwdrivers?
Why this matters: small fasteners and hardware need precise torque and durable tips to avoid rounding heads.
Steps:
- Keep a 4–10 mm micro-adjustable wrench for bolts and small nuts.
- Carry a screwdriver set with hardened tips (PH0–PH2, slotted 3–6 mm); match tip to screw for a snug fit.
Real-world example: installing hinge screws on a cabinet door, use the PH1 hardened screwdriver and a micro wrench for the hinge screw nuts to get screws fully seated without stripping.
5) How should you maintain and store your hand tools?
Why this matters: sharp, calibrated tools work predictably and last longer.
Steps:
- Hone blades weekly if you use them daily; stropping after each session preserves the edge.
- Check plane blade angles and tighten cap irons before each use.
- Store tools on a pegboard or in a roll with blades covered; keep them away from moisture.
Real-world example: after a weekend of trimming joinery, you’ll notice fewer tear-outs the next day if you stropped your chisel and reset the plane blade.
Pair these hand tools with power tools when you need speed or material removal, but use the hand tools for final fit, feel, and control.
Recommended Products

Contains Everything You Need to Shape and Sharpen All Woodturning Tools
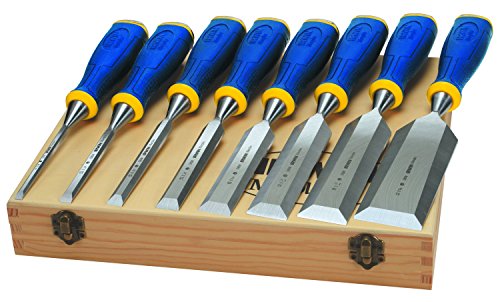
Set of 6 Plus 2 Chisels FREE
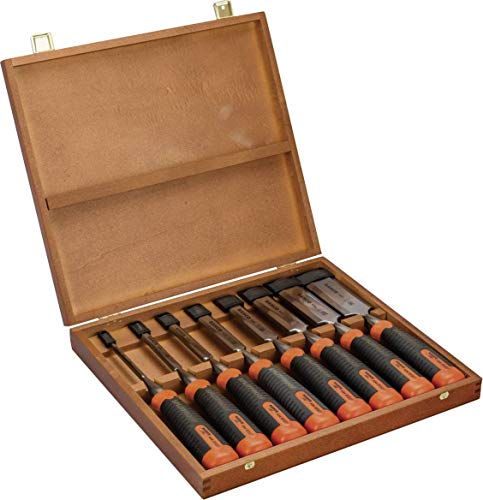
Polished blade for increased rust resistance
Frequently Asked Questions
How Do I Tune a Chisel Edge Without Professional Tools?
I’ll use a simple honing technique: flatten a stone, set bevel alignment with a marker, hold consistent angle, stroke evenly, finish with a strop or leather, and test on end grain until it slices cleanly.
Can Power Tools Damage Historical or Reclaimed Materials?
Yes — I’ve seen power tools sand through patina like a winter wind, causing surface abrasion and inducing fastener stress that splits old joinery; I’d always opt for gentler hand methods to preserve reclaimed or historic pieces.
What Hand Tool Grips Reduce Wrist Strain Over Long Sessions?
I recommend ergonomic handles and palm supports on chisels, files, and screwdrivers; I choose contoured grips, soft overmolds, and palm-supporting designs to distribute pressure, cut vibration, and prevent wrist strain during long hand-tool sessions.
Are There Eco-Friendly Sharpening Stones or Alternatives?
About 70% of hobbyists prefer water stone alternatives for sustainability, and I’d say yes: eco-friendly options include ceramic stones, synthetic diamond plates, and recycled glass stones—I use ceramic stones for low waste and consistent sharpening.
How Do I Teach Kids Safe Hand-Tool Basics at Home?
I’ll teach kids safe hand-tool basics at home with supervised introductions, age appropriate demonstrations, clear rules, slow guided practice, proper grip and storage, sharpness respect, protective gear, praise for patience, and gradual skill challenges.