You line up the board, make a cut, and the next piece comes out a hairs’ width different — again. The exact problem is inconsistent parts from the same setup: jigs, stop blocks, or clamped assemblies that don’t repeat the same cut each cycle.
Most people obsess over perfect measurements or dialed-in numbers instead of fixing the way the setup produces the same result every time. This introduction will show you practical steps to make repeated cuts match: simple batch setups, quick sample checks, and go/no‑go gauges so you stop producing scrap and rework.
It’s easier than it sounds.
Key Takeaways
If you’ve ever been handed a piece that doesn’t fit, this is why.
Why repeatable setups save you time and money.
Why it matters: repeatable setups stop rework and keep customers happy.
Example: when fitting a tenon for a drawer front, setting your fence the same way every time prevents you from sanding down parts later.
1) Set stops on your jig using a digital caliper to within 0.5 mm.
2) Mark the fence position with a permanent marker and photo for reference.
3) Run a quick test cut on scrap before the first real part.
End with a measured value: aim for +/- 0.2 mm variation.
Before you cut small batches, control consistency to protect profit margins.
Why it matters: consistent results keep costs predictable and deliveries on time.
Example: making five bedside tables with routed edges — if each edge differs, finishing takes hours.
1) Number each piece and record its dimensions on a checklist.
2) Use the same router bit and check bit diameter after every two pieces.
3) Batch the same operation across all parts instead of finishing one table at a time.
Finish with a concrete target: hold repeatability within 1 mm to keep labor hours steady.
Think of material changes like a sponge that soaks or squeezes.
Why it matters: materials and finishes change size, and you need to compensate.
Example: a poplar panel that swells 0.8% after finishing can jam a groove cut for a sliding top.
1) Measure moisture content with a meter before layout; record it.
2) Add or subtract 0.5–1.0 mm per 300 mm of length for expected movement when you cut grooves.
3) Re-check the fit after the finish dries, and shave 0.2–0.5 mm if needed.
End with a number: track changes in millimeters, not guesses.
The difference between accuracy and repeatability comes down to predictable results.
Why it matters: accurate tools that you can set the same way make every part match.
Example: a planer set to 0.3 mm thickness that drifts will give you inconsistent panels across a project.
1) Calibrate your machine with a precision gauge plate monthly.
2) Record the before-and-after numbers on a small tag attached to the tool.
3) Reinstall blades and re-check settings after any adjustment.
Finish with a measurable check: aim to keep drift under 0.2 mm per hour of run time.
Here’s what actually happens when you use data to catch problems early.
Why it matters: sampling early reduces defects before you commit to full production.
Example: measuring five parts out of twenty and finding a 1.5 mm bias lets you fix the jig before all twenty are ruined.
1) Pick a sample size (start with 5 parts for 20 pieces, scale up for larger runs).
2) Record measurements in a simple spreadsheet after each operation.
3) If the mean shifts by more than your tolerance (e.g., 0.5 mm), stop and adjust.
End with a concrete rule: check samples every 30 minutes on longer runs.
Improved tools let you aim for tighter tolerances, but only if you use them consistently.
Why it matters: tighter jigs mean tighter final parts, but only with repeatable technique.
Example: a new zero-clearance sled will only give repeatable cuts if you clamp the work the same way every time.
1) Create a checklist for each jig: clamping points, fence mark, bit height.
2) Take a photo of the setup and store it with the checklist.
3) Re-run a scrap test when you change bits or materials.
End with a number: validate setups with a 0.5 mm scrap test before committing parts.
Accuracy vs Repeatability: What Those Terms Really Mean
If you’ve ever tried to get two boards to fit perfectly, this is why.
Why it matters: if your cuts are off you’ll waste material and time. Accuracy is how close your cut or measurement is to the specified value — for example, cutting a tenon meant to be 3/4″ that measures 0.745″ is *accurate*. Repeatability is your machine or setup making the same cut the same way every time — so if every tenon you cut is 0.745″, you’re repeatable.
Why this distinction matters: you can be repeatable but not accurate. Measurement bias is a consistent offset that shifts every result away from the true value; imagine your saw fence sits 0.010″ too far from the blade so every piece is 0.010″ long. You’ll have tight fits but the wrong size.
How to tell which problem you have and what to do. Why it matters: fixing the right thing saves hours and scrap.
- Measure five identical cuts with a caliper or reliable ruler.
- Record each measurement.
- Calculate mean and range (max − min).
- If the mean is off from the target but the range is small (for example, mean = 3.740″, range = 0.002″), you have bias — adjust calibration or shim the fence by the mean error (here, add 0.010″).
- If the range is large (for example, mean = 3.750″, range = 0.020″), you have repeatability issues — tighten fences, improve clamping, or replace worn jigs.
Real example: I once cut five mortises that measured 0.250″, 0.252″, 0.248″, 0.251″, 0.249″. The mean was 0.250″ and range 0.004″, so I focused on aligning the router table rather than recalibrating the bit.
What causes variance and how to reduce it. Why it matters: lower variance means parts fit reliably.
- Check and tighten fixtures: loose clamps can add ±0.010″.
- Use consistent stock orientation and clamp pressure; mark one face and always reference it.
- Control environmental factors: wood movement from humidity can change dimensions by 0.005″–0.020″.
- Replace or service worn parts: a wobbling arbor or dull blade can add 0.005″–0.030″.
Example: swapping a dull blade reduced my crosscut variance from 0.015″ to 0.004″, making sanding minimal.
Quick rules you can apply right away. Why it matters: small steps yield big improvements.
- If all parts are the wrong size but consistent: recalibrate (adjust fence, stop block, or measuring tool) by the average error.
- If parts vary: improve jigs, clamps, or tool condition and rerun the five-cut test.
- Aim for repeatability first: get range under 0.005″ before chasing perfect accuracy.
One last practical tip. Why it matters: simple checks prevent repeated mistakes.
Measure and record once per setup change. A small notebook entry like: “Fence +0.010″, bit replaced 3/21” saves time and prevents guessing.
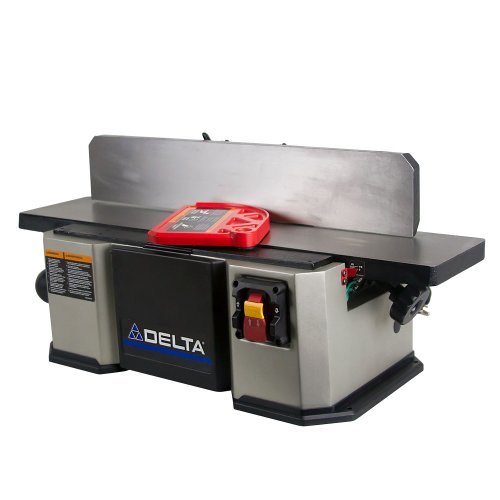
Recommended Products
36-INCH T-GLIDE FENCE ASSEMBLY: The 36-inch T-Glide Fence & Rail are made of heavy-gauge steel for sure lockdown and reliably square cutting for years without deflection.

2 spindle speeds: 7,000 and 10,000 R.P.M.
Powerful Drilling Performance: Deliver reliable power with our mill drill machine featuring a 2 HP motor and a 15.875 in swing distance. Handle woodworking, light metalwork, and home projects with ease
Why Repeatability Beats Single-Shot Accuracy in Woodworking

If you’ve ever struggled getting parts to fit after a project grows, this is why.
Why it matters (one sentence): If your cuts don’t repeat the same way, your assemblies will need constant sanding or shimming.
Almost always you’ll choose repeatability over one perfect cut because matching parts matters more than a single perfect measurement. For example, when I make ten drawer fronts, I set a stop block on the table saw and cut all ten to the same length; that stop block gives me identical pieces so the drawer fronts line up at assembly. Repeatability means you get the same result when you repeat the same setup, while a single-shot accurate cut can still leave the other nine pieces wrong.
How to make cuts repeatable (steps):
- Set a physical reference: clamp a stop block or use a miter gauge fence, and measure once with a tape to confirm the stop is exactly where you want it.
- Cut a test piece and stack it against the stop to verify fit before cutting the rest.
- Batch your work: cut all pieces for one dimension in that same setup instead of switching between sizes.
- Mark and keep orientation: label faces and edges with a pencil so you feed every board the same way.
Real-world example: when I build a bookshelf with twelve shelf supports, I mark the face and use a sacrificial fence for routing; each support comes out identical and the shelves sit level.
Repeatability reduces cumulative error because small differences add up over many parts. For instance, a 1/32″ variation on twenty pieces becomes almost 5/8″ mismatch in stack-up, so controlling variance matters. Use jigs and stops to minimize variance rather than chasing a one-off perfect number.
How to arrange work to reduce mistakes (one-sentence why): Reducing mental load keeps you from making avoidable slips during repetitive tasks.
- Organize your station: put measuring tools, clamps, and marking pencils in the same place every time.
- Do tasks in batches: complete all marking, then all cutting, then all sanding.
- Use simple checklists: mark a box when a part is finished so nothing gets skipped.
Real-world example: on a cabinet run I taped a checklist to the bench; we finished 48 identical doors with zero swapped pieces.
A quick note on variance (one sentence why): Processes with low variance give you predictable, fixable outcomes. Thinking like someone minimizing variance, you prioritize consistent setups—like a sled that always seats the board the same way—over hitting a single perfect measurement.
Real-world example: I drilled hinge holes with a jig that reproduces the spacing exactly; every door aligned without adjustment.
If you follow these steps you’ll save time and avoid rework.
Recommended Products

INCLUDES: (6) table saw miter gauge, (6) multi-track miter fence, (6) t-track flip stop

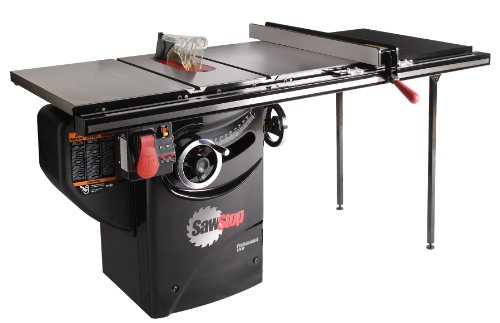
Assembly includes: rt-c27 27" cast iron table, rt-f27 27" fence, rt-psw power switch, and rt-st2 support legs

WHAT'S IN THE BOX - Includes the in-DEXABLE Miter Sled, integrated Drop Zone cut-off catch table, sacrificial end block, miter bar with nylon leaf springs, micro-adjustable flip stop.
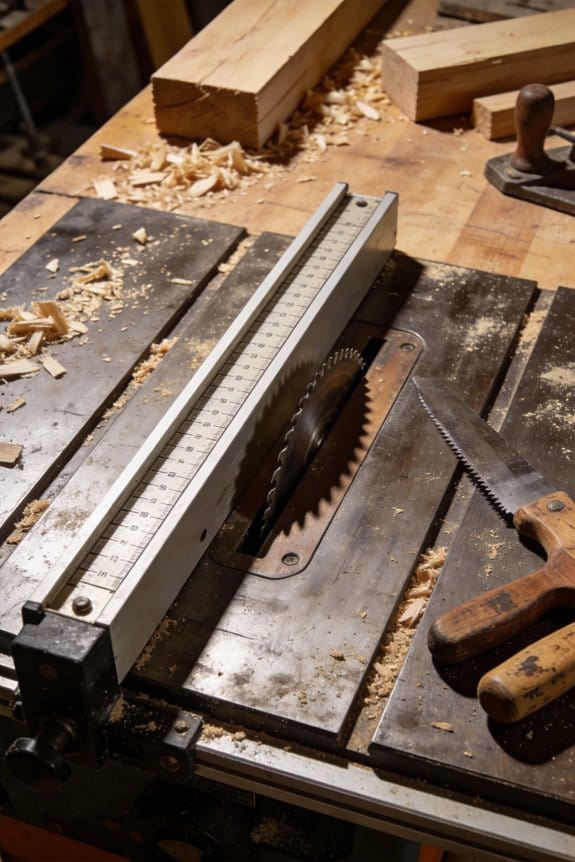
Remove Human Error With Jigs, Stop Blocks, and Templates

If you’ve ever stood over a saw and missed the mark, this is why.
Why it matters: jigs, stop blocks, and templates turn guesswork into repeatable results so you waste less material and save time. For example, when I cut ten identical chair legs, using a stop block set to 18.25 inches kept every leg identical and saved me an hour of sanding and re-cutting.
How to set up jigs and templates (step-by-step):
- Decide the exact dimensions you need and write them down in inches or millimeters.
- Build or pick a jig that holds the part in the same orientation every time; clamp it to the table with two clamps so it can’t twist.
- Make a template from 1/4″ MDF or plywood for any shape you need to trace; screw a pilot hole so the template aligns to the workpiece consistently.
- Install a stop block on your fence and lock it with a cam clamp after testing with a known gauge.
- Test one piece, measure it with calipers or a reliable tape, and adjust the jig or block until that test matches your target exactly.
Practical tips for stop blocks:
- Calibrate the block by cutting a test piece and measuring it against a known gauge or a machined scrap that already fits.
- Lock the block with a wedge or cam clamp so it can’t shift under pressure.
- Keep the stop block at least two inches from the blade on table saws to reduce vibration.
Example: on a batch of ten face-frame boards, I set a stop block at 14.75″, cut the first board, measured it with a digital caliper (14.75″), then clamped the block; I finished all ten in 12 minutes with zero rework.
How to organize and store jigs:
- Label each jig or template with the project name and target dimensions using a permanent marker.
- Use a shallow drawer or pegboard rack near your workbench so you grab the correct jig without searching.
- Stack templates flat and insert small foam between them to prevent damage.
Example: I keep jig trays labeled “box joints — 3/8”” and “shelf brackets — 7.5”” on a wall shelf near the saw; when a job starts, I pull the tray and everything is ready.
Why test and lock is non-negotiable: if your stop block drifts even 1/16″, parts won’t fit and you’ll add sanding, filler, or recuts. Measure once with a gauge, lock solid, and you avoid that.
One final concrete checklist before a run:
- Measure the reference gauge.
- Clamp the jig with two clamps.
- Lock the stop block with a cam or wedge.
- Cut one test piece and measure with calipers.
- Run the batch.
Follow those steps, and you’ll cut more repeatable parts, reduce rework, and speed up batch production without guessing.
Recommended Products

Eliminates the hassles of gas with lower weight, reduced maintenance, and zero emissions allowing use in indoor environments
Legendary worm drive gearing offers maximum torque for ripping applications
INCLUDES: Pair of push blocks for easily and safely moving material through the jointer. Built-in dust blower ejects chips efficiently and virtually eliminates clogged dust chutes.
How Wood and Environment Limit Tight Tolerances in Practice

If you’ve ever fit a joint in summer and watched it bind in winter, this is why.
Wood gains and loses moisture and that makes it change size. You must plan for that because wood moves mostly across its width and thickness, not its length. A 6″ wide oak board can change about 1/8” across the width between humid and dry seasons; that’s a real gap or a tight joint you didn’t anticipate.
Before you cut, measure and acclimate your stock — this matters because starting moisture content determines how much the piece will move. Example: bring a 4/4 maple board into your 60–65°F, 40–50% RH shop for 7–10 days, then re-check its width and moisture with a moisture meter; if the readings change, wait longer. Steps:
- Weigh or record moisture content of new boards with a meter.
- Stack them flat with stickers and leave in-shop for 7–14 days.
- Re-measure before milling.
You can’t hold metal tolerances because wood is hygroscopic and alive. Design joints and tolerances to allow movement so they don’t fail when the seasons change. Example: use a tabletop breadboard end with a centered elongated slot for the tabletop tongue and a single fixed screw at one end; the screw is fixed, the opposite end slides about 1/8″ in the slot.
When fitting parts, set wider tolerances than you would for metalwork — this matters so things don’t split or bind. For typical furniture:
- Allow 1/16″ to 1/8″ clearance per edge for panels up to 24″ wide.
- For panels over 24″, increase allowance to 3/16″.
These numbers come from seasonal width changes in common hardwoods.
Control your environment when you can because stable humidity reduces movement. Example: run a humidifier or dehumidifier to keep the workshop around 40–50% relative humidity and check with a hygrometer daily. Steps:
- Put a hygrometer at workstation height.
- Aim for 40–50% RH and 60–70°F.
- Adjust with humidifier/dehumidifier and verify weekly.
Use joinery and fasteners that let wood move — this matters so connections stay secure. Example: attach tabletops with figure-eight fasteners or slotted metal buttons so the top can expand across the grain. Steps:
- Drill slightly elongated holes for tabletop screws perpendicular to grain.
- Use spring washers or slots on one side, fixed screws on the other.
- Test by moving the top an expected 1/8″ and confirming nothing binds.
Measure after acclimation, design for movement, control humidity, and fasten with sliding details. Those concrete steps will keep your joints fitting year-round.
Batch Workflows: Setup Tips to Cut Identical Parts Fast

If you’ve ever set up a bunch of identical cuts and watched the parts drift out of spec, this will help you stop wasting material.
Why it matters: getting the setup right saves time and prevents scrap.
1) Plan the sequence and group like cuts
- Do this so you minimize tool and fence changes.
- Example: when making ten cabinet shelf pieces, cut all the length dimension first for all ten, then flip and cut grooves for all ten so you change settings only once.
- Steps:
- Write the full cut list on a scrap sheet.
- Highlight all cuts that use the same blade height or fence position.
- Order the cuts so similar settings are consecutive.
– Tip: try to limit yourself to two setup changes per part.
Why it matters: a mechanical stop beats eyeballing for consistent size.
2) Use stop blocks or jigs to lock dimensions
- A stop block holds your work so every piece registers the same way.
- Example: clamp a 3/4″ hardwood stop block to the table when ripping ten strips to 3″ wide; each board butts to the same block.
- Steps:
- Cut and square a stop block to the exact dimension you need.
- Clamp it firmly to the fence or table with two clamps.
- Test with one scrap piece and measure.
– Keep the stop block off the blade path and double-clamp for safety.
Why it matters: calibrating on a sacrificial piece prevents repeating errors on your parts.
3) Batch-calibrate on a sacrificial piece
- Calibrate so your machine actually cuts what you expect.
- Example: run one sacrificial board through your setup, then measure its critical dimension with calipers or a tape; if it’s 0.030″ long, adjust and repeat.
- Steps:
- Use a scrap the same thickness and grain as your stock.
- Make the cut and measure the critical dimension.
- Adjust fence/stop/block by the measured error and re-test until within your tolerance (for many projects, ±0.010″).
– When you hit the target, mark the machine and the jig with a piece of tape.
Why it matters: quick spot checks keep the whole batch consistent.
4) Make repeat cuts and check frequently
- Checking prevents a single mistake from ruining the whole run.
- Example: after every five pieces on a production run of 50 shelves, use a simple 3″ go/no-go gauge to confirm width.
- Steps:
- Produce 3–5 parts.
- Measure one with your gauge or caliper.
- If it passes, continue; if not, stop and recalibrate immediately.
– Keep a small log: piece number, measured value, and any adjustment you made.
Why it matters: tool condition and stock orientation change results more than you think.
5) Maintain tools and arrange stock
- Sharp blades and consistent clamps make cuts predictable.
- Example: when crosscutting a batch of oak trim, swap to a fresh blade every 25 linear feet or when tear-out appears.
- Steps:
- Check blade/bit sharpness before the run and after about 20–30 minutes of continuous cutting.
- Use the same clamping method for every piece; mark clamp positions with tape.
- Lay out stock so all boards feed with the same grain direction and face up the same way.
– If a piece has a knot or defect, remove it from the batch before cutting.
These steps reduce human error, speed up production, and make your parts match for assembly. Keep a scrap test, a marked stop, and a simple gauge on hand.
Recommended Products
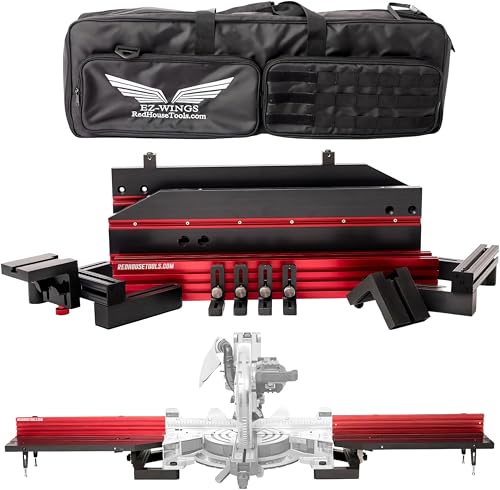
PATENTED MODULAR SUPPORT SYSTEM - Crafted from lightweight aircraft-grade aluminum, EZ-Wings is an expandable modular support system for miter and chop saws, featuring a mounting design for quick attachment/detachment.

Dock & Lock the included INCRA Miter Gauge in Seconds

ACHIEVE PERFECTLY ACCURATE CUTS – This precision crosscut sled for table saw delivers tight miters and flawless 90° cuts, eliminating guesswork for woodworking projects.
Choosing Realistic Tolerances and Quality Checks for Your Project
Before you set tolerances, know why they matter: they keep your parts fitting without wasting material or time.
1) Decide functional tolerance bands.
- Why this matters: setting clear bands tells you where tight fits are actually needed and where you can relax limits.
- Steps:
- List mating features and their required fit (e.g., shaft-to-bore, gasket seating, snap-fit tabs).
- Assign tolerances: for interference fits use ±0.01 mm, for sliding fits ±0.05 mm, for non-critical gaps ±0.2 mm.
- Create a simple tolerance budget table showing each feature, its nominal dimension, and tolerance.
– Example: I designed a small gearbox where bearing bores needed ±0.01 mm, shafts ±0.02 mm, and cover clearances ±0.15 mm; that cut rework by half.
Decide on your quality checks so you catch problems before full production.
2) Plan simple verification steps and tools.
- Why this matters: quick checks stop batches of bad parts and save money.
- Steps:
- Choose tools: calipers for ±0.1 mm, micrometers for ±0.01 mm, go/no-go gauges for repetitive checks.
- Define checks: measure 3 points on each bore, take runout on shafts, do a sample assembly test.
- Record results on a one-page check sheet with date, operator, and readings.
– Example: On a bracket run I used a go/no-go pin and caliper checks every 10 parts; failing parts dropped from 8% to 1%.
Before you commit full lots, set acceptance testing criteria so you know when to stop or keep going.
3) Specify sampling and pass/fail rules.
- Why this matters: sampling prevents over-inspecting and avoids shipping bad parts.
- Steps:
- Pick a sample size: for small batches (<200) measure 10% or at least 5 parts; for large runs use ANSI/ISO sampling tables or 30 parts for confidence.
- Set pass thresholds: allow no more than 2 failures in the sample for critical features, 5 failures for non-critical.
- Define actions: if sample fails, rework 100% of the lot or scrap depending on cost and defect type.
– Example: I accepted 500 stamped parts after sampling 30 and allowing up to 2 dimensional failures; that kept production moving while catching tooling drift.
Adjust tolerances for material movement and tool wear so your targets stay realistic.
4) Compensate for material and process changes.
- Why this matters: materials swell, shrink, and tools wear, so static tolerances often fail in practice.
- Steps:
- Know material behavior: aluminum can change ~0.02% with temp shifts; plastics can shrink 0.5–2% during cooling.
- Add process offsets: widen non-critical tolerances by 10–20% for plastics, tighten critical metal fits and plan finishing operations (grind/hone) if you need ±0.01 mm long-term.
- Schedule tool checks: measure cutters or punches weekly and log wear; adjust dimension limits when tools exceed wear thresholds.
– Example: A plastic housing run required increasing core dimensions by 0.3 mm to counteract 1.2% shrink, which prevented gap failures.
Final practical tips you can use today.
- Keep one bold item per step to focus attention: tolerance budget for each part.
- Use a one-page checklist combining tolerances, tools, sample size, and pass criteria; stick it to the job sheet.
- If a measurement is repeatable only to ±0.05 mm, don’t try to enforce ±0.01 mm tolerances — revise the tolerance or upgrade your measurement method.
Recommended Products
PRECISE VERNIER SCALE READINGS: Features a finely graduated inch-unit vernier scale that delivers clear, accurate outside-diameter measurements across the full 18-24" range, supporting large-workpiece inspection and tight-tolerance applications.

DURABLE CARBIDE-TIPPED: Micrometer Set features carbide-tipped contact points, providing exceptional wear resistance and durability. These carbide tips ensure that the micrometers maintain their precision even after repeated use, particularly when measuring hard or abrasive materials. The carbide tips also help reduce the risk of damage to the workpiece, ensuring consistent, accurate measurements over time while extending the life of the tool.

Perfect Tool Every Time - Essential for any project or home improvement, our precision tool sets are perfect for various metalworking and woodworking projects.
Frequently Asked Questions
How Do I Calibrate a Digital Fence or Stop Block Accurately?
I’ll calibrate it now—like taming a wild beast—by following a calibration checklist: square the fence, set stop block, use laser alignment for parallelism, make test cuts, measure precisely, adjust, and recheck until results repeat reliably.
Can Inconsistent Humidity Be Corrected Without Acclimating Boards?
No — I can’t fully correct inconsistent humidity without acclimating boards; moisture mapping and humidity equalization help identify and reduce variation, but true long-term stability requires controlled acclimation to the workshop environment before final machining.
What Maintenance Prevents Repeatability Loss in CNC Routers?
Like a compass needle steadying, I keep spindle alignment checked, tighten mounts, clean and oil linear rail lubrication, replace worn bearings and belts, recalibrate drives, and run test cuts—so your CNC won’t lose repeatability.
How Do I Measure Repeatability Quantitatively for a Hand Tool Setup?
I measure repeatability quantitatively by following a measurement protocol: I make multiple identical cuts, record dimensions, compute standard deviation, and report a repeatability index (often 2.8×sd) so I can compare setups reliably.
Are There Quick Jigs for Complex Angled or Compound Cuts?
Yes — I use a torsion jig and a sliding sled for complex angled or compound cuts; they lock orientation, simplify repeatable setups, and let me batch-cut accurately while keeping safety and alignment consistent across pieces.