You set up a table saw or planer, make a cut, and the part comes out slightly off—again—so you’re left asking why the measurement shifted.
Or you dial a router bit, make a pass, and the joint won’t close because a tiny runout or misaligned fence changed the outcome. Most people assume a single tweak or eyeballing alignment is enough, then blame the material or tool.
This introduction shows step‑by‑step setup habits that replace guesswork with repeatable measurements so you stop scrapping parts and reworking projects.
You’ll get concrete checks and a short checklist that keep dimensions consistent. It’s easier than it looks.
Key Takeaways
If you’ve ever grabbed a push stick and realized your machine was still live, this is why.
Why it matters: accidental startups and poor PPE choices cause most shop injuries.
1) Lock out power, wear PPE, and verify the machine is unplugged before adjustments.
- Step 1: Turn the machine off and flip the breaker or remove the plug.
- Step 2: Hang a visible lockout tag or use a keyed lock on the breaker.
- Step 3: Wear eye protection (ANSI Z87.1), hearing protection (NRR 25+), and a snug dust mask when needed.
Example: Before changing a blade on a contractor saw, I flip the breaker, pull the cord, and tape the plug to the motor housing; that simple routine stopped two accidental start scares in my shop.
Think of alignment like lining up the rails on a train — it keeps everything running straight.
Why it matters: misalignment causes repeated off-size parts and ruined work.
2) Verify and record fence/blade/router-bit alignment and table squareness to ensure repeatable, accurate cuts.
- Step 1: Use a 12″ combination square and a 12″ straightedge to check fence parallel to blade or bit; aim for less than 0.005″ error over the length.
- Step 2: Square the table to the blade with a dial indicator or square; record the readings on a simple chart taped to the machine.
- Step 3: Adjust, re-check, and write the final setting (e.g., “table square = 0.002″ left”) so you’ll have a baseline next time.
Example: When ripping ten oak boards to 3″, I set the fence, checked 0.003″ variance with a dial indicator, and avoided rework halfway through the cut.
It sounds obvious, but sharp cutters do the heavy lifting.
Why it matters: dull cutters increase tearout, burn marks, and change finished dimensions.
3) Check cutter condition and runout, and maintain blade/bit sharpness to reduce tearout and dimensional drift.
- Step 1: Inspect teeth or edges for chips and resin; replace or sharpen when you see damage or after about 8–12 hours of heavy use.
- Step 2: Measure runout with a dial indicator; keep runout under 0.005″ for precision work.
- Step 3: Clean and lightly oil arbors, then tighten per manufacturer torque specs before reuse.
Example: On a router panel, replacing a slightly chipped bit cut cleanly and eliminated the 1/16″ tearout I had been sanding out for two days.
Before you pull your final piece through, test it first.
Why it matters: test cuts catch setup mistakes before they ruin real parts.
4) Use scrap mockups, dry runs, and test cuts with measurements to validate settings before cutting real workpieces.
- Step 1: Make a scrap the same thickness and grain orientation as your stock.
- Step 2: Run a dry pass (no power on moving fences) to verify clearances and hand positions.
- Step 3: Do a test cut and measure critical dimensions with calipers; confirm within tolerance (e.g., ±0.010″) before proceeding.
Example: I once saved a 20-piece order by discovering a fence offset during a single scrap test cut; fixing it kept the shipment on time.
The fastest way to lose accuracy is to leave things loose.
Why it matters: mid-run movement ruins repeatability and can be dangerous.
5) Tighten locks, recheck after initial cuts, and document presets to catch mid-run movement and preserve repeatability.
- Step 1: After setting the fence or depth, tighten all clamps and torque to hand-firm plus a quarter turn; note torque feel for future reference.
- Step 2: After the first two pieces, stop and measure; re-tighten if any change greater than 0.010″ appears.
- Step 3: Label presets (e.g., “rip 3.00″ fence stop”) and store them in a notebook or photo folder for the next run.
Example: On a planer run I had a slightly loose stop that shifted 0.015″ after five boards; rechecking after the first two boards caught it and saved the rest.
Step‑by‑Step Setup Checklist for Table Saw, Router, and Planer
Here’s what actually happens when you set up your tools: mistakes on one cut get copied to the next, so stopping them at the start saves time and wood. Before you touch anything, shut the tool off, unplug it, and lock or remove the key if it has one — that prevents accidental startups.
Why this matters: a single rogue startup can ruin a blade or your fingers. Real example: I once left a router plugged in, bumped the switch during a setup, and the bit nicked a test board; I had to re-cut the joint and lost a day.
1) Safety and basic checks
Why this matters: starting safe keeps you alive and reduces rework.
Steps:
- Unplug the machine and keep it unplugged until adjustments are done.
- Inspect guards and riving knives; they must be straight and engage easily.
- Confirm blades/bits are tight to the specified torque or manufacturer recommendation (hand-tight plus a quarter-turn if no spec).
- Wear eye and hearing protection and a snug apron or no loose clothing.
Real example: on a table saw I found the riving knife bent by 1/8″, which let the cutoff kick back on a test scrap; replacing it fixed kickback instantly.
2) Align fences, beds, and cutters
Why this matters: alignment prevents tapered cuts and misfitting joints.
Steps:
- Table saw: check that the fence is parallel to the blade with a 24″ bar or straightedge; gap must be under 0.010″ at front and back.
- Planer: confirm the infeed and outfeed tables are coplanar; place a straightedge across the bed and measure any gap — aim for less than 0.005″.
- Router table: verify the fence is square to the miter slot or table with a 3-4″ combination square; adjust until within 1°.
Real example: I once adjusted a planer bed that had a 0.015″ dip at the outfeed; after shim and relevel the glue-up panels sat flat without snipe.
3) Square cutters to the table and set heights
Why this matters: squaring ensures joints seat and edges are true.
Steps:
- Use a 4″ square against the cutter (or blade) and the table; if you see light under the square at the back, rotate/tool-mount until there’s no gap.
- For blade height on the table saw: set to one tooth above the stock thickness for clean cuts — e.g., for 3/4″ stock, raise so one tooth is above the top.
- Router bits: set bit length using calipers or a depth gauge to the exact cut depth; mark the fence setting with a permanent marker at the scale reading.
Real example: setting a dado stack too high caused a tenon shoulder to be 1/16″ proud; lowering the stack fixed the fit instantly.
4) Measure twice, document once
Why this matters: recorded settings let you repeat cuts and recover from mistakes quickly.
Steps:
- Measure and write fence-to-blade distances and blade heights on a small notepad or whiteboard.
- Take a quick photo of the setup with your phone; include scales and test scrap.
- Label the scrap with the setup name and date and keep it with the notes.
Real example: a photo of a router fence setup saved me an hour when I swapped bits the next day — I matched the fence in two snaps.
5) Do dry runs and test cuts
Why this matters: trial cuts prove the setup before you commit stock.
Steps:
- Use scrap the same thickness and grain as your project piece.
- Run the full operation at normal feed rate and check the joint or edge fit; adjust if the fit is off by more than 0.010″.
- If you hear chattering, slow the feed by 20% and check sharpness.
Real example: a test trim on a 3/4″ oak offcut revealed a tearout; switching to a slower feed and a fresh blade fixed the finish.
6) Check tool condition, sharpness, and feed rates
Why this matters: dull cutters cause tearout, heat, and poor fits.
Steps:
- Inspect blades/bits under a light for chipped teeth or nicked edges; replace if any chips are visible.
- Use a simple feed guideline: for a new sharp blade on hardwood, feed at roughly 20–30 inches per minute by hand; for softwood, 40–60 ipm works better.
- Note motor load: if the motor bogs down more than 30% under cut, reduce depth or make multiple passes.
Real example: an old planer blade made boards burn after two passes; replacing the blade eliminated the burn and reduced motor load.
Finish your setup by double-checking the power is still off, your notes are recorded, and your test scrap fits to your tolerances.
Recommended Products

Accurate Cutting: Upgrade your rip guide precision with the Wixey digital rip saw fence system that offers ±0.002" accuracy per ft and a digital readout for reliable, repeatable cuts across all woodworking projects

Complete Kit for Performance and Safety: This kit is the ultimate bundle for maximizing the safety and performance of your band saw. The XTENDER Fence System with Support Feeds and Clamps extends the work surface. The added featherboard and push stick maximize safety and assist with precision cuts and smooth feeds.

Fits saws with 27-inch tables
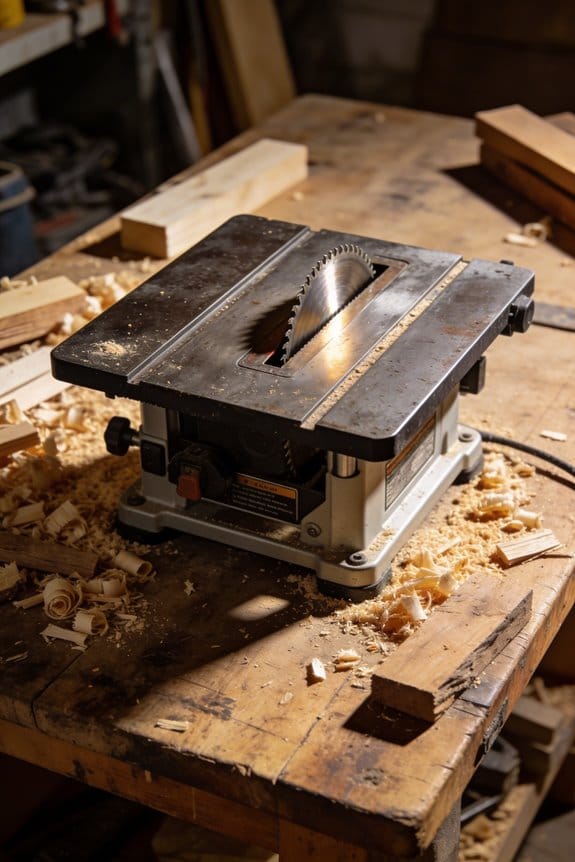
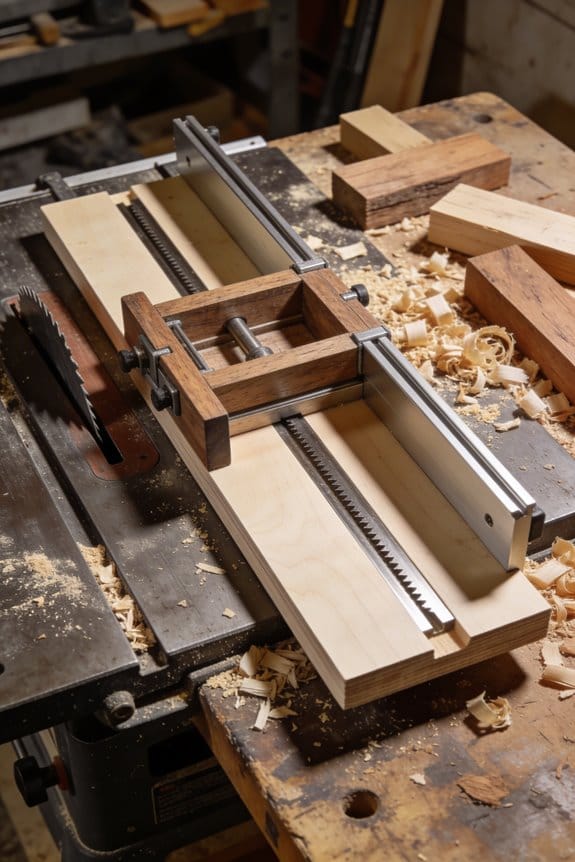
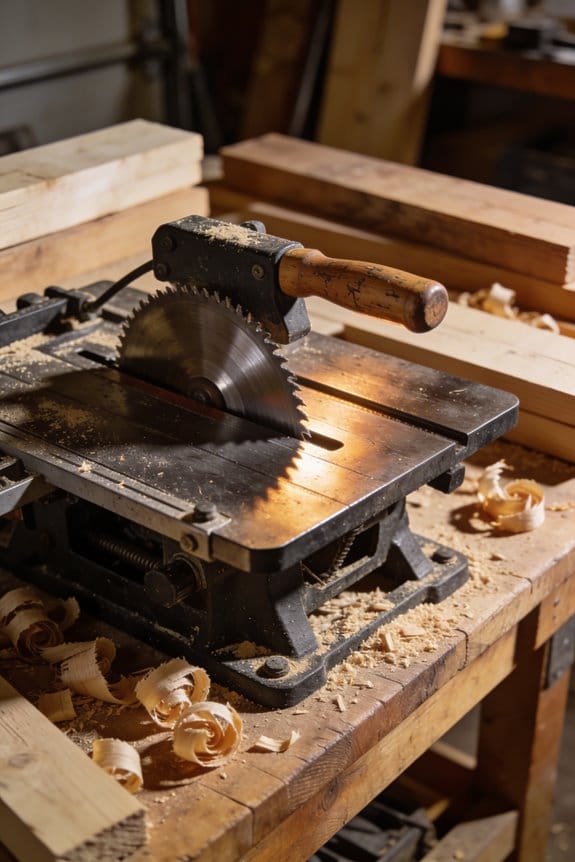
Table Saw, Router, and Planer Starter Checks (Blade, Fence, Table, Rollers)

Before you start cutting, you need to know why these checks matter: misaligned blades, fences, tables, or rollers give you poor cuts and can kickback stock.
Blade centering: does the blade track true and sit evenly in the throat plate?
Why it matters: an off-center blade makes uneven cuts and adds vibration.
Example: on a plywood rip, an off-center blade will burn one edge while the other edge splinters, and the cut will tug in your hands.
How to check:
- Unplug the machine and raise the blade to full height.
- Remove the throat plate if needed so you can see the arbor.
- Visually confirm the blade runs concentric with the arbor; if you have a dial indicator, mount it to the table and sweep the blade—runout should be under 0.005″ (0.13 mm).
- Lower the blade to the throat plate and spin by hand to check for even engagement around the opening.
If you see runout over 0.005″, replace or re-seat the blade. Short sentence.
Fence squareness: is your fence parallel to the blade and square to the table?
Why it matters: a skewed fence shifts the stock during a cut and ruins repeatability.
Example: when you cut ten identical strips for a cabinet face, a skewed fence will make every strip progressively wider or narrower.
How to check:
- Use a quality combination square or a dial indicator against the blade (with blade lowered to avoid contact).
- Measure at the front and rear of the fence; difference should be less than 0.01″ over the fence length for accurate joinery.
- Adjust the fence rails or stops until front and rear readings match.
Tighten locking handles and recheck after clamping. Short sentence.
Table flatness and cleanliness: is the table a reliable reference surface?
Why it matters: debris or a warped table forces stock away from the fence or blade and ruins your reference.
Example: a wet glue glob hidden near the blade will cause a thin veneer to lift and tear when you feed it.
How to check:
- Run a straightedge (at least 3 feet/1 m) across the table in several directions.
- Any gap over 0.02″ indicates you need to shim, plane, or replace the table top.
- Clean the table with a brush and a solvent rag; remove pitch, sawdust, or metal shavings.
Wax table surfaces lightly if you work with plywood often. Short sentence.
Planer and router roller/feed: do the rollers contact evenly and feed smoothly?
Why it matters: uneven or sticky rollers will snipe, cause chatter, or stall the feed.
Example: a drum sander roller with a chunk of hardened finish will pinch a board and gouge a 6′ table leg blank.
How to check:
- Inspect rubber or urethane rollers for flat spots, cuts, or embedded debris.
- Measure roller alignment: rollers should be parallel to the table and spaced per the manual—use a straightedge across the top of a test board while feeding by hand.
- Spin rollers by hand to feel for rough spots; replace any roller that feels gritty or has flat spots.
- Verify tension and pressure settings on the feed mechanism match the material you use (refer to machine specs).
If rollers slip under load, change or re-cover them. Short sentence.
Final quick checklist you can print and tape to the machine:
- Power off and lock out.
- Blade runout < 0.005″ (0.13 mm).
- Fence variance < 0.01″ over length.
- Table gaps < 0.02″.
- Rollers smooth, parallel, and free of debris.
Do these checks before you feed any stock and you’ll avoid most alignment-caused mistakes.
Recommended Products

INCLUDED: 2x Stock Guides Assemblies, 1x 30" Track, 8x #10 Self Tapping Screws, 4x 1/4-20 x 1/2" Low Head Cap Screws, 4x 1/4-20 Square Nuts, 1x T-25 Torx Screwdriver, 1x1/8" Hex Key, 1x #19 Drill Bit

【Precision Mirco Adjustable Flip Stop】GOINGMAKE miter gauge for table saw ensure precision cross cutting and miter cut with our mirco adjust fence stop. The micro adjustable flip stop is easy to use and the accuracy is up to 0.001 inch(0.0254mm). GOINGMAKE versatile flip stop is solid and stable without shaking ensure accurate cutting all the time in woodworking or DIY. We also support square face and angle faces workpieces with locating pin. And you can easily read the scales with our magnifying glass.

SPECS - You will receive a fully-equipped Taper Sled including 2 18.5" miter bars, rigid powder-coated steel fence that won't deflect, 2 knuckle hold-down clamps, 32" honeycomb plywood sled, and Rack-It. Fits any 3/4" x 3/8" table saw miter slot.
Material Prep: Moisture, Sharpness, and Measurement Habits

If you’ve ever opened a board and it warped after a week, this is why.
Why it matters: boards that change moisture, dull blades, or were measured wrong cost you time and money. I check moisture first because wood moves as it absorbs or releases water and that movement ruins joints. Use a reliable moisture meter and a humidity monitor: aim for 6–8% moisture for indoor hardwoods and 8–12% for exterior or green lumber. Example: before ripping a 1×6 oak for a table top, I let it sit in my shop for two weeks with the dehumidifier running and confirm 6–7% across several boards. Steps:
- Put the boards in your shop for 7–14 days.
- Check three spots per board with a meter.
- Record readings and only mill when they’re within target range.
Before you mill, look at grain and growth-ring orientation.
Why it matters: grain direction affects strength and how the piece looks after finishing. Lay boards flat and mark the face that will be visible, then mark the growth-ring direction with an arrow so you know which way to plane or run through the jointer. Example: for a bookshelf, I pick boards with matching grain flow across the shelf front so the seams read like one board. Steps:
- Lay out boards in the order you want them to appear.
- Mark visible face and draw an arrow for growth rings on each end.
- Note any sapwood or knots that need to be avoided.
It sounds obvious, but dull blades and bits wreck edges and waste material.
Why it matters: sharp cutters give cleaner cuts, reduce tearout, and lower heat that can burn wood. Keep a maintenance log and either replace or sharpen blades and bits after a set amount of use: for table saw blades, sharpen after ~40 hours of cutting softwood or ~20 hours of hardwood; for router bits, replace or resharpen when you start seeing burn marks. Example: I swap a blade after two full plywood sheets cut on a weekend; the next sheet is near-perfect. Steps:
- Keep a blade/bit log with hours or sheet counts.
- Inspect edges before each job under a strong light.
- Sharpen or replace when you see dulling or heat discoloration.
If you’re guessing measurements, you’ll compound mistakes.
Why it matters: one bad measurement turns into multiple bad cuts and wasted material. Use a quality tape (steel, biased to the blade) and make full-size mockups on scrap when fitting complex joints. Example: when I built a cabinet, I cut a full-size face-frame on scrap hardboard to check spacing before cutting the actual maple. Steps:
- Measure twice and write the dimension down.
- Make a full-size template or mockup for complex parts.
- Recheck critical dimensions at the workpiece, not just on paper.
Final practical checklist before you cut:
- Moisture: meter readings within target range (6–8% indoor).
- Orientation: faces and growth-ring arrows marked.
- Cutting tools: blade/bit logged and sharpened per schedule.
- Measurements: written, confirmed, and tested with a mockup.
Keep that checklist on your phone or taped to the wall. It saves boards.
Recommended Products

CONCRETE & WOOD MOISTURE TESTING: Instant, non-destructive & quantitative moisture content testing of concrete & wood flooring, as well as relative humidity & dew point testing of concrete & ambient conditions

Measures moisture in wood and wood floors, drywall, concrete and concrete block, stucco, plaster, masonry and other building materials

Troubleshooting Setup Drift : Symptoms, Quick Fixes, When to Recalibrate

If you’ve ever had a setup slowly stop cutting the way you expect, this is why.
Why it matters: small setup drift ruins fit and wastes material. For example, a cabinet door cut on a table saw that slips 1/16″ will leave a visible gap on a 24″ frame.
When to notice drift
– Look for repeatable errors that point to a cause: one-off tearout usually means a dull blade; a consistent change in part width by the same amount every pass means the fence has shifted; cutlines that wander along the workpiece indicate blade wander. Measure the same cut three times to confirm repeatability. Use a digital caliper for widths and a combination square for squareness.
Quick checks you can do right now (why: these take 2–10 minutes and often fix the problem)
- Warm-up and measure: machines change as they heat, so run the tool for 5–10 minutes, then measure a test cut. Example: a router table that moves 0.02″ after 10 minutes of running.
- Tighten and reseat: check fence locks, cam clamps, and mounting bolts; torque hand knobs firmly by feel. A loose fence can shift 0.03″ per pass.
- Re-seat jigs and stops: press the jig against the reference surface and re-clamp; test with a scrap board. If your stop block shifts, mark its face with a pencil to see contact points.
- Check blade/bit condition: swap in a fresh or sharpened blade and cut the test piece. A dull blade causes tearout and increased cut force.
- True the table: place a straightedge across the table and feel for gaps; shim low spots or replace the insert plate if needed.
When to recalibrate (why: small tweaks won’t fix systemic errors)
– Recalibrate when the error persists after the quick checks, when different setups give different results on the same machine, or after transport or major maintenance. Example: after moving a planer to a job site, wood that was flat before now shows a taper—recalibrate the tables and fence.
How to recalibrate (why: following clear steps restores reliable accuracy)
- Read the manual for factory tolerances and reference points.
- Square the major reference surfaces: use a machinist square or digital angle gauge to square the table to the fence, and set to 90.0° (or within the machine’s spec). Example: set a table saw fence square to 90.00° ±0.02°.
- Index and dial in positions: use feeler gauges and a dial indicator to set zero on miter slots, fence rails, and arbor runout. Adjust until the dial indicator reads within the spec (often 0.001″–0.005″ depending on the tool).
- Cut and measure a calibration test piece: make a 12″ long reference cut and measure width and squareness at both ends. Record the results.
- Iterate adjustments until measurements match targets, then lock everything and label settings for future checks.
Maintenance and prevention (why: small habits prevent big recalibrations)
- Check reference points weekly if you use the tool daily, and after any transport. Example: mark a scratch line on the fence at the zero position so you can visually confirm if it moved.
- Keep a simple log: date, test cut measurement, and any adjustments. If you see a trend—say, 0.005″ change per week—you’ll know recalibration is due.
Quick symptom-to-fix cheat sheet
- One-off tearout → swap/sharpen blade.
- Consistent width change → check/tighten fence and re-measure at three points.
- Wandering cutline → inspect blade runout and fence alignment.
- Precision shift after warm-up → measure after 5–10 minutes and adjust accordingly.
- Errors after moving the machine → full recalibration.
Do the quick checks first. Recalibrate only when those don’t fix the problem or after major events.
Recommended Products

COMPLETE 94" FENCE SYSTEM: Includes two 94" Ultra Track fence extrusions, four mounting brackets with hardware, two 12" ruler tapes, and one curved plus one straight flip stop. Maximum length for production trim shops and wide outfeed tables.

Fence locks securely to front guide rail allowing for fence attachments
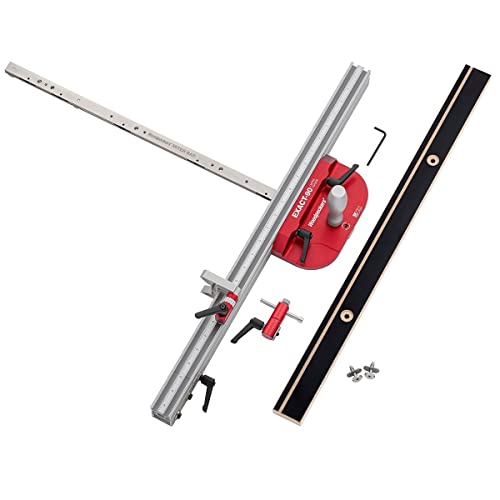
SQUARE PERIOD - The Exact-90 Miter Gauge cuts one angle and one angle only, 90 degrees. It is permanantly calibrated to cut perfectly square every time.
Why Machine Pre‑Checks Prevent Compounded Cutting Errors

If you’ve ever made a tiny saw cut turn into a ruined project, this is why.
Why this matters: small errors multiply with each pass, so catching them up front saves you money and time. For example, I once cut ten 2″ boards with a misaligned fence and ended up with eight unusable pieces.
1) What to check and why
- Check blade alignment: put a combination square against the blade and the miter slot; you want less than 0.005″ runout across the blade. A 10″ blade with 0.020″ misalignment shifts cuts by about 1/16″ after four passes.
- Check fence parallelism: measure 12″ from the blade at both the front and back of the fence; if the gap differs by more than 0.005″, shim or adjust the fence.
- Check table position: ensure the tabletop is level to the blade by sighting along the table surface; if it tilts, your workpiece can twist mid-cut.
Real example: I once let the fence sit 0.030″ off parallel and lost three hours ripping 1x stock to width.
2) How to check cutters and tension
Why this matters: dull cutters need more force and change cut accuracy.
Steps:
- Inspect tooth sharpness visually and by touch—if teeth feel rounded, replace or sharpen.
- Measure blade runout with a dial indicator; aim for less than 0.005″.
- Check belt and blade tension to the manufacturer’s spec (e.g., 90–110 lb for many table saws).
Example: a dull saw blade made me push harder and produced burn marks after only two cuts.
3) How to do a dry run and confirm presets
Why this matters: a dry run confirms dimensions without wasting material.
Steps:
- Clamp a scrap piece and set your fence and stop blocks to the intended measurements.
- Run the motion or make one pass without turning the blade on, feeling for snags.
- Cut one scrap piece and measure; confirm the final dimension within your target tolerance (e.g., ±0.010″).
Real example: I saved a full sheet of plywood by discovering a stop block was 1/8″ off during a dry run.
4) Locking positions and preventing mid‑run drift
Why this matters: unlocked presets let tolerances creep during a run.
Steps:
- Tighten fence locks and use clamps on stop blocks.
- Tape or mark digital presets so you can see if a number changes.
- Recheck locks after two cuts.
Example: a single loose carriage clamp shifted 0.060″ after five pieces and ruined a batch.
These pre‑checks take five minutes or less. Do them before you touch stock and you’ll catch errors when they’re still fixable.
Recommended Products

SPECS- IMG-I includes one in-DEXABLE Miter Gauge Fence including miter gauge head, extendable fence with imperial scales, leaf-spring miter bar, and micro-adjustable flip stop.

Precision Miter Gauge System: Complete miter gauge solution with adjustable fence designed for accurate, repeatable angle cuts on table saws
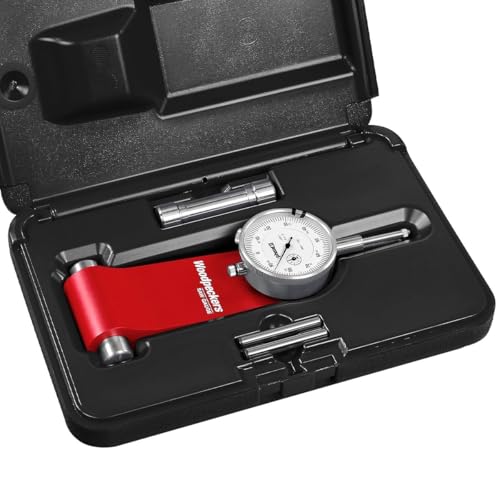
SPECS - SG-WP | Includes Gauge, Pin Set, Dial Indicator, Storage Case | Great for Rip Fence & Saw Blade Alignment
Frequently Asked Questions
How Do I Document Setup Changes for Future Repeatability?
I keep a setup checklist and photo log for each job; I note measurements, tool settings, blade/bit IDs, and material moisture, timestamp photos, store files by project, and review them before reruns so I can replicate setups.
Can I Use Digital Tools Instead of Physical Jigs?
Measure twice, cut once — yes, I can use digital templates and virtual fences; I’ll rely on them for repeatability, but I’ll also keep physical jigs for backup, verification, and situations where tactile precision matters most.
How Often Should I Replace Blades Versus Sharpening?
I recommend replacing blades when blade lifespan ends or performance won’t recover; I monitor sharpening frequency based on use, resharpening frequently for high production and replacing when tooth geometry or damage prevents effective sharpening.
What PPE Best Complements Careful Setup Routines?
I recommend hearing protection and face shields as essentials; I also wear dust masks, safety glasses, push sticks, and cut-resistant gloves when appropriate, because careful setup lowers risk but PPE protects me from residual hazards.
How Do Environmental Changes Affect Calibration Schedules?
“Measure twice, cut once.” I’ll tighten calibration schedules when temperature drift or humidity cycling accelerates; I’ll check alignments more often after seasonal swings, shipping, or heater/cooler changes to catch creeping errors early.