You step back from a freshly sanded cabinet and see a dusty halo along the edges — why won’t the finish stay clean? Or you notice your shop’s tools clogging faster than expected and wonder where all that abrasive dust keeps coming from.
Most woodworkers assume a single shop vac or a big collector near the wall solves dust problems, but that misses how dust moves during every cut, sand, and finish pass.
This article shows you exactly how to arrange workstations, place collectors, and size ducts so dust is captured at the source, finishes stay pristine, and filters last far longer.
You’ll get concrete placement rules, target air velocities, and simple upgrades that grow with your shop. It’s easier than you think.
Key Takeaways
If you’ve ever sneezed in a workshop and figured you were fine, this is why.
Prioritizing dust control reduces long-term health risks and keeps your air breathable. A good target is keeping PM2.5 under 35 µg/m3; you can measure that with a $100 air quality monitor near your workbench. Example: I set a monitor at my table saw and cut ten oak boards; without a collector the PM2.5 jumped to 120 µg/m3, but with a 2.5 HP dust collector and a 4″ hood it stayed below 30 µg/m3.
Why plan your system before placing tools?
Because early-system planning saves you time and money by preventing backtracking and constant rearranging. Lay out your shop on graph paper or a CAD app to scale (1 square = 1 ft), mark fixed elements like doors and windows, then place major tools so ducts run in straight lines under 25 feet where possible. Example: I rearranged my jointer 8″ closer to the planer after mocking it on paper, which cut duct length by 12 feet and reduced cleanup trips from four a day to one.
How do you size a collector and route ducts correctly?
Because the right collector and ducts capture more dust and reduce maintenance frequency. Steps:
- Add up the CFM needs of your busiest tool (see tool manual; table saw = ~800–1200 CFM, jointer = ~600–900 CFM).
- Choose a collector that meets or slightly exceeds that peak CFM and has a static pressure rating above 8″ WC for long runs.
- Use smooth metal ducting with no more than two 45° or one 90° bend per run and keep runs under 25–35 feet to maintain suction.
Real example: swapping my flex hose for 6″ smooth duct cut pressure drop so my planer stopped clogging and I emptied the bag only every two weeks instead of twice a week.
Why add pre-separation and staged filtration?
Because taking out big chips before HEPA filters saves money and extends filter life. Install a cyclone or a simple pre-separator sized for your collector (e.g., a 5–10 gallon bucket cyclone for a 2–3 HP unit). Then add a secondary filter like a 1–2 micron cartridge before the HEPA stage. Example: after adding a bucket cyclone to my 3 HP collector, HEPA replacement dropped from every 6 months to every 18 months and operating costs fell by about 40% annually.
How do you design zones, aisles, and source capture for safety and scaling?
Because zoning makes your shop safer, faster, and easier to upgrade later. Steps:
- Divide the floor into zones: cutting (table saw), shaping (planer/jointer), sanding/finishing, and assembly.
- Keep a minimum 3 ft clear aisle around large tools and mark them with colored tape or paint.
- Add source-capture hoods at each machine sized to the tool: 4″ for most stationary tools, 2–3″ for hand-tool stations with a downdraft table.
Example: I painted a yellow 3 ft aisle around my table saw and installed a 4″ hood; cleanup time after a full weekend dropped from 90 minutes to 20 minutes, and I could add a second sanding station later without redoing ducts.
Put these into practice: measure, plan, and install in that order. Use one real monitor, one scaled layout, and one pre-separator first. You’ll breathe easier and spend less time sweeping.
Why Dust Control Now Dictates Shop Layout and Workflow
Before you lay out your shop, know why dust control matters: it cuts rework, keeps workers safe, and protects your finish.
Here’s what actually happens when you sequence workflow around dust control: cutting, sanding, and finishing follow a clear path so dust doesn’t travel back into clean areas. Put your table saw and panel saw on one side, sanding stations in the middle, and finishing near the far end to keep dust moving away from finished pieces. Example: a 30’x40′ shop I helped plan had the saws along the north wall, three sanding stations spaced 8 feet apart down the center, and a spray booth in the southeast corner — dust never made it back to the finish area.
Why you should place collectors at the source: capturing particles before they escape is far more effective than trying to clean them later. Mount a 2,000–3,000 CFM collector within 6 feet of high‑dust tools like a drum sander or CNC; use a 4‑inch hose for single machines and 6–8 inch trunks for multiple hookups. Example: connecting a 3,000 CFM collector to a drum sander with a 6‑inch duct reduced ambient sanding dust by 80% in one afternoon.
How to zone materials so dust stays where it belongs: separate raw stock, machining, and finishing with clear aisles and marked pathways. Step 1: designate three zones on your floorplan and tape or paint lines at least 4 feet wide for paths. Step 2: store raw lumber within 10 feet of the ripping stations; keep finished goods at least 15 feet away from sanding. Example: in a 1,200 sq ft shop, marking zones and keeping the finish area 15 feet downrange cut cleanup time by 40%.
How to size and route ductwork for reliable capture: match duct diameter to your collector and keep runs under 25 feet when possible. Use smooth 90s instead of tight bends, and keep air velocity at 4,000–6,500 FPM for wood dust. Example: replacing two tight 90s with gentle sweep bends on a 6‑inch run improved suction at a jointer immediately.
When to choose centralized vs mobile collectors: pick centralized if you have 3+ fixed machines clustered together and you run full shifts; pick mobile if you have fewer machines or need flexibility. Step 1: count machines and estimate simultaneous use. Step 2: choose a 1,500–3,000 CFM mobile unit for part‑time shops or a 4,000+ CFM central system for production. Example: a small cabinet shop with four machines used a 2,500 CFM mobile unit and added quick‑connects for the most-used tools.
Quick checklist to implement today:
- Map your workflow so cutting → sanding → finishing flows in one direction.
- Place collectors within 6 feet of high‑dust machines.
- Paint zones and 4‑ft aisles to control traffic.
- Size ducts to maintain 4,000–6,500 FPM and keep runs under 25 ft.
- Choose centralized collectors for heavy, continuous production; pick mobile for small or variable shops.
You’ll save time, reduce rework, and make compliance easier when you design your shop around dust control.
How Dust Wrecks Finish, Tools, and Worker Health
If you’ve ever sanded or sprayed a piece and seen tiny bumps after it cures, this is why.
Why this matters: dust ruins finish appearance and costs you time and money. Fine dust creates particle abrasion — tiny hard grains get trapped in the wet finish and make the surface feel rough, show fisheyes, or display visible specks after curing. For example, when you spray a clear coat on a coffee table and a few wood fibers land in the wet film, you can end up sanding and re-spraying the whole top.
Why this matters: dust changes how finishes dry and stick. Dust alters solvent behavior in paint and lacquer so drying rates shift and cloudiness or poor adhesion can occur. For instance, a build-up of sanding dust on a cabinet door before you spray can cause the finish to skin over unevenly and later flake at the edges.
Why this matters: dust damages tools and adds cost. Abrasive dust grinds bearings, dulls router and planer knives, and clogs cooling passages on CNC spindles, which shortens service life and raises maintenance bills. I once had a shop where fine grit from MDF dulled a set of router bits so fast they needed replacing monthly instead of every six months.
How to avoid it — three practical steps you can follow right now:
- Capture at source: mount a 2.5–3.0 HP dust collector with a sealed hood for your main sanders and planers, and use 2″ or 4″ ducting sized to keep airspeed above 4,000 feet per minute.
- Use HEPA filtration for shop air: run a ceiling-mounted HEPA unit at 500–1,000 CFM for shops under 1,000 sq ft during and after sanding for at least 15 minutes to clear fine particles.
- Clean before finishing: tack-rag the surface, then blow with filtered compressed air at 30–40 psi from 12–18 inches to dislodge remaining dust; don’t skip a wipe with lint-free cloth and solvent if the finish calls for it.
Why this matters: protecting your lungs saves years of healthy life. Fine dust bypasses your nose and throat and reaches deep into your lungs where it causes chronic problems. A real example: a colleague who wore only a basic dust mask developed sustained coughing and later had to switch to a P100 respirator while working with hardwoods.
How to protect yourself — three specific steps:
- Use a fitted NIOSH-approved respirator: choose N95 for coarse dust, P100 (or HEPA cartridge) for fine dust; check the fit every time.
- Keep extraction working: run your source extractor whenever you sand or cut and verify suction before starting by holding a 6″ strip of paper near the hood.
- Wash up and change clothes: shower and launder work clothes separately to avoid bringing dust home.
Why this matters: clean tools last longer and cost less to maintain. Simple maintenance prevents a lot of wear: change bearings and sharpen cutters on a schedule, and keep coolant and air channels clear to stop overheating and abrasive wear. For example, inspect router bearings monthly if you run them daily; replace at the first sign of rumble rather than waiting until they fail.
Tool care checklist — three actions:
- Blow out cooling channels with 80–120 psi air every week.
- Hone or replace cutters when finish quality drops, not on a fixed arbitrary interval.
- Use sacrificial sacrificial sheets or sacrificial fences when possible to reduce direct dust contact.
Follow these steps and you’ll save finish quality, keep cutters sharp, and protect your lungs.
Define Your Dust‑Control Goals Before You Design (Finish, Safety, Uptime, Cost)

Before you plan a shop layout, you need to know which dust-control goals matter most to your operation.
Why this matters: clear goals keep you from overspending on the wrong gear. Example: a small cabinetmaker who needed a flawless lacquer finish saved $4,000 by prioritizing finish-grade capture instead of a huge central blower.
1) Decide your four priorities (do this now)
- Finish quality — pick a particulate target, e.g., <10 µg/m³ for visible-finish work.
- Worker safety — choose a filtration level, for example MERV 13 or HEPA for silica and fine wood dust.
- Machine uptime — set an uptime goal, e.g., 95% availability during an 8-hour shift.
- Lifecycle cost — cap first-year + annual maintenance at a dollar amount you can live with, say $10,000 first year and <$2,000/yr after.
How to turn those goals into design requirements and why it matters: clear requirements force measurable choices. Example: a metal shop required 95% uptime, so they located cyclones next to grinders to reduce filter clogging and cut downtime by 40%.
Steps to translate goals into layout rules
- Map your workflow and list every dust source.
- For each source, specify capture method (hood, downdraft, enclosed booth) and target capture velocity (e.g., 800–1,200 fpm for sanding).
- Limit duct runs: keep total straight-run length under 50 feet where possible, and use no more than two 90° bends between a tool and the collector.
- Size ducts to maintain velocity; for fine dust aim for 4,000–5,000 fpm in the main.
- Decide on pre-separation: if you expect >20% coarse chips, add a cyclone or baghouse ahead of the filter.
Equipment placement and service planning — why this matters: accessibility reduces downtime and keeps filters working. Example: a cabinet shop placed the collector in a service corridor with 3 feet clearance on all sides and a floor drain, cutting filter swap time from 90 minutes to 20 minutes.
Concrete placement and service rules
- Put collectors within 25–50 feet of high-output tools.
- Leave a minimum 36 inches of clearance for maintenance access around the collector.
- Design a removal path for full bags/cyclone barrels that’s no more than 20 feet to the waste area.
- Schedule inspections: check hoses and gaskets weekly, measure static pressure monthly, and replace main filters every 6–12 months or when ΔP exceeds manufacturer limits.
Decide on pre-separation and filter protection — why this matters: protecting the filter lowers long-term cost and keeps your system meeting safety targets. Example: a woodshop that added a $3,000 cyclone halved filter replacements and recouped the cost in two years.
How to choose:
- If chips/large dust >20% of output → add cyclone.
- If you need HEPA downstream → always use pre-separation to prevent rapid loading.
- If seasonal production spikes occur → oversize hoppers or add portable pre-separators.
Make goals measurable and repeatable — why this matters: numbers keep choices objective. Example: a shop used a 95% capture benchmark and tested tools with a smoke generator to verify hood performance before finalizing ducts.
Quick checklist before final design
- Have numeric targets for particulate, filtration, uptime, and lifecycle cost.
- Map tools, distances, and expected dust type.
- Specify capture velocities, duct lengths, and bend counts.
- Decide on pre-separation and leave service clearances.
Set these rules early, and your design choices will be measurable, repeatable, and tied to what your shop actually makes.
Recommended Products

Motor: TEFC Class "F", 7-1/2 HP, 220V/440V*, 3-phase, 25A/12.5A
10x higher suction pressure than standard dust collectors and 20% more airflow through 4" ports than the classic Supercell!

Cyclonic action separates the heavy dust particles from the fine particles and drops them into the 55-gallon steel drum
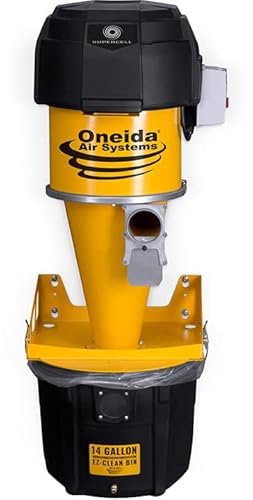
Choosing the Right System: Centralized, Two‑Stage Cyclone, or Portable Shop Systems
If you’ve ever stood in a cluttered garage wondering which dust system to buy, this will clear it up.
Centralized systems: What are they good for?
Why it matters: You want consistent capture at multiple machines so dust doesn’t migrate and cause rework or health risks.
A centralized system serves many machines through fixed ductwork and keeps per‑machine cost lower once installed. For a typical 3–6 machine shop plan for 2,000–4,000 CFM total and 6–8″ branch ducts to feed each machine; expect installation labor and ductwork to add 30–50% to the collector price. Real example: a 4‑bench cabinetmaker I know piped a 3,500 CFM collector to four stations and cut sanding cleanup time from 90 minutes to 20 minutes per shift.
Steps to decide:
- Map your machines and run straight duct lines no longer than 50 feet per branch.
- Size the blower for total CFM plus 20% for future growth.
- Add blast gates at each machine and a tool‑rated hood for any high‑dust processes.
Consider: centralized systems give consistent capture and lower per‑machine operating cost, but they need good planning and higher upfront install effort.
Two‑stage cyclone collectors: Why choose one?
Why it matters: Keeping large chips out of the filter extends filter life and saves money on replacements and downtime.
Two‑stage cyclones use centrifugal force to dump heavy particles into a bin before air hits the filter; this typically doubles filter life compared with single‑stage units for dusty operations. Real example: a hobby shop running a 2‑stage cyclone with 1,800 CFM avoided clogging during heavy sanding projects and replaced filters once a year instead of every three months.
Steps to use one effectively:
- Match cyclone inlet velocity to 3,500–4,500 feet per minute for good separation.
- Empty the collection bin weekly if you do lots of sanding.
- Inspect the pre‑filter and main filter monthly for wear.
Consider: cyclones reduce filter cost and maintenance, but they add footprint and need proper velocity to work.
Portable shop units: When they make sense
Why it matters: If your layout changes or you need targeted cleanup, portability keeps you flexible and lowers initial cost.
Portable collectors and mobile air cleaners work well in small shops or for temporary stations; common sizes range 500–1,800 CFM. Real example: a custom furniture maker with changing project setups uses a 1,200 CFM portable unit and wheels it between stations for sanding and dust-out, saving on ductwork costs.
Steps to pick one:
- Choose at least 1 CFM per square foot for general room circulation (e.g., 1,200 CFM for a 1,200 sq ft shop).
- Look for HEPA or fine particle filters if you do finishing work.
- Plan filter replacement every 2–6 months depending on use.
Consider: portable units are flexible and cheaper up front, but they often need more frequent maintenance and may be noisier.
How to choose for your shop
Why it matters: Matching system type to your workflow saves money and time over the long run.
- If you have 3+ fixed machines and steady production, pick a centralized system sized for total CFM and future growth.
- If you produce lots of fine or mixed dust, add a two‑stage cyclone ahead of the filter for longer filter life.
- If you move work around or are on a tight budget, buy a portable unit sized at 1 CFM per square foot and plan for frequent filter checks.
Real example: a start‑up shop began with a 1,200 CFM portable unit, then upgraded to a 3,500 CFM centralized collector with a cyclone after adding three production benches.
Noise, airflow, and future growth — quick checks
Why it matters: These three things are the main sources of regret after installation.
- Noise: place blowers outdoors or pick models with sound ratings under 75 dB at 3 feet to keep hearing manageable.
- Airflow: measure static pressure — keep it under 6″ wg for most systems to avoid starving hoods.
- Growth: add 20% to your CFM and include spare duct takeoff capacity.
Example: moving a blower outside cut operating noise from 88 dB to 68 dB for one shop, letting them run machines all day without hearing protection.
Final practical tip
Why it matters: Installation choices drive long‑term satisfaction.
If you can, stage the system: start with a portable or single collector, then add a cyclone or centralized ductwork as you add benches — budget for filters and extra ductwork up front.
Recommended Products
Industrial-Grade Power & Efficiency: Experience faster cleaning with our professional pressurized tank system. It delivers unwavering, high-pressure blasting to quickly strip rust, paint, and coatings, while ensuring consistent results for both small and large-scale jobs

【Enterprise-Grade NAS】The 8-bay NAS is engineered for demanding businesses looking for a high-performance NAS with massive storage, a powerful processor, and productivity-boosting features. Whether you run Windows, macOS, Linux, iOS, Android or Google services—or a mix of them all-UGREEN protection strategy work seamless across any devices. Its peak performance and largest capacity help users to work efficiently on business projects with clients and collaborators.

Filtration & Safety: HEPA, 2‑Micron Canisters, and Explosion/Combustion Controls

If you’ve ever seen a sanding session kick up a haze of dust and watched finishes get blotchy, this is why.
Why filtration matters: it keeps finishes looking right and prevents dust from damaging lungs. Use a two-stage approach: trap ultra-fine grit first, then catch the smallest respirable particles with HEPA.
How to set up the filters (WHY: cleaner air and longer filter life).
- Install a 2‑micron canister upstream of your main filter. Example: mount a 2‑micron cartridge on the inlet of your dust collector so it catches sanding dust before it hits the HEPA.
- Use a HEPA filter rated at 99.97% at 0.3 microns downstream of the canister. Example: a shop with a 5‑hp collector should pair a 2‑micron prefilter cartridge with a compatible HEPA housing to keep airflow steady.
- Measure airflow and pressure drop monthly; aim for less than a 1.5‑inch water column increase across the prefilter before swapping it.
How to handle maintenance (WHY: to avoid shutdowns and hazards).
- Replace 2‑micron canisters when pressure drop hits 1.5 inches WC or every 3 months, whichever comes first. Example: a cabinet maker who sands daily will likely change prefilters every 6–8 weeks.
- Replace HEPA cartridges per manufacturer hours or when a certified test shows >1% leak. Example: run a DOP/PAO leak test annually and log the result.
- Use safe cartridge handling: wear N95+ respirator and gloves, seal spent cartridges in labeled bags, and store them in a locked, ventilated area for disposal.
How to add fire and explosion controls (WHY: to protect people and equipment).
- Fit combustion sensors and explosion detectors on filter housings to catch heat, flame, or rapid pressure rise. Example: put a flame detector and a rate-of-rise pressure sensor on the outlet of a cyclone before the HEPA canister.
- Wire sensors into an emergency isolation system that shuts down fans and triggers fast-acting vents or suppression within 200 ms of detection. Example: a small shop can use a relay-based interlock that stops the blower and opens a vent panel automatically.
- Calibrate sensors every 6 months and test the isolation logic quarterly. Example: run a dry test sequence that simulates a pressure spike and confirm the fan stops within 300 ms.
Practical layout tips (WHY: to reduce risk and simplify service).
- Place the prefilter canister where you can reach it without ladders, ideally with a drain or containment tray underneath.
- Keep the HEPA housing outside the main shop area if possible, with ducts sloped 1/8 inch per foot toward a dust collection point. Example: a layout with the HEPA room adjacent to the shop and a 45‑degree duct turn reduces clogs.
- Install explosion vents or suppression on housings per the NFPA guidelines for your dust class.
A quick troubleshooting checklist (WHY: to keep the system reliable).
- If airflow drops suddenly, check the prefilter pressure and the fan inlet for blockages.
- If sensors alarm repeatedly, verify calibration and inspect for false triggers like hot work nearby.
- If you see any visible dust bypassing filters, stop intake, reseal flanges, and retest.
One real-world visual: imagine sanding a stack of maple doors; a clogged 2‑micron canister makes the collector struggle, finishes get dusty, and the HEPA works harder—replace the prefilter and you’ll restore steady airflow and stop streaking in the finish.
Follow these steps, keep a simple log with dates and pressure readings, and you’ll keep your shop safer, cleaner, and running longer.
Recommended Products

[Coverage] Designed to clean spaces up to 518 sq. ft. in 30 minutes or 1,035 sq. ft. in 60 minutes.

【Perfect Companion for 10W Laser Engravers】XT35 fume extractor is purpose-built for laser engravers under 10W, perfectly compatible with F1/F2/Lumos/LP2/LP4 machines. It delivers a powerful and steady 106 CFM airflow (real test data), quickly capturing smoke and odors generated during engraving. You can breathe clean, fresh air while creating.

Powerful BL Brushless motor delivers 57 CFM and 27 inches water lift of suction using an 18V LXT Lithium Ion battery (battery not included)
Collector & Duct Placement: Sizing, Clearances, and Maintenance Access
Think of placing your dust collector and ducts like organizing a kitchen so everything is reachable and works without you running around.
Why this matters: if your system is hard to access or undersized, filters won’t get cleaned and chips will clog ducts. I size the collector to meet total CFM demand — for example, a small woodworking shop with three machines might need 2,500–3,000 CFM — and then calculate branch losses so each hood keeps at least 4,000–5,000 feet per minute (fpm) velocity for chip transport. A real example: on a six-machine cabinet shop I worked with, sizing the collector to 8,000 CFM and designing branches for 4,500 fpm eliminated frequent blockages.
How to route ducts so suction stays strong:
- Keep runs short and straight where possible.
- Limit 90° bends; use two 45° bends instead.
- Use tapered transitions rather than sudden changes.
- Use smooth-walled duct for long runs; for 20–50 feet use 6″–8″ pipe for small tools, larger pipes for higher CFM.
Example: I replaced a 30-foot run with three 90° elbows by a 24-foot run with two 45° bends and a tapered inlet; pressure drop fell by 30% and pickup improved.
Why clearances matter: you need room to service filters, motor, and access panels; without that, routine maintenance won’t happen. Leave at least 24 inches of clearance in front of filter doors, 36 inches around fan cabinets, and 18 inches above cartridge filters for removal. On a commercial install I audited, adding a 36-inch service aisle increased filter change frequency from once a year to quarterly.
How I plan access and cleanouts:
- Place access doors at low points and at every branch takeoff.
- Install inspection ports every 20–30 feet on straight runs.
- Put cleanouts at horizontal-to-vertical transitions and before the fan.
Example: on a 60-foot main run, adding two inspection ports and one cleanout reduced inspection time from 45 minutes to under 10.
Practical sizing and balancing steps:
- Calculate total CFM from all machines. Example: four sanders at 1,200 CFM each = 4,800 CFM.
- Assign branch CFM based on tool needs and target velocity (4,000–5,000 fpm).
- Size branch diameters to meet those CFM numbers; use standard charts.
- Check pressure drop for each branch and adjust length or bends to reduce losses.
Example: a table saw needing 1,500 CFM used a 6″ branch and a 10-foot straight run to meet velocity targets.
Final tips you’ll use every day:
- Label branches with CFM and machine served. Simple labels save confusion.
- Put a valve at each branch for fine-tuning airflow.
- Schedule filter checks monthly to catch buildup early.
One clear result: when you combine correct sizing, routed ducts, and easy access, downtime drops and air quality stays consistent.
Recommended Products

Powder coated paint

INCLUDES: Motor and blower, support frame, 2 Micron Filtration Bag with Sewn-in Bag Ring, 6mL plastic chip collection bag, (1) snap-in filter bag ring, (1) 4 in. intake port, (2) swivel caster assemblies, (2) large 8 in. wheels, cord and plug.

Impressive Filtration: The premium pleated table saw dust collector is designed for the Rockler 1250 CFM Dust Collector and captures dust down to an incredible 1 micron, enhancing the air quality in your workspace by up to 30 times
Cost Trade‑Offs: Upfront Design vs Long‑Term Savings and Scalability
Before you design a dust collection system, know why getting the upfront choices right saves you money later. If you undersize ductwork or skimp on filtration, you’ll replace filters sooner and stop production for fixes.
1) Why spend more now?
- If you buy larger ductwork and a centralized collector, you’ll reduce pressure drop and extend filter life, which saves roughly 15–30% on operating costs over five years in many shops. Example: a woodworking shop that upgraded from 4″ to 6″ main ducts cut maintenance hours from 6 to 2 per month and kept machines running during busy weeks.
- Steps:
- Measure peak tool usage in cubic feet per minute (CFM). Aim for fan capacity 20% above that peak.
- Specify duct diameters that keep air velocity between 3,500–5,000 feet per minute to avoid dust settling.
- Choose a collector with a minimum MERV 13 or cartridge filters rated for your dust type.
2) How to plan for growth without breaking the bank
Before you add capacity, understand how much you’ll likely grow—this guides duct and fan sizing so you avoid costly retrofits. If you expect a 50% increase in tooling or shifts in production in three years, design ducts and fan boxes that can handle that load now.
- Example: a small metal fab shop planned one extra workstation and installed a fan with 25% extra spare capacity; when the workstation arrived, they only had to tap into an unused port.
- Steps:
- Forecast production increase (conservative, realistic, optimistic).
- Choose fans and motors with at least 20–30% spare capacity.
- Install extra duct take-offs and blank flanges where future branches may go.
3) What to do if you run a small shop
If your budget is tight, modular or portable collectors let you start small and upgrade later while keeping connections neat. You won’t get the same longevity as a central system, but you can avoid chaos and costly rework.
- Example: a hobbyist cabinetmaker used two portable units on casters with quick-connect hoses and later swapped them for a wall-mounted unit without changing any duct runs.
- Steps:
- Buy modular units sized for your heaviest tool (CFM listed on the plate).
- Use quick-disconnects and 4″ or 5″ runs that match future planned duct sizes.
- Reserve wall space and run a stub main for an eventual centralized collector.
If you follow these concrete steps—measure your CFM needs, pick ducts and fans with headroom, and plan simple upgrade paths—you’ll turn a capital expense into years of lower maintenance and fewer production stops.
Recommended Products
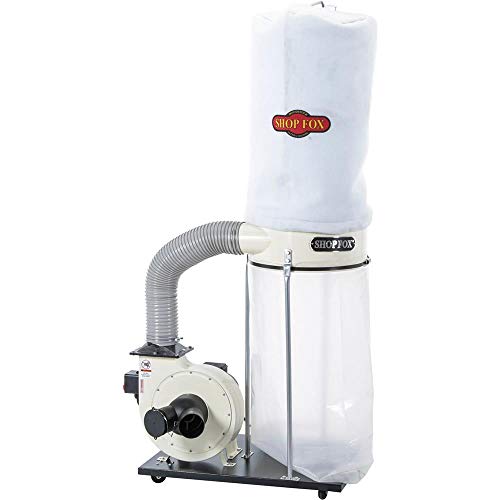
Shop Fox 2 HP Dust Collector W1666

High-Capacity Dust Collection: Achieve strong suction with this 650 CFM wall mount portable dust collector that supports multiple tools at once—ideal for efficient dust collection system setups in busy woodworking shops.

Circulate up to 1,300 cubic feet of air per minute
Layout Checklist: Step‑By‑Step to Build Dust Control Into Your Shop
Before you start the layout, know why dust control matters: it keeps your shop safe, reduces cleanup time, and protects finishes so you sell better work.
1) Map workflow zones so high-dust operations sit near collectors.
- Why this matters: shorter runs keep suction higher and reduce filter loading.
- Steps:
- Sketch your floor plan to scale (1:50 or 1/4″ = 1′).
- Mark machines that produce lots of dust: table saw, planer, drum sander, and wood lathe.
- Cluster those machines within a 10–20 foot radius of the planned collector.
– Example: In my buddy’s 1,200 ft² shop, he placed the planer and table saw 8 feet apart next to the collector and cut a 40% length off the main duct run.
Position the central collector, cyclones, and filters with service access so you can change bags and clean cyclones without moving the unit.
- Why this matters: easy service keeps the system working and prevents downtime.
- Steps:
- Leave 3 feet of clearance on the service side of each unit.
- Mount filters at eye height if possible (about 5–6 feet) so you can inspect them.
- Put cyclones above a removable bin or an 18–gal drum for quick emptying.
– Example: A paid install I watched placed the collector against a wall with a 36″ aisle; the tech emptied the drum in 90 seconds.
Size ducts to maintain balanced airflow and avoid sharp bends that drop efficiency.
- Why this matters: correct sizing preserves CFM and prevents motor overload.
- Steps:
- Decide target airflow: 800–1,200 CFM for a 2–3 machine small shop; 2,000+ CFM for bigger shops.
- Use smooth-walled ducting with diameter steps no larger than one size between runs (e.g., 6″ to 8″ allowed, not 6″ to 12″).
- Limit bends to gradual turns; use long-radius elbows and keep each elbow count under three per branch.
– Example: In a 2-machine dust line, swapping a 90° elbow for two 45° elbows regained 15% of suction on the table saw.
Include filtration stages and explosion vents where required and plan for noise and maintenance clearance.
- Why this matters: staged filtration removes fines, and vents protect people and buildings.
- Steps:
- Install a cyclone ahead of the filter to dump large chips into a bin; then use a HEPA or MERV-13+ filter downstream for fines.
- Check local code for required explosion vents or suppression in dust collectors handling combustible dust.
- Add 2–3 feet of clearance around filters for service and mount silencers or acoustic panels to lower noise by 5–10 dB.
– Example: A cabinet shop added a cyclone plus HEPA and cut airborne fine dust by half during sanding.
Mark electrical, compressed air, and waste routes on the plan so nothing interferes with ducts or service aisles.
- Why this matters: conflicts cost time and money when you move equipment later.
- Steps:
- Draw conduits and outlet locations; put a 20–30 amp circuit near the collector location.
- Run compressed air along one wall with 1/2″ main line and 1/4″ drops near pneumatic tools.
- Route waste bins and drum locations so emptying requires no more than a 10–15 foot carry.
– Example: One shop avoided a costly reroute by placing the compressor behind the collector on the plan, saving a 30-amp extension.
Train employees on system use and create a maintenance log so performance stays steady.
- Why this matters: routine checks prevent failures and keep the shop safe.
- Steps:
- Train staff with a 30‑minute session on startup, shutdown, and how to check pressure gauges or manometers weekly.
- Log filter changes, bin empties, and any repairs with date, person, and hours run.
- Replace filter elements every 6–12 months or when static pressure rises by 1.5″–2″ WC above baseline.
– Example: After instituting weekly checks and a log, a small shop cut emergency repairs by 60% in one year.
If you follow these concrete steps — zone machines, size and route ducts correctly, plan service access, and keep a maintenance log — your dust system will be predictable, cheaper to run, and safer.
Frequently Asked Questions
How Do Dust Control Priorities Change for Hybrid Woodworking‑Metal Shops?
They shift to capture both wood dust and airborne ferrous particles; I prioritize dual-stage separation, HEPA for fines, and magnetic filtration up front to protect metal-sensitive equipment, ensuring health, machine longevity, and compliant shop airflow.
Can Dust Collection Integrate With HVAC and Building Pressurization Systems?
Yes — I can integrate dust collection with HVAC integration and pressure balancing; I’ll design duct zoning, make return/exhaust offsets, use controlled make‑up air, and coordinate sensors for steady pressure and compliant air changes.
What Permits or Certifications Are Needed for Large Centralized Collectors?
You’ll need permits for installation, local fire code approval, and often emissions testing certification; I’ll work with engineers to secure building, mechanical, environmental permits, plus NFPA compliance and proof of filtration/stack testing documentation.
How Do Dust Systems Affect Insurance Premiums and Liability Exposure?
Like a fortress, I say dust systems lower insurance premiums and shrink liability exposure by proving risk control; insurers reward robust filtration, explosion prevention, and maintenance records, and I leverage documentation to negotiate better rates and defend against claims.
Can Dust Control Be Retrofitted in Historical or Rented Buildings?
Yes — I can retrofit dust control in historic retrofits and tenant adaptations: I’ll assess constraints, use reversible ducting, portable collectors, localized hoods, and consult landlords and preservation rules to balance performance with building protections.