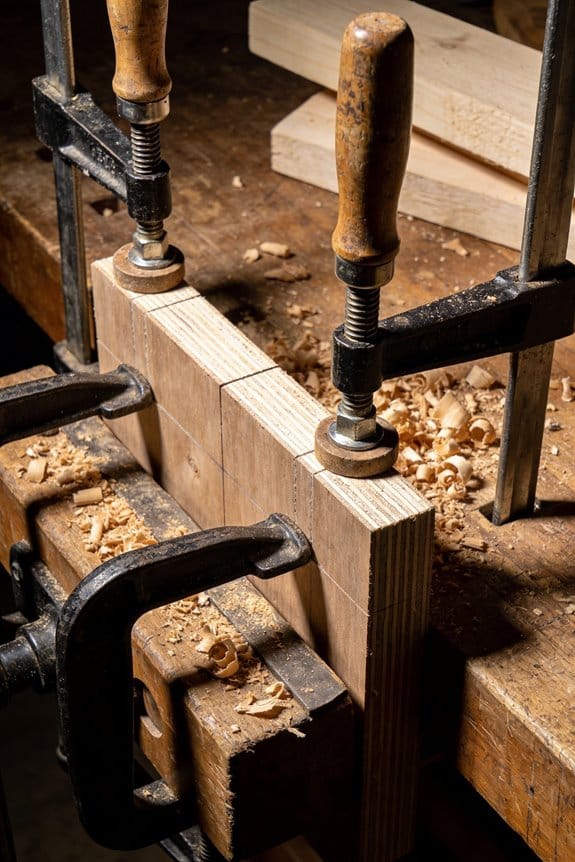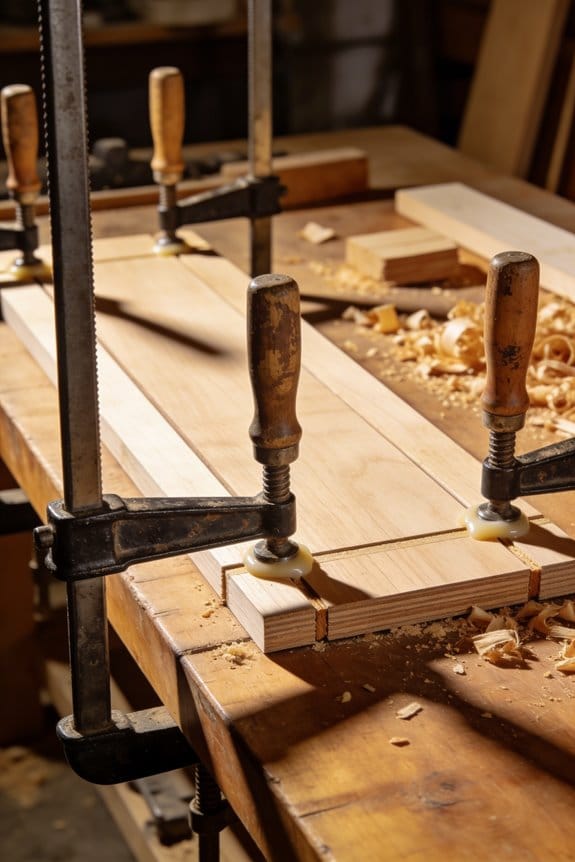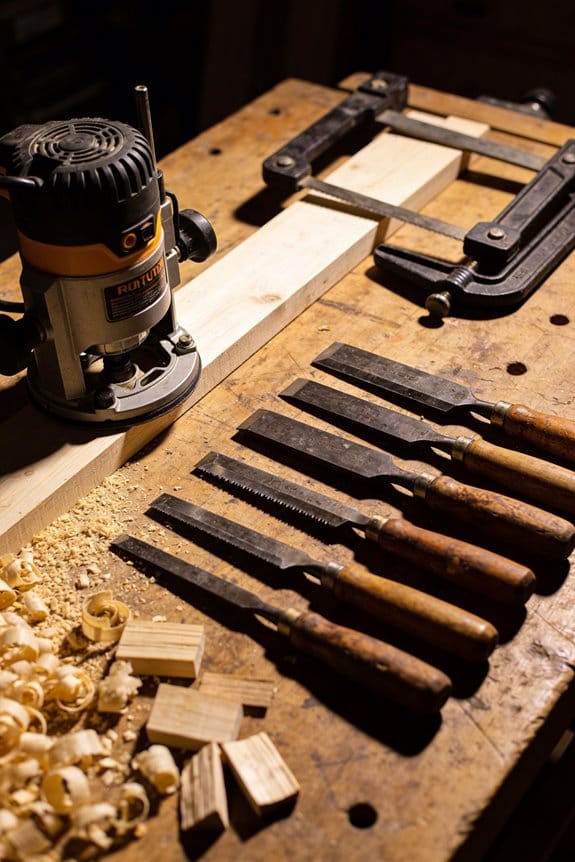

You’re midway through a cut when the stock suddenly shifts and the router bit or chisel jerks—check alignment with a framing square before cutting—now you’re staring at a ruined edge and a very close call. You want to know exactly how to hold and control work so it can’t move, preventing catches, kickback, and messy cuts.
Most people assume any clamp will do or rely on muscle and reflexes instead of repeatable, secure workholding. This intro will show step-by-step practical setup habits: which clamps and jigs to use, how to set sacrificial fences and featherboards, and how push blocks, torqueing collets, and checks reduce risk and improve cut quality.
Follow these steps and you’ll finish cleaner, safer routings and chiseling. An oscillating multi-tool helps clean up flush cuts afterward. It’s easier than it looks.
Key Takeaways
If you’ve ever had a clamp slip while routing—or while driving screws from a pocket-hole jig—this is why.
Why it matters: a slipping clamp can pivot the workpiece and throw the cutter; that can ruin the part or injure you. Use these specific steps to stop pivoting and kickback.
1) Torque clamps correctly
- Step 1: tighten T‑handle or toggle clamps to the torque the manufacturer lists (often 20–40 in‑lb for small bench clamps).
- Step 2: mark the clamp position with a witness line so you can see any movement at a glance.
- Example: I clamp a 3/4″ hardwood board for an edge profile — torquing to 30 in‑lb and marking the clamp kept the board from rotating when I took multiple passes.
If you follow those two steps you’ll avoid sudden workpiece movement.
Before you start routing, protect fences and faces.
Why it matters: sacrificial fences and faces stop cutter exposure from damaging your fixtures and reduce tear-out at the cut edge. Use these exact actions.
1) Add a sacrificial fence or face
- Step 1: glue or screw a 1/2″ pine or MDF sacrificial strip to the fence or jig.
- Step 2: replace it when you see 1/8″ of cutter contact wear.
- Example: I screw a 1/2″ pine strip to my router fence when flushing tenon cheeks; after five panels the strip showed 1/4″ wear and I swapped it.
Do that and your fence stays true.
Think of vibration like itch you can’t ignore.
Why it matters: vibration makes your feed inconsistent and leads to catches. Reduce it with non‑marring pads and even clamp spacing using these steps.
1) Use pads and balance pressure
- Step 1: put rubber or cork pads under clamps where they contact the part (3–5 mm thick).
- Step 2: space clamps evenly—every 8–12 inches for thin stock, every 12–18 inches for thicker stock—to distribute pressure.
- Example: with a 24″ maple panel I used four clamps spaced 6″, 8″, and 10″ apart and thin cork pads; the panel did not vibrate while rabbeting.
That setup lowers chatter and keeps the feed steady.
You don’t need to risk your hands near cutters if you build simple aids.
Why it matters: jigs, push blocks, and guarded slots keep your hands away and give repeatable movement so you don’t rely on reflexes. Make these items like this.
1) Use and make push aids
- Step 1: cut a 3″ wide push block from hardwood with a 1/2″ kerf slot for the cutter and a 45° face for control.
- Step 2: add a hook or skid pad on the trailing edge to keep pressure toward the fence.
- Example: I routed a 2″ wide slot using a 3″ push block with a trailing hook; it held the part firmly and kept my fingers 6″ away from the bit.
That keeps your hands out of danger and the cut repeatable.
Before you clock in, inspect the gripping and cutting parts.
Why it matters: a loose clamp, a worn collet, or bit runout causes fixture failure, chatter, and wobble that you won’t expect. Check these things in this order.
1) Pre‑shift inspection steps
- Step 1: visually inspect clamps and fasteners for cracks or stripped threads.
- Step 2: tighten all fasteners to spec and check clamp torque by re‑marking positions after a light tap.
- Step 3: remove the bit, clean the collet, insert the bit and tighten to the manufacturer’s torque (usually 10–15 ft‑lb for router collets), then spin the router by hand to feel runout.
- Example: before a bench shift I found 0.015″ runout on a 1/2″ bit; replacing the collet dropped runout to 0.003″ and the cut became smooth.
Do the checks and you avoid unexpected wobble.
Final practical checklist (do these every time)
- Tighten clamps to spec and mark their position.
- Use a 1/2″ sacrificial fence and replace at ~1/8″ wear.
- Put 3–5 mm rubber or cork pads under clamps and space them 8–18″ based on stock thickness.
- Use a 3″ push block with a trailing hook for hand routing.
- Inspect clamps, collet, and bit runout before powering up.
Follow this, and your routing and chiseling setups will be safer and more predictable.
Quick 5-Step Setup Before Routing or Chiseling
Before you start routing or chiseling, check your setup so you avoid mistakes and injuries.
1) Why check the material, and what to look for?
Why it matters: flaws in the wood change how tools bite and can cause tear-out or kickback.
Example: a knot near the edge of a 1×6 can grab a router bit and pull your workpiece.
Steps:
- Lay the board flat and run your hand over it to feel for bumps.
- Visually inspect for cracks, knots, and grain direction; mark any defects with a pencil.
- For grain direction, mark the feed direction with an arrow so you rout against the grain on a handheld pass.
Tip: if you find a knot within 2 inches of your cut line, relocate the cut or use a backing board.
2) How should you light the workspace?
Why it matters: good lighting reveals defects and markings so you cut where you intend.
Example: a single overhead bulb left a shadow that hid a 1/8″ crack on a table top I was planing.
Steps:
- Set a bright task light (at least 800 lumens) at a low angle across the board to cast shadows into imperfections.
- Use a second light on the opposite side if you see shadows that hide edges.
- Wear clear safety glasses with anti-fog; they cut glare but keep vision clear.
End note: aim the lights so the pencil mark is crisp.
3) How do you secure the workpiece?
Why it matters: movement causes binding, chips, or dangerous kickback.
Example: clamping a 12″ board with one small C-clamp let the far end lift while routing a groove.
Steps:
- Use at least two clamps for any board under 24″ long—one near each end.
- For handheld routing, add sacrificial fences or a straightedge clamp to guide the bit.
- If the cut is short, use a stop block bolted to the workbench to prevent forward motion.
Safety detail: clamp pressure should hold without crushing—tighten until the board stops moving, then a quarter turn more.
4) What should you check on your tools?
Why it matters: sharp, properly adjusted tools cut predictably and keep you in control.
Example: a router bit with a 1/16″ nick required double the feed speed on a mortise and grabbed the stock.
Steps:
- Inspect bits and chisels for nicks, chips, or rounded edges; check router collet for debris.
- Sharpen chisels to a 25–30° bevel for general work; use a honing guide if you have one.
- For router bits, spin them by hand—if they wobble, replace the bit or clean the shank and collet.
Concrete metric: if a straight bit’s runout exceeds 0.1 mm, swap it out.
5) How do you plan and test the cut?
Why it matters: planning avoids surprises and keeps the workpiece intact.
Example: marking relief cuts and doing a scrap pass saved a dovetail board from splitting during the final routing.
Steps:
- Mark the full cut path and then mark 1/8″ reliefs where the cutter exits the wood.
- Identify safe hold points and mark them with tape—these are the spots you’ll grip while cutting.
- Always do a short pass on scrap of the same species and thickness to verify feed speed, depth, and fence alignment.
Rule of thumb: cut shallow—take 1/8″ depth passes with a router for hardwoods, up to 1/4″ for softwoods.
Follow these five checks every time and you’ll prevent most routing and chiseling problems.
Choose the Right Workholding for Routing and Chiseling
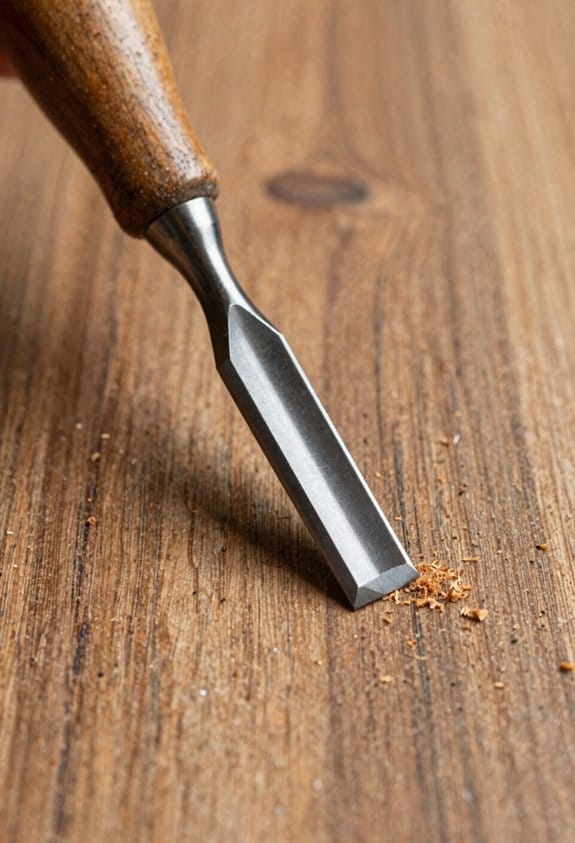
Before you start routing or chiseling, you need to know that the wrong hold can let the cutter grab and ruin your part — and it can be dangerous.
Pick a workholding that matches the cut and the material so you get both stability and access. For an odd-shaped hardwood blank I routed a decorative edge last month; I used an adjustable vise with one jaw at 30° and the other set 1/2″ offset so the router bit cleared the corner while the piece stayed tight. Adjustable vises work well for odd shapes because you can change jaw spacing and angle; set the jaws to leave 1/16″ clearance around the cutter and tighten to about 30–40 ft·lb on bench vises so nothing shifts. Use a wrench with a torque indicator if you have one.
Why this matters: thin or delicate stock will collapse under normal clamps and you’ll lose the part. For delicate or thin sheets, use a vacuum fixture that distributes holding force without crushing; on a 12″×12″ thin plywood panel I used a vacuum pod at 18 inHg and held the panel flat while routing a 1/8″ rabbet. Vacuum fixtures are great when clamps would block the tool, and you should check vacuum level every 5–10 minutes during longer cuts.
You’ll want quick repositioning if you do multiple cuts or frequent set-ups. Look for quick-release features so you can reposition without losing alignment — like cam locks or toggle clamps that snap open in one motion, letting you re-seat the part in under 10 seconds. For finished pieces, protect the surface: add non-marring pads such as 1/8″ rubber or leather between jaws and work, and press to about 50–70 psi contact pressure so the finish isn’t dented.
Before you cut, always verify that the hold resists torque and lateral forces; try a 90° pull and a lateral shove with the tool off to confirm nothing rotates or walks. If the part moves under a firm shove of about 10–20 lbf, re-fixture it or add a secondary clamp.
Recommended Products

Blade size: 64-1/2-Inch x 1/2-Inch; Max. capacity circular @ 0 degrees: 5-Inch

60,000 psi ductile iron movable jaw and base provides greater durability with lighter-weight material
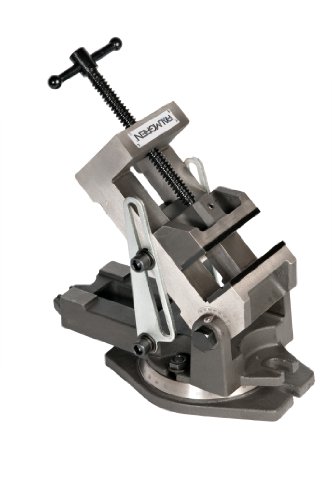
Jaw surface square to 0.002 inches
How Proper Clamping (Workholding) Reduces Kickback and Movement
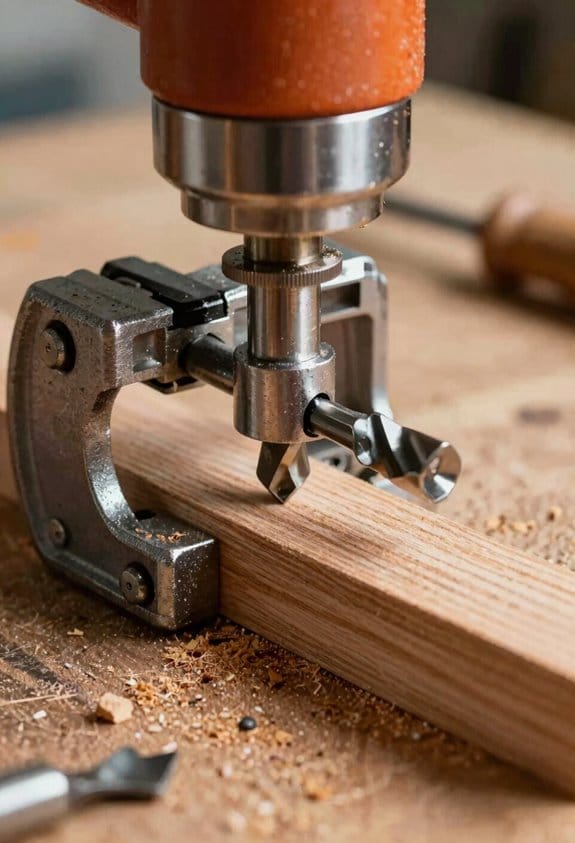
If you’ve ever had a board kick back, this is why. Proper clamping keeps the piece from shifting under the cutter so the bit can’t grab and throw your work, and that dramatically lowers the chance of a kickback.
Why this matters: a moving workpiece can suddenly jam the cutter and eject the stock toward you.
How to clamp so the piece won’t move:
- Start at the clamp closest to the cutter and tighten that first, then work outward.
- Use consistent pressure—tighten each clamp to roughly the same hand-feel or about 20–30 ft·lb for bench clamps and 60–80 ft·lb for heavy hold-downs if you have a torque wrench.
- Leave a small gap (1–2 mm) between the clamp pads and the workpiece at first, then snug them all up once every clamp is aligned.
Example: when edge-routing a 12″ x 6″ oak board on a router table, place a hold-down at the front edge by the bit, then one at each end; tighten front first, then ends to the same feel, and finally retighten the front.
Why clamp sequencing matters: uneven clamping lets the workpiece pivot around a loose point and the cutter meets a moving surface.
How to sequence clamps:
- Place your clamps so they oppose the cutting force (one clamp on the feed side, one on the outfeed side).
- Tighten the clamp nearest the cutter first.
- Move outward and tighten each additional clamp to match the first.
Example: ripping a 24″ panel on a table saw—clamp a stop at the fence near the blade, then add clamps every 8–12″ working away from the blade so the panel can’t pivot.
Why lateral control reduces sudden ejection: keeping the stock against the fence and table stops sideways movement that leads to sudden force spikes.
What to use for lateral control:
- Pair a featherboard with an anti-kickback pawl or spring-backed device.
- Set the featherboard so its fingers just touch the work with about 1–2 mm of flex.
Example: trimming a 3/4″ plywood edge with a fence-mounted router—mount a featherboard 6″ from the bit and an anti-kickback pawl behind it; the board stays flush and the plywood won’t walk away.
Why protect your hands: holding a handheld router too close invites a sudden catch that jerks the tool.
How to keep your hands safe when routing by hand:
- Use a push block or push stick to control short stock and hold steady forward pressure.
- Maintain two hands on the tool or handles, never on the stock within the cutter path.
- If you need a fence, clamp a sacrificial fence against the real one so the cutter can’t hit metal.
Example: handheld edge-trimming a 2″ strip—use a push block behind the strip, keep steady forward pressure, and clamp a 1/2″ pine sacrificial fence to the router base.
Why dampening vibration matters: less vibration gives a cleaner cut and reduces the chance the cutter will catch on grain or a knot.
How to reduce vibration with clamping:
- Use multiple clamps spaced 6–12″ apart on thin stock.
- Add a soft pad (rubber or leather) between clamp and workpiece for fragile or thin pieces.
- Tighten until the piece stops rattling, then add a quarter-turn.
Example: planing a 1/8″ plywood trim—use three clamps every 8″ with rubber pads; the plywood stops vibrating and the bit feeds smoothly.
Follow these concrete steps and you’ll cut more consistently and with far less risk of sudden movement or kickback.
Recommended Products

One (1) pair of IBEAM30 clamps that provide 30" of clamping width.
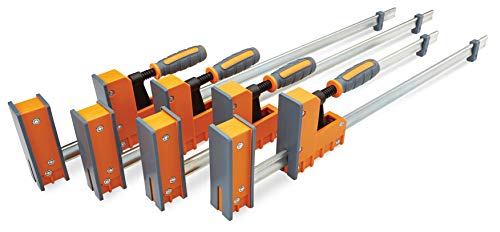
ULTIMATE WOOD WORKING CLAMP SET - This set includes two 24" Inch parallel clamps and two 31" parallel clamps covering a broad range of woodworking tasks from gluing, joinery, small frames, to larger case assemblies. Making them an essential addition to your wood working tools and accessories.
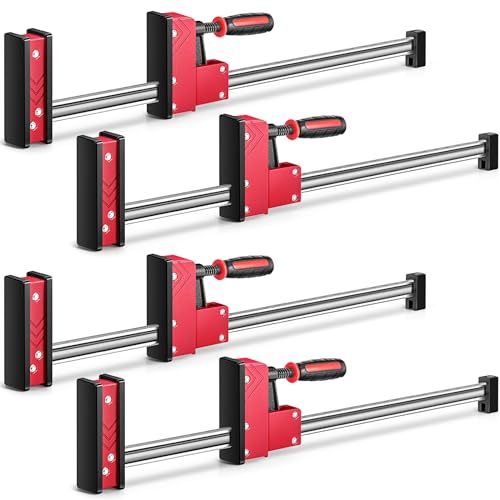
Quantity and Size: the set includes 4 heavy duty parallel clamps for woodworking, providing a sufficient quantity for various woodworking projects; With a size of about 32.09 x 5.91 x 1.77 inches, these parallel fixture are suitable for a wide range of woodworking applications, ensuring that you have the right tools for your projects
Jig Designs to Keep Fingers Away From Blades
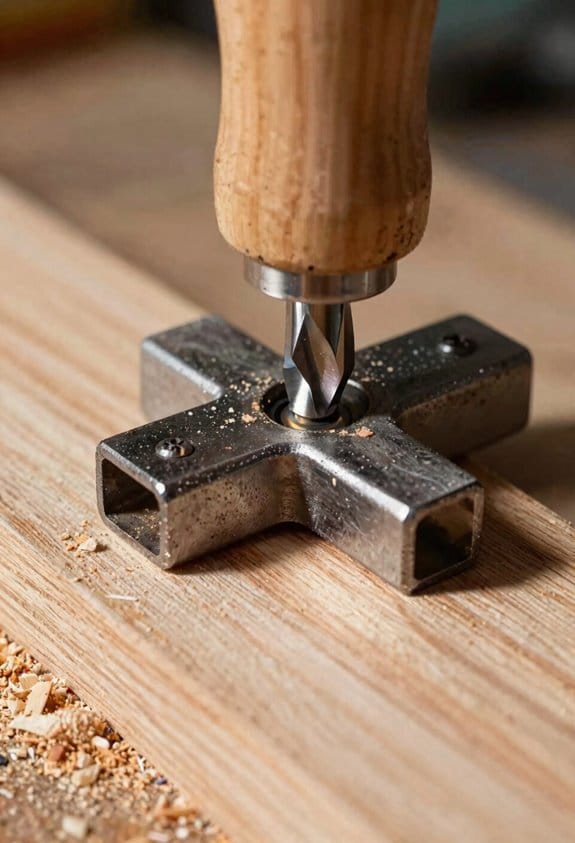
Before you cut, know why keeping your fingers away matters: a small slip can cost you weeks of healing or a lost fingertip.
Think of a jig like a traffic barrier for your hands; it forces the workpiece to move while your hands stay back. I design jigs that put fences, push blocks, and guards between you and the blade so your hands never enter the cutting path. For example, when ripping a 2×6 on the table saw, I use a 3/4″ plywood fence clamped to a sled so my hands stay 8–10 inches from the blade.
Why use a fence jig? It holds stock square and rides a reference so you can feed material with a single hands-off push block. Step-by-step:
- Cut a fence from 3/4″ plywood to the length of the sled.
- Square it to the sled with a framing square and clamp with two 3″ bar clamps.
- Position the fence so the cut width is accurate to ±1/32″.
- Use a 2″ tall push block with a 1/4″ lip to feed the stock.
A real example: I cut ten matching 1-1/2″ rails for a door and used this setup to keep each push at least 9 inches from the blade.
Before you make push blocks, know why they work: they add distance and leverage so your fingertips never touch the stock. Make one like this:
- Glue a 3″ x 6″ hardwood pad to a 3/4″ plywood body.
- Screw a 1/4″ hardwood lip on the front, 1/2″ thick and 1″ deep.
- Add a 1/4″ scrap of rubber to the bottom for grip.
When I used this push block to trim plywood edges, my fingertip pressure dropped and each board fed smoothly.
If you clamp sacrificial faces, you distribute force and protect both the jig and the bit. Cut sacrificial faces from 1/4″ pine and clamp them to the fence with two 1″ screws countersunk 3/8″ from the edge. Example: when routing a hinge mortise, the sacrificial face absorbed tear-out and kept the router from chasing the grain.
The guarded slot idea keeps the tool in and your fingers out. Cut a 1″ wide tunnel through the jig so a chisel or bit reaches the waste without exposing your hand. For a 3/8″ router bit, make the slot 1/2″ wider than the bit and 1″ longer than the cut, then test clearance with a scrap piece. I used this method to rout ten identical grooves for drawer bottoms with zero finger exposure.
Simple and repeatable beats fancy and risky; jigs that force the workpiece to move predictably cut both risk and variation. For repeat cuts, mark stops with a sacrificial stop-block screwed 3/4″ from the fence and index each piece against it; you’ll get identical parts every time.
Recommended Products

Shop Fox 10 in. 2 HP Open-Stand Hybrid Table Saw W1837

POWERFUL 15A MOTOR & PRECISION 10"" TCT BLADE FOR MULTIPLE SAWING TASKS: The 15A motor paired with a 10"" TCT blade delivers powerful cutting performance, making it ideal for crosscuts, rip cuts, and miter cuts in various materials like wood and plywood.

INCLUDES: (6) table saw miter gauge, (6) multi-track miter fence, (6) t-track flip stop
Select Router Bits & Chisels and Secure Their Mounts
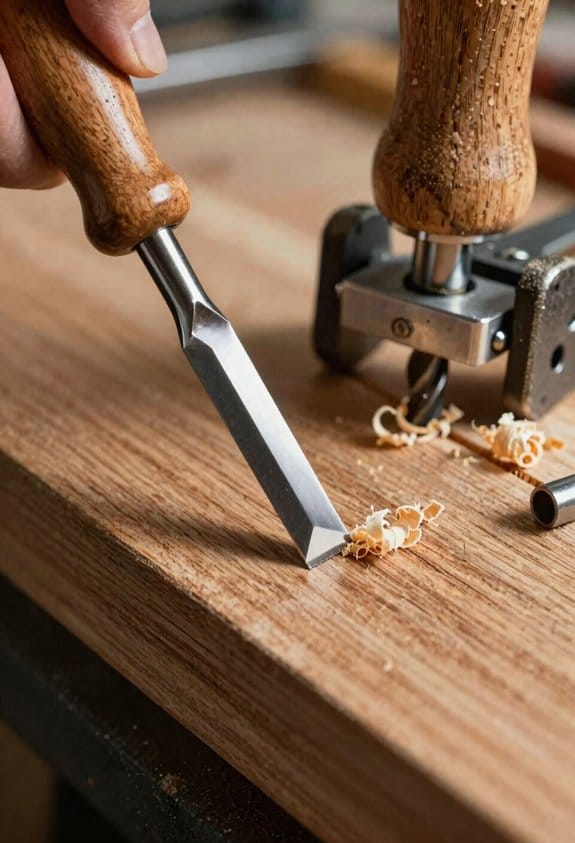
Before you pick a bit or chisel, know this: a loose cutting tool can fly out and seriously injure you, so mount security matters as much as choosing the right cutter.
1) How do you choose router bits that match the job?
Why it matters: the wrong bit causes vibration, burns, and kickback.
Steps:
- Match diameter to the cut: use a 1/4″ shank bit for small trim cuts and a 1/2″ shank bit for heavy stock removal or long plunge cuts.
- Match profile to the joint: pick a roundover for edges, a straight bit for dados, and a rabbeting bit for shoulders.
- Match shank size to router collet and speed: if your router has a 1/2″ collet, use 1/2″ shanks at speeds under 18,000 RPM for bits over 1″ diameter; reduce speed to 8,000–12,000 RPM for 2″ or larger bits.
- Inspect the bit: look for chips on carbide tips and any wobble by spinning it in your fingers.
Example: for a window trim rabbet, I pick a 1/2″ shank rabbeting bit, set router speed to 14,000 RPM, and make 1/16″ passes.
2) How do you inspect and pick chisels?
Why it matters: dull or damaged chisels tear fibers and make joints sloppy.
Steps:
- Check bevels and backs for nicks and flatness; run your fingernail across the bevel to feel for burrs.
- Choose the blade width for the cut: use a 1/4″ chisel for tight mortises and a 1″ chisel for trimming shoulders.
- Confirm handle and ferrule are solid and not cracked so the chisel won’t break under mallet blows.
Example: when cleaning up a tenon shoulder, I use a sharp 3/4″ chisel with a polished back and a light wooden mallet.
3) How do you secure mounts so tools don’t come loose?
Why it matters: proper seating and torque prevent ejection and wobble.
Steps:
- Clean the collet and shank: remove dust and oil with solvent and a rag; compressed air helps.
- Seat the shank fully: push the bit or chisel shank into the collet until it bottoms out, then pull back 1–2 mm before tightening.
- Torque to spec: tighten the nut to the router manufacturer’s torque—typically 15–20 Nm for 1/2″ shanks; if you don’t have a torque wrench, tighten firmly with the router’s wrench and then add a 1/4 turn.
- Test at low speed: run the router at 3,000–5,000 RPM for 5–10 seconds and watch for wobble or noise before full cuts.
Example: before plunge cutting a groove, I clean the collet, seat the 1/2″ straight bit, torque the nut, and test at low speed; any wobble and I stop immediately.
Final quick checklist you can use before every cut:
- Bit/chisel chosen for diameter/profile/shank.
- Edges and bevels inspected.
- Collet and shank cleaned and seated.
- Nut torqued to spec (15–20 Nm typical).
- Low-speed test run for 5–10 seconds.
Do these steps and you’ll cut cleaner and stay safer.
Recommended Products

Bits in these sets have profile & groove or rabbet cutters

Includes 8 three-wing slot cutters, 4 slot cutter arbors, 4 bearings and a hey key

Devotion to consistently providing the highest quality
Inspect Holds & Log Near-Misses: Inspection Checklist & Metrics
If you’ve ever had a clamp fail you at the worst time, this is why.
Why this matters: a small loose bolt or worn jaw can launch a workpiece and injure someone, or ruin a part in seconds. I’ll show you exactly what to check, when to check it, and how to record problems so you fix the same thing only once.
Pre-shift, mid-shift, post-shift — what to inspect and why
Why this matters: catching wear early keeps you working and prevents kickback.
1) Pre-shift: do a full walkaround before you touch the machine.
– Steps:
- Visually inspect every clamp and fixture for cracks, rust, or gouges; mark any that show hairline cracks and remove from service. Example: I once found a clamp jaw with a 2 mm crack near the bolt hole; I tagged it out and prevented a possible ejection.
- Check fastener torque with a calibrated torque wrench to the value on the machine plate (for example, 30–35 Nm for a medium clamp); record torque in the checklist.
- Verify jaw alignment by clamping a test block and measuring parallelism with feeler gauges; tolerance: ≤0.5 mm over 100 mm.
– End with the pass/fail checklist filled and signed.
Mid-shift spot checks — quick validation to catch shift drift
Why this matters: clamping setups shift under load and time, so quick checks stop small problems turning into incidents.
1) Mid-shift: perform two quick checks during long runs.
– Steps:
- Randomly pick 3 clamps on the machine every 2 hours and check torque on at least one fastener per clamp; note any drop greater than 10% from pre-shift readings. Example: during a 4-hour run, we found one clamp lost 15% torque after a heavy cut and retorqued it to spec.
- Look for jaw slip by marking jaw position with paint and checking if mark moved more than 1 mm.
– Use the simple pass/fail boxes on your sheet and write the torque numbers where applicable.
Post-shift documentation — log what happened and fix it
Why this matters: logging creates patterns you can fix before failure repeats.
1) Post-shift: document defects and corrective action.
– Steps:
- Enter every issue into the near-miss log using the taxonomy: severity (1–5), cause (fastener, wear, operator, process), and corrective action (retorque, replace jaw, rework fixture). Example: a near miss logged as Severity 2: loose fastener; Cause: improper initial torque; Action: retrained operator and added torque check to pre-shift.
- Close the loop: for any item graded Severity 3+, generate a corrective work order with target repair time (for example, 24 hours) and assign an owner.
Checklist design — keep it simple and specific
Why this matters: a checklist you don’t use is worse than none.
1) Build one-sheet checklists with clear fields:
- Items (clamp ID, jaw condition, fastener torque, alignment, surface damage).
- Pass/Fail boxes next to each item and a numeric field for torque readings (Nm).
- Signature, time, and shift.
- Example entry: Clamp C12 — Jaw: Pass; Torque: 32 Nm; Alignment: Fail (0.8 mm); Action: Tag for repair.
Near-miss taxonomy and metrics — turn logs into fixes
Why this matters: metrics show recurring problems so you stop repeating them.
1) Near-miss taxonomy — categories and an example:
- Severity 1–5: 1 = cosmetic, 5 = imminent danger.
- Cause: Fastener, Wear, Alignment, Operator, Process.
- Corrective action: Retorque, Replace, Retrain, Engineering change.
- Example: Severity 4, Cause: Wear, Action: Replace jaw and review supplier spec.
2) Metrics to track (measure weekly):
- Defects per 100 inspections (goal: reduce by 20% in 3 months).
- Time-to-correct median (target ≤ 24 hours for Severity ≥3).
- Repeat failure rate for the same clamp (target < 5% over 30 days).
- Use a simple spreadsheet with timestamps, clamp ID, and status.
Feeding results into training and maintenance
Why this matters: data lets you focus effort where it pays off.
1) Steps:
- Review metrics weekly with operators and maintenance; highlight top 3 recurring clamp IDs.
- Update training: show photos of actual failures and the correct torque/technique; run a 15-minute refresher when repeat issues exceed the target.
- Adjust preventive maintenance: replace jaws after X cycles or Y hours (for example, every 1,000 clamp cycles or 500 hours).
– Example: after logging 7 repeat failures on one fixture, we changed to a higher-grade jaw and cut repeat rate from 30% to 3%.
Quick tips you can use today
Why this matters: small habits stop big problems quickly.
- Always write torque numbers on the checklist.
- Tag out any clamp with a crack, even hairline.
- Use paint marks to spot jaw movement faster.
You’ll be safer if you do these steps every shift and record what you find.
Guards That Work With Your Clamps and Mounts
Before you pick a guard, you need to know why compatibility matters: a mismatched guard can keep your clamp from getting a secure hold, or it can let the clamp intrude into the guarded zone and create a hazard.
Start by checking the guard’s footprint and fastener pattern against your mount so they align precisely. For example, if your mount has a 50 mm bolt pattern with two M8 holes 40 mm apart center-to-center, make sure the guard’s holes match those measurements; this prevents you from having to drill new holes or use adapters that shift the guard out of position.
Next, verify mounting clearance so your clamp jaw, screw, or quick-release won’t hit the guard during adjustment. Why this matters: interference will stop you from tightening or let the clamp slip under load. Try this real-world check: with the clamp closed on a test piece, move the adjustment screw through its full travel and watch for contact—if the screw contacts within 10 mm of full travel, the guard needs repositioning or a different model.
Follow these specific steps before final assembly:
- Measure the mount’s bolt centers and hole sizes in millimeters.
- Place the guard over the mount and mark any interference points while cycling the clamp through its full range.
- If marks appear within the clamp’s travel, reject that guard or plan for a guard with a larger clearance or different hole spacing.
I prefer guards that let you set the clamp in a consistent position, provide defined standoffs so your hand and parts stay the safe distance away, and bolt to mounts without bending the clamp. A practical example: using a guard with 15 mm standoffs kept my palm 15–20 mm away from a rotating shaft, preventing repeated scraped knuckles during an assembly session.
If the guard and clamp are borderline compatible, aim for these targets: 10–20 mm of unobstructed adjustment travel beyond the clamp’s normal closed position, standoffs of 12–20 mm for hand clearance, and fastener holes within ±1 mm of the mount locations. These numbers give you room to tighten without forcing the guard or deforming the clamp.
When you install, torque bolts to the clamp and guard manufacturers’ specs so nothing shifts under load; if you don’t have a spec, use 8–12 Nm for M6 bolts and 20–30 Nm for M8 bolts as a safe starting point. A quick real-world tip: mark the guard and clamp edges with a felt-tip line after first tightening; if the lines move more than 2 mm during use, retighten or add threadlocker.
Do this compatibility checklist every time you change clamps, mounts, or guards:
- Confirm bolt pattern and hole sizes match to ±1 mm.
- Cycle clamp through its full travel and note any contact within 10 mm of travel end points.
- Verify standoff distance is at least 12 mm for hand clearance.
- Torque fasteners to spec or the suggested starting values and mark alignment.
Following those checks keeps your clamp secure and your guard doing the job you bought it for.
Recommended Products

Made To Withstand Even The Toughest Jobs

Thread Size: Diameter 8mm-1.25mm pitch, Length exclude head: 50mm ; Full thread.
Shop Habits & Training to Avoid Cuts and Amputations
Before you start working in a shop, you need to know why everyday habits matter: small lapses are what usually lead to deep cuts or amputations. I insist on consistent use of PPE, like cut-resistant gloves when you’re handling sharp edges and properly fitting eye protection, because those reduce injuries measurably. For example, a coworker I trained cut his palm badly once by grabbing a jagged offcut without gloves; after switching to level-3 cut-resistant gloves and a habit of never grabbing bare metal, he avoided further injuries for years.
Why should you follow step-by-step machine routines? Because missed steps let blades meet fingers. I teach and require these steps every time you use a table saw:
- Secure stock with clamps or a push block every time for pieces under 12 inches.
- Check the blade guard and splitter — the guard must move freely and the splitter must align within 1/8 inch of the blade.
- Use a push stick for stock under 6 inches wide and a push block for longer skinny pieces.
A student once ignored the splitter alignment and had a kickback that shattered a fence; after correcting the splitter to within that 1/8 inch tolerance, the saw ran smoothly and safely.
You should manage fatigue because tired hands make mistakes fast. Schedule breaks every 60–90 minutes and limit consecutive machine hours to 4 hours maximum with at least a 30-minute break afterward. In one shop, a machinist worked six straight hours and misfed a part, costing the company a finger tip; switching to a 90-minute rhythm cut those errors by half.
Why document and refresh training? Because habits fade if you don’t reinforce them. I require written sign-offs for initial training, quarterly 20-minute refreshers, and a near-miss log anyone can fill out in under two minutes. At a small fabrication shop, logging a near-miss about unsecured stock led to a short checklist by the saw, which stopped repeats immediately.
How do you encourage reporting near-misses? Make it simple and nonpunitive. Put a one-page form at each station with three fields: Date, Brief description, and What you changed. A welder’s one-line near-miss note about sparks hitting a jacket led to swapping a polyester jacket for a leather one that same day.
You should practice under supervision until you’re competent because practice without feedback can reinforce bad habits. Require three supervised sessions on each machine: one demo, one guided try, and one assessed run where you reach a checklist score of 90% or higher. When a trainee failed the first assessed run on a band saw, extra guided reps focused on stock control until they hit the 90% mark.
Keep these final concrete rules pinned in your shop:
- Always wear cut-resistant gloves for handling raw metal and eyewear that seals to your face.
- Follow the numbered machine checklist every time.
- Take a break every 60–90 minutes and don’t run machines more than 4 hours straight.
- Sign and date training records; do a 20-minute refresher every quarter.
- Report near-misses on a one-page form and act within 24 hours.
If you do these things consistently, severe incidents become far less likely.
Troubleshooting Common Workholding Failures and Near-Misses
If you’ve ever had a workpiece slip, this is why.
Why it matters: a slipping part can ruin a cutter and send metal across your shop. Check every clamp, fixture, and contact surface for wear before you cut. Example: I once saw a 1/2″ aluminum bracket shift because a clamp jaw had a 0.03″ groove worn into it; the groove let the part pivot under a 0.125″ depth of cut.
1) Inspect contact points and replace worn bits.
- Step 1: Look for grooves, rounded edges, or shiny spots on jaws and fixture faces.
- Step 2: Measure wear with a caliper; if faces are out by more than 0.02″, regrind or replace them.
- Step 3: Clean surfaces with a solvent and a brass brush so you get metal-to-metal contact.
If you’ve ever felt a tool vibrate, this is why.
Why it matters: vibration means the cut can chatter and force the part loose. When you hear a high-pitched buzz or see scalloped surface finish, stop the spindle and fix support or balance. Example: a 3/4″ end mill started to chatter on a steel plate because the vise jaw screw was loose; tightening the screw removed the vibration and eliminated 0.010″ runout.
1) Diagnose and stop vibration fast.
- Step 1: If vibration starts, reduce spindle speed by 20% and lower feed by 30% immediately.
- Step 2: Check that tool holders and collets are clean and torqued to spec.
- Step 3: Confirm the workpiece has solid backing or add a sacrificial block to reduce overhang.
Before you ramp up feeds, check guards, stops, and feeds.
Why it matters: aggressive feeds can overpower a clamp and launch a part. Match feed per tooth to your holding method: for a 1″ four-flute end mill in mild steel, target 0.005–0.007″ per tooth when using soft jawing; you can go higher only with hardened jaws or mechanical stops. Example: a team ran 0.020″ per tooth against stock soft jaws and the part crept 0.08″ after three passes.
1) Set feed and stops to the holding.
- Step 1: Position mechanical stops within 0.05″ of the work to prevent travel.
- Step 2: Use feed charts for FPT and cut percentages you can support.
- Step 3: If you need higher material removal, upgrade jaws or add clamps.
You don’t need fancy tests to prove a setup.
Why it matters: simple checks catch most failures before cutting. Do a manual push and a low-speed trial cut to validate security. Example: before a 0.060″ facing pass on stainless, I pushed the part with moderate force (about 10–15 lbf) and then ran a 500 RPM, 0.010″ depth trial; both checks caught a loose spacer that would have caused a crash.
1) Do these two quick tests every time.
- Step 1: Apply a firm manual push toward the cutter path; no movement should occur.
- Step 2: Run a 500–800 RPM, light-depth (0.005–0.010″) trial cut while observing for movement or sound.
Treat near-misses like lessons, not embarrassments.
Why it matters: documenting failures prevents repeat mistakes. Keep a short log with date, what failed, the measured wear, feed settings, and the fix you used. Example: after logging a clamp screw that backed out twice, the team switched to a threadlocker and dropped repeat occurrences from three per month to zero in two weeks.
1) Log and share fixes.
- Step 1: Record the problem, measured data, and corrective action in two sentences.
- Step 2: Brief your crew on the fix at shift change and note it on the shop whiteboard.
Final practical tip: stay tactile. Run your fingers along jaws, listen at the machine, and measure, measure, measure.
Frequently Asked Questions
How Do Humidity and Wood Movement Affect Long-Term Workholding Reliability?
I’ve seen seasonal expansion and moisture cycling cause clamps to loosen, jaws warp, and slips to increase, so I adjust tension, use moisture-stable fixtures, and recheck setups regularly to keep long-term workholding reliable.
Can Workholding Methods Be Adapted for CNC Versus Hand Routing?
Yes—I adapt workholding: I use CNC specific fixtures for precision, hand adaptable clamps for versatility, router friendly sacrificial boards, and techniques that enable jigless routing when appropriate, balancing safety, repeatability, and ease of use.
What Insurance or Liability Implications Arise From Amateur Woodworker Injuries?
Like a loose clamp snapping, I tell you liability insurance often rises for amateurs after injuries, with claims citing negligence or medical negligence; homeowners face higher premiums, potential lawsuits, and denied coverage without proper safety measures.
How Do Vibrations From Routers Influence Clamp Fatigue Over Time?
I’ve seen router vibrations excite clamp resonance, accelerating material fatigue and causing fastener loosening; over time that lowers grip, increases kickback risk, and demands frequent retightening, inspection, and using vibration-damping clamps or locking fasteners.
Are There Ergonomic Workholding Setups to Reduce Repetitive Strain Injuries?
Yes — I recommend adjustable fixtures and cushioned clamps to cut strain: I set work at neutral heights, use quick-release vises, anti-vibration mounts, and rotate tasks so I avoid repetitive grips and reduce fatigue.