You’re staring at a backlog of custom orders and wondering how to stop lead times from ballooning without hiring more staff. You’ve tried speeding up setups and working longer hours, but parts still pile up and mistakes wipe out profit.
Most makers assume the only fix is big, expensive equipment or a full production overhaul. This introduction will show you how compact, affordable CNCs plus smarter workflows cut errors, boost material yield, and let your current team focus on high-value tasks so you deliver faster and scale custom work. I’ll also explain simple CAM choices and maintenance steps that protect resale. It’s easier than it looks.
Key Takeaways
If you’ve ever tried to get a product out the door, this is why compact CNCs matter: they let you start selling faster and with less risk. Why it matters: quicker revenue shortens your runway. Example: a one-operator shop buys a small CNC and simple CAM for about $12,000, learns basic toolpaths in two weekend courses, and launches a cabinet line in 8–10 weeks. Steps: 1) pick a compact CNC that fits a 6’x10′ shop, 2) choose CAM with nesting and a library of feeds/speeds, 3) run three prototype parts to dial settings.
You don’t need expensive automation if your goal is scalable, low-cost growth. Why it matters: affordable gear can cut labor without huge upfront debt. Example: a 2-person shop adds a benchtop router and a low-cost edge bender for roughly $7,000 total, trims a second hire, and pays the machines off in 12–18 months from saved wages. Steps: 1) calculate hourly labor saved, 2) compare to machine cost, 3) target payback under 18 months.
Think of productivity like removing speed bumps from a road. Why it matters: fewer errors and faster cycles raise throughput and let your skilled people focus on custom work. Example: switching from manual setup to a CNC reduced one shop’s setup time from 45 minutes to 8 minutes per job and cut scrap by 40%. Steps: 1) document current setup and cycle times, 2) program templates for common jobs, 3) train one person to run templates.
Before you optimize panels, know that nesting changes how much board you need. Why it matters: better layouts lower material cost directly. Example: using nesting software turned 4 full sheets per week into 3.2 sheets for a fixtures run, a 20% yield gain that saved $180 monthly on plywood. Steps: 1) import part sizes, 2) run nesting with sheet-size constraints, 3) re-arrange only if a part is fragile.
If you’ve ever worried about skills and resale, here’s the reality: short courses plus decent resale value keep ownership affordable. Why it matters: you won’t be stuck with unusable gear. Example: a used CNC bought for $8,000 and upgraded with a spindle sold two years later for $5,500 when the owner upgraded, recouping most of the cash outlay. Steps: 1) choose machines with common controllers, 2) attend a 2–3 day vendor course, 3) track maintenance and service records for resale.
Why Small-Shop Woodworking Is Growing Faster Than You Think
If you’ve ever wanted to start a woodworking business but felt shut out by big shops, this is why.
Why it matters: you can launch faster and make money sooner with less risk.
Small shops pick up specific digital tools quickly, and you can too by following clear steps. Example: a two-person shop in Portland bought a compact CNC router (about $6,000) and a one-year license to Fusion 360 ($0–$60/month depending on plan), then started turning custom shelf orders in two weeks.
How they move faster
Why it matters: speed turns designs into sales before trends change.
- Pick one tool and learn it well. Choose a compact CNC or a five-axis router under 8 feet long.
- Use simple CAM software—Fusion 360 or VCarve—and watch two tutorial projects.
- Automate repeat tasks: set up templates for joinery and cutting paths.
Real example: a three-person shop in Austin used a Shapeoko and set up three cut templates, which cut production time for a dining table top from 8 hours to 3 hours.
Lower startup costs and faster training
Why it matters: you spend less and get staff productive faster.
- Buy bench-sized machines ($1,000–$8,000) instead of industrial lines.
- Hire for attitude, not years—train employees on one machine for two weeks.
- Use short video lessons and checklists for onboarding.
Real example: a one-person maker in Detroit trained an assistant in 10 two-hour sessions and doubled output within one month.
Community workshops and shared tools
Why it matters: you save money and learn proven workflows faster.
- Join a maker space membership ($50–$200/month) for access to routers, sanders, and laser cutters.
- Share jigs and templates; copy what works and tweak for your parts.
- Attend weekly shop nights to trade techniques.
Real example: a collective in Seattle split the cost of a $12,000 CNC and took turns producing parts, lowering each member’s capital outlay to $2,000.
Iterate quickly and reduce wasted builds
Why it matters: fast prototyping saves materials and reveals flaws early.
- Prototype in plywood or MDF for one low-cost test piece.
- Make one change, cut another prototype, measure, and repeat—limit cycles to three before finalizing.
- Move to hardwood only after the third prototype.
Real example: a maker in Brooklyn used two plywood prototypes before producing a walnut console, cutting material waste from 40% to 12%.
Meeting bespoke demand efficiently
Why it matters: customers pay more for customization and you can supply it without big overhead.
- Offer three levels of customization (size, finish, hardware) with fixed price add-ons.
- Use digital templates to swap dimensions in minutes and generate cutlists automatically.
- Price jobs to cover labor at $40–$60/hour and machine amortization.
Real example: a shop in Minneapolis created a configurator that let clients pick dimensions online; average order value rose 35% while lead time stayed under three weeks.
Bottom line: you can start small, pick focused tools, use community resources, prototype fast, and price for profit. Start with one machine, one software package, and one prototyping cycle.
Recommended Products

Dream Big: Genmitsu PROVerXL 4X4 CNC Milling Machine, unlock endless possibilities using its expansive 1300mm x 1300mm (4' x 4') work area. Thanks to its open front-and-back design, even large sections of standard 4' x 8' sheets can be easily processed through indexing, making it suitable for large-scale projects or batch production.

Instant Setup, Unlimited Possibilities: Unlike other CNC machines on the market, Origin doesn't require any computer programming. You can design directly on-tool and best of all, it's highly portable and compact. A comprehensive online library of projects is accessable right after unboxing, so you can start your next creation effortlessly.

Massive 2×2 Work Area for Professional-Scale Projects: A spacious 679 × 679 × 113 mm (26.76" × 26.76" × 4.44") working envelope lets you take on furniture pieces, signage, full-size woodworking, and other pro-level builds—perfect for makers upgrading beyond hobby-grade machines.
How CNC Adoption Boosts Small-Shop Productivity and Output

If you’ve ever watched a job pile up while someone’s fiddling with a tape measure, this is why CNC matters: it gets parts cutting sooner so you meet orders faster.
Why this matters: CNC reduces setup errors and scrap so your lead times shrink. For example, a two-person shop I know moved from hand-scribed layouts to CNC files and cut setup time on a typical bracket from 90 minutes to 20 minutes, with scrap dropping from 3 pieces per run to zero.
How CNC does that, step by step:
- Digitize the design: export your CAD file as a CAM-ready format (STEP or DXF). This removes manual transcription and keeps dimensions exact.
- Load the program and tools: pick a cutter, set spindle speed and feed rates from a tooling chart, and use the machine’s tool library so you don’t guess settings.
- Run a dry toolpath or simulation: check for collisions and overcuts in under five minutes before touching metal.
- Execute and inspect: run the part, then measure three critical dimensions with calipers or a CMM to confirm tolerances.
CNC cutters follow optimized toolpaths that shorten cycle times and improve finishes, so your parts leave the machine closer to final spec. A local furniture maker I know cut dovetail slots with a CNC router and dropped finishing sanding by 60%, because the machine’s passes left a cleaner surface.
Why this matters: skilled people do higher-value work when machines handle repetition. For example, with one programmer setting up jobs, the operator can batch-run dozens of parts while tuning fixtures for the next job.
Practical ways to get more output without hiring:
- Use nesting routines to pack multiple parts into one sheet or plate; you can often increase material yield by 10–25%.
- Set up remote monitoring alerts for stoppages so you restart the machine within minutes rather than hours.
- Standardize fixtures so changeovers take under five minutes.
Remote monitoring and nesting raise uptime and yield, so your throughput grows without proportional staff increases. A metal fab shop I visited used nesting plus overnight runs and doubled monthly output while adding only one half-time helper.
If you want to start:
- Pick one recurring part you make weekly.
- Create or buy a CAD file for it.
- Program a basic toolpath, simulate it, and run a single trial piece.
- Measure and adjust until you hit targets.
Do this, and you’ll see setup time fall, scrap decrease, and output climb — while your team focuses on jobs that actually need human skill.
Recommended Products
【UPGRADED FOURTH AXIS&SKINK】: Compared with the three-axis machine, the four-axis is not only suitable for plane engraving, but also for three-dimensional engraving and round carving. The jade and wood can be engraved 360°, and the power and clamping force are very stable. The sink is made of 304 stainless steel. In order to protect the tool and prevent the tool from heating when processing hard materials, the jade and metal must be filled with a sink.

Mega-Scale 33"x33"x4.72" Workspace: Tackle ambitious projects with a super large XYZ working area (33x33x4.72in) and 5.3" pass height, engineered for large materials and complex designs.

The top surface of this plate is precision ground to achieve a high degree of flatness and the accuracy is +/-.0004. It is a Grade B (Grade 1) plate.
Which CNC and Automation Tools Small Shops Are Buying (Costs & Use Cases)

Here’s what actually happens when you add a CNC router to your small shop: you cut parts faster and with far less rework, which directly saves labor hours.
A mid-size CNC router is a common starting point and will change how you shop operates. Expect to pay about $20,000 for a basic two- to three-axis machine and roughly $80,000+ for a larger bed and a heavier spindle that can handle thicker panels and production runs. Example: a cabinetmaker I know replaced hand layout and manual cutting with a $45,000 router that cut 200 cabinet panels per week, reducing sanding and fitting time by 40%.
Before you buy, think about what you’ll cut and how often. If you cut occasional prototypes or small parts, get a desktop router under $5,000 that fits on a bench. If you plan nested-based production or full-size furniture, budget for the mid-size machine and a computer with basic CAD/CAM software.
Think of low-cost automation like adding a good clamp or jig that never takes a sick day. Jigging systems, pneumatic part loaders, and simple drilling fixtures typically cost from a few hundred to a few thousand dollars and reduce manual alignment time by minutes per part, which adds up across a week. Example: a small shop spent $1,200 on pneumatic loaders and cut assembly time for nightstands from 6 hours to 3.5 hours weekly.
You should consider higher-end automation only when your volume justifies the price. Automated edgebanders and multi-head drill presses cost tens to hundreds of thousands, but they let you scale custom furniture production and nested manufacturing with consistent quality. Example: a shop that invested $120,000 in a multi-head drill saw a 60% throughput increase on framed cabinet orders during peak season.
How to decide in three steps:
- List your weekly parts and cycle times.
- Estimate labor savings per part if it were CNC/automated.
- Divide equipment cost by monthly labor savings to get a simple payback months figure.
If the payback is under 18 months, buy it.
Recommended Products
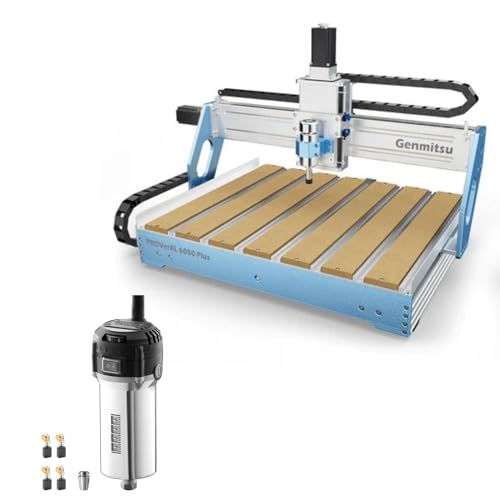
Now with a larger working area (23.62" x 19.69" x 4.53"), 300W spindle motor, redesigned all metal frame and motion-system. The PROVerXL 6050 Plus CNC Machine is ready for all your projects big or small. Faster and more accurate than ever before.

NymoLabs Custom-made 710W Router: The NBS-6040 features the Self-developed Trim Router as a spindle, a Second-to-none move in the market. Its soft start, and constant current drive features, make the spindle RPM slow to fast without stalling, ranging from 7000 to 30000 adjustable

NEMA23 Closed-loop Stepper Motors: Equipped with four closed-loop stepper motors, this enables the FoxAlien XE-PRO can run faster and smoother in a lower noise level. The max moving speed is 5000mm/min, which is 2.5 times faster than the open-loop stepper motors.
How Resale Value, Uptime and Nested Manufacturing Cut Ownership Costs

Here’s what actually happens when you treat resale value, uptime, and nesting as cost levers for CNC ownership: you cut cash tied up in machines, run more parts with the same equipment, and waste less metal.
Why this matters: reducing lifecycle cost lets you buy better tech sooner or expand capacity without big capital outlays.
Resale value — pick machines that hold value
- Why this matters in one sentence: stronger resale means less capital loss when you replace or upgrade.
- Steps to act:
- Check five-year resale rates before buying; aim for machines advertised or recorded at 50–60% retained value.
- Buy name-brand models with documented secondary-market sales (e.g., Haas, Mazak, DMG Mori).
- Keep a maintenance log and sell with full service records to improve price.
– Example: A shop bought a used Haas VF-2 for $40,000 and sold it five years later for $24,000 because they logged every service and used OEM parts.
Uptime — stop losing hours to surprises
- Why this matters in one sentence: more uptime increases effective capacity so you don’t need extra machines.
- Steps to act:
- Install remote monitoring on each CNC to track alarms and spindle hours.
- Set preventive-maintenance intervals by runtime (e.g., oil change every 250 spindle hours; coolant replace every 1,000 hours).
- Train one operator to handle first-line fixes (tool changes, probe resets) within 15 minutes.
– Example: A small shop cut unscheduled downtime 40% after adding vibration monitoring and a weekly 30‑minute check routine, freeing one shift for production.
Nested manufacturing — put more parts on one sheet
- Why this matters in one sentence: nesting raises material yield and cuts cost per part by reducing scrap and handling time.
- Steps to act:
- Use nesting software and set part spacing to the minimum safe clearance for your cutting method (laser/plasma/plasma: 2–5 mm; waterjet: 1–2 mm).
- Group similar-thickness parts together to avoid extra setups.
- Run a daily nesting review: prioritize the largest leftover sheets first.
– Example: By switching to automated nesting and tightening clearances, a fabricator increased sheet yield from 72% to 86%, reducing material spend by 18% on one job.
Put it together: a quick checklist
- Target machines with 50–60% five-year resale and keep records.
- Add remote monitoring and a 250‑hour preventive plan.
- Use nesting software, set minimal clearances, and prioritize leftover sheets.
If you follow those steps, you’ll lower ownership cost through preserved resale, more productive hours, and better material use — often saving the equivalent of one machine’s cost over several years.
Recommended Products

All-Aluminum Structure & Enhanced Stability: Engineered with an all-metal framework and linear rail Z-axis, the FoxAlien Masuter Pro offers superior precision, durability, and stability for detailed engraving and cutting on wood, acrylic, MDF, nylon, and more.

High Performance & Precision: The Longer Ray5 5000mW laser engraving machine features an advanced 240MHz ESP32 chipset, delivering impressive speeds of up to 10,000mm/min. It uses cutting-edge laser technology with a laser spot size of just 0.08 × 0.08mm and an engraving accuracy of 0.01mm, allowing for intricate designs and fine details. The spacious 400 × 400mm working area supports projects of various sizes, making it highly versatile for different engraving tasks.
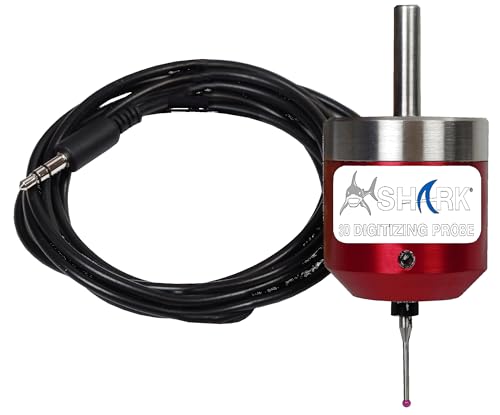
The 3D Digitizing Probe requires Vectric VCarve or similar software to be used with all CNC Shark models.
Why Customization Demand Keeps Small-Shop Customers Coming Back

If you’ve ever walked into a small shop and wanted something slightly different, this is why.
Why customization matters for your small-shop purchase
- Why it matters: customization gives you exactly the size, fit, and finish your space needs so you don’t have to rearrange anything.
- Real example: a couple in Portland wanted a dining table that fit a 42-inch bay window and matched a mid-century sideboard; the shop adjusted the apron depth by 2 inches and matched the walnut stain, so the table sat flush with the window seat.
Small shops let you pick dimensions, edge profiles, and drawer depths in inches, not presets, so the piece actually fits.
How tailored options create practical value for you
- Why it matters: tailoring choices prevents costly returns and daily annoyances like doors that catch or drawers that scrape.
- Steps:
- Measure the opening or room in three places (top, middle, bottom) and record the smallest number.
- Agree to final exterior dimensions within a 1/8-inch tolerance.
- Choose hardware and test a sample pull size (2–3-inch diameter is common) on a cardboard mockup.
– Real example: a client avoided a $450 refinish after the shop built a cabinet 1/4 inch narrower than the doorway because they measured at three points and confirmed fit.
How bespoke finishes build loyalty
- Why it matters: unique finishes make your piece feel personal and hard to replace, so you’ll come back to the same maker for additions.
- Steps:
- Select three finish samples on the actual wood species.
- Approve one for color and one for texture (e.g., hand-rubbed vs. sprayed).
- Ask for a small 6×6-inch test panel before full application.
– Real example: a homeowner wanted a matte, slightly grayed oak; the shop hand-wiped a custom mix of stain and oil on a test board so the homeowner could compare it by the window at noon.
How client workshops reduce mistakes and increase satisfaction
- Why it matters: workshops let you see materials and make choices so the final piece matches your vision.
- Steps:
- Attend a 60–90 minute workshop where the shop brings three woods, three hardware options, and a scale drawing.
- Sit with the maker to mark up the drawing and sign a single-sheet approval.
- Ask for one photographed mockup or a small plywood test piece.
– Real example: at a Saturday workshop, a client changed a leg profile from tapered to square after seeing both on a life-size mockup and avoided a style mismatch.
How shops combine CNC accuracy with hand finishing for one-offs
- Why it matters: CNC machines cut precise parts so you get tight fits, while hand finishing keeps the look human and unique.
- Steps:
- Request CAD printouts of any complicated joinery.
- Ask for a single CNC-cut test part to verify fit before full production.
- Confirm which surfaces will receive hand-sanding and which will be machine-sanded.
– Real example: a maker used CNC to cut dovetail templates to 0.02-inch accuracy, then hand-sanded the visible faces so the drawers had tight joints and a handcrafted surface.
How to manage timelines and approvals so your project stays on track
- Why it matters: clear timelines and documented approvals keep you from waiting and reduce expensive rework.
- Steps:
- Get a written timeline with three dates: design approval, start of build, and delivery.
- Use a single approval sheet that lists dimensions, finish, hardware, and a photo of the test piece. Sign it.
- Expect a 1–3 week lead time for small pieces and 4–12 weeks for larger custom builds.
– Real example: a customer received their custom bookcase on week 9 because the shop had a signed approval and staggered build milestones.
Practical final checklist before you place an order
- Why it matters: a quick checklist prevents common mistakes and delays.
- Checklist (numbered):
- Measure three places and note the smallest dimension.
- Approve a 6×6 finish sample on the actual wood.
- Sign a one-page approval sheet with final specs.
- Request a single CNC or plywood test part if joinery is complex.
- Confirm delivery week and any site prep (door sizes, floor protection).
– Real example: following this checklist, a renter avoided a missed delivery because they measured the hallway clearance and scheduled an elevator reservation.
If you follow these steps, you’ll get a piece that fits, looks the way you imagined, and keeps you coming back to the same maker.
How Timber Sustainability Trends Help Small-Shop Furniture Makers
If you’ve ever wanted customers to choose your furniture because of its environmental impact, this is why: you can charge more and build trust by using sustainable timber.
You can market durability and carbon storage. Use one clear example: show a dining table made from a 2″ thick oak top that a customer can pass down, and compare it to a veneer table that will likely be replaced in 5–7 years. Say the oak stores roughly 0.5–0.7 kg CO2 per board foot and highlight the longer lifespan. This gives a concrete reason people will pay a premium.
Before you pick suppliers, know how to source low-impact wood. Choose mills within 200 miles or reclaimed-wood dealers to cut transport emissions. For example, I buy reclaimed pine from a deconstruction yard 40 miles away and track the load with receipts and photos to prove origin. Do this: 1) list three nearby suppliers; 2) ask for harvest region or deconstruction records; 3) pick the one with the shortest average haul.
You should run a simple lifecycle step to compare materials because it shows where emissions come from. Example: compare a solid maple top and an MDF top with veneer. Steps: 1) measure material volume in board feet; 2) multiply by typical emissions per board foot (use 0.6 kg CO2 for solid hardwood, 1.2 kg CO2 for engineered with adhesives); 3) add transport emissions by distance (0.12 kg CO2 per ton-mile as a rule of thumb). You’ll then see which choices cut the most emissions.
Cut waste with smarter layout and nesting since reduced scrap saves money and materials. For instance, I re-cut chair parts from a 4’x8′ sheet to get 10% more usable pieces than my old layouts. Steps: 1) create a digital nesting plan for each sheet; 2) mark alternate grain directions for non-visible pieces; 3) reserve offcuts for small projects or sell them by the pound.
You can justify premium pricing by documenting the benefits. One real-world approach: photograph each batch, keep supplier invoices, and list estimated carbon stored per piece on your product page — e.g., “This sideboard stores ~14 kg CO2.” Customers will pay 10–30% more when they see numbers and provenance. Keep receipts and a short provenance note with every sale.
Finally, attract customers who value transparency by telling a simple story. Example: include a one-page card with a photo of the mill or reclaimed source, a short note on distance traveled (miles), and the carbon-stored estimate. That tangible detail makes environmental choices feel real.
Where Regional Growth and Policies Create Opportunities for Small Shops
If you’ve ever tried to charge more for better materials and found no buyers, this is why it matters: regional growth and government policy can turn your timber choices into real profits. In Portland, for example, a city grant program and municipal green procurement rules helped a small mill win a $40,000 contract to supply certified cedar for public benches, covering three months of payroll.
Why local incentives pay off: grants, tax breaks, and procurement rules can lower your operating costs and open municipal contracts. Map incentives near you and compare dollar values to setup costs. Step 1: list three nearby programs (grants, tax credits, procurement preferences). Step 2: estimate each program’s annual value to your shop in dollars. Step 3: compare that to one-time setup costs like certification or equipment. Do the math and you’ll see which ones actually help.
Policy clustering creates clear zones where sustainable wood and small manufacturing are favored. In one Michigan county, zoning changes, a workforce training fund, and a recycled-wood procurement rule arrived together and cut a startup’s permit time from six months to six weeks, saving them $12,000. Look for clusters by checking county and city planning pages, state economic-development sites, and municipal procurement rules.
What to do next: join local trade groups, because they share leads and simplify bidding. Three actions to take now:
- Contact your county economic-development office and request a list of relevant programs.
- Join one local trade association and attend their next meeting.
- Create a one-page cost/benefit spreadsheet comparing program benefits to your setup expenses.
If a particular program looks promising, apply and track timelines closely; municipal contracts often require specific certifications, so plan for that lead time.
What Small-Shop Owners Should Do Next to Scale With CNC
Before you add CNC, map your current workflow so you know where automation will actually save you time and money — this keeps you from buying the wrong machine. Start by timing one typical job from start to finish (record cycle time in minutes), list each labor step, and mark every defect or rework incident; for example, you might find edging adds 12 minutes per cabinet and causes 3% of your rejects.
Why that matters: you avoid overspending on features you won’t use. For instance, a 2-person shop I know replaced a manual edgebander with a mid-size CNC router plus automatic edge-feeder and cut their touch time per cabinet from 45 to 22 minutes.
1) Pinpoint high-value tasks.
- Step 1: Record three repeat jobs and note which tasks take the most time (cutting, drilling, nesting, edging).
- Step 2: Count how many of those tasks you do weekly.
- Step 3: Multiply time saved per task by weekly frequency to estimate weekly labor hours saved.
Choose a machine that matches part complexity and volume, because buying a machine rated for 8-hour continuous production when you run 20 hours a week wastes cash. If you build 10–20 identical cabinets per week, a compact 3-axis router with an automatic tool changer is often enough; if you run 100+ mixed parts weekly, look at 5-axis or fully automated nesting cells.
Why that matters: matching capacity to demand keeps ROI realistic. A shop I visited justified a compact router by projecting a 14-month payback based on current orders and a $6,000 monthly labor cost.
1) Match machine to volume.
- Step 1: Calculate monthly part count for each part family.
- Step 2: Check machine specs for throughput (parts/hour) and uptime percentage.
- Step 3: Choose the model where projected throughput meets 110% of your current demand.
Prioritize workflow automation to cut touch time and reduce errors because fewer manual handoffs equal fewer mistakes. Automate feeding, nesting, and material handling before upgrading spindle speed; a $15k automatic sheet feeder often saves more labor than a $30k high-speed spindle.
Why that matters: it lowers per-piece cost quickly. Example: adding an automatic feeder reduced a shop’s manual lifting by 60% and dropped labor per panel by $2.50.
1) Automate the right steps.
- Step 1: List manual touchpoints for one product (pick the one you make most).
- Step 2: Cost each touchpoint by hourly wage and minutes per touch.
- Step 3: Invest in automation where payback is under 18 months.
Train one technician deeply because one well-trained person dramatically reduces downtime and keeps setups consistent. Give them a training plan (40 hours on machine ops, 20 hours on CAM software, 8 hours on basic maintenance) and a budget for vendor-led classes.
Why that matters: skilled operators fix small issues fast. Example: a shop assigned one lead tech who reduced emergency service calls from twice a month to once every three months.
1) Build a training plan.
- Step 1: Create a 68-hour syllabus covering operation, CAM, and maintenance.
- Step 2: Schedule vendor training within the first 90 days of use.
- Step 3: Pay for cross-training so a second person can cover when needed.
Use vendor partner programs for financing, training, and maintenance because they spread risk and speed adoption. Ask for at least three financing options, a training package with on-site days, and a service SLA that specifies response time and spare-parts lead times.
Why that matters: better terms lower downtime and cash strain. A cabinet shop financed a router on a 36-month lease with included quarterly maintenance and avoided a $12k unexpected repair bill.
1) Negotiate partner terms.
- Step 1: Request financing quotes with and without maintenance included.
- Step 2: Ask for a written SLA with guaranteed response times.
- Step 3: Get training days and tech support hours in the contract.
Start with modular upgrades, measure output and quality, then scale when demand and margins justify it because iterative upgrades keep cash flow healthy. Track OEE (overall equipment effectiveness) monthly and set a threshold — for example, only buy the next module if OEE is above 70% and gross margins are at least 25%.
Why that matters: you grow when the numbers support it. One small shop added a nesting software license, saw a 28% material savings in two months, and then bought an automated panel loader three months later.
1) Upgrade in modules.
- Step 1: Define an OEE and margin trigger for the next purchase.
- Step 2: Buy one module, run it 90 days, and record the change in cycle time and scrap rate.
- Step 3: Re-evaluate before the next purchase.
Recommended Products

【Smart and Affordable :A Hobbyist's Dream Desktop CNC Machine】Carvera Air, a precise and versatile desktop CNC mill. Perfect for milling, carving, and engraving. Easy to use with our user-friendly software. Endless Materials | Quick Tool Changer | Auto Probing and Leveling | Optional 4th Axis and Laser supported | All-in-one CAM Software

【Large Working Area for Big Projects】This CNC engraving machine features a spacious 1000×1000×110mm working area, allowing you to create large-scale wood crafts, custom signs, and complex patterns without size limits.

Now with a larger working area (23.62" x 19.69" x 4.53"), 300W spindle motor, redesigned all metal frame and motion-system. The PROVerXL 6050 Plus CNC Machine is ready for all your projects big or small. Faster and more accurate than ever before.
Frequently Asked Questions
How Do Small Shops Finance CNC Purchases Without Heavy Debt?
I use owner savings, lease-to-own deals, and vendor financing to avoid heavy debt; I also tap grants, small-business loans with low rates, and equipment resale markets, balancing cash flow while preserving capital for growth.
What Insurance Covers Cnc-Related Production Liabilities?
You’ll need product liability and equipment insurance: product liability covers defects/claims from finished items, while equipment insurance protects machines and downtime; I’d also add general liability and cyber/GL extensions for remote-monitoring risks.
How Do Shops Recruit Cnc-Skilled Employees Effectively?
Think of hiring as a talent garden: I’ll attract CNC pros by offering targeted apprenticeships, cultivating industry partnerships, promoting skill-based pay, flexible schedules, clear growth paths, hands-on culture, and showcasing modern tools to lure committed candidates.
What Cybersecurity Risks Affect Cloud-Connected CNC Machines?
I see risks like unauthorized access, ransomware, and supply-chain attacks on cloud-connected CNCs; I recommend network segmentation, strict access controls, encrypted links, and timely firmware updates to reduce exposure and preserve uptime and IP.
How Do Small Shops Handle Long Lead-Times for Parts and Tooling?
I stock critical bits like a pit crew—once saved a job by swapping pooled cutters—so I use inventory pooling, hybrid sourcing (local mills plus online suppliers), and schedule nesting to bridge long lead-times efficiently for parts and tooling.