
You’ve just test-fitted a drawer and found it sticks on one side by a millimeter, or your dovetail tails sit proud and won’t glue flush—layout with a framing square helps catch that early. That tiny mismatch left you frustrated, wondering why joints that looked right on the bench won’t behave in the assembly.
Most people blame joinery technique or wood movement and overlook one thing: inconsistent board thickness.
This article will show you how to measure and control thickness so parts fit reliably, glue surfaces align, and joints carry load as intended—no guessing, just repeatable steps.
You’ll learn specific measurement, testing, and correction habits to prevent rework. It’s easier than you think.
Key Takeaways
If you’ve ever struggled to make drawers slide smoothly, this is why.
Consistent thickness keeps your joinery tight so you don’t force parts together. For example, if your drawer sides vary by 0.020″ (0.5 mm), dovetails will either leave a visible gap or need hammering; measure both sides with calipers and plane each board to within 0.005″ (0.13 mm) before fitting.
Before you assemble, uneven parts create cumulative error that warps frames and racks shelves.
- Measure each rail and stile with a ruler and calipers.
- Mark high spots with a pencil.
- Remove 0.010–0.020″ per pass on the planer or jointer until parts match.
A warped bookshelf made from three uneven face frames can lean by 3/8″ over a 6-foot span.
Think of accurate thickness like setting a template: it preserves your design dimensions and function.
If your panels vary, drawers stick and instrument tops won’t clear hardware; plan to size parts to final thickness before cutting joinery. For instance, set drawer faces to 3/4″ final thickness, then cut rabbets sized to that thickness—or assemble with a pocket-hole jig—so the drawer closes without rubbing.
You don’t need expensive cutters if you control allowance and passwork.
- Leave 0.020–0.050″ extra when rough milling.
- Make two light passes on a planer at 1/8″ depth of cut or less.
- Finish with a sanding block or hand plane for surface quality.
A table top milled with a final 0.010″ cleanup pass will have far less tear-out than one taken heavy in one go.
If you’re not measuring regularly, you’ll get surprised at assembly.
Keep a log sheet taped to the bench listing each part, its target thickness, and its measured result. Calibrate your planer knives and table saw fence monthly; a 1° twist in the planer bed can shift thickness across a 48″ panel by over 0.030″ end-to-end.
Quick Rules: Target Thickness and Tolerances
Before you plane or sand, know why consistent thickness matters: it makes parts fit reliably and saves hours at assembly.
1) What target thickness and tolerance should you set?
Why it matters: a clear number prevents guesswork and rework.
Steps:
- Decide the final thickness that matches your joint—example: for a mortise-and-tenon on 3/4″ stock, target 18.5 mm if your tenon is 18 mm.
- Choose a tolerance—example: ±0.5 mm for precision joinery, or ±1.0 mm for non-structural panels.
- Write the target and tolerance on your work order or a sticky note on the bench.
Real-world example: I once cut a drawer side to 12 mm target with ±0.5 mm tolerance; marking that on the part stopped me from shaving another 0.7 mm and ruining the fit.
2) How much stock allowance should you leave?
Why it matters: leaving extra lets you make final, accurate passes without risking the joint.
Steps:
- Leave 1.5–3 mm extra for final planing on faces if you’ll use a handplane, or 0.5–1.5 mm if you’ll use a thickness planer.
- Leave 1–2 mm extra at edges for cleanup if you’ll joint by hand; leave 0.5 mm if running through a jointer.
- Mark the allowance on the piece so you don’t remove it by mistake.
Real-world example: For a glued-up table top I left 2 mm on each face; after flattening and surfacing I hit the target without exposing glue line issues.
3) How should you measure and track thickness during machining?
Why it matters: measuring frequently catches drift early so you can correct it before it becomes scrap.
Steps:
- Measure with calipers or a digital thickness gauge after each machining step—after jointing, after planing, after sanding.
- Record each reading on a simple log: part ID, step, measurement, deviation from target.
- If deviation > tolerance, stop and decide: either rework the offending face or adjust the mating part by the same amount.
Real-world example: On a cabinet build I measured after every pass and found a progressive 0.3 mm loss per pass; I corrected after the third pass and saved all four doors.
4) What do you do if a piece is outside tolerance?
Why it matters: knowing your options prevents panic and wasted material.
Steps:
- If it’s too thick, remove material in controlled passes—example: take 0.3–0.5 mm per pass and re-measure.
- If it’s too thin but salvageable, adjust the mating part or add a shim—example: glue a 0.5 mm veneer to a panel edge for a snug fit.
- If it’s beyond salvage, cut a new part using the recorded mistakes to avoid repeating them.
Real-world example: I had a stile 1.2 mm over; I rebated the mating stile and left the stile as-is, keeping visual lines consistent.
Practical checklist before final assembly:
- Target thickness and tolerance written on the part. (Yes or no?)
- Stock allowances marked. (Yes or no?)
- Measurements logged after each step. (Yes or no?)
- Corrective action documented if out of tolerance. (Yes or no?)
If you follow those steps and record measurements, you’ll avoid most fit problems and assemble faster.
Why Accurate Thickness Matters for Fit and Strength

If you’ve ever tried to fit a drawer that sticks, this is why.
Thickness controls whether parts fit tightly and carry loads safely — even a 0.5 mm difference can make a dovetail bind or a drawer rack. For example, if your drawer sides are 12.5 mm and the runners assume 12 mm, the drawer will jam; plan for exact stock thickness and trim to match before assembly. Pay attention to grain direction because strength changes with grain orientation and affects how boards bend or split under load; test a scrap to see which way it bends.
Why it matters: uneven thickness concentrates stress and creates gaps that let joints fail.
How to keep thickness accurate:
- Measure: use calipers or a reliable ruler and check six points per board — both ends, both faces near the center, and the middle edge.
- Flatten: pass boards over a jointer or run them through a planer set to remove no more than 1–2 mm per pass to avoid tear-out.
- Match panels: when building multi-panel pieces, sort boards by final thickness and label them so panels stack flush.
Example: when making a tabletop from five planks, plane each to 20.0 mm ±0.2 mm, then glue in the order you numbered them to prevent alignment surprises.
Why it matters: fasteners need enough material to bite without breaking through the surface.
How to plan fasteners:
- Mark fastener locations on a test piece and drill clearance holes on one face with the exact bit you’ll use.
- Use screws that engage at least 10 mm of core material for softwoods and 15 mm for hardwoods, or select bolts with appropriate washer sizes.
Example: when attaching a shelf bracket to a 25 mm shelf, pilot-drill 3 mm for an 8 mm bolt so the bolt head sits flush and the shelf edge isn’t split.
Why it matters: consistent thickness keeps joints aligned and spreads loads evenly.
How to lay out joints:
- Dry-fit joints before glue: assemble the dovetail or mortise-and-tenon without glue to check for gaps.
- Adjust stock by shaving 0.2–0.5 mm with a shoulder plane where needed instead of forcing a tight fit.
Example: fitting a mortise-and-tenon for a chair leg — cut the tenon cheeks to 9.5 mm when the mortise is 10.0 mm wide, then fine-tune with a file for a snug, gap-free fit.
Final tip: always test-fit on scraps that match your final thickness; they reveal fit and strength issues early.
Measure Board Thickness Reliably (Tools & Methods)
Before you measure board thickness, know that small errors ruin joints and cause gaps.
Here’s how to measure board thickness reliably so your joints fit tight and assemblies stay square. Use the tools and steps below.
Section 1 — What tool should you start with?
Why it matters: a quick, accurate first check saves time and catches big problems before you cut or plane.
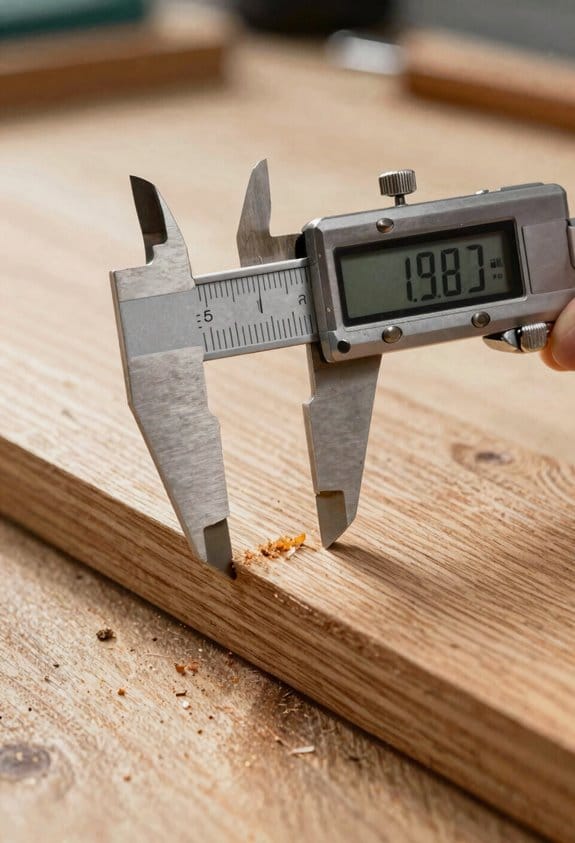
1) Use a digital caliper reading to 0.01 mm.
- Step 1: Zero the caliper on a clean face.
- Step 2: Measure at three places along the board—near each end and the center.
- Step 3: Record the smallest reading.
Real-world example: measuring a 24 mm hardwood shelf — you’ll get readings like 24.02, 23.98, 24.00 mm; use 23.98 mm for setup.
A caliper is handheld and simple.
Section 2 — When should you use a thickness planer?
Why it matters: planing gives consistent thickness across the board so joints line up.
1) Use the planer when the board varies by more than 0.5 mm over its length.
- Step 1: Mark one reference face with a calibration sticker and a pencil line every 300 mm.
- Step 2: Set the fence and dial the planer to remove 0.5–1.0 mm per pass.
- Step 3: Re-measure the marked points after each pass and stop when the smallest reading matches your target.
Real-world example: a 1.2 m wide pine panel that measures 19.2, 19.6, and 19.3 mm — plane 0.3–0.6 mm until all three read 19.0 mm or slightly over.
Section 3 — When is a tape measure or ruler okay?
Why it matters: sometimes you only need a rough check to decide if a board is usable for non-critical parts.
1) Use a ruler when tolerance is ±1.0 mm or larger.
- Step 1: Lay the board flat on a bench with a straightedge.
- Step 2: Measure at three points and note the smallest value.
- Step 3: Flag edges that are rounded or pinched; don’t trust them for critical joins.
Real-world example: cutting drawer bottoms where a 0.8–1.0 mm variance is acceptable — a ruler reading 4.2, 4.0, 4.1 mm tells you the board will work.
Section 4 — Can you use smartphone caliper apps?
Why it matters: apps can log measurements quickly, but they depend on calibration.
1) Pair the app with a physical caliper for validation.
- Step 1: Calibrate the app using a known gauge block or your caliper reading.
- Step 2: Take three measurements and compare to the physical caliper.
- Step 3: If differences exceed 0.2 mm, don’t rely on the app for final setup.
Real-world example: logging measurements during a deck build — the app saves readings but you always check the final board that gets used with a real caliper.
Section 5 — Measurement technique and rules to follow
Why it matters: consistent technique prevents false readings and wasted work.
1) Always measure at multiple points and use the minimum value for set-up.
- Step 1: Clean the surface of dust and chips.
- Step 2: Support the board so it’s flat and cannot flex.
- Step 3: Use a straightedge to locate low spots and measure there.
Real-world example: a glued-up tabletop with cupping — measurements at low spots (e.g., 20.6 mm) determine how much you need to plane, not the high spots (21.4 mm).
Quick checklist to carry with you
- Caliper zeroed and clean.
- Three measurements recorded (left, center, right).
- If variance > 0.5 mm, plane or joint until within tolerance.
Follow these steps and you’ll avoid surprises at glue-up.
Recommended Products

High Accuracy and Precision - Groove Calipers are excellent tools in providing accurate markings to maintain exact measurements and hardened stainless steel construction. One lithium battery for over one year of normal usage.

High Accuracy and Precision - Starrett calipers are excellent tools in providing accurate markings to maintain exact measurements from various work applications.

No Setting Needed - When the Three-Blade Plunger is pressed against a flat surface, the gage should read the set number stamped on the back of the indicator. This means you'll save time and hassle when taking measurements.
Set Tolerances for Dovetail, Mortise, and Tongue Joints

If you’ve ever frustratedly forced a joint that then split or left a gap, this will help.
Why it matters: correct tolerances keep joints snug under load and prevent splits or sloppy fit.
Dovetail: how tight should the pins and tails be?
- Target: aim for about 0.002–0.005 inches (0.05–0.13 mm) clearance between mating faces so the joint resists a light tap but assembles without a hammer.
- Steps:
- Cut tails first, transfer layout to pins.
- Pare pins to leave ~0.003″ clearance on each contact face.
- Test-fit dry; if it binds, pare 0.001–0.002″ from the high spot and test again.
3. Real-world example: when fitting a 10″ drawer side dovetail, I left 0.003″ clearance and the drawer slid in with one light mallet tap and no visible gaps.
Tip: mark tight spots with a pencil on the mating face to see where to pare.
Mortise-and-tenon: how to get shoulders and cheeks to seat?
Why it matters: misaligned shoulders or over-thick cheeks keep the joint from transferring load and can split surrounding wood.
- Target: tenon cheeks should be 0.002–0.006″ thinner than the mortise width; shoulders should seat flush with no visible gap.
- Steps:
- Cut mortise cleanly; measure its width with calipers.
- machine or pare tenon cheeks to leave 0.003–0.004″ clearance total (0.0015–0.002″ per cheek) for a 1⁄2″ mortise.
- Trim shoulder depth so the shoulder faces contact fully; if shoulders stop short, pare the housing by 0.005″ increments and re-test.
3. Real-world example: for a 3″ table leg tenon, I set the cheeks 0.004″ under the mortise and the leg shoulder sat flush with the apron, giving a tight load-bearing joint.
Tongue-and-groove: how to size tongues for smooth engagement?
Why it matters: uneven tongues bind and split the groove or leave rocking that weakens panels.
- Target: tongue thickness about 0.002–0.004″ less than groove width; keep the tongue length and thickness uniform along its run.
- Steps:
- Cut a test tongue 6–8″ long and test it in the actual groove.
- If it binds, reduce thickness by 0.001–0.002″ with a plane or sanding block and re-test.
- Once the test fits, run the full-length tongue to the same settings and re-check at three points (near ends and middle).
3. Real-world example: when fitting 48″ plywood panel flooring, making a test tongue 0.003″ under the groove prevented mid-span pinch and kept panels flat.
General workflow for any joint
Why it matters: a controlled, measured approach saves material and time.
1. Steps:
- Measure twice with calipers or a combination square; record target clearances.
- Cut one test piece and dry-fit; mark contact highs with a pencil or feeler gauge.
- Adjust in 0.001–0.005″ increments until the target fit is achieved.
- Transfer settings to final pieces and re-check at multiple points before glue-up.
Example: I always cut a 6″ test length for long runs; it reveals twist or tool drift before I commit.
One last practical tip: keep a small shim pack of 0.001″, 0.002″, and 0.005″ feeler gauges or shim stock in your toolbox so you can quickly measure and set those tight clearances.
Recommended Products

DIAL-INDICATING ACCURACY: Built with Dial indicator for Go/No-Go (GO/NG) tolerance inspection in inch units to deliver stable, repeatable spindle control and precise measurement performance across demanding inspection, machining, and QC environments.

HIGH PRECISION:Three holes can be machined at a time in the vertical position,one large hole for the hinge head and two holes for the assembly screws.Positioning stopper with accurate scale,the stopper can be adjusted according to demand.Ruler with positioning calipers for more accurate positioning.Air spring rubber compression device, prevent the board from moving.

Heavy-Duty - The Starrett Tubular Inside Micrometer has rigid and lightweight rods, quick reading figures and lock nut. Extension rods are made of steel tubing and each rod is marked with length.
Planing Methods for Uniform Thickness
Before you plane wood to a uniform thickness, know that consistent thickness keeps joints tight and prevents problems when you glue or finish.
1) Inspect the stock and mark high spots.
- Why this matters: high spots will cause uneven passes and wasted time.
- Example: on a 8/4 oak board, you’ll often find a cupped edge and a crown down the middle; mark those with a pencil at the ends and every 6–8 inches.
- Steps:
- Lay the board flat on your bench and sight along its length.
- Feel for ridges with your hand and mark them with a pencil line.
- Measure thickness every 12 inches with calipers and write the numbers on the board.
– Critical: sharpened pencils show fine highs better than blunt markers.
Here’s what actually happens when you set your planer or hand plane too deep on the first pass: you tear the fibers and create new high spots that are hard to correct.
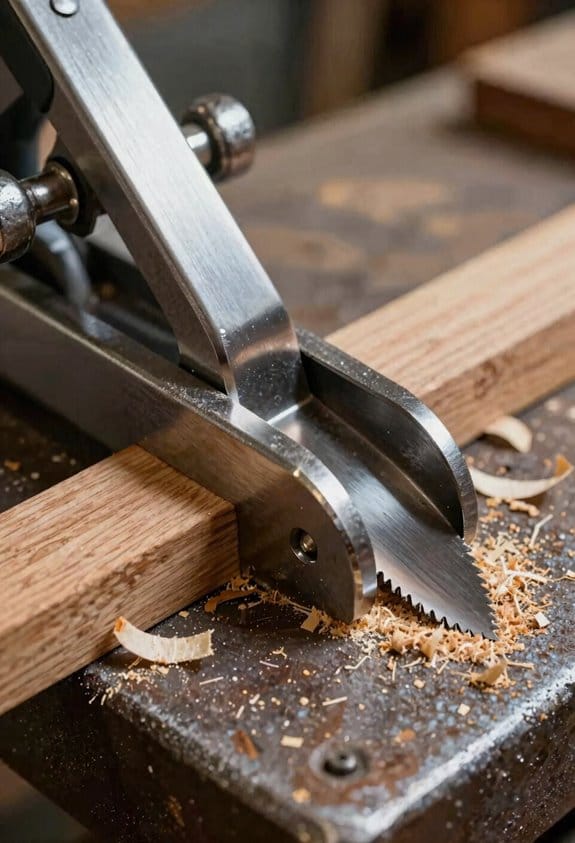
2) Set a conservative cutting depth and remove material in passes.
- Why this matters: taking off too much at once causes tear-out and error.
- Example: on a thickness planer with 3 knives and a 1/8″ total cut capacity, take 1/32″ to 1/16″ per pass for hardwoods.
- Steps:
- Set the cutter to remove 0.5–1.0 mm (≈1/32″–1/16″) per pass for hardwood; double that for softwoods only if your knives are razor-sharp.
- Run the board through, then measure at three places (near each end and middle) with calipers.
- Adjust and repeat until you hit your target thickness.
– Critical: always run the grain direction with a hand plane to minimize tear-out.
The fastest way to keep large runs consistent is to calibrate your machine and control feeds.
3) Calibrate for large runs and maintain consistent feeds.
- Why this matters: small variations multiply across many boards and ruin batch uniformity.
- Example: when planing 20 cabinet door rails from maple, set the planer to the final thickness, clamp a sacrificial reference board under the infeed, and check the first five pieces.
- Steps:
- Verify knife alignment and that the cutterhead is trued to within 0.1 mm.
- Set feed speed to the machine’s recommended RPM for your material (consult the manual; typical planers list feed rates like 6–12 m/min).
- Use a sacrificial reference board or gauge block indexed to the thickness stop and check every 5th piece with calipers.
– Critical: keep knives sharp and replace or rotate them when they dull to maintain consistent cuts.
If you’ve ever been frustrated by finish sanding revealing small high spots, blend planing with progressive sanding for fine work.
4) Combine hand planing and progressive sanding for fine surfaces.
- Why this matters: planing sets flatness; sanding refines the surface for finish.
- Example: for a tabletop edge where you want a silky feel, use a smoothing plane then sand from 120 to 320 grit.
- Steps:
- Use a #4 or #5 smoothing plane with a fine mouth for the last few passes; remove no more than 0.2–0.5 mm per pass.
- Sand in sequence: 120 grit to remove plane marks, 180 grit to even the surface, 320 grit to prepare for finish.
- Check thickness after the final sanding because sanding removes measurable material—expect ~0.03–0.1 mm loss between grits depending on pressure.
– Critical: clamp the piece when sanding edges to avoid compressing the wood and producing false thickness readings.
You’ll avoid surprises if you measure frequently and keep a short log.
5) Measure, record, and correct.
- Why this matters: repeated measurements catch drift and let you correct before wasting parts.
- Example: for a batch of ten dovetail boards, write thickness at each end and center on a sticky note and stick it to the workpiece.
- Steps:
- Measure with calipers at three points after every pass.
- Record the values on the piece or a sheet: Date, pass number, thicknesses.
- If one spot is more than 0.5 mm off target, clamp the board and flatten that zone with a hand plane or a sled on a planer, then recheck.
– Critical: calipers are faster and more precise than a ruler for final tolerances.
Follow these steps and you’ll get repeatable, predictable thicknesses without guesswork.
Recommended Products

JET BLACK PERFORMANCE COATING: Coated cast iron tables resists corrosion, reduces friction, and eliminates the need for waxing/polishing

Heavy-duty, ball bearing board return rollers

2 - 4" dia. dust ports for easy hook-up to a collection system
Thickness Rules by Application: Cabinets, Trim, Beams, Instruments
Before you match thickness to function, know this matters because correct thickness makes parts fit, look right, and last longer.
Cabinets — What thickness should you use for cabinet panels?
Why it matters: Proper thickness keeps shelves from sagging and makes joinery fit without gaps.
Real-world example: I built a kitchen base cabinet with 3/4″ plywood shelves and 1/2″ plywood backs; the shelves stayed flat under heavy cookware for years.
How to choose and prepare:
- Pick a standard: use 3/4″ (19 mm) for carcass sides and shelves, 1/2″ (12 mm) for backs, and 1/4″ (6 mm) for drawer bottoms.
- If you’re resawing rough boards, plane to the final thickness after letting the wood acclimate 48–72 hours in the room where the cabinet will live.
- For joinery like dovetails and dados, test-fit on scrap at the exact thickness; adjust router fence or saw blade height by 1/64″ increments until it slides but doesn’t wobble.
Example detail: a 30″ shelf span for heavy pots benefits from a center cleat or 3/4″ shelf with a 1″ front rail to prevent sag.
Trim — How thin should trim be to match existing profiles?
Why it matters: Matching thickness lets trim sit flush and conceal gaps.
Real-world example: I replaced living-room baseboard with 5/8″ stock so it matched the old door casings and sat flat against plaster.
Steps to match trim:
- Measure the existing piece at three points; record the thinnest number.
- Plane or thickness it to that measurement; aim within 1/32″.
- If profile detail exists, use a smoothing plane and light passes so you don’t remove the profile; remove small surface defects with a block plane.
Quick tip: When nailing, use 6d or 8d finish nails for 5/8″ trim.
Beams — What thickness (or depth) do beams need?
Why it matters: Correct dimension prevents stress points and ensures safe load distribution.
Real-world example: For a 14′ span in a small shop, I used a built-up beam from three 2x8s glued and screwed to achieve the needed depth and stiffness.
How to size and manage beams:
- Calculate required depth with span tables or a structural calculator; as a rule of thumb, use depth = span (in feet) ÷ 20, so a 20′ span needs about a 10″ depth.
- Use uniformly planed members and fasten laminated pieces every 12″ with glue and screws to avoid local stress.
- Let laminated or solid beams equilibrate to site moisture for 1–2 weeks before installation; clamping while drying reduces twist.
Specific: for modest residential loads, two built-up 2x10s can handle many spans under 18′.
Instruments — How thin should parts be for sounding boards and backs?
Why it matters: Thickness controls resonance and stiffness so the instrument rings correctly.
Real-world example: For a small parlor guitar top I aimed for 2.8–3.2 mm spruce thickness and carved the braces to about 5–6 mm at the lower bout.
Steps for working thin parts:
- Start at about 4 mm for tops and remove in 0.2–0.5 mm passes until you reach the target, checking tap tone as you go.
- Choose a species: spruce or cedar for tops, maple or rosewood for backs; the top should be lighter and slightly softer than the back.
- Keep humidity at 45–55% while shaping and assembling; store finished plates in that range for at least a week.
Technique note: Use a thickness caliper and small increments; don’t sand away structural ridges — plane them off with care.
Final practical rule: always acclimate your stock to the room for at least 48 hours and verify thickness with a caliper before cutting joinery.
Recommended Products

MODERN & ELEGANT: The minimalistic and sleek design of Ayna Maya’s bathroom vanity features sleek lines and bold accents of brass hardware to create a bathroom vanity that is elegant, contemporary, and spacious.

DURABILITY and LONGEVITY: Constructed from premium solid hardwood and plywood for exceptional strength and durability, this vanity is built to last longer than MDF or particle board units, with moisture-resistant plywood that helps prevent warping, cracking, and paint peeling.

MODERN & ELEGANT: The minimalistic and sleek design of Ayna Maya’s bathroom vanity features sleek lines and bold accents of brass hardware to create a bathroom vanity that is elegant, contemporary, and spacious.
Fixing Problems and Shop QC for Consistent Thickness
If you’ve ever struggled to get boards that finish the same thickness, this is why.
Why it matters: uneven boards waste glue, time, and can ruin a joint. I’ll show you simple QC habits and fixes so your parts meet spec before assembly.
1) Where to measure and why
Why it matters: measuring early catches problems before you cut joinery.
Steps:
- Measure rough stock as it arrives with a caliper or digital thickness gauge to ±0.01 in (±0.25 mm).
- Measure after milling (planer/jointer) at three spots along each board: near each end and the center.
- Measure final parts right before assembly.
Example: I had a batch of 12 maple boards where the centers were 0.06 in thicker than the ends; catching that at step 2 saved me from reglueing eight panels.
2) How to set up quick shop QC
Why it matters: a few quick checks cut rework by half.
Steps:
- Create a simple checklist on a clipboard: arrival reading, post-joint reading, post-planer reading, final reading. Record date, machine, and operator.
- Use batch sampling: check 1 in every 5 boards in a pile, or at least three boards per 20. If variance >0.02 in (0.5 mm), expand sampling.
- Mark bad pieces with a bright tag and put them in a rework bin.
Example: On a 50-board run, sampling found 7 bad boards early; tagging and isolating them kept the assembly line moving.
3) Basic machine calibration and common fixes
Why it matters: machines drift, and small errors become big problems.
Steps:
- Calibrate your planer/table: use a calibrated 12 in steel rule or a precision gauge, run a test board, measure, then adjust cutting depth in 0.005–0.01 in increments.
- Check jointer fence and tables for alignment: use a straightedge and shim or adjust bolts until gap <0.005 in across the length.
- Replace or sharpen knives when they produce torn grain or require extra passes; change knives every 8–12 hours of cut on hardwoods or sooner if finish looks rough.
- If a machine repeats the same error, try adjusting feed rate ±10% first, then check knives and alignment.
Example: A planer was cutting 0.03 in light on one side; after loosening the table bolts and realigning, the error dropped to 0.003 in.
4) Rechecking and record keeping
Why it matters: records reveal trends and prevent repeat mistakes.
Steps:
- Log each run’s mean thickness and standard deviation. If standard deviation >0.01 in (0.25 mm) for finished parts, schedule maintenance.
- Keep a one-line history for each machine: last knife change, last belt service, last alignment check.
- Review logs weekly and look for upward trends in variance or repeat failures by operator.
Example: Weekly logs showed variance rising after a certain shift; swapping operators and retraining reduced variance from 0.018 in to 0.006 in.
5) Handling bad pieces
Why it matters: deciding quickly saves hours.
Steps:
- Replane or joint only if the defect is <=0.06 in (1.5 mm) and you’ll remain above final thickness spec.
- Reject pieces that require more than two corrective passes or will drop below final dimension.
- Use bad boards for small parts, test cuts, or practice setups.
Example: A board with a 0.08 in cup was cut into three shorter pieces for practice parts instead of wasting time trying to flatten it for panels.
Follow these checks: measure early, sample fast, fix the machine when errors repeat, and keep simple logs. You’ll waste less material and get assemblies that fit.
Recommended Products
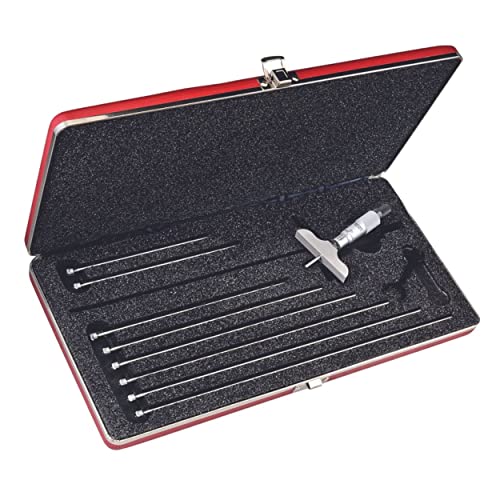
Heavy Duty - The Micrometer Depth Gage is made to last with quality materials that ensure durability, heavy use and better work performance. It comes with a ring-type knurled lock nut for quick and sure locking.

Absolute Origin Calibration: The iGAGING Absolute Origin Electronic heavy duty digital caliper retains the set zero reference point even after the caliper is off. This large thickness or diameter measuring tool feature saves time, as well as ensures consistent and accurate inch/metric measurements at 12", 24", or 40".

Portable - Starrett Electronic Height Gage is handy, reliable and easy to use for vertical measurements within its range. It is the trusted tool used by professionals and do-it-yourselfers.
Frequently Asked Questions
How Does Wood Moisture Content Affect Final Thickness After Installation?
Moisture equilibration changes board dimensions as wood gains or loses water; I tell readers it causes seasonal movement, so final thickness can swell or shrink after installation, affecting joint fit and structural stability unless acclimated properly.
Can Different Planer Blades Change Thickness Consistency Over Time?
I ran a shop where a dull HSS blade produced drift; yes, different planer blades affect thickness consistency over time due to Blade wear and varying Cut geometry, so I monitor edge condition and swap profiles regularly.
Are There Thickness Differences Between Kiln-Dried and Air-Dried Lumber?
Yes — I’ve seen kiln impact cause tighter, more uniform thicknesses, while air-dried boards show greater drying variance and minor thickness inconsistency; I’d plane kiln-dried less, but always check and adjust for final uniformity.
What Thickness Allowances Should I Make for Veneered or Laminated Panels?
I’d allow about 0.5–1.0mm extra for veneered or laminated panels to account for edge banding tolerances and potential substrate compression, tightening to ±0.2mm where precise joinery or matching faces is required.
How Does End-Grain Swelling/Shrinkage Impact Joint Tightness?
Like a sponge swelling, I tell you end grain movement can open joint gapping over seasons; I factor wood orientation and leave allowance, glue appropriately, and use joinery that hides or tolerates movement to keep joints tight.


