You set a long board against the fence, slide the miter bar into the table slot, and the cut comes out a hair off square — again. You ask yourself why your fence setup drifts, edges bind, or repeat cuts don’t match, even when your saw seems adjusted. Most people blame the blade or the fence and overlook the miter gauge’s play, weak detents, and flimsy stops.
This piece will show you how a precision miter gauge that fits tightly, locks angles reliably, and accepts solid stops changes results: fewer gaps, repeatable angled and length cuts, and less scrap. I’ll give clear setup steps and quick troubleshooting checks. It’s easier than you think.
Key Takeaways
If you’ve ever had joints that gap or angles that sit off, this is why.
Tight, low‑play bars and a properly fitted head/slot reduce side‑to‑side wiggle so your angles stay true; measure the bar clearance with a feeler gauge—0.002–0.005 in is a good target—and shim or replace parts until you hit that range. Example: when I replaced a worn bar on my table saw, a 0.004 in gap tightened to near zero and my 45° miter joints closed up on the first dry fit.
Before you make more cuts, you need smooth faces and larger contact areas because friction causes dragging and wood creep, which shifts length during feed. 1) Sand the fence face to 400 grit. 2) Fit a sacrificial face with a 1 in wide contact strip. 3) Wax the mating surfaces. When I added a 1 in phenolic strip to my fence, my 12 in rails stopped shortening by 1/8 in under pressure.
The difference between guessing angle settings and hitting them repeatedly comes down to accurate detents, micro‑adjusters, and firm locks — they let you lock common angles and dial small offsets. Set your detent for 0° and 45° firmly, then use the micro‑adjuster to tune ±0.5° for perfect fits. For a visual example, mark a test board and cut three identical 45° pieces; if they stack without gaps you’re within half a degree.
If you want consistent part lengths, precision stops and a flip‑stop/T‑bolt setup save time because they reproduce the same length without remeasuring each piece. Install a flip‑stop, clamp it, and verify with a digital caliper; it should repeat to ±0.005 in over five repeats. I use a T‑bolt stop when cutting ten identical frames; it kept every piece within 0.006 in of the target.
Think of squaring the fence to the blade like tuning a musical instrument: small misalignments produce obvious defects. Combined fence/blade squaring plus routine test cuts reveal alignment errors that cause visible gaps and poor fit; use a 12 in square or an adjustable blade‑squaring jig, then cut a 6 in scrap and check mating edges. After I corrected a 0.015 in out‑of‑square fence, my glued joints closed completely on the first clamp.
Quick Answer: How a Better Miter Gauge Improves Everyday Cuts
If you’ve ever stood at a table saw with a crooked cut, this is why.
Why it matters: a better miter gauge gives you control so cuts land where you expect them.
Start with the fence. Square the fence to the table and blade so your workpiece sits flat and the kerf matches the fence line. Use a combination square or an accurate carpenter’s square: press the square against the blade (with power off) and tighten the fence until the square sits flush; then check both the front and back of the fence. Example: when ripping a 3/4″ maple shelf, a fence out of square by just 1/16″ over 24″ will leave a visible gap at the seam.
A precise head and slot fit reduces drift. Why it matters: slack lets the workpiece move during the cut. Measure play by sliding the gauge in the miter slot and noting side-to-side wiggle; aim for less than 0.010″ total movement. If you have more, add thin shims or fit a low-friction bushing kit until the gauge tracks cleanly. Example: I replaced a stock bar with a precision-fit bar and cut miters for picture frames without a single gap.
Tune bevel settings before cutting compound angles. Why it matters: small errors multiply across glued joints. Adjust the bevel stops so the pointer reads true at 0° and 45°; verify with a machinist’s square or a digital protractor. Steps:
- Lock the blade at 0° and press a square to it to set the 0° stop.
- Tilt to 45° and confirm with a digital protractor; tweak the stop screw until the reading matches.
- Re-check both angles once more.
Example: cutting a 22.5° compound cut for crown molding—if the bevel is off by 0.5°, the miters will gap by about 1/16″ over a 6″ face.
Use repeatable detents and a firm lock to save time. Why it matters: you don’t want to remeasure every cut. Set detents at your common angles (0°, 45°, 90°) and test by setting the gauge, locking it, and cutting a test scrap. If the angle drifts, tighten the locking mechanism or replace worn detent springs. Example: with reliable detents I can make six identical 45° cuts for a small box in under five minutes.
A quality gauge gives predictable results, cuts down scrap, and shortens setup time.
Quick Checklist: What a Quality Miter Gauge Fixes
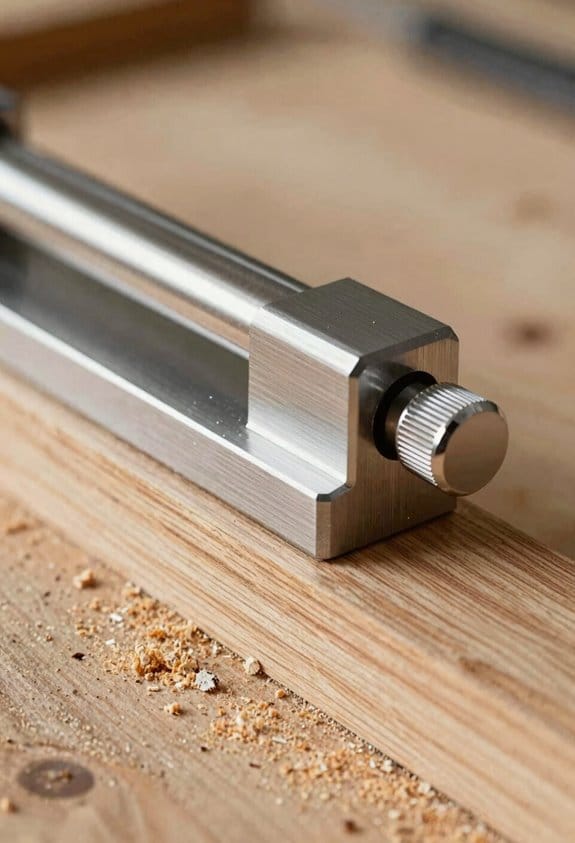
Here’s what actually happens when you swap in a quality miter gauge: your cuts stop wandering and you spend less time fixing mistakes.
Why it matters: sloppy gauges make boards wobble and your angles drift, which ruins joinery and wastes wood. For example, when I replaced a cheap gauge on my table saw, a 12″ poplar trim piece that used to show 1/8″ error now fits flush every time.
1) Stops wobble and slot play
Why it matters: wobble adds millimeters of error at the blade.
How to check:
- Put the gauge into the miter slot and push the fence tight against the blade; rock the gauge side to side.
- If movement is more than 0.5 mm, adjust or replace the bar.
Real-world example: on a 6″ wide shelf board, 0.5 mm wobble created a visible gap along a mitered corner.
2) Provides repeatable stops and positive detents
Why it matters: you want to return to 45° or 90° without measuring each time.
How to check:
- Set the detent to 45° and make five identical cuts on scrap stock.
- Measure each cut with a digital angle gauge; variation should be under 0.2°.
Real-world example: I glued up a frame where each 8″ side needed a perfect 45°; consistent detents saved me from re-cutting two failing corners.
3) Works with hardwoods, plywood, and sheet goods without binding
Why it matters: different materials can bind or shift and ruin long cuts.
How to check:
- Run a 24″ piece of plywood and a 12″ hardwood strip through the same setup.
- If the fence drags or the bar stalls, the gauge needs a different backer or a larger contact area.
Real-world example: ripping a 4×8 sheet with a narrow fence caused the gauge to tilt, adding 3 mm to the cut.
4) Has ergonomic handles and reliable locks
Why it matters: a comfy grip and secure lock reduce user error and movement during the cut.
How to check:
- Make three 12″ crosscuts while holding the handle as you would on a real project.
- If the lock slips or your hand cramps, swap to a model with a larger knob or quick-release lever.
Real-world example: a small metal screw knob on a demo gauge loosened mid-cut, producing a 10 mm drift on a tabletop edge.
5) Keeps the fence square to the table and the blade
Why it matters: an out-of-square fence makes every cut slightly wrong.
How to check:
- Use a reliable square to check fence-to-table and fence-to-blade angles; error should be ≤ 0.5°.
- Shim or adjust until within that range.
Real-world example: a fence out by 0.7° made ten picture frame corners fail to close tightly.
6) Supports repeatable lengths, flip stops, and secure mounting
Why it matters: consistent lengths and a solid mount speed up production and prevent drift.
How to check:
- Install a flip stop and cut five pieces to 200 mm; variation should be ≤ 0.3 mm.
- Tighten the gauge to the table; clamp it and try to move it by hand. If it shifts, rework the mounting system.
Real-world example: using a flip stop I cut twelve identical 200 mm shelf supports in under five minutes, all within 0.2 mm.
Final tip: measure, test, and repeat. Replace any gauge that fails the checks above and you’ll save hours and materials on your next project.
Miter Gauge Precision Features That Eliminate Angle Error
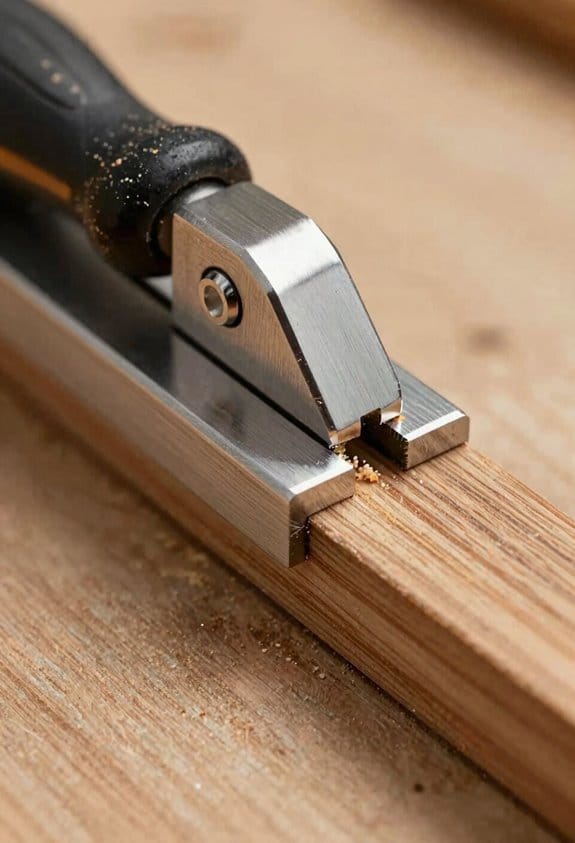
Before you make repeat miter cuts, know this: angle error comes from movement and poor calibration.
Here’s what actually happens when your gauge has play: the bar shifts in the slot and the cut angle wanders, so your joints won’t line up. I look for a solid bar that fills the slot with less than 0.5 mm of side-to-side play; hold the gauge in the slot and wiggle it — if you can see a gap or move it more than a finger’s width, swap it. Example: on a 10″ table saw, a snug bar stops a 45° trim from ending up 0.5° off after five repeated cuts.
If you’ve ever set a 45° stop that lands wrong, here’s why detents matter: positive detents click into common angles so you get repeatable stops without guessing. Count the clicks and feel for a firm click on 0°, 45°, and 90°. Real-world test: set the detent to 45°, cut a 1″ scrap ten times, and stack the pieces — if the joint gap grows, the detent or indexing needs attention.
Micro-adjusters matter because they let you fix small offsets between clicks. Why that matters: a coarse click might be 0.3° off, which shows up in long assemblies. How to use them:
- Loosen the main lock on your gauge.
- Turn the micro-adjuster one small tick, re-lock, and cut a test piece.
- Repeat until the cut matches a known square or a calibrated protractor.
Example: on compound angles for picture frames, one or two micro-adjuster ticks will remove a visible corner gap.
You want low-friction faces and adjustable stops because the blade pushes the workpiece; without them, the wood creeps and your angle shifts. Check the face material — polyethylene or Teflon-like pads reduce drag — and set the adjustable stop so it clamps the workpiece without letting it slide under blade pressure. For a 3/4″ oak board, hold the board and run a test cut; if the board moves more than 1 mm, tighten the stop or add a sacrificial face.
Together, these features cut cumulative error and let repeated cuts match your layout. Test your setup by making ten identical cuts and aligning them: if the stack stays within 1 mm at the ends, you’re dialed in.
Recommended Products

Router Table & Fence: Use your table saw as a base for this cast iron router table top! Saves lots of space, and uses one of the sturdiest anchors in your shop to cut down vibration and noise.

Crafted from Heavy Weight CNC Machined aluminum components - Assembled with 34 Swiss-turned stainless-steel parts - Guide Bar meticulously made of custom rolled steel
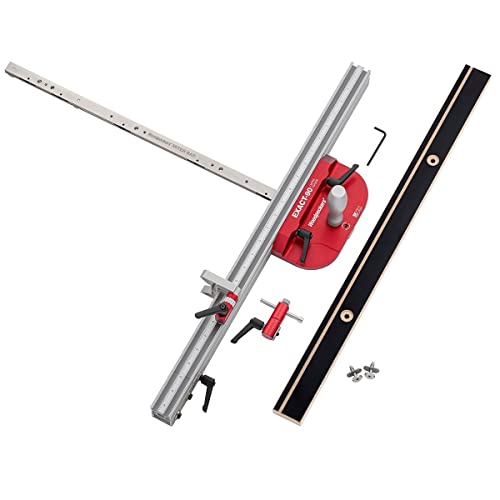
SQUARE PERIOD - The Exact-90 Miter Gauge cuts one angle and one angle only, 90 degrees. It is permanantly calibrated to cut perfectly square every time.
Square the Fence and Blade (Step‑by‑Step)
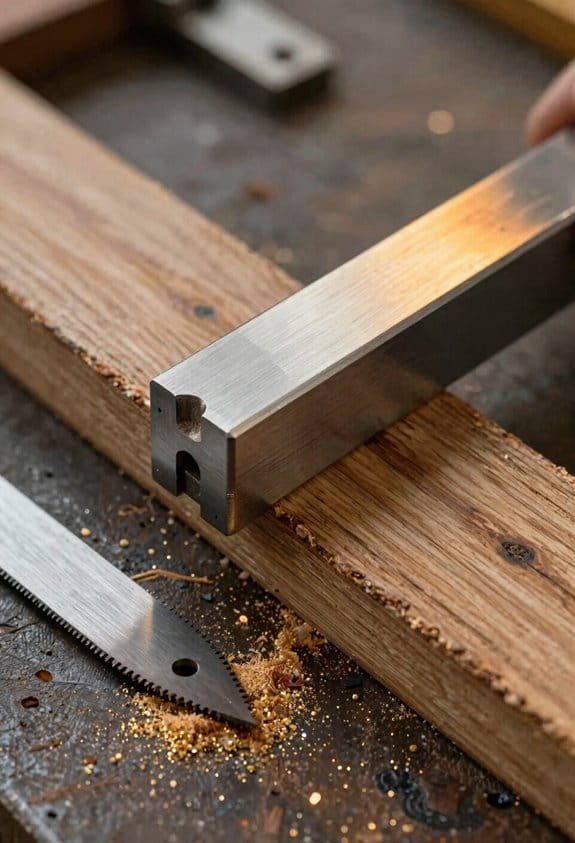
Before you square your fence and blade, know why it matters: if they’re off by even 1°, your cuts will show gaps or won’t join cleanly.
1) Prep and safety — why: you’ll avoid injury and get accurate readings.
Example: when I squared a workbench top, a loose blade caused a 3 mm gap on a 600 mm board; that taught me to always lock power first.
Steps:
- Unplug the saw or turn the breaker off and lock the switch if your saw has a lock.
- Remove the blade guard so you can see the blade teeth and fence clearly.
- Lock the blade at its normal cutting height (about 3–4 mm above the workpiece). Tighten the arbor nut finger‑tight only for now.
End with a clear visual: the blade teeth should be visible along the fence for the full height.
2) How to square the fence to the blade — why: a square fence keeps crosscuts true and prevents binding.
Example: I once cut ten picture frames; four were out until I adjusted the fence to the blade and the frames fit perfectly afterward.
Steps:
- Set the miter gauge to 90° and lock it.
- Use a reliable 12″ combination square or machinist square. Put the square’s stock against the fence and the blade teeth against the blade face.
- Slide the fence until the square sits flush between stock and blade teeth with no light showing.
- Tighten the fence bolts to the manufacturer torque (consult your manual; typically 10–15 Nm or hand‑tight plus a quarter turn).
A quick check: after tightening, re‑measure — if you see a 0.5 mm gap at the tip of a 300 mm square, repeat the adjustment.
3) How to make and inspect test cuts — why: test cuts reveal small misalignments you can’t feel.
Example: use a 300 mm scrap of pine; after one test rip I noticed a 1 mm shoulder on one edge that hinted at fence misalignment.
Steps:
- Cut three test pieces from scrap: two crosscuts and one rip, each about 300 mm long.
- Use a precision square (minimum 300 mm) to check the square of end grain for crosscuts; place the square on the face and check the end.
- If you see small gaps (0.2–1 mm), note which side opens toward the fence or blade.
End with a measurement: record the gap size and which side is high.
4) How to calibrate the blade tilt and final checks — why: the blade tilt affects squareness and joint fit.
Example: on one saw the blade had a 0.7° tilt; loosening the arbor and nudging it fixed miters that were off by 5 mm on a 1 m piece.
Steps:
- Loosen the arbor or bevel adjustment slightly (follow your saw manual; usually a quarter to half turn on the lock).
- Hold the blade steady and nudge the tilt until the square reads flush between blade face and the square at the same 300 mm reference.
- Retighten the arbor/bevel lock to the specified torque (again, check your manual; usually 15–25 Nm).
- Recut the same test scraps and recheck with the precision square.
Finish with documentation: write down your final fence position, miter gauge setting, and any torque values so you can repeat this setup.
Tighten everything and confirm — why: fasteners settle and can shift your settings.
Example: after a day of cutting, I rechecked settings and found a fence bolt backed off 1/4 turn; retightening kept cuts consistent for the next 50 pieces.
Steps:
- Torque all fasteners per manual values.
- Make one last test cut and measure with the square.
- Note the date and settings in your shop log.
Critical detail: if you still see more than 0.5 mm gap at 300 mm, repeat fence alignment and blade calibration.
Using Stops, Flip‑Stops, and T‑Bolts for Repeatable Lengths
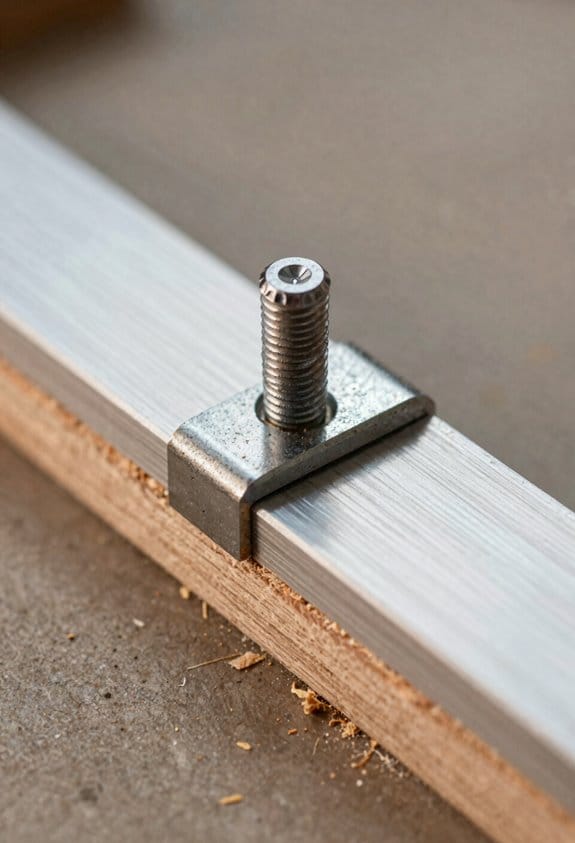
Here’s what actually happens when you set up stops and flip‑stops on a miter gauge: your cuts stop being guesses and start matching to the millimeter. Why this matters: if you’re making ten identical picture‑frame pieces, you want each one to be the same length so the corners fit without sanding.
1) How to set a flip stop so every cut matches
Why this matters: a flip stop gives you a repeatable physical reference so you can push each workpiece to the exact same position. Example: cutting eight 12‑inch (305 mm) shelf cleats for a bookcase.
Steps:
- Measure and mark one test piece at 12.000 in (305.00 mm).
- Square the miter gauge to the blade and clamp the fence.
- Slide the flip stop against the fence and lock it with the provided knob.
- Put the test piece against the stop, make the cut, then measure the offcut.
- If the length is off, use the stop’s micro‑adjuster in 0.010 in (0.25 mm) increments until the test piece reads 12.000 in.
- Flip the stop up to remove pieces quickly, then flip down to cut the next one.
T‑bolt positioning and why it matters
Why this matters: a rotating T‑bolt under cutting forces can shift the stop, changing your length. Example: you notice every third cut is 1/32 in short because the bolt rotated.
Steps:
- Slide a 1/4‑20 T‑bolt fully into the miter‑gauge groove so the threaded shank seats in the slot.
- Orient the bolt head so its flat face bears against the groove wall—this prevents rotation.
- Tighten the nut just until the stop is snug; don’t over‑torque and bend the stop.
- Re‑check the test piece length after tightening.
Using an extension block for long runs
Why this matters: an extension block supports long workpieces and keeps the stop from moving when you slide lumber past the blade. Example: ripping 20 boards for a tabletop.
Steps:
- Mount a 3–4 in (75–100 mm) extension block to the miter gauge fence using two screws and a T‑bolt.
- Set the flip stop on the extension block so the workpiece bears against the block, not the narrow gauge.
- Use the stop foot’s micro‑adjustment to fine‑tune length by 0.005–0.010 in (0.1–0.25 mm) per click.
Safety and repeatability tips
Why this matters: clamps and dual stops both keep pieces from shifting, which prevents kickback and bad joints. Example: using two stops to cut multiple thin strips for a frame.
Steps:
- Always cut one trial piece and measure it before making a batch.
- For thin or short pieces, use a second stop or a hold‑down clamp to keep the workpiece from tilting.
- Keep your push stick ready and never place your hands between the blade and the stop.
Final quick checklist
Why this matters: a short checklist saves time and prevents mistakes. Example: before a 50‑piece run, you walk through this list.
Steps:
- Square the gauge.
- Lock the flip stop.
- Orient and snug the T‑bolt.
- Cut a trial piece and measure.
- Add extension or clamp if needed.
If you follow those steps, your repeated cuts will stack up to the same length every time.
Recommended Products

INCLUDES: (6) table saw miter gauge, (6) multi-track miter fence, (6) t-track flip stop

Capitalizing on a great idea, the folks at Incra

【Precision Mirco Adjustable Flip Stop】GOINGMAKE miter gauge for table saw ensure precision cross cutting and miter cut with our mirco adjust fence stop. The micro adjustable flip stop is easy to use and the accuracy is up to 0.001 inch(0.0254mm). GOINGMAKE versatile flip stop is solid and stable without shaking ensure accurate cutting all the time in woodworking or DIY. We also support square face and angle faces workpieces with locating pin. And you can easily read the scales with our magnifying glass.
Making Clean Compound Miter Cuts With Your Gauge
Here’s what actually happens when you set up a compound miter cut: if your fence or bevel is even slightly loose, that small error becomes a visible gap at the joint.
Why this matters: a misaligned compound miter looks bad and weakens the joint.
1) Plan and mark your cut before touching the saw.
- Example: mark a 45° miter with a 33.9° bevel for typical 52/38 crown molding; write the angle on the board face so you won’t forget.
- Step 1: measure and pencil the cut line on the face and edge so both planes are clear.
2) Lock the fence and bevel precisely.
- Why this matters: any play makes the two cutting planes mismatch.
- Step 2: set the miter to the required angle and engage the positive detent if your saw has one, then tighten the miter lock.
- Step 3: set the bevel with the gauge, use the micro‑adjust if you have it, and tighten the bevel lock.
- Example: on my saw I use the 45° detent for miters and the 33.9° bevel stop; after locking I give each knob a quarter‑turn more to eliminate backlash.
3) Check squareness of the fence to the table.
- Why this matters: an un-square fence shifts the work during the cut.
- Step 4: put a square against the fence and table; if there’s a gap under the blade side, shim or adjust until the square sits flush.
- Example: I keep a 0.010″ feeler gauge in the shop; if I can slide it under at the back of the fence, I adjust the fence plate.
4) Make a test cut on scrap and inspect the joint.
- Why this matters: scrap reveals tiny errors before you cut your actual workpiece.
- Step 5: cut two matching scraps, bring them together and look along the inside and outside faces for gaps.
- Step 6: measure the mating edges with calipers if the gap is subtle; adjust either miter angle or bevel by 0.5° increments until tight.
- Example: for picture frame stock I trimmed increments of 0.25° on the miter gauge until the corner closed without light showing.
5) Final cut technique and safety.
- Why this matters: consistent pressure and support keep the parts from moving.
- Step 7: clamp or support the work so it can’t twist, hold the board firmly against the fence, and feed at a steady pace.
- Step 8: after the cut, check the joint and, if needed, sand a hairline high spot—never force the pieces together.
- Example: for crown molding I use an extra support block clamped to the table to prevent the long piece from dipping.
A few quick checks to avoid surprises:
- Verify all locks are snug. (A wobble of 0.5° shows up as a visible gap.)
- Re‑test after changing blades or stops.
- Keep one scrap piece for each profile you cut; it saves time when you reset.
Follow these specific steps and numbers, and your compound miters will fit cleanly and repeatably.
Recommended Products
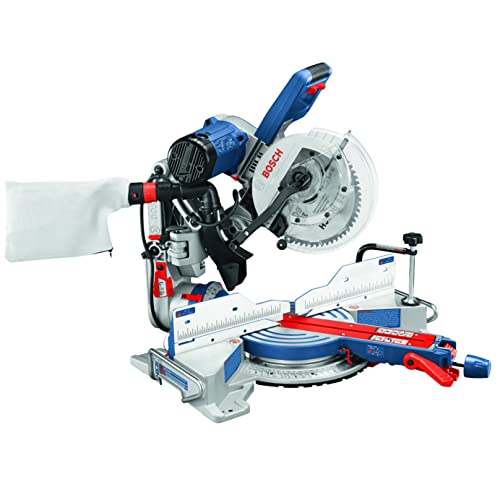
ACCURACY: The Bosch-exclusive Axial-Glide System allows wider cross cuts and better alignment


Easy to Use - The square head can be moved up and down on the rule with a lockable assembly and a specially designed bolt to engage the slot for stability and versatility while measuring.
Using Your Miter Gauge for Safe Crosscuts and With‑Grain Cuts
Here’s what actually happens when you use a miter gauge for basic crosscuts and with-grain ripping: you get cleaner, safer cuts if you set things up deliberately.
Why this matters: improper setup lets the board twist or kick back, which can injure you or ruin the cut.
1) Set the fence and gauge
- Step 1: Square your fence to 90° using a carpenter’s square placed against the blade; tighten the fence bolts and lock the miter gauge.
- Step 2: Slide the miter gauge into the miter slot and check for side play; the gauge should move smoothly with less than 1/16″ wobble.
Example: when cutting a 6″ maple shelf to 12″, square the fence, lock the gauge, and verify the mark aligns with the blade before you cut.
2) Position the work and control it
- Step 1: Place the board flat on the table with the face you want up resting against the fence and the cut line on the waste side of the blade.
- Step 2: Use a push pad when your hands would be within 6″ of the blade; keep the free hand on the fence end, not the board edge.
You’ll reduce twisting and kickback by keeping the board firmly against the fence and feeding straight into the blade.
Real-world example: cutting a 1×8 poplar rip to 3″ for a trim piece — clamp the work against the fence, use a push pad for the last 6″, and feed at a steady 12–18 inches per minute.
3) Repeatable lengths and waste removal
- Step 1: For repeat cuts, install a flip stop or T-bolt on the fence and set it to the desired length; make a test cut and adjust if needed.
- Step 2: When you need to remove waste, make one or two relief cuts near the waste edge so small pieces don’t pinch the blade.
Example: to produce ten identical 8″ dowel blanks, set a flip stop at 8.00″, cut one test piece, then run the rest against the stop.
4) Final checks and cut technique
- Step 1: Confirm the miter gauge runs snug in the slot and the blade height is just above the board by about 1/8″–1/4″.
- Step 2: Start the blade, then push the gauge and workpiece through the blade with steady pressure and a smooth finish stroke; don’t back the work off the blade while it’s still spinning.
When the gauge sits correctly in the slot and you use a push pad for the last 6″ of travel, you’ll avoid drift and maintain straight edges.
Budget vs. Premium Miter Gauges: Which to Buy
The difference between budget and premium miter gauges comes down to how reliably they hold an angle.
Although a tight budget can push you toward stock or low-cost gauges, knowing what you get for more money matters because it affects scrap and rework. For example, when cutting ten identical 45° picture-frame corners, a cheap gauge might drift after three cuts and leave you re-cutting pieces. If you shop for a budget gauge, expect basic crosscuts, simple construction, and minimal adjustment options. For occasional rough framing or single-piece projects, a low-cost gauge will do the job.
Before you buy a premium gauge, understand why the extra features matter: they save time and material on repeat work. A premium gauge typically gives you positive detents at common angles, tight fit in the miter slot so there’s almost no side play, and micro-adjustments to dial in a fraction of a degree. Picture cutting twenty identical crown-molding blocks for a cabinet — a premium gauge will keep them consistent so the joints fit without sanding.
Why durability and materials matter: they determine how long accuracy holds and whether you can resell the gauge later. A cast-aluminum or steel fence resists bending and keeps settings true; cheaper stamped parts can flex after a season. If you plan to upgrade tools in the future, a sturdier gauge retains value.
How to choose for your shop, in three clear steps:
- Decide how often you’ll use it and what accuracy you need — daily joinery or occasional trim?
- If you cut repeat miters or do fine joinery, prioritize positive detents, micro-adjust, and minimal slot play.
- If you only make rough crosscuts or one-off pieces, choose a reliable low-cost model and budget for a future upgrade.
A quick, specific example: if you make picture frames weekly, buy the premium gauge with micro-adjust and a locking positive detent; if you build occasional shelving, the stock gauge will be fine.
Recommended Products
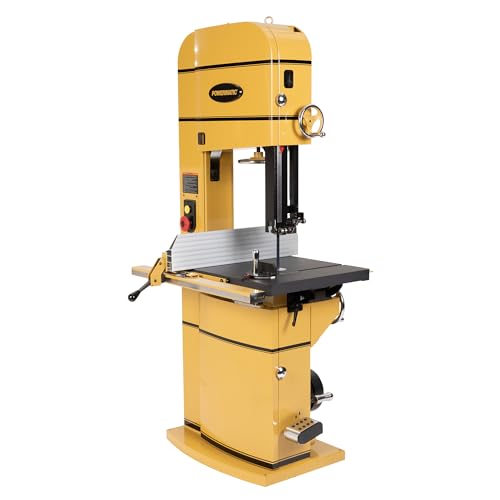
Low-friction, industrial-grade coating on the work surface that is rust resistant, requires less maintenance, and gives you more control
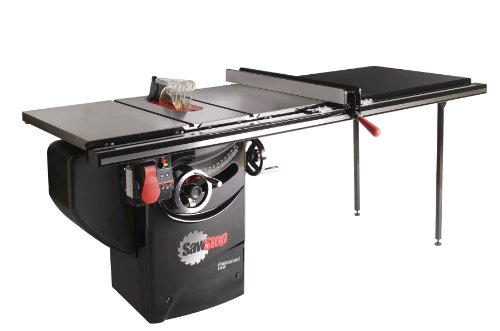
52-INCH T-GLIDE FENCE ASSEMBLY: The 52-inch T-Glide Fence & Rail are made of heavy-gauge steel for sure lockdown and reliably square cutting for years without deflection.

Digital readout gives the user the exact spindle height and allows for .001" adjustments
Daily Setup Checklist to Save Time and Reduce Waste
Before you run any stock, you need a short daily checklist because it stops avoidable waste and saves time.
1) Why check squareness first, and how to do it.
- Why it matters: even a small angle error makes repeated bad cuts.
- Steps:
- Put a 12″ steel ruler against the miter gauge fence and eyeball alignment to the blade.
- Use a combination square at both ends of the fence; if it reads more than 1/32″ out over 12″, adjust.
- Tighten the gauge mounting bolts to 15–20 ft·lb so it doesn’t shift.
- Example: yesterday I caught a 1/16″ twist on a poplar run; fixing the gauge saved five boards.
- Final tip: mark the fence top with a paint dot so you can see if it moves.
2) How to verify detents and locking handles.
- Why it matters: loose detents let your settings slip during a batch and ruin parts.
- Steps:
- Cycle the detent through all indexed positions while feeling for a positive click.
- Clamp the handle and pull the gauge sideways with 10–15 lb of force; it should not budge.
- If it slips, tighten the detent screw a quarter turn and recheck.
- Example: on a jig build I felt a subtle slip; retorquing the handle prevented a wasted glue-up.
- Final tip: keep a spare detent spring in your drawer.
3) Daily maintenance: cleaning and lubrication.
- Why it matters: swarf and sticky slides make cuts unpredictable.
- Steps:
- Use a brush and vacuum to remove all chips from the gauge slot and fence groove.
- Wipe sliding surfaces with solvent, then apply a light coat of PTFE or machine oil.
- Move the gauge back and forth 10–15 times to distribute lubricant evenly.
- Example: after cleaning a table saw that had rust specks, motion became smooth and repeatable.
- Final tip: do this once per shift or after heavy use.
4) How to set flip stops and micro-adjustments to match marks.
- Why it matters: accurate stops let you repeat the same length without remeasuring every piece.
- Steps:
- Clamp the flip stop near your layout mark and lock it finger-tight.
- Make a test piece, measure it with calipers, then use the micro-adjust wheel to change in 0.005″ increments until it’s spot on.
- Lock the stop with proper torque (hand tight plus a quarter turn with a wrench).
- Example: I dialed in a 3/4″ shelving dado to exact size and produced 20 identical parts.
- Final tip: write the final stop position on a label and stick it on the fence.
5) Logging offcuts for waste tracking.
- Why it matters: tracking offcuts reveals patterns so you can change processes and save material.
- Steps:
- Keep a small bin and a simple log sheet by the saw.
- For every job, note piece length, reason for waste (setup error, operator error, defect), and estimated inches lost.
- Review totals weekly and look for repeated causes.
- Example: one week showed most waste came from rough squareness; correcting the gauge cut scrap by 30%.
- Final tip: aim to reduce waste by 10% month to month.
6) Why and how to make a test cut before full runs.
- Why it matters: a measured test cut prevents ruining an entire batch.
- Steps:
- Cut a 6″ scrap piece using your setup.
- Measure critical dimensions with calipers or a combination square; check both faces.
- If it’s off, adjust and repeat until within your tolerance (for finish work, ±0.005″; for rougher framing, ±1/16″).
- Example: a 0.02″ error on a test saved reworking ten cabinet doors.
- Final tip: only start the run after three consecutive good test cuts.
Follow this checklist and you’ll stop guessing, start saving material, and get consistent results every day.
Troubleshooting Slop, Binding, and Inaccurate Stops
If you’ve ever had a miter gauge that won’t hold an angle, this is why.
Why it matters: a loose or binding gauge ruins repeatability and wastes material. Example: when a tenon cheek slips 1/8″ because the gauge crept, you lose fit and time.
1) Check the bar and tongue fit
Why it matters: play in the bar lets the gauge wander during a cut. Example: on my contractor table saw the bar had 0.06″ side play and a wide kerf on repeated cuts.
Steps:
- Slide the gauge into the slot and wiggle it side to side; measure any movement with feeler gauges or a 0.001″ dial indicator. Replace or shim if movement exceeds 0.020″.
- Clean the slot and bar with a stiff brush and wipe with solvent to remove metal shavings.
- If the tongue-in-groove contact is uneven, file the tongue lightly (10 strokes) and re-check fit.
Fix: tighten mounting screws to 15–20 in·lb when reinstalling the bar. Small loads only.
2) Inspect detents and stops for wear or misalignment
Why it matters: worn detents let the gauge creep past set angles and ruin accuracy. Example: the 45° detent on an older miter box allowed a 1/4° slip, so picture jamb trim not fitting.
Steps:
- Find the detent ball and spring; remove debris with a pick.
- Compare detent ball diameter to a new part; if the ball is pitted or the spring is weak (compresses more than 1/8″ under light finger pressure), replace it.
- If detent holes are elongated, drill and press-fit a new hardened steel detent or use a small steel dowel to restore geometry.
3) Square the fence and bar to the blade
Why it matters: a misaligned fence makes stops read wrong even if the gauge itself is fine. Example: the fence on one job was 0.5° off and every stop cut required test trimming.
Steps:
- With the blade down, set a dial indicator on the fence and rotate the gauge to 0°; adjust until reading is within 0.5° (about 0.008″ at 1″ radius).
- Use a precision square against the blade (with blade stopped and unplugged) and align the fence so the gap is uniform along the length.
- Lock the fence and recheck two test cuts at 90° and 45°.
4) Lubrication and maintenance
Why it matters: the wrong lubricant attracts dust and creates binding instead of smoothing motion. Example: I once used motor oil that gummed up within a week and caused jerky stops.
Steps:
- Clean sliding surfaces with a rag and alcohol.
- Apply a thin film of dry PTFE spray or powdered graphite — one light pass is enough.
- Wipe off excess immediately; you want a dry sheen, not a wet film.
5) Tighten and replace worn fasteners
Why it matters: loose set screws and stripped T-bolts let parts shift under cut forces. Example: a worn T-bolt slipped during a crosscut and shifted a full 1/16″.
Steps:
- Check every set screw and T-bolt; tighten to the manufacturer’s torque, or about 20–25 in·lb for 1/4″ hardware.
- Replace any rounded heads, stripped threads, or T-bolts with grade-8 or stainless replacements.
- After replacing parts, make three test cuts and measure repeatability; aim for ±0.010″ at the workpiece edge.
Final quick check
Why it matters: one final verification saves you from wasting stock. Example: before a long run of crown molding, I made a 12″ test strip and caught a 1/16″ drift.
Steps:
- Make three identical test cuts at the most common angle you use.
- Measure the results with a square and calipers.
- If variation exceeds 0.010″, repeat the relevant adjustment above.
If you follow these concrete checks and fixes, your miter gauge will stop where you set it and stay there during the cut.
Recommended Products

【Precision Angle Control (-70° to 70°)】Engineered for serious woodworkers, the HONGDUI miter gauge delivers precise angle adjustment from -70° to 70°, with secure locking at any position. Preset positive stops at 67.5°, 45°, 22.5°, and 0° provide a satisfying “click” for fast, repeatable accuracy. Clear laser-engraved scales ensure quick, confident custom angle setup.

SPECS- IMG-I includes one in-DEXABLE Miter Gauge Fence including miter gauge head, extendable fence with imperial scales, leaf-spring miter bar, and micro-adjustable flip stop.

180 Angle LOCK Indexing Stops with 1-Degree Step Spacing and Special Stops at ±22-1/2-Degree
Frequently Asked Questions
Can I Retrofit My Current Gauge With Aftermarket Parts?
Yes — I can retrofit my current gauge if it has retrofit compatibility; I’ll check slot size and mounting, use shim adjustments for perfect fit, and swap fences, stops, or detents to gain precision and repeatability.
How Do I Transport and Store a Precision Miter Gauge Safely?
I’d whisper that pampering helps: I carry my gauge in a padded case, store it in climate controlled spots or on vertical racks, and treat metal with anti corrosion measures so it’s always ready and dignified.
Will a Better Gauge Fit All Table Saws and Miter Slots?
No — I can’t promise universal compatibility: gauges follow different slot standards and widths. I check my saw’s miter slot size and profile, then choose adapters or specific models to guarantee a proper, snug fit.
Do Upgraded Gauges Affect Blade Alignment or Arbor Height?
Like a tuned instrument, I’ll say yes and no: upgraded gauges don’t directly change blade alignment or arbor height, but their precise fences expose misalignment and demand correct arbor height setup for repeatable, accurate cuts.
Are Specialized Jigs Needed for Nonstandard Mouldings?
No, you usually don’t need specialized jigs; I use custom templates and flexible clamps to cradle odd profiles, letting my upgraded miter gauge hold consistent angles and repeatable cuts without fabricating complex, dedicated fixtures.