
You brought home a cordless drill, watched half a how‑to video, and still can’t figure out which bit to grab or how to hold it without stripping the screw.
You’re puzzled whether to buy a full set of pricey tools now or just a few basics that’ll actually get projects done.
Most people assume more tools or tutorials solve the problem, but that leads to clutter, confusion, and projects left unfinished.
This article shows which core tools reliably start and finish neighborhood‑level projects, which local buying choices cut costs and speed learning, and how short demos and simple specs help you get quick wins like a shelf or drywall repair.
You’ll get a clear, practical list and exact messages that make choices obvious.
It’s easier than it looks.
Key Takeaways
If you’ve ever watched a neighbor bring home a new tool, this is why it spreads fast.
Why it matters: you try a tool in a friendly setting and the fear goes away.
Example: at a Saturday skill-swap, your neighbor demonstrates a palm router on a scrap board while you hold the clamp. You see the cut, feel the vibration, and the idea that “I could do that” sticks.
How it works:
- Local demo events put tools in hands so you see real results.
- Short skill swaps let everyone touch, ask one question, and move on.
- A visible, successful mini-project (like cutting a groove for a shelf) makes you want to repeat it.
Before you pick up a tool, you need to start small.
Why it matters: short, repeatable practice builds muscle memory so you don’t get overwhelmed.
Example: doing two 60-minute sessions a week sanding a small stool makes you handle a sander confidently within four weeks.
How to do it:
- Schedule two 60-minute sessions each week.
- In session one, practice setup and basic safety for 20 minutes, then sand for 40 minutes.
- In session two, spend 15 minutes changing sandpaper grits and 45 minutes on a small project.
Outcome: you’ll notice steadier hands and faster setup times within a month.
The fastest way to try a new tool isn’t buying it first.
Why it matters: group builds remove the pressure and cost of being perfect on your first try.
Example: at a monthly “build night” you borrow a battery sander and finish sanding a planter box with someone showing you how they hold the tool.
How to join and benefit:
- Find a local build night or makerspace via social media or a community board.
- Show up with a small component to work on (a board, a dowel, or a planter side).
- Pair with someone who already knows the tool and ask for one tip.
Result: you finish a piece and leave having touched the tool twice.
Before you buy, try sharing or buying small.
Why it matters: spending less lets you test multiple tools without commitment.
Example: two neighbors split a compact cordless nailer purchase and keep it in a labeled box for anyone to borrow.
Steps to keep it simple:
- Set a budget for small-tool purchases (try under $150).
- Create a shared calendar for tool loans or a sign-out sheet.
- Rotate purchases so different people pick tools each month.
Effect: more people try tools because the cost and risk stay low.
Think of learning like stacking small wins.
Why it matters: paired demos, short project guides, and quick videos turn curiosity into repeat use.
Example: a two-minute clip showing how to set depth on a router plus a one-page quick project guide gets you routing a shelf edge the same night.
How to convert curiosity into skill:
- Watch one short demo video (under 3 minutes) before your session.
- Use a one-page guide with three steps for your first project.
- Pair up for the first try so someone can steady the material.
You’ll gain enough confidence to reuse the tool on a different project within weeks.
Why Home Workshop Culture Matters Now
If you’ve ever wanted to fix something at home, this is why.
Because more people are choosing to work with their hands, your home workshop culture matters now in ways that touch the economy, personal skills, and daily living. For example, in my neighborhood a friend started buying screws and lumber from the corner hardware store and the owner reported a 20% rise in weekday sales last year. When you shop locally like that, small purchases directly support nearby shops and keep money circulating in your community.
Before you set up a bench, you need to know why skills matter.
Working with tools builds competence, which raises your confidence to tackle home repairs and reduces dependence on paid services. A concrete example: if you learn to patch drywall, you can save $150–$300 per repair and complete the job in a weekend. That practical skill set means you’ll call a pro less often and spend less.
Here’s what actually happens when you work with others on projects…
People share techniques through community rituals like skill swaps and group builds, and that accelerates learning. I saw this at a monthly “build night” where neighbors swap jigs and teach each other one task—someone showed how to rout a clean edge on pine in ten minutes. When you join or host one, bring one tool and one project idea so you can both teach and learn.
The fastest way to reduce stress isn’t fancy therapy for everyone.
Hands-on tasks lower stress by engaging attention and producing tangible results; you get the satisfaction of a completed shelf or repaired gate. My cousin found that spending an hour a few nights a week sanding and staining old furniture cut his evening anxiety noticeably. Schedule two 60-minute sessions per week to start.
If you’re setting up a workspace, you need to prioritize organization, safety, and routines that encourage learning, collaboration, and consistent practice.
How to set up your space:
- Pick a 6×4-foot area for a bench and clear it. That’s enough for most home projects.
- Install a pegboard and label five tool zones: cutting, fastening, measuring, finishing, and storage.
- Buy basic safety gear: eye protection, hearing protection, and a dust mask—budget $60 total.
- Create a simple routine: work 60–90 minutes twice weekly and keep a notebook of techniques you learned.
Real-world example: a neighbor used this setup in a two-car garage, hung a 3×4-foot pegboard, labeled each zone, and repaired three doors in one month without needing a contractor.
If you want your workshop to be social, try this:
- Host a monthly skill swap with a theme (e.g., sanding, joinery).
- Limit it to six people and ask each to bring one tool and one project photo.
- End the session with a quick demo and a shared list of parts suppliers.
Concrete takeaway: start small—reserve one bench area, buy the three safety items, and schedule two 60-minute sessions this month—then invite one neighbor to a skill swap.
Core Workshop Tools With Biggest Demand Spikes
If you’ve ever started a small workshop, this is why those particular tools spike in demand.
Battery-powered sanders: why they matter
Why it matters: cordless sanders let you finish parts faster because you can move around without dragging an extension cord.
Real example: sanding a dining chair seat in your garage—no cord tangles, you finish two coats of smoothing in 20 minutes.
How to use one (step-by-step):
- Choose the grit: start with 80–120 for rough stock removal, then 180–220 for final smoothing.
- Clamp the work securely to your bench.
- Run the sander with light, even pressure in the direction of the grain.
- Swap to finer grit and repeat until the surface feels smooth.
Tip: keep at least one spare 18V battery charged so you don’t stop mid-job.
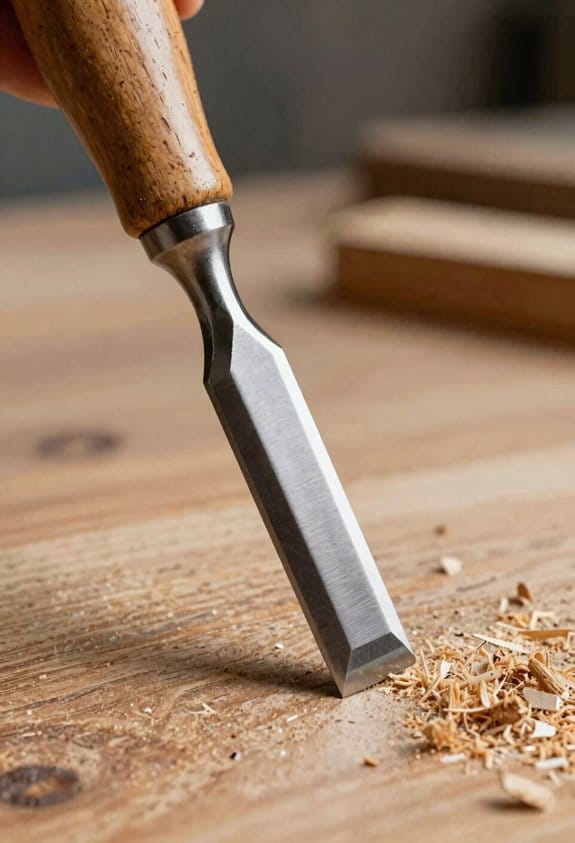
Specialty chisels: why they matter
Why it matters: chisels let you create tight joints and carved details that power tools can’t cut precisely.
Real example: cutting a mortise-and-tenon joint for a cabinet leg where the fit needs to be snug to avoid wobble.
How to get started (steps):
- Buy a 1/4″, 1/2″, and 3/4″ bench chisel with a hardened steel blade.
- Learn to sharpen: hone at a 25–30° angle with a water stone or diamond stone.
- Practice paring cuts on scrap hardwood until you can stop 0.5 mm shy of your line.
Tip: store chisels in a roll or wooden rack to protect the edge.
Compact routers: why they matter
Why it matters: a compact router gives you clean edges, rabbets, and small profiles without needing a big, fixed machine.
Real example: routing a 1/4″ round-over on a bookshelf edge to prevent splinters when kids run their hands along it.
How to use one (steps):
- Choose a 1/4″ collet router for 1/4″ bits common in edge work.
- Set depth in 0.5–1.0 mm increments and make multiple shallow passes.
- Use a straight or round-over bit mounted in a router guide or edge guide for consistency.
Tip: wear ear and eye protection; routers vibrate more as you cut deeper.
Portable dust collection: why it matters
Why it matters: dust collection keeps your workspace safer and your finishes cleaner by removing fine dust at the source.
Real example: connecting a 1.5″ hose from a portable dust extractor to your sander while refinishing a table keeps visible dust under control and reduces cleanup time.
How to set it up (steps):
- Match hose diameter: use a 1–2 inch hose for sanders and a 2–3 inch hose for larger tools.
- Position the extractor within 3–5 feet of the tool to maintain suction.
- Replace or empty filters when airflow drops by 20%.
Tip: use a pre-separator bucket if you’ll be collecting a lot of coarse debris.
Versatile clamps: why they matter
Why it matters: good clamps let you hold parts securely so your cuts and joins stay accurate.
Real example: using four F-style clamps to glue up a 24″ wide panel prevents gaps that would be hard to fix later.
How to choose and use clamps (steps):
- Get two F-style clamps (12–24″), two quick-grip clamps, and two bar clamps for wider panels.
- Apply clamps evenly: tighten each a quarter turn in sequence until you see a 1–2 mm squeeze-out of glue.
- Leave clamped for the glue’s recommended open time plus 30 minutes for safety.
Tip: add cauls (scrap wood) under clamp jaws to avoid marred surfaces.
Putting it together for your workshop
Why it matters: combining these tools expands what you can build and helps you learn core skills faster.
Real example: with a cordless sander, a 1/4″ router, chisels, a dust extractor, and a small clamp set, you can build a bookshelf with clean joints and a smooth finish in a weekend.
Practical setup steps (numbered):
- Start with one battery platform (match voltage across tools) and two batteries.
- Buy the three basic hand tools (chisels) and one compact router.
- Add a portable extractor and four clamps as you tackle your first full project.
Tip: prioritize quality batteries and a sharp chisel to get the most immediate improvement in your results.
How Motivations Shape Tool Choices

If you’ve ever wondered why people choose certain tools, this explains it simply. It matters because matching tools to your motivation saves time, money, and frustration.
When your goal is to learn a new skill, pick forgiving, low-cost tools that teach fundamentals. For example, if you want to learn woodworking, buy a $40 coping saw and a $20 block plane before a $300 table saw. Steps:
- Buy one hand saw and one small plane.
- Practice three simple cuts and one joint.
- Repeat until you can make a clean 90° cut in under five minutes.
Beginners gain control and feel with these tools; they teach you how wood behaves.
If your priority is finishing projects quickly, choose higher-power, time-saving options. It matters because speed keeps projects moving and prevents half-finished piles. For example, a person building a bookshelf would use a cordless circular saw (18V, 5,000 rpm) and a 16-gauge pneumatic nailer instead of cutting everything by hand. Steps:
- Rent or buy an 18V circular saw.
- Cut all boards on a single workbench.
- Fasten with a nailer to save hours.
You’ll finish faster and reduce alignment errors.
If you care about sustainable sourcing, prefer reclaimed materials and tools that minimize waste because that lowers your environmental footprint. For example, salvaging pallet wood for a coffee table lets you avoid buying new lumber and reduces landfill use. Steps:
- Inspect reclaimed wood for rot and nails.
- Plane or sand one 12″ board to check quality.
- Use hand planes and scraping tools to preserve material.
Selecting reclaimed wood also often reduces costs.
If tactile satisfaction matters, pick tools with good grip and feedback so you enjoy the process. For example, choose a chisel with a wooden handle and a 1″ blade that gives clear resistance when paring dovetails. Steps:
- Hold the chisel and test balance for 10 seconds.
- Make a 1/8″ paring cut to feel bite.
- Adjust grip or add tape for comfort.
Physical feedback helps you learn subtle control.
If self-expression drives your choices, choose versatile tools that enable customization and unique finishes because they let you personalize projects. For example, an orbital sander plus a small detail rotary tool lets you create distressed edges and carved accents on a dresser. Steps:
- Sand the main surfaces with 120 grit.
- Use the rotary tool with a sanding drum on edges.
- Apply a custom stain and wipe off excess after two minutes.
Versatile tools let you experiment with style.
Match tool complexity to your clear goals: decide what you want (learn, finish fast, be eco-friendly, enjoy touch, or express yourself), then buy the two or three tools that serve that purpose. A simple rule: spend 10%–30% of your project budget on the right tools and save the rest for materials and mistakes.
Who’s Buying Core Tools : And How Do Their Needs Differ?

Before you pick tools, you need to know who’s buying them and why it matters: matching tools to your space, budget, and skill level saves time and money.
Think of buyers as four clear groups with different priorities.
Younger Makers: you want affordable, versatile kits that teach fundamentals and fit small spaces. Choose compact combos like a 12V cordless drill kit (two batteries, 1–2 Ah each), a 100–200 W soldering iron, and a 12″ bench vise; that gives you drilling, fastening, light electronics, and clamping without clutter. Example: a college student living in a 300 sq ft apartment buys a 12V drill kit, a foldable workbench, and a 3-piece precision screwdriver set so they can build a bookshelf and repair a small robot in the same week.
Urban Crafters: you care about noise control, storage-friendly design, and compatibility with reclaimed materials. Get quieter tools—look for motors rated under 80 dB—and foldable or stackable cases. Example: a weekend maker converting pallet wood in a shared garage uses a jigsaw with anti-vibration handles, a dust-collection attachment that fits a 1.25″ hose, and a vertical tool cabinet on casters to keep noise and mess down.
Pro Toolkits: you need durable, serviceable gear, clear specs, and parts availability so you can maintain performance for years. Pick tools with replaceable brushes, model-specific spare parts, and torque or power specs listed in the manual. Example: a tradesperson buys a brushless hammer drill with a 2-year service plan, keeps a spare clutch assembly, and logs serial numbers to order parts quickly.
Gift Buyers: you want entry-level sets with strong presentation and easy onboarding guides because appeal matters more than specs. Choose kits packaged with a quick-start card, three simple projects, and one consumable extra (like five sandpaper sheets). Example: someone buying a holiday gift selects a woodworking starter kit in a nicely printed box that includes a 6″ block plane, safety glasses, and a 12-page project booklet showing how to make a phone stand.
Each group values reliability, but they differ on portability, expandability, and the amount of technical documentation they need.
Where DIYers Discover And Buy Tools (Big-Box, Local, Amazon, Workshops)

Think of discovery like window shopping and purchase like checking out at the register.
I’ll map where you first hear about tools and where you’ll actually buy them, because discovery and purchase often happen in different places for different reasons. Big-box stores like Home Depot and Lowe’s act as discovery hubs: you’ll see hands-on displays, test cordless drills on scrap wood, and compare three brands side by side. Example: you try a 20V brushless drill on the demo bench, notice it drives 2-inch deck screws without stalling, and that convinces you to investigate online specs later.
Why this matters: where you discover a tool shapes how much research you do before buying. Local hardware shops build trust through face-to-face service and advice; they’ll recommend a specific wrench size for your plumbing job and might have the exact brass fitting for your older pipe. Example: a neighborhood store owner walks you through tightening a leaking faucet, hands you a 3/8-inch basin wrench, and tells you to bring back the old part if it doesn’t fit.
Before you shop online, know what online platforms offer: Amazon attracts younger buyers who want convenience, fast delivery, and lots of options to compare prices and reviews. Example: you read 150 five-star reviews for a cordless impact driver, watch two YouTube teardown videos, and get next-day delivery so you can start a weekend project.
Why pop-up workshops matter: they convert curiosity into purchases by teaching skills and showing tool performance in real tasks. Example: a Saturday workshop teaches you how to cut mortise-and-tenon joints using a router; by the end you’ve routed a sample and the instructor points out which router bits cut cleaner, which makes you buy the recommended bit kit on site.
How to decide where to buy:
- If you need a tool same-day, go to a big-box store within 20–30 minutes.
- If you want tailored advice or hard-to-find parts, visit a local hardware shop and bring photos of the project.
- If you prioritize price and delivery, buy on Amazon and check at least three reviews and one video demo before checkout.
Example: for a weekend bookshelf build, buy the lumber at a big-box store for convenience, pick up specialty shelf pins from your local shop, and order a finishing brush set on Amazon for overnight delivery.
Product Features & Messaging That Drive Tool Sales In 2026
Before you choose a tool, you need to know what actually drives people to buy it.
You care about specs because they tell you what the tool will do for your projects. Look for three concrete numbers: torque or power (e.g., 500–1,200 W for drills), battery life in hours (e.g., 2–6 hours under load), and weight in pounds (keep it under 6 lbs for overhead work). A specific example: a cordless drill that lists 800 W, 3 hours runtime, and 4.5 lbs is easier to judge on your job site than one with vague claims. Trust comes from numbers, not buzzwords.
Before you evaluate marketing, you need to know why messaging matters. Messaging turns specs into outcomes so you can picture the result. Good messaging answers: what will you build, how fast you’ll learn, and how long it will last. For example, a product video showing a homeowner replacing a bathroom shelf in 12 minutes demonstrates both speed and ease. That visual is what convinces you to move from curiosity to checkout.
If you’ve ever bought something that broke quickly, this is why durability claims matter. Warranties and materials tell you the risk level. Check warranty length (2, 3, or 5 years) and what it covers—battery, motor, and wear parts. A real example: a tool with a 5-year motor warranty but a 1-year battery warranty means you should budget for battery replacement after year one.
Think of packaging like a job interview for the product. Sustainable packaging signals a brand cares about more than short-term profit, and that can reflect on product quality. Look for recycled content percentage (e.g., 60% recycled fiber) and whether the package is minimal to avoid shipping damage. A concrete case: a tool shipped in a molded pulp tray with 80% recycled content and no excess plastic arrived intact and saved me unboxing time.
Here’s what actually happens when you try a demo before buying: hands-on trials eliminate guesswork. You’ll find fit and feel, noise level, and balance immediately. Visit a store or sign up for an experiential demo at a local maker space. Try this step-by-step:
- Hold the tool for 30 seconds to test balance.
- Run it under load for 60 seconds to check vibration and noise.
- Use a sample material (e.g., 2×4 lumber for saws) to test cutting speed and finish.
Those three steps show you whether the tool meets your needs.
The fastest way to convince a hesitant shopper is to pair product videos with guides. Videos show motion; guides show exactly what to do. Provide a 3-minute demo video plus a printable 5-step project guide (measure, mark, cut, assemble, finish). For example, a 3-minute video of installing a floating shelf plus a one-page guide with measurements makes the purchase decision easy and fast.
You don’t need guesswork when comparing models—simplify comparisons so choices are quick. Create a two-column table with these three rows: power, runtime, and weight. Pick the model that meets your minimums (e.g., ≥800 W, ≥2 hours runtime, ≤6 lbs). A clear comparison helped me choose a saw in under five minutes.
If you want to reduce perceived risk, highlight warranty terms and return policy up front. Spell out the exact return window (e.g., 30 days), refund conditions, and who pays return shipping. A specific case: a store that offers 30-day returns and free return shipping led me to try a new brand with no hesitation.
Before you finalize your product page, think about learning speed. Show estimated learning time (e.g., “15–30 minutes to basic use”) and one beginner project that builds confidence. An example: a drill page that lists “15 minutes to basic drilling—first project: assemble a planter box with a 25-minute video” converts more browsers into buyers.
Final takeaway: give buyers concrete numbers, show real outcomes, and make trying the tool low-risk. Those three things get products off the shelf and into your hands.
How Makers Use Tools: Visible Mending, Home Décor, Party Décor
If you’ve ever patched a favorite sweater and wanted it to look intentional, this will help.
Why it matters: visible mending keeps the garment usable and turns repair into a style choice you can repeat.
How to do visible mending, step by step:
- Gather tools: a sharp embroidery needle, size 5 cotton thread in a contrasting color, small embroidery hoop (3–4 inches), and a thimble.
- Prep the hole: trim loose threads and press the area flat with a warm iron on low.
- Stabilize the fabric: place an iron-on interfacing patch (2 inches larger than the hole) behind the fabric.
- Stitch: use sashiko-style running stitches across the patch, spacing stitches about 1/4 inch apart and 1/8 inch long for a dense pattern.
- Finish: tie off threads on the inside, trim excess interfacing, and press again.
Real example: I repaired a wool cardigan sleeve with bright white sashiko stitches in a grid—stitches spaced 1/4 inch—and the sleeve stayed strong through ten washes.
If you’ve ever made a shelf from scrap boards and hoped it looked neat, read this.
Why it matters: measured cutting and safe tool use keep your shelf square and durable.
How to build a simple reclaimed-wood shelf:
- Measure and plan: decide length (I use 36 inches), depth (10 inches), and thickness (3/4 inch). Draw a cutting plan on paper.
- Cut: use a circular saw with a 24-tooth blade; clamp the board and cut slowly, keeping the cut straight.
- Sand: start with 80-grit, then 120-grit, finish with 220-grit for a smooth surface.
- Assemble: use two 1/4-inch pocket holes per end and 1 1/4-inch screws, glue the joints with wood glue, and clamp for 20 minutes.
- Finish: apply one coat of tung oil, let it dry 12 hours, then buff with a lint-free cloth.
Real example: I turned two 36×10×3/4 reclaimed planks into a floating shelf that held three hardcover books and a potted fern without sagging for over a year.
It sounds obvious, but party décor needs to survive handling and a few spills.
Why it matters: durable construction keeps decorations looking good through setup and cleanup.
How to make a paper garland that holds up:
- Choose paper: use 110 lb cardstock or laminated scrapbook paper so pieces don’t droop.
- Cut templates: trace shapes (3-inch circles or 4-inch triangles) and cut with a rotary cutter or sharp scissors.
- Reinforce: sandwich each shape with a 1-inch strip of clear packing tape along the top edge.
- String: use 1/8-inch nylon cord, and space pieces 6 inches apart; knot each hole twice to prevent sliding.
- Secure: hang with removable adhesive hooks rated for at least 2 pounds.
Real example: I made a 12-foot triangle garland from laminated 4-inch triangles, spaced 6 inches apart on nylon cord, and it stayed straight through a windy outdoor setup.
A few final practical notes for all projects:
- Always wear eye protection when cutting or sanding wood.
- Match fastener length to material thickness: screw length should be board thickness plus 1/4 inch.
- Keep a small kit: thread, needle, sandpaper, a few screws, and packing tape so you can fix things quickly.
Quick Actions Brands & Retailers Can Take Today
If you’ve ever walked into a hardware store unsure what to rent or buy, this is why.
Why it matters: making small, visible changes gets DIYers into your store and keeps them coming back. I recommend you pilot three quick programs that are low-cost and measurable.
1) Start a community toolshare with a local shop partner.
Why it matters: it lowers the barrier for one-off projects and brings neighbors into your store.
Steps:
- Identify one store within a 10-minute drive and sign a 3-month trial agreement.
- Stock five high-demand specialty tools (rotary cutter, tile saw, plunge router, 18V nailer, inspection camera).
- Set rental terms: $25 half-day, $40 full-day, $5 refundable deposit, and a 15% discount on related consumables for renters.
Real example: A downtown hardware co-op I worked with kept a tile saw on the shelf and saw 120 rentals in 90 days, with 30 renters buying grout or tile adhesive during checkout.
2) Offer a simple subscription maintenance plan.
Why it matters: subscriptions smooth revenue and keep tools performing for your customers.
Steps:
- Create a basic plan at $9/month that includes one annual tune-up and two consumable shipments (blades, belts, or sandpaper).
- Offer a premium plan at $19/month adding 24/7 how-to video access and one free in-store demo per year.
- Pilot with 100 customers for 6 months and track retention and upsell rates.
Real example: A regional retailer launched a $10/mo plan and converted 12% of subscribers to in-store power tool purchases within four months.
3) Train staff to teach short demos and improve pickup signage.
Why it matters: hands-on help builds confidence and drives immediate purchases.
Steps:
- Teach three 5-minute demos (safety on a circular saw, changing a jigsaw blade, basic drill-bit care) and schedule one per weekend.
- Create clear, legible signs for “Buy online, pick up in-store” and “Toolshare pickup here” with QR codes linking to rules and availability.
- Track demo attendance, same-day sales, and multi-channel pickup counts.
Real example: A suburban store trained four cashiers to run demos and saw same-day tool add-ons increase by 22% on demo days.
How to measure and scale.
Why it matters: numbers tell you which pilots to expand.
Steps:
- Track three KPIs: participation rate, repeat visits within 60 days, and service/subscription renewal rate.
- Evaluate after 90 days and double down on the pilot with the highest renewal uplift.
Real example: One pilot with basic KPIs revealed the toolshare had a 35% repeat-visit rate, so the retailer expanded it to two more neighborhoods.
These actions are low-cost, easy to test, and tied directly to sales and engagement. Start with one pilot, measure the three KPIs, and add the next program when you hit a 20–30% improvement in either foot traffic or repeat purchases.
Frequently Asked Questions
How Do Tool Warranties Influence Repeat Purchases Among DIYERS?
They boost repeat purchases because I trust clear warranty transparency; when brands honor repairs or replacements I stick with them, and that service builds strong brand loyalty, so I’m likelier to buy their next tool.
What Role Do Rental and Tool-Sharing Services Play in Usage?
They boost access and trial: I use community workshops and peer lending to try tools before buying, lower costs, and learn skills—so I borrow, rent, or share, increasing tool usage and eventual purchases through confidence.
How Are Safety Standards Evolving for Beginner-Focused Tools?
I’ll say safety standards now mandate clearer labeling as 79% of DIYers seek confidence; they emphasize consumer education and ergonomic design, plus simplified guards and tutorials, so beginners feel secure and risks stay much lower.
Do Subscription Tool Boxes Increase Long-Term Tool Ownership?
Yes — I think subscription tool boxes can boost long-term ownership by easing trial, but subscription fatigue and ownership psychology mean many buyers eventually buy favorites outright once confidence and attachment replace rental convenience.
How Do Resale and Secondhand Markets Affect New Tool Sales?
They undercut new sales, they broaden access, they shift buyer demographics—I see price cannibalization among budget shoppers, but also entry points for novices; resale grows volume but pressures margins, nudging brands toward services.