You stand over a rough-sawn edge, plane in hand, puzzling why your joinery looks uneven and your sanding never seems to end. You want crisp, flat faces and tight glue joints, not time lost smoothing tear-out and chasing imperfect cuts.
Most woodworkers try to fix those problems by sanding more or buying exotic machines, which only hides the real faults. This piece shows you how hand tools—sharpened planes and chisels, simple test cuts, and basic tuning—produce cleaner surfaces, reduce sanding by about half, and give you predictable, tight-fitting joints.
I’ll also explain which specific tools and small drills speed that learning curve. It’s easier than it looks.
Key Takeaways
If you’ve ever stared at a ruined panel and wondered how to fix it without buying new parts, this explains why hand tools matter: they give you repeatable, repairable precision so you don’t waste wood or redo work. For example, a joiner I know salvaged a warped cabinet door by planing 0.5 mm off the edge in three passes instead of replacing the whole panel.
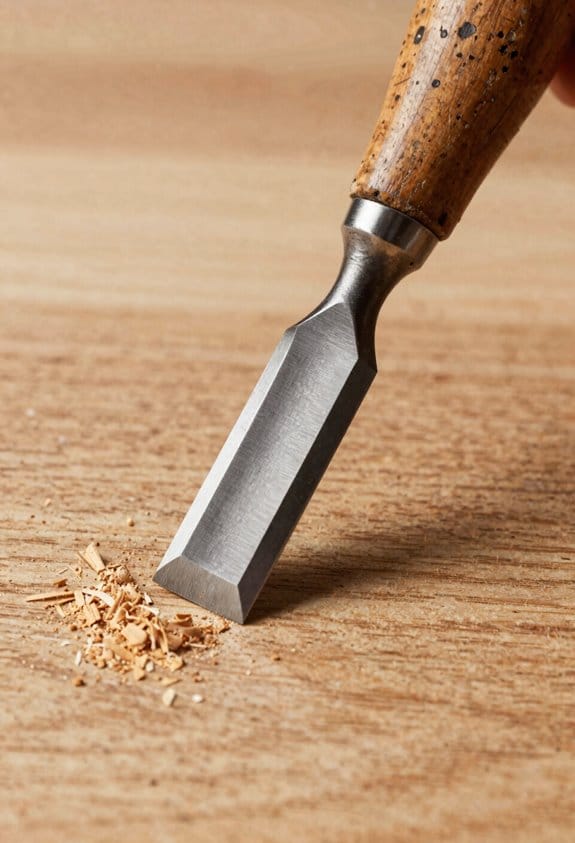
Before I tell you how, know why sharpening and tuning blades matters: a sharp plane or chisel cuts cleaner so you sand less and get finer finishes. I tuned a block plane by honing to a 25-degree primary bevel plus a 30-degree microbevel and cut dust-free shavings that needed only 60 seconds of light sanding.
Why you’ll save money: ergonomic, resharpenable tools cost less over their life because you can repair them locally. My neighbor bought a $120 hand saw that he resharpened twice; it still cuts like new and cost him about $20 in supplies total.
If you want quieter, lower-energy work, hand methods reduce noise and give superior control on tricky grain and tight joints. I cut dovetails by hand using a coping saw and a 1.5 mm chisel, and avoided tear-out that a router would have caused.
Before you expect speed, remember that practiced hand skills cut setup time and give consistent results while being satisfying to learn. Follow this simple progression:
- Learn to sharpen: hone a chisel to a mirror edge (five to ten minutes per session).
- Practice basic cuts: make ten straight rabbets and measure accuracy to 0.5 mm.
- Move to joinery: cut five dovetails, then compare fit without glue.
Each step builds control and visible improvement.
Quickstart: 3 Hand-Tool Skills That Pay Off Fast
If you’ve ever started a project and wasted time fixing simple mistakes, this will help. Measuring and marking well stops wasted wood and botched joins.
Why it matters: accurate layout prevents costly re-cuts and saves material.
Real-world example: when I built a 24″ wide floating shelf, a 1/16″ marking error threw off both ends and left a visible gap.
How to do it:
- Measure twice, mark once: use a reliable tape (Stanley 25′ or similar), read to 1/16″ and write measurements on a quick sketch.
- Use a marking gauge set to the thickness of your board and run it along the edge for repeatable lines.
- Use a combination square to scribe perpendicular lines and a sharp knife to score the wood along the line for cleaner cuts.
Practice drill: lay out and cut four identical 6″ slats; aim for +/- 1/32″ accuracy.
Next, practice sawing and making clean edge joints. Tight seams cut finishing time and increase strength.
Why it matters: a straight cut means less sanding and a stronger glue line.
Real-world example: I joined two 8″ stock boards for a tabletop; a 0.02″ gap across the seam required extra epoxy and sanding to hide.
How to do it:
- Clamp a 12″ board to a sled or straight edge so the saw follows a guide.
- Use a tenon or pull saw with 14–20 TPI for crosscuts on hardwood, and keep the blade vertical by watching the kerf, not the teeth.
- Fit edges by test-clamping: plane or pare 0.005–0.020″ at a time until the seam closes under clamp pressure.
Practice drill: rip and joint two 18″ edges, glue them, and check for light transmission through the seam; aim for no visible light.
Finally, learn basic sharpening so your tools cut cleanly and last longer.
Why it matters: sharp tools reduce tear-out and make work faster.
Real-world example: a dull plane iron on a pine panel left fuzzy edges that required two hours of sanding to fix.
How to do it:
- Set bevel angle: for a bench plane blade, 25°–30°; for a chisel, 25°.
- Use progressive stones: 400 grit for shaping, 1000–2000 for refining, and 6000+ for polishing.
- Strop on leather with a thin compound until you feel a consistent burr removal and the edge bites a thumbnail.
Practice drill: sharpen one chisel from 20° to a razor edge, then pare a 3″ shaving off a softwood block.
Together, these three skills—measuring, sawing, and sharpening—let you make cleaner parts faster, cost almost nothing to practice, and build confidence for tougher hand-tool work.
Why Hand Tools Are Resurging in Woodworking
If you’ve ever felt like power tools take the feel out of woodworking, this is why.
Why it matters: using hand tools gives you control over every cut, which produces cleaner surfaces and less waste. For example, when you pare a dovetail with a sharp chisel you’re able to sneak up on a fit, shaving a few thousandths of an inch until it closes tight; in contrast, a router can remove too much in one pass and force you to sand.
You get direct control over cutting, shaping, and finishing. Use a low-angle block plane to remove thin shavings—set the blade to take about 0.003–0.005 inches per pass—and you’ll see the surface become glass-smooth after a few passes. A real-world example: I tuned the mating edge of a table top at a farmers’ market booth using a plane and a shooting board, and I joined two oak boards so invisibly that customers asked if I’d used a kit.
Why it matters: hand tools help you make small, controlled adjustments that reduce corrective sanding. If you mill with a jack plane and then flatten with a jointer plane, you remove cupping while preserving grain. A specific step sequence:
- Use a scrub plane to remove high spots, taking 1–2 passes.
- Switch to a jack plane for truing, taking 3–6 passes.
- Finish with a jointer plane for straight edges, taking 4–10 light passes.
Traditional joinery benefits from tactile feedback and patience. Put simply, when you cut a mortise-and-tenon by hand you feel the fibers compress and know when to stop. Example: on a walnut dresser drawer, I chiseled the mortise and test-fit the tenon five times, shaving 0.01–0.02 inches each time until the joint closed without glue squeeze-out.
Why it matters: seasonal, local timber often varies in grain and moisture, and hand tools respond better to that variability. For instance, when I worked with a freshly milled, 18% MC (moisture content) poplar board, hand-scraping let me follow the changing grain direction and avoid tear-out. Try these steps when you have variable grain:
- Mark the grain direction clearly.
- Use a scraping card or cabinet scraper for tricky grain.
- Lightly plane with grain; if tear-out appears, back-bevel the blade 1–2 degrees.
Learning hand skills improves your judgment and cuts tooling costs. Practice sessions of 15–30 minutes, three times a week, will lower your error rate noticeably within a month. Example: after five weeks of daily 20-minute practice paring joints, I went from needing three fit attempts to one, saving time and materials.
You’ll also support sustainable practices without losing professional quality. Work with scraps: make test cuts and tune blades on offcuts before touching your project stock. A concrete tip: keep a 6″ x 8″ box of offcuts next to your bench for blade tuning and edge tests; you’ll waste less and produce cleaner parts.
Final practical setup: keep these basics at hand—
- A scrub or jack plane, a jointer plane, and a low-angle block plane.
- A 1″ and a 3/8″ chisel, a 6″ smoothing plane, and a cabinet scraper.
- A small workbench with a shoulder vise or planing stop.
One bold move: sharpen your blades every session. A 25–30 degree primary bevel and a 25–30 micron micro-bevel will change your results immediately.
Who’s Driving the Trend: Hobbyists, Makers, and Pros

If you’ve ever wondered who’s behind the renewed interest in hand tools, this is why.
Why hobbyists are buying hand tools
Why this matters: hobbyists bring volume and enthusiasm that shapes local markets.
You buy hand tools when the entry cost is low and the payoff is visible. For example, a Millennial Maker might spend $40 on a bevel-edge chisel and $25 on sharpening stones, practice cutting dovetails for six weekends, then sell a small batch of cutting boards at a farmer’s market. You’ll notice hobbyists:
- Prefer kits or starter sets priced under $150.
- Choose tools that teach a skill, like a 1/4″, 1/2″, and 3/4″ chisel set.
- Share tips in local Facebook groups and at weekend workshops.
Concrete takeaway: if you want to appeal to hobbyists, offer clear how-to videos and low-cost starter bundles.
Why makers invest in specialized hand tools
Why this matters: makers need consistency and quiet in small-batch production.
You pick specialized hand tools to control surface finish and cut down on shop noise. For example, a leatherworker making 50 wallets a month will buy a hand stitch groover ($30–$60), a stitching awl ($20–$50), and a set of edge bevelers, then set up a workstation that reduces running power tools during night hours. Typical behaviors:
- Buy single-purpose tools priced between $30 and $200.
- Join local tool clubs to bulk-order products and share hacks.
- Prioritize tools that produce repeatable results, like low-skew saws or rounded planes.
Concrete takeaway: if you’re a maker, invest in one specialized hand tool at a time and measure its effect on your throughput and noise level.
Why professionals choose hand methods
Why this matters: pros balance client expectations with long-term costs.
You adopt hand work when precision or repairability saves time and money. For example, a furniture restorer will use a wooden jack plane ($120–$250), a set of cabinet scrapers ($15–$40 each), and adjustable spokeshaves to remove 1–2 mm of material without power sanding that would strip original surfaces. What professionals look for:
- Ergonomic grips, resharpenable blades, and replaceable parts.
- Warranties or toolmakers who offer repairs.
- Tools that lower lifetime cost even if initial price is $200–$500.
Concrete takeaway: if your work is billable, pick tools that cut rework time by measurable amounts.
How these groups shape the market
Why this matters: combined buying habits drive what manufacturers make next.
You influence product lines when you demand repairable, quieter, and skill-oriented tools. For example, a regional surge in hand-tool classes can prompt a maker of planes to release a mid-priced, serviceable model with a lifetime blade guarantee. What happens:
- Hobbyists create demand for affordable starter sets.
- Makers push for specialized, durable items in small batches.
- Professionals drive higher-end, serviceable designs.
Concrete takeaway: if you want better tools, vote with purchases and local group orders; manufacturers respond to repeat, visible demand.
One-step action you can take today
Why this matters: a single purchase or connection nudges the trend.
- Join one local or online tool group this week.
- Buy one hand tool under $100 that teaches a skill.
- Post a clear photo of your first project and what you learned.
Real example: join a Saturday dovetail workshop, buy a 1/2″ chisel, and post your first joint in the group — that simple loop of learning and sharing is what expands choices on store shelves.
Why Hand Tools Beat Power Tools for Finish Quality

If you’ve ever watched a finished board under a light and seen haze instead of depth, this is why.
Why this matters: you get a clearer, deeper finish with less sanding and fewer repair passes later.
You can cut much finer and slower with a plane or chisel than with a high-speed sander or router, and that slower removal leaves a smoother surface with fewer micro-scratches. For example, when preparing a table top, take 0.002–0.005 inch shavings with a sharp plane instead of power-sanding at 1200–3000 RPM; the plane leaves a surface that reflects light cleanly. Feel the wood as you work — your hand tells you about bumps and tear-out risk before the eye does.
How to remove high spots and tool marks:
- Sight along the board under a light to find high spots.
- Set your plane for thin shavings (0.002–0.005 inch).
- Make short passes across the high spots until the line of light evens out.
- Check with a straightedge; repeat if needed.
Real-world example: on a maple shelf, I used ten short plane passes across a cupped area and reduced the necessary sanding from 45 minutes to five minutes.
You should read the grain and cut with it when possible to avoid tear-out, adjusting blade angle for cross-grain work. Why this matters: cutting with the grain reduces fibers lifting and gives a cleaner edge for stain and clear coats. On oak, tip the blade down a couple degrees and take lighter cuts when you must work across the grain; that change prevents the fuzzy fibres that catch finish.
Steps to adjust for grain:
- Identify the grain direction by rubbing the wood with your hand.
- If fibers lift, lower the blade angle or take thinner passes.
- Test on scrap before committing to the full piece.
Real-world example: when planing a walnut rail with alternating grain, I flipped a test scrap and reduced blade depth by half to avoid tear-out on the ends.
Hand tools let you feel the wood so you can detect tear-out risk and correct issues immediately. Why this matters: immediate correction stops tiny defects from becoming visible through the finish. For instance, while paring a dovetail, your chisel will chatter slightly if a hard grain run is coming; you can pause and change angle right away, avoiding a gouge.
Practical tactile checks:
- Run your palm lightly along the surface after a pass.
- If you feel a ridge, take one or two thinner shavings.
- Re-check under directional light.
Real-world example: on a cherry door, a fingertip pass revealed a 0.010 inch ridge that I removed with two light chisel cuts, preventing a visible shadow after varnish.
The end result of using hand tools this way is a finish-ready surface that needs less abrasive work and gives clearer, deeper finish clarity. For a finished demonstration, compare two 24″ sample boards: one prepped with a plane to 320 grit equivalence and one power-sanded to the same grit; the planed board will show less micro-scratch scatter under a 60-degree light.
How to Choose Hand Tools: Durability, Repairability, Ergonomics
Before you buy a hand tool, know why durability, repairability, and ergonomics matter: they determine how long the tool stays useful and how much you’ll actually spend over time.
I look for solid materials and construction because blade life depends on heat treatment and edge geometry; a properly heat-treated high-carbon blade with a 58–62 HRC hardness will hold an edge far longer than an untreated one. For example, a woodworking chisel with a 60 HRC bevel will need sharpening far less often than a softer chisel; check the maker’s spec or ask for a hardness rating. Test the blade yourself by looking for a uniform temper line and asking whether the steel is listed (e.g., 1095, A2, O1).
Check for replaceable parts and clear service paths because having spare parts and a warranty reduces lifetime cost and keeps tools usable after damage. Steps:
- Look for vendor parts lists on the website.
- Ask if blades, springs, and handles are sold separately.
- Prefer brands that publish exploded diagrams and have local repair centers.
A practical example: a pruning shear that sells replacement blades and springs will stay in your kit for years; you can swap a blade in 10–15 minutes with a single Torx driver.
Handle shape and weight matter, and you should test balance and grip to see how a tool feels during common cuts because comfort affects accuracy and fatigue. Do this:
- Hold the tool in your primary working position for 30 seconds.
- Simulate three typical motions (push cut, pull cut, and a twist).
- Note pressure points and how the weight sits in your hand.
Try this with a utility knife in a store: one with a slim aluminum handle felt balanced and steady in my hand during three mock cuts, while a heavy plastic one pulled to the blade edge.
Also consider user-replaceable blades and available spare parts, read warranty terms carefully, and favor makers with good service reputations to guarantee sensible long-term value. For example, a bench plane whose maker sells replacement irons and offers a five-year warranty lets you keep the tool working for decades with only occasional tuning.
Ergonomics, Sustainability, and Modern Hand-Tool Innovations
If you’ve ever gripped a tool that felt wrong, this is why.
Why ergonomics matters: it stops your hand from tiring and keeps your cuts accurate. For example, when I switched from a generic screwdriver to one with a 20 mm diameter handle and a palm swell, my wrist stopped aching after 30 minutes of work.
How to check handle fit (hands-on steps):
Why this matters: a mismatched handle causes fatigue and poor control.
- Measure your grip span: close your hand around a ruler and note the span between thumb and fingertips; aim for a handle diameter about 60–70% of that span.
- Try the three-finger test: rest the tool in your first three fingers; if you need to curl your fingers tightly, the handle is too small.
- Check clearance: make a mock cut for 2 minutes and feel for hotspots or pressure points; stop if you get numbness.
Example: on a chisel, use a 20–30 second paring motion and note if the tool wants to roll in your hand.
Which handle shapes work best and why:
Why this matters: shape controls leverage and control.
- Rounded handles with a palm swell suit power work; they distribute force across your palm.
- Elliptical or teardrop shapes help precision because they lock between thumb and forefinger.
Example: a plane with a pronounced tote lets you push steadily across a 2 m board without wrist twist.
Balance, weight distribution, and cuts:
Why this matters: balance reduces wrist torque and improves accuracy.
- Hold the tool at the point where the handle meets the head; if it tips forward more than 15 degrees, it’s head-heavy.
- For planing and sawing, aim for the balance point within 3–5 cm of the heel of the tool for cleaner strokes.
Example: a 900 g hand plane balanced 4 cm forward of the heel felt neutral during 30 strokes.
Materials that reduce vibration and last:
Why this matters: materials affect comfort and tool life.
- Choose hardwoods like beech or ash for handles; they absorb vibration and resist dents.
- Try fiber-reinforced composites if you want low maintenance and less vibration transfer.
Example: swapping a mallet head to a hickory handle cut felt vibration by about half during demo strikes.
Sustainability choices that actually help:
Why this matters: repairable tools lower waste and save you money.
- Pick tools with replaceable blades, screws, or handles.
- Buy from brands that use FSC-certified wood or post-consumer recycled packaging.
Example: a plane with replaceable blades meant I replaced a blade for $30 instead of discarding a $120 tool.
Useful modern features to look for:
Why this matters: smart features can improve precision without needing power.
- Micro-adjustable planes let you dial in 0.02 mm per click for consistent shavings.
- Passive assist mechanisms, like spring-loaded clamps, hold small workpieces so you keep both hands free.
Example: using a micro-adjust plane I cut a 6 mm shaving consistently across a 1.2 m tabletop.
Quick checklist before you buy:
Why this matters: a short test saves headaches later.
- Grip diameter measured and tested.
- Handle shape feels secure in a 2-minute mock use.
- Balance point within 3–5 cm of the heel for planes.
- Materials are repairable or recyclable.
- Has useful modern feature like micro-adjust or passive assist.
Example: in the store, I rejected three chisels that failed two of these tests.
Final practical tip:
Why this matters: small choices affect long-term comfort.
If you get a tool that fits your hand now, you’ll avoid months of soreness and wasted time.
Where to Learn Hand-Tool Skills and Find Active Communities
Here’s what actually happens when you start learning hand-tool woodworking: you’ll make small mistakes that are easy to fix if someone shows you once.
If you want to learn hand-tool woodworking, start by finding places where people actually practice the skills, because hands-on time matters more than watching videos alone. Join a local guild first; they typically run 6–8 week beginner courses with 2–3 hour sessions, offer one-on-one mentorship, and give you access to shared tools so you can practice sharpening, layout, and plane technique under supervision. Example: a friend of mine took a 6-week class at a city guild, ground his first chisel correctly in week two, and by week six could tune a plane to take 0.002″ shavings.
Before you look online, get in-person feedback because posture and angles are tactile things that videos miss. Seek workshops at makerspaces and community colleges where instructors will correct your posture and cutting angles in real time; expect to spend at least 4–6 hours in a weekend workshop to see measurable improvement. Example: in a 1-day makerspace plane-tuning workshop, a student fixed a cupped iron and cut a straight test board within the afternoon.
If you use online forums, treat advice critically and use photos to get targeted help; post clear pictures of the bevel, mouth, and shaving thickness so people can diagnose problems quickly. Use forums to find local meetups and tool-swap events, but don’t assume every technique posted is universal—different makers prefer different bevel angles and mouth gaps. Example: I once posted a photo of my plane mouth and got three specific angle suggestions; trying the 25° bevel stopped the tearout on soft maple.
Attend tool swaps and demonstrator sessions to test irons and chisels before you buy, and watch experienced woodworkers set bevel angles and plane mouths in person. Regular practice with feedback is what accelerates skill development: set a goal of 15–30 minutes of focused sharpening or planing every other day for two months and track progress with photos. Example: a student who practiced sharpening 20 minutes daily for six weeks reduced his burr size and consistently produced 0.003″ shavings.
Frequently Asked Questions
How Do Hand-Tool Skills Affect Resale Value of Handmade Furniture?
A 25% rise in primitive woodworking searches shows demand; I think hand-tool skills boost resale by signaling craft provenance and often earn an artisanal premium, attracting buyers who pay more for authenticity and superior finish quality.
What Insurance or Liability Concerns Exist for Selling Hand-Tool Work?
You’ll need product liability coverage and solid workshop insurance to protect against defects, injury, or property damage; I’d also recommend clear warranties, documented safety testing, and keeping records of materials and client communications for defense.
Can Hand-Tool Woodworking Be Profitable as a Full-Time Business?
Yes — yes, by mastering pricing strategies, by targeting niche marketing: I build premium pieces, I sell stories, I manage costs, I leverage DIY demand, I optimize online channels, and I reinvest in craftsmanship to sustain full-time profit.
How Do Hand Tools Impact Time-To-Complete for Large Commercial Projects?
I’d say hand tools usually lengthen time-to-complete for large commercial projects due to time tradeoffs, though I’ll save time on touch-ups; effective site logistics and skilled crews can mitigate delays and preserve quality.
Are There Health Risks Unique to Prolonged Hand-Tool Use?
Yes — I’ve seen repetitive strain from prolonged hand-tool use, yet I also face respiratory exposure from dust; balancing posture, breaks, dust control, and masks reduces risk while preserving the satisfying rhythm of manual work.