
You reach for a clamp mid-glue-up and pull out a tangled mess of different sizes, some with rusty jaws that won’t close.
You fumble through piles until the wrong clamp bends the workpiece or slips off, wasting time and ruining a joint. Most people assume clamps are too awkward to organize or that any rack will do, so they pile them in a bin or hang heavy clamps on drywall hooks.
This piece shows exactly how to set up labeled racks, hooks, or magnetic strips, mount heavy clamps safely to studs or a plywood backer, and care for soft jaws and silica-packed bins so clamps last.
You’ll finish with a simple, durable system that saves time, prevents damage, and cuts replacement costs.
It’s easier than it looks.
Key Takeaways
If you’ve ever fumbled through a pile of clamps looking for the right one, this is why.
– Organized clamp storage speeds glue-ups and builds because you can grab the right clamp in seconds instead of minutes. Example: hang bar clamps by size on labeled hooks (12″, 24″, 36″) so you grab the 24″ bar clamp for that long tabletop without searching.
Before you set up mounts, know that proper mounting protects your clamps and your workpieces.
– Bolt clamps to plywood backers over studs using 3/8″ bolts and lock washers to avoid wobbly mounts. If you use shelf clips, put felt pads between metal and wood to prevent marred jaws.
Here’s what actually happens when you keep visible inventory.
– Weekly checks cut down on misplaced clamps and surprise shortages because you see gaps and replace clamps before a project. Example: once a week, walk your shop with a checklist and mark any missing C-clamps or quick-grip clamps on a whiteboard.
Think of safety like building a small rack that won’t pull off the wall.
– Use stud-mounted backers and lag screws rated for the load (3/8″ lag screws into studs for heavy pipe clamps) so mounts won’t fail under strain. A rack built from 3/4″ plywood with 1/2″ spacers keeps clamps from rubbing.
The difference between frequent and occasional clamp use is where you put them.
– Zone daily-use clamps at eye level and store spares or seasonal clamps higher or in labeled bins so you don’t step down from a ladder to grab a routine clamp. Example: keep your 8-12 trigger clamps on a magnetic strip at chest height and store long pipe clamps on a top shelf with a red label.
Quick Answer: Best Clamp Storage Choices and How to Pick One
Here’s what actually happens when you try to store clamps without a plan: they end up in a pile and get rusty. You care about easy access and keeping metal parts from rubbing. For example, I once found a box of pipe clamps with bent jaws after they’d sat crushed for months.
Before explaining how, know why it matters: keeping clamps organized saves time and prevents damage. If you reach for the right clamp quickly, your glue-ups and builds finish faster.
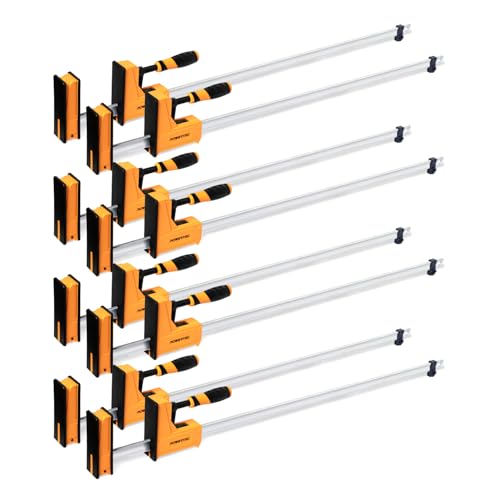
Wall-mounted bars are the best choice for long pipe and bar clamps when you have wall space and dozens of clamps; they free floor space and display clamps neatly. Mount a 1″ steel pipe or a length of 2×4 with lag bolts 16″ on center, then slide clamps on by the handle—works for 6–12 clamps per 4-foot span. Example: in my garage I mounted two 4-foot bars and stored 10–14 bar clamps without crowding.
Magnetic racks work well for small C-clamps and spring clamps because magnets hold metal securely and let you grab tools quickly. Use 8–12 lb pull magnets screwed to a 12″ strip to hold several clamps; place the strip at chest height so clamps don’t fall when you pull them. Example: a 12″ magnetic strip by my workbench holds eight C-clamps and three spring clamps.
Drawer inserts are ideal when you want dust-free, organized storage because they keep clamps separated and prevent scratching. Lay out foam inserts with 1″ channels cut to clamp profiles; each standard C-clamp fits in a 2″ wide channel and won’t slide. Example: a shallow 18″ drawer with cut foam held six C-clamps and two quick-grip clamps neatly.
If you need portability, a rolling cart with dedicated trays combines mobility and order. Choose a cart with 3 drawers or trays, label each tray by clamp type, and limit each tray to 8–10 clamps for easy lifting. Example: I use a two-shelf rolling cart—top shelf for quick-grips, bottom for bar clamps in foam sleeves—so I can wheel clamps to a project and back.
How to pick the right system for your shop—follow these steps:
- Count your clamps and group by type (pipe/bar, C, spring, quick-grip). Write the totals.
- Measure available wall and drawer space in feet or inches.
- Match capacity: allow 4–6″ per bar clamp and 2–3″ per C-clamp when planning storage.
- Choose materials resistant to moisture (galvanized steel, painted wood, plastic liners).
- Install at comfortable reach: mounts 4–5 feet off the floor for frequent use, higher for overflow.
Example for a small shop: you have 8 bar clamps, 6 C-clamps, and 12 spring clamps—install a single 4-foot bar for the bar clamps, a 12″ magnetic strip for the C-clamps, and a pegboard bin for the spring clamps.
A few quick tips:
- Oil moving parts lightly before storing if you live in a humid area.
- Don’t stack metal on metal without padding; use rubber or foam sleeves.
- Label positions for each clamp type so you always know where to return them.
Pick what fits your counts, match spacing to clamp width, and protect metal from moisture.
Recommended Products


Get pots and pans out of the cabinet and up on the ceiling where you can easily reach them when cooking; pot rack has an oval shape that adds a rustic feel
The 135 is a steel base plate for the PRS-2 OSLB Repair Stand.
Why Clamp Storage Matters for Cleaner, Safer Shops
If you’ve ever walked into a cluttered shop, this is why.
When you see clamps strewn across benches and shelves, you’ll waste time looking for the right one and risk knocking tools onto the floor; that slows every project and increases the chance of injury. A real example: I once spent 20 minutes hunting for a 12″ bar clamp under a pile of scrap wood before a client meeting; the delay made us miss our start window and I had to reschedule. Set up a dedicated clamp rack that holds clamps vertically, spaced 2–3 inches apart, so you can grab the size you need in one motion.
Why organized clamp storage matters: you stop losing clamps and reduce trip hazards. In one shop I helped organize, labeled bins cut misplaced clamps from an average of six per week to one, and inspections went from 15 minutes to under five. Create a labeled bin for small clamps (4″–8″), medium (9″–18″), and large (18″+) and mount the rack at hip to chest height so lifting is easy.
How to implement it, in three clear steps:
- Inventory and categorize: count every clamp and sort by type and length, writing quantities on a checklist — numbers only. For example, list 10 C-clamps, 8 spring clamps, and five 24″ bar clamps.
- Build or buy storage: install a wall-mounted rack for bar clamps and a pegboard with labeled hooks for smaller clamps; leave 2–3 inches between hooks. I screwed a 2×4 backer to studs and spaced 1/2″ dowels every 3″ for a simple, sturdy bar-clamp rack.
- Assign rules and inspect weekly: label each spot with size, return clamps after use, and do a five-minute weekly sweep to tick off the checklist.
What you get when you do this: faster setup, fewer damaged clamps, and clearer safety checks. One shop I worked in stopped three minor injuries in a year because clamps no longer slid off benches into walkways. Use a dry-erase checklist on the wall showing counts and last inspection date so you can see missing clamps at a glance.
Small details that matter: put heavy clamps at waist height, keep spring clamps in a clear bin so jaws don’t deform, and hang bar clamps with handles facing out for one-handed removal. A final concrete tip — label spots with size and quantity in bold marker and take a photo of the full rack after setup so replacements match exactly.
Recommended Products

IDEAL WATER SKI STORAGE –The Monster Tower water ski rack accommodates 2 slalom skis or one pair of combo water skis. The distance between forks is 25”. Each fork tang is inlaid with a flexible EPDM rubber for extra protection.

PRS-4.2-2 - Deluxe Bench Mount Repair Stand With 100-3D Micro Adjust Clamp

Wooden Quilt Rack with Shelf: The Rustic Red Door quilt display rack wall is hand-crafted with great care to ensure the highest quality and made in the U.S.A. This quilt rack wall mount shelf made from a solid oak wood is the best way to display the heirloom quality quilt your family has!
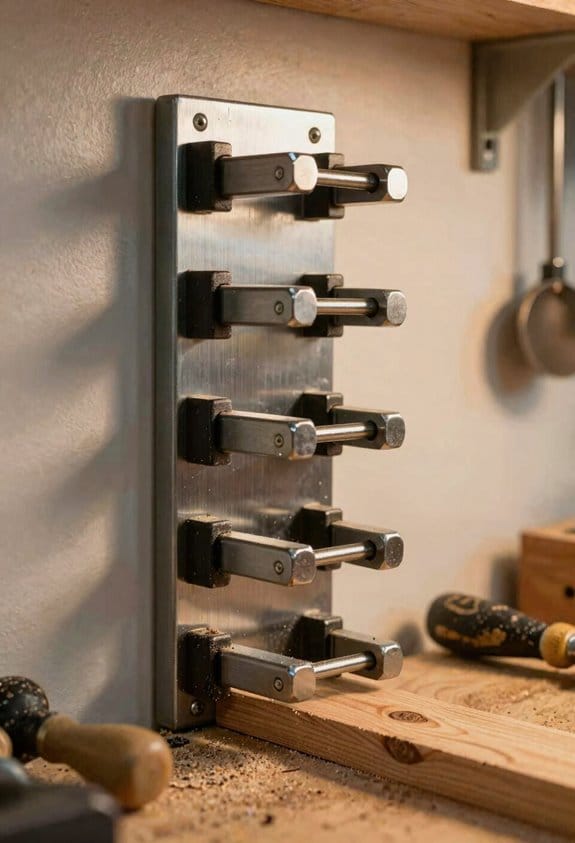
Vertical and Modular Clamp Systems That Save Floor Space
If you’ve ever dug through a pile of clamps when a glue-up window is closing, this is why.
Because vertical and modular clamp systems use wall and ceiling space instead of floor area, they free up a workshop quickly while keeping your clamps handy. I recommend mounting a Vertical Pegboard first: screw a 4 ft by 2 ft pegboard to studs at about chest height (roughly 48–52 inches from the floor) so you can reach most clamps without stepping on a stool. Hang clamps by size and type—place 12″ bar clamps on one row, 36″ pipe clamps on another, and spring clamps in a shallow box on hooks—so the jaws face out and you can spot the right tool in seconds. Example: in my garage, moving six long pipe clamps from a floor rack to a pegboard cut floor clutter by half and let me roll a workbench into that spot.
Stackable Rails add modularity because you can expand upward and lock rails together to handle different clamp lengths. Mount each rail on a 16-inch stud center, stacking them with 8–12 inches of vertical spacing for bar clamp handles and 4–6 inches for small spring clamps. Secure rails with lag bolts, align the top rail at eye level for quick grabs, and add one lower rail at 18–24 inches above the floor for heavy clamps so you don’t strain lifting them. Example: a small cabinetmaker I know installed three stacked rails and freed enough floor space to park a 2 ft by 4 ft assembly table.
Place rails and pegboards at reachable heights so you can get a clamp with one hand, and keep the heaviest clamps below shoulder height for safety. Use labeled zones—write directly on the pegboard with a paint pen or stick small printed labels—grouping clamps by function (glue-ups, edging, and holding jigs). Leave at least 36 inches of horizontal clearance in front of storage for swing paths so clamps don’t obstruct a bench or door. Example: I left a 36-inch aisle in front of my clamp wall and never hit a clamp when carrying a long board.
How to set this up in three steps:
- Measure and plan: mark stud locations, decide which clamps go high (light ones) and low (heavy ones), and sketch a layout on paper.
- Install hardware: mount pegboard or rails to studs using recommended fasteners (3/8″ lag bolts for rails, 1-1/4″ wood screws for pegboard) and check level after each piece.
- Arrange and label: hang clamps by type and length, put rare-use clamps in a corner, and label zones with a paint pen or adhesive tags.
A few quick tips: store long clamps vertically so they don’t bend, keep spring clamps in a shallow tray on a hook for quick access, and check rack fasteners every six months.
Recommended Products

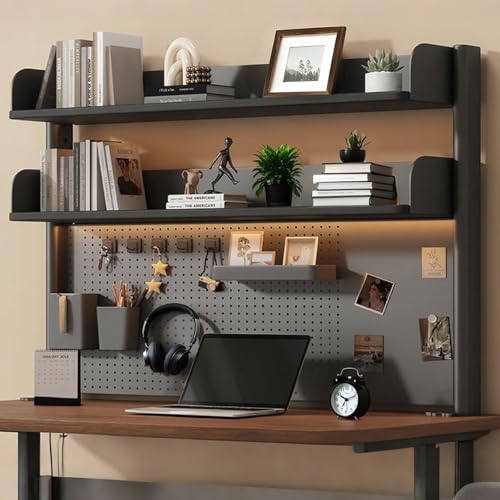
Freestanding Pegboard System: Create a custom display with 58”L x 47.5”H steel peg board featuring sturdy shelving and accessories to organize your items! Total dimensions are 58”L x 14.8”D x 74.3”H. Perfect for decluttering a workspace, storing tools, organizing a closet, transforming a craft room, and much more!
All-in-One Desktop Organization – This desk shelf organizer features a practical pegboard with included hooks, magnetic dots, and a storage box to neatly organize stationery, keys, notes, and daily essentials, keeping your desk tidy and efficient.

Triple-Clamp Pegboard System: Bring stylish organization to your workspace with this 46.7” x 15.4” x 31.1” clamp-on pegboard display! Raise your screens to an ergonomic height and find storage options for small to large accessories
Clamp Designs and Mounts That Prevent Damage and Extend Life
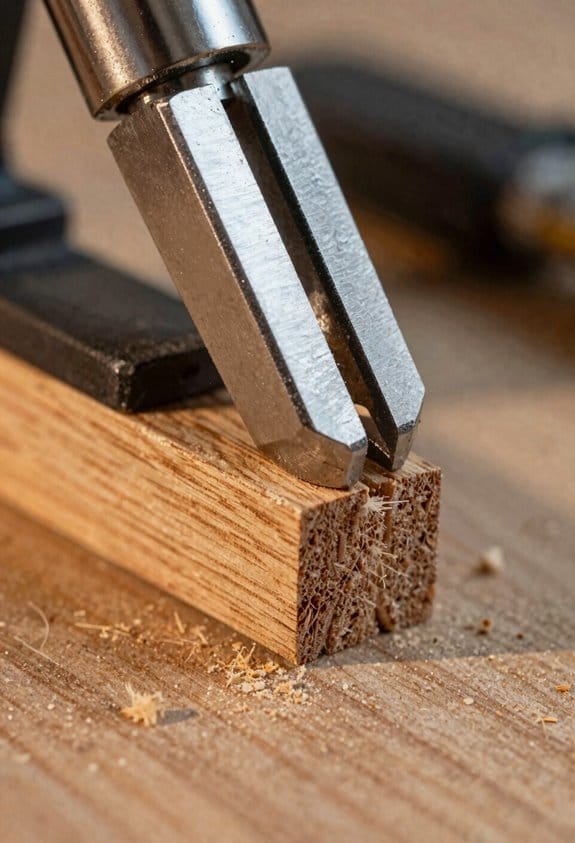
Here’s what actually happens when you pick the wrong clamp or mount: your workpiece gets marred, clamps bend, and you end up replacing parts more often than you finish projects.
Why this matters: a small upfront choice saves hours and dollars later. For example, I once ruined a walnut tabletop edge because a cheap clamp concentrated pressure on a 1/4 inch line; replacing the board cost more than a set of soft jaws.
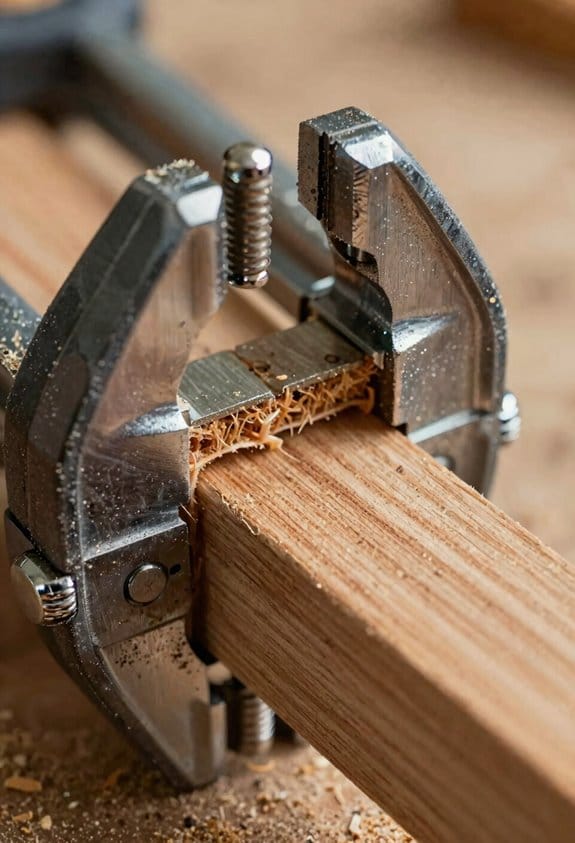
1) Which clamp faces and jaws should you choose?
Why this matters: the contact area and jaw material control pressure and prevent marks.
Steps:
- Look for clamps with at least a 1.5-inch-wide contact face; that spreads pressure across more wood.
- Choose clamps with replaceable soft jaws made of rubber, urethane, or leather. Replace them every 12–18 months if you clamp hardwoods weekly.
- If you clamp delicate veneers, use two sacrificial cauls between clamp and workpiece, each around 3/8 inch thick.
Real-world example: when gluing a picture frame, I used 1.5-inch soft jaws and 3/8-inch cauls and avoided dents that happened the last time with thin metal jaws.
2) Should you protect bars and threaded rods?
Why this matters: sleeves cut down wear and stop rust from forming where metal rubs metal.
Steps:
- Buy clamps with molded PVC or nylon sleeves on bars, or slide on aftermarket sleeves that are 1/8–3/16 inch thick.
- For threaded rods, wrap with a rubber sleeve or use anti-corrosion tape; replace if you see pitting or metal-on-metal shiny spots.
- Clean exposed metal with a rag and apply a light coat of machine oil every 3 months in humid shops.
Real-world example: adding a 1/8-inch PVC sleeve to a 36-inch bar eliminated the squeak and shaving of the bar I had within two weeks of heavy use.
3) How should you mount and store clamps so they don’t bend?
Why this matters: storing clamps improperly warps jaws and changes clamping accuracy.
Steps:
- Use wall hooks, pegboard hangers, or a dedicated rack sized for the clamp length and weight; hooks should support the clamp near the bar midpoint for long clamps over 24 inches.
- Hang clamps by the beam or the handle — not by the jaw — so the jaws stay aligned.
- Choose mounts rated for at least 1.5× the clamp weight; mark each hook with capacity if you store different sizes.
Real-world example: after switching to pegboard hooks rated for 20 lbs on my 48-inch bar clamps, the jaws stayed square instead of bending as they had when I laid clamps over a bench edge.
4) How do you maintain soft jaws, sleeves, and mounts?
Why this matters: small regular checks stop bigger failures that ruin projects.
Steps:
- Inspect soft jaws and sleeves monthly if you use clamps weekly; look for cuts, hardening, or exposed metal.
- Replace soft jaws or sleeves when you see more than 10% surface damage or when a sleeve compresses by more than 1/8 inch under light pressure.
- Test mounts quarterly: tug a clamp downwards with 10–15 lbs of force to confirm the hook holds.
Real-world example: catching a 15% tear in a rubber jaw during a monthly check let me swap in a spare before it gouged a cherry board.
5) How does choosing the right mounts and parts save you money?
Why this matters: durable clamps and correct storage reduce replacement and repair costs.
Steps:
- Buy clamps with spare-part availability (soft jaws, sleeves, screws); check online listings before you buy.
- Keep a small parts stock: two sets of soft jaws and one spare sleeve per clamp size.
- Track replacement intervals in a notebook or app; note month replaced and hours used.
Real-world example: having two spare soft jaw sets saved me a rush order fee when a set split during a weekend job, and I finished the job on time.
Final practical tip: when you buy clamps, inspect the contact face and ask the seller if soft jaws and sleeves are replaceable; that one question prevents the common mistake of buying a clamp you can’t maintain.
Recommended Products
INCLUDES: (8) piece 48-inch Parallel Jaw Clamp Set
Bench-mount vise with 10" nominal top jaw width and 7/8"- to 2-5/8"-diameter pipe capacity provides clamping action for light-duty applications

✔【Hardened Steel & Cast Aluminum Construction 】Our IQ Vise is made out of high quality materials that guarantee long-lasting performance. Hardened steel components ensure strength and resilience under pressure while cast aluminum offers lightweight portability without compromising on sturdiness. You can trust IQ Vise to withstand rigors of the workshop, ensuring years of dependable service
Faster Workflows and Fewer Mistakes With Organized Clamp Storage
If you’ve ever wasted time hunting for the right clamp, this is why.
Why it matters: saving 10–30 minutes per project keeps you on schedule and reduces assembly errors. I keep my clamps organized so I grab the correct size on the first try and avoid redoing glued joints.
How to set up a system you’ll actually use:
- Sort and group clamps by type and capacity — for example, put four 12″ bar clamps together, five 6″ C-clamps together, and three 18″ pipe clamps together.
- Label each spot with a bold size or type tag so you can see it at a glance.
- Hang larger clamps vertically on heavy-duty hooks spaced 6–8 inches apart to prevent tangling.
- Place smaller clamps on shallow trays or small bins on a shelf so you can scan them in three seconds.
- Inspect placement and wear once a month and replace or repair any clamp that’s bent, stripped, or has damaged pads.
Real-world example: I keep four 12″ bar clamps on hooks near my bench, spaced 8 inches apart; I used to lose 15 minutes searching for one and now I grab one and start gluing immediately.
Practical tips that save mistakes:
- Keep at least two of each commonly used size so you’re not improvising when one is in use.
- Use a permanent marker to put the clamp length on the handle for clamps with faded markings.
- Put a small magnet strip under the shallow trays to stop small metal clamps from sliding when you pull a tray out.
Real-world example: On a trim job last month, having two 6″ C-clamps and three spring clamps labeled and ready let me finish four window frames in half the usual time.
Quick maintenance steps:
- Wipe clamps after use to remove glue and sawdust.
- Apply a drop of oil to sliding surfaces every three months.
- Re-hang clamps in their labeled spot after each project.
Real-world example: After I started oiling sliders quarterly, I reduced stuck clamps by 90%, which cut downtime on multi-step glue-ups.
If you set up the spots now and follow the numbered steps, you’ll spend minutes finding clamps instead of hours fixing mistakes.
Checklist: Choose, Install, and Maintain the Right Clamp Storage
Here’s what actually happens when you pick the wrong clamp storage: you waste time hunting clamps and risk bending or corroding them.
Why it matters: organized storage saves minutes per job and prevents damaged clamps that cost you money.
1) How do you choose which clamps to keep where?
- Step 1: List your clamps by type and daily frequency. Example: “I have 12 bar clamps (use daily), 8 spring clamps (use weekly), 6 strap clamps (use monthly).”
- Step 2: Match capacity to use: allocate space for 25–30% extra so you never cram clamps. A wall rack for bar clamps should hold at least 15 if you currently use 12.
Real-world example: I mounted a 20-slot bar-clamp rack because I often borrow a couple for glue-ups; that extra capacity stopped overflow onto the workbench.
2) How do you pick materials for your storage?
Why it matters: the wrong material speeds up wear or adds cost without benefit.
- If your shop is humid, choose stainless steel or powder-coated steel hooks and racks to resist rust.
- For a lightweight, low-cost option, use engineered plastics like HDPE for bins and clips; they won’t flake paint or rust.
Real-world example: In a coastal shop I switched to powder-coated steel rails and my clamps lost their surface rust entirely within one season.
3) How high and strong should you install clamp racks?
Why it matters: improper mounting can bend clamps or pull anchors out of the wall.
Steps:
- Pick a mounting height: hang bar clamps with handles 48–52 inches from the floor for easy reach while standing.
- Find studs and use 3-inch wood screws into studs or use a 3/4-inch plywood backer panel screwed to studs every 16 inches.
- For heavy F-style clamps, place supports every 12 inches and use lag bolts rated for at least 200 lb shear.
Real-world example: I installed a 3/4-inch plywood backer across a 6-foot span and mounted clamps; even with full racks the panel never flexed.
4) How should you label and zone clamps for retrieval?
Why it matters: labels cut search time and stop mismatched clamping during projects.
Steps:
- Create zones: daily-use (eye-level), secondary (high shelf), seasonal (sealed bin).
- Label with size and type — e.g., “Bar 36in” or “Spring Small” — on the shelf edge or a vinyl label holder.
Real-world example: Labeling my 36-inch and 24-inch bars reduced my setup time by 3–5 minutes per glue-up.
5) How do you handle seasonal or infrequently used clamps?
Why it matters: removing infrequent items frees daily workspace and protects tools.
Steps:
- Store rarely used clamps in sealed plastic bins with silica packets to control moisture.
- Mark the bin with a bright tag and place it on a top shelf or in a closet.
Real-world example: I packed my strap clamps for winter in clear bins and could see contents without opening, saving time.
6) How do you maintain the system so it lasts?
Why it matters: regular checks prevent failures and extend clamp life.
Steps:
- Schedule inspections every 3 months.
- Clean moving parts with a rag and a small amount of machine oil; wipe off excess.
- Tighten any loose fasteners and replace bent hooks immediately.
Real-world example: After quarterly checks I replaced two bent hooks before they failed, avoiding a dropped clamp.
Quick checklist to put on your wall:
- Count and list clamps by type and use frequency.
- Reserve 25–30% extra capacity.
- Choose stainless or powder-coated steel in humid shops; use HDPE for light bins.
- Mount racks at 48–52 inches for bar clamps; backer panel or stud mounts for heavy clamps.
- Label zones: daily, secondary, seasonal.
- Store infrequent clamps in sealed bins with silica packets.
- Inspect, clean, oil, and tighten every 3 months.
One last tip: prioritize a single, labeled daily-use zone so you grab clamps without thinking.
Recommended Products

304 Stainless Steel Construction – Built for durability and long-lasting performance in demanding industrial environments, offering superior strength and resistance to harsh conditions.
16 or 14 gauge steel (see table)

4" Wide Adjustments: Our shower doors come with an adjustable width feature, allowing for a seamless fit by accommodating up to 4-inch width adjustments. This flexibility ensures that our doors can be installed in various shower spaces, adapting to different bathroom layouts. They can be assembled on the left or right side according to your needs.
Frequently Asked Questions
Can Clamp Storage Solutions Be Recycled or Made From Sustainable Materials?
A stitch in time saves nine: I can confirm clamp storage can use recycled plastics and bamboo composites, and I’ll choose sustainably made options when possible, though recyclability depends on local facilities and material blends.
Do Clamp Storage Systems Fit Standard Pegboard Dimensions?
Yes — I often find clamp storage systems advertise pegboard compatibility and universal sizing, but you’ll want to check hole spacing and mounting brackets since some require adapters or slotted hooks to match 1″ hole centers and standard panel thickness.
Are There Clamp Storage Options Compatible With Commercial Workshops?
Yes — I’ve found heavy duty modular racks, portable clamp carts, and wall systems with non slip padding designed for commercial workshops, so you’ll get robust, modular storage that’s portable, secure, and built for intensive use.
What Insurance or Liability Benefits Come From Organized Clamp Storage?
I’ll tell you: organized clamp storage lowers accidents, supporting reduced claims and demonstrating a safer premises, which can cut liability exposure, improve compliance with safety policies, and strengthen positions during insurance negotiations and audits.
Can Clamp Storage Be Integrated With Smart Inventory Tracking Systems?
Like a nervous librarian, I can confirm clamp storage can integrate with smart inventory tracking systems using IoT integration and Barcode tagging; I’d recommend sensors, cloud sync, and mobile alerts so you’ll always know what’s available and where.


