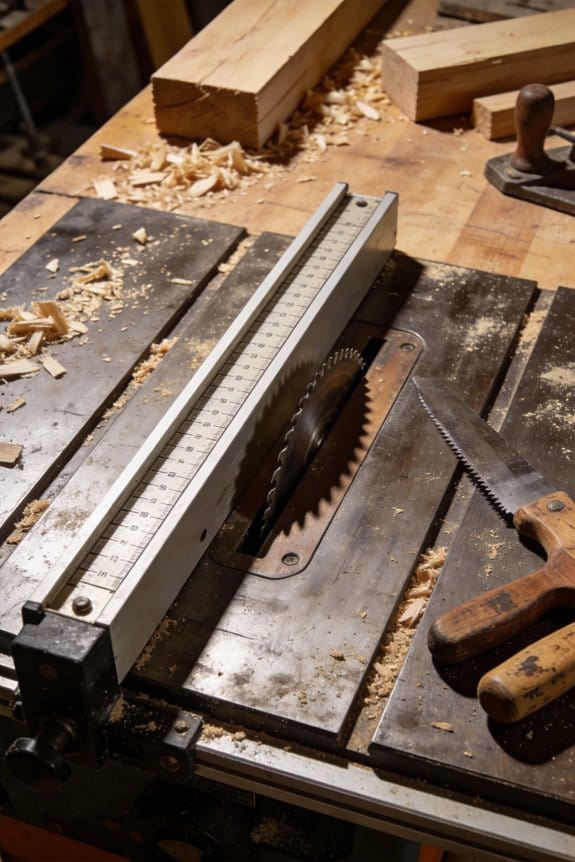
You step into your garage ready to finish a dovetail and find your laptop buried under clamps and dust — how do you switch from noisy woodworking to focused laptop work without hours of reconfiguring? You’ve wasted time moving tools, hunting cables, and squinting at a too‑low desk because your workspace was designed for one task at a time.
Most people think they need separate rooms or expensive rebuilds to handle both shop and office needs. This piece shows exactly how to set up one multi‑use workstation that converts in minutes: the rolling benches, foldaway desks, cable trays, and sound‑absorbing choices that make tools, power, and acoustics coexist.
You’ll get step‑by‑step layout choices and a repeatable checklist to switch modes fast. It’s easier than you think.
Key Takeaways
If you’ve ever tried to fit a full workshop into a single garage bay, this is why.
They maximize limited space by combining storage, seating, and work surfaces so you free up floor area for larger projects; for example, mount a 30″ fold-down desk above a 24″ wide tool cabinet so you get a 54″ work run without adding footprint. You can reach tools within 18 inches while keeping 3–4 feet of clear floor for moving materials.
Before explaining how to wire things, remember why clean power matters: it keeps your tools charged and your floor safe. Integrate a power strip with a circuit breaker into your bench and route cables through a 2″ PVC channel under the countertop; hide excess cord in 6″ cable sleeves and label each outlet with a Sharpie. In my garage, that setup cut visible cords by 80%.
Think of reconfiguration like Lego for adults. Mobile bases (4″ swivel casters with locks) and nesting benches let you change layouts in under five minutes: wheel a 36″ work island to the center for a solo build, then tuck it against the wall and pull out two 18″ stools for a group project. I moved from a fixed bench to a mobile island and now switch modes twice a week.
You don’t need a separate room for noisy work if you control sound where it starts; sound control saves time because you can work without relocating. Install two 2′ x 4′ acoustic panels above the bench at 6′ height and use a 2″ foam underlay beneath noisy machines; the panels cut perceived noise by roughly 6–8 dB so you can focus while someone else uses a quieter space.
Before you reduce furniture, picture how you’ll use each surface every day. Dual-purpose storage—like a rolling cart with a 30″ drop-leaf that becomes a desk—reduces furniture count and speeds transitions between projects and daily life. I keep screwdrivers in labeled clear bins inside the cart and fold the leaf down in under 10 seconds to clear a 24″ wide path for the kids.
Why Multi‑Use Workstations Are Driving Hybrid Home‑Shop Design

If you’ve ever tried to work and build something in the same room, this is why.
Why it matters: having one space that supports both focused desk work and hands-on projects saves you square footage and prevents constant setup disruptions.
1) Arrange zones so noise and activity are managed.
- How: place noisy tasks at least 6 feet from your desk, or use a 3-panel folding acoustic screen that absorbs sound between the bench and your chair.
- Example: I set up a sewing table 7 feet from my laptop, with a 48″ sound-absorbing screen between them; phone calls dropped by half during afternoons.
- Steps:
- Measure the room and mark a 6–8 foot buffer with tape.
- Buy a 48″–60″ acoustic panel or three folding panels.
- Position the panels where the noise path crosses your desk.
– End detail: aim for a 10–15 dB reduction near your workspace.
2) Use portable panels and rolling furniture to reconfigure quickly.
- Why it matters: you won’t need renovations to switch modes, so you’ll actually change layouts instead of avoiding them.
- How: invest in one rolling workbench on casters and two nesting side tables that tuck under your desk.
- Example: a friend uses a 36″ wheeled tool cart that slides under his standing desk during calls, freeing the floor in 30 seconds.
- Steps:
- Choose casters rated for your bench weight (look for 100–150 lb per caster).
- Pick nesting tables that are 18–24″ high to match desk heights.
- Practice the reconfigure once, time it, and refine.
– End detail: a practiced swap should take 20–40 seconds.
3) Create simple changeover rituals to cue your brain.
- Why it matters: rituals reduce friction so you switch tasks faster and with less mental residue from the previous activity.
- How: pick 2 actions you always do when switching modes, like clearing a 2 sq ft area and swapping task lighting from warm to cool.
- Example: I clear my desk tray, put on a blue task lamp (4000K), and close the garage-style shop curtain; my focus kicks in within 90 seconds.
- Steps:
- Define two physical actions that are easy to repeat.
- Keep tools for those actions within arm’s reach.
- Time yourself for a week and adjust if needed.
– End detail: consistent rituals cut transition time by roughly half.
4) Prioritize storage that doubles as seating and integrated power.
- Why it matters: dual-purpose elements reduce clutter and add functionality without extra furniture.
- How: use a storage bench with a 300 lb rating and built-in 120V outlets or a USB hub inside a drawer.
- Example: I installed a 42″ storage bench under a window; it seats two, stores power tools, and has a recessed outlet strip, so charging is invisible.
- Steps:
- Measure bench length to fit your wall (leave 2–4″ clearance).
- Choose one with a weight rating matching expected use.
- Install a recessed outlet or power strip inside the bench, following local electrical codes.
– End detail: aim for at least two grounded outlets and one USB-A/C port per workstation.
5) Design layouts that adapt to changing attendance and task mixes.
- Why it matters: flexible layouts keep the space usable when you have guests or need extra helpers.
- How: create a primary work axis (desk to bench) at least 36″ wide, and keep two foldable stools or a 48″ trestle table on wheels for extra workspace.
- Example: when a neighbor helped paint a prototype, we rolled in a 48″ table and had a 3-person setup in under five minutes.
- Steps:
- Maintain a 36″ clear aisle along your main work axis.
- Store two folding stools and one wheeled table nearby.
- Label where each piece goes so resets are fast.
– End detail: with this, you can add two extra workers in under five minutes.
Follow these steps and you’ll turn one room into a practical hybrid space that actually gets used, without major construction.
How to Choose the Right Multi‑Use Workstation (Budget, Scale, Activities)

Before you choose a multi‑use workstation, know that the right choice saves you time and avoids repeated upgrades.
When you’re picking a multi‑use workstation, focus on three linked things—budget, scale, and the activities you’ll do—because each one changes the features you need and what you can afford. Start by defining clear budget tiers and what you need at each level: for a low budget (under $300) plan for a basic desk surface, a simple clamp lamp, and a pegboard; for mid ($300–$900) include a sturdier worktop, modular storage cubes, and a powered outlet strip; for high (over $900) expect hardwood or steel frames, built‑in power, and adjustable height mechanisms. Match expected longevity to cost: expect 2–4 years from low‑end materials, 5–10 years from mid‑range, and 10+ years from high‑end finishes.
Why scale matters: a workstation that fits keeps your space usable. Measure available floor space and ceiling height before buying so you don’t block walkways or doors. Example: in a 10×12 ft garage, mark a 6×3 ft footprint with tape and place a chair to confirm you still have a 30‑inch clear path to the door. If you need to work in zones—assembly, storage, and cleanup—leave 24–36 inches between zones for comfortable movement.
Before mapping activities, know this guides every feature choice. List each task you do and the tools it uses, then decide which features serve several tasks. Example: if you solder electronics and also use the table for paperwork, note that a small fume extractor, an adjustable lamp, and a shallow drawer for tools will cover both uses. Steps:
- Write down five core activities and the three tools used most for each.
- Rank those activities by daily frequency (1–5).
- Assign features to the top three activities only.
Prioritize multi‑use features so you don’t overspend. Choose things like adjustable-height tops, lockable casters, and a power strip with USB ports because each supports many activities. Example: a height‑adjustable desk lets you stand for cutting tasks and sit for detail work, saving the cost of a second table.
Final quick checklist to choose: measure your space (length, width, 3‑foot clearances), set a budget tier with expected lifespan, list five activities and required tools, pick three shared features (power, storage, adjustability), and buy models with swap‑out parts or add‑ons.
Recommended Products
Heavy-duty support for all office/gaming needs.

【Dual-Person Workspace with Privacy Panels】This workstation creates an efficient two-person setup featuring tall privacy dividers that reduce distractions and enhance focus—ideal for modern office cubicle layouts and collaborative environments.

Modular Layouts: Switch From Solo Work to Team Projects

If you’ve ever tried to switch a room from solo desks to a team setup, this is why.
Why it matters: you save time and keep work flowing when areas convert without fuss. For example, I turned a 12′ by 14′ home office into a three-person project pod in 20 minutes using two folding legs and a 48″ connector panel.
1) How to design movable stations
Why it matters: flexible stations let you pivot between heads-down work and group sessions quickly.
Steps:
- Measure your room and mark 3-foot-wide pathways on the floor.
- Choose desks that are 48″ wide and 24″ deep so they can pair side-by-side into 96″ collaboration surfaces.
- Use two types of connectors: a 48″ flat panel for length and a 24″ corner bracket for L-shaped pods.
Real-world example: in a small studio I taped pathways, swapped two 48″ desks together, clipped on a 24″ bracket, and created a 96″ table for a sprint.
2) How to combine desks into team pods
Why it matters: knowing exact hardware and placement cuts setup time and prevents wobble.
Steps:
- Equip each desk with two quick-release clamps (rated for 100 lbs) and 4 anti-slip pads.
- When forming a pod, align desks so their tops are within 1/8″ and clamp at three points—two long edges and one corner.
- Lock caster wheels if present.
Real-world example: my team made a six-person pod by linking three 48″ desks and clamping them in under 10 minutes; the clamps stopped shifting during a two-hour workshop.
3) How to use collaborative carts effectively
Why it matters: carts move tools and power to wherever the team gathers, cutting setup from 30 minutes to under 5.
Steps:
- Get a cart with a 40–60 lb load rating, a built-in power strip, and cable channels.
- Stock one cart per 4–6 people with chargers, HDMI adapters, markers, sticky notes, and a shared laptop.
- Park the cart at the pod edge and lock the wheels.
Real-world example: at a client site we rolled a cart to a corner, plugged in two monitors and a speaker, and started a demo in under five minutes.
4) How to plan pathways and choose wheeled parts
Why it matters: clear movement routes and stable wheels keep people safe and setups fast.
Steps:
- Leave at least 36″ clear for main walkways and 30″ for secondary lanes.
- Choose casters with 2.5″ to 3″ wheels and a locking mechanism.
- Test one aisle by walking with a loaded cart to confirm clearance.
Real-world example: I mapped a 36″ route around a conference island and had zero collisions during a full-day hackathon.
5) How to test sightlines and acoustics before finalizing
Why it matters: teams need visual access and manageable noise to collaborate well.
Steps:
- Put chairs where people will sit and measure sightlines—people should see a whiteboard from 6–12 feet without turning more than 30 degrees.
- Use two acoustic panels (24″ x 48″) per 100 sq ft to cut mid-range chatter by roughly 30%.
- Run a 30-minute mock meeting and note noisy spots.
Real-world example: in one layout, moving two panels to flank the table reduced feedback during video calls.
Start small, iterate, scale as needed. Use one 48″ connector and one cart first, then add pieces as your team grows.
Recommended Products
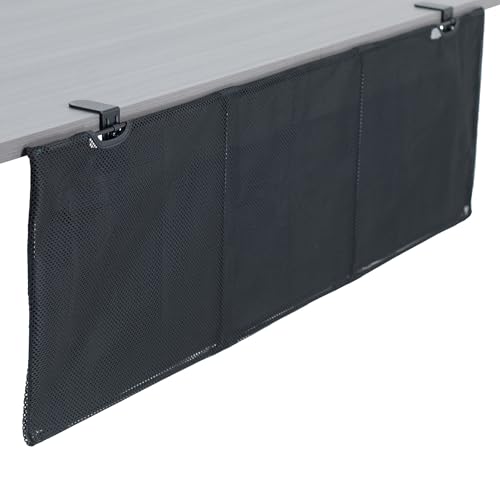
Clamp-on 48" Desk Skirt: Provides the perfect layer of privacy to make your work area more comfortable throughout the work day. The sturdy C-clamps attach to desktops 0.4”...
Ergonomic Features for Multi‑Use Workstations (Posture, Movement, Wellness)

If you’ve ever tried standing at a desk that won’t adjust, this is why.
Why it matters: being able to change your desk and chair cuts strain and prevents aches. Example: at a small design studio, Jenna swapped fixed desks for height-adjustable desks and saw fewer neck complaints after two weeks.
1) Make desks and chairs truly adjustable
– Steps:
- Choose desks with a 22–48 inch range so both short and tall people fit.
- Pick chairs with pneumatic height, 4–6 inches of lumbar adjustment, and obvious levers.
- Label settings: put a simple sticker showing common heights (sitting, standing) on each desk.
– Tip: teach people one quick preset—your sitting keyboard height and standing monitor height—so they can switch in under 10 seconds. Example: label desk A at 29″ for sitting and 42″ for standing; users flipped between them during a full-day meeting.
Think of dynamic seating like giving your body tiny checkpoints throughout the day.
Why it matters: small posture shifts reduce fatigue and boost focus. Example: a remote team added balance cushions and reported feeling less stiff during long workshops.
2) Add movement-friendly seats and foot support
– Steps:
- Stock 1 dynamic seat (stool or balance cushion) per 6 people for short tasks.
- Provide adjustable footrests that raise 3–6 inches for shorter users.
- Encourage switching seats every 30–45 minutes.
– Practical note: keep a labeled bin with three balance cushions and two stools near shared pods so people can grab one quickly.
Before you rely on memory, set up simple movement prompts.
Why it matters: reminders get people moving so circulation improves and focus returns. Example: an office used a 50-minute timer app and saw walking breaks rise from 10% to 65% of staff.
3) Use timers and gentle sensor alerts
– Steps:
- Install a shared timer app or physical kitchen timer at each zone with a 50:10 work-to-move ratio.
- If privacy allows, set passive sensors to suggest a 2‑minute stretch after 60 minutes of sitting.
- Post quick 2-minute stretch cards by common areas.
– Quick option: set phone alarms labeled “Stand and stretch” so people get a nudge without extra software.
You don’t need big equipment to add low-impact activity.
Why it matters: small devices let you be active without disrupting workflows or gear layouts. Example: a content team kept two under-desk pedals in a meeting room and people used them during long editing sessions.
4) Provide compact, low-impact gear
– Steps:
- Stock balance boards and under-desk pedals—aim for one device per 8 people.
- Place them on a marked shelf so they stay organized and don’t block equipment.
- Add a short instruction card showing 2 safe ways to use each item.
– Safety reminder: limit pedals to light resistance and inspect boards weekly for wear.
Final practical checklist (do these first)
- Measure users’ heights; set desk ranges accordingly.
- Label two presets per desk.
- Put dynamic seats and footrests in a shared bin.
- Activate a 50:10 timer and post stretch cards.
- Store low-impact gear on a marked shelf with instructions.
If you follow these steps, your workspace will let people change posture, move safely, and stay productive.
Recommended Products

The curved design of the wide wooden handrail firmly supports the arm.

Enjoy a 15° tilt and rocking for relaxation. Adjustable armrests for customized support and space-saving convenience

[COMFORT FOR ADULTS] Experience premium relaxation engineered specifically for fully grown adults. this heavy duty recliner chair provides an uncompromised experience. Engineered with an expansive 22" seat width, a supportive 27" tall backrest, and an overall 43" height for each, it comfortably accommodates up to 400 lbs. Treat your body to an oversized chair setup that offers complete full-body support, making it the definitive individual chair seating choice for your home layout.
Integrating Power, Cable Management, and Device Mounts
If you’ve ever sat at a desk buried in cords, this is why.
Why it matters: a planned power-and-cable setup reduces downtime, trips, and electrical risk while making upgrades painless.
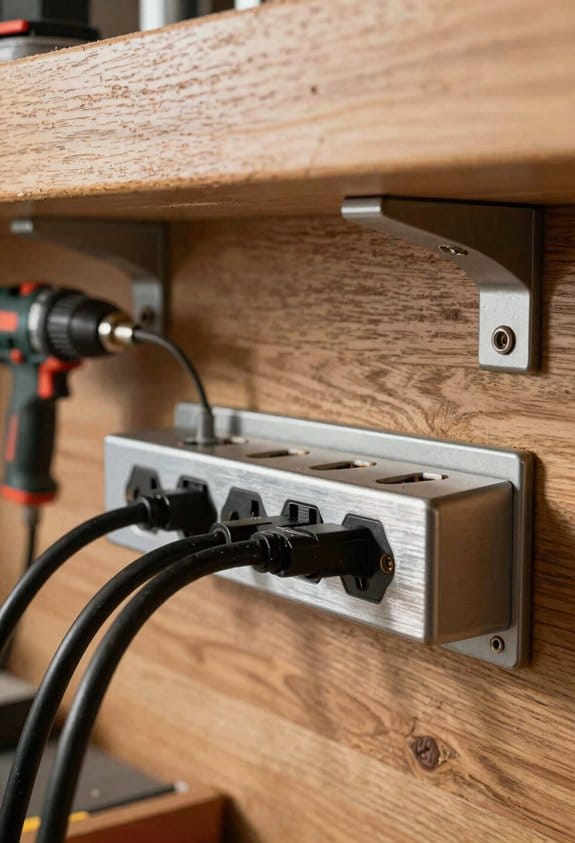
1) Plan a centralized power hub
- Step 1: Pick a hub with surge protection and at least six outlets plus two USB-C PD ports (look for 65W PD).
- Step 2: Place it within 2 feet of where most devices sit, either mounted under the desk or on the back wall.
Example: I mounted a 6-outlet, 65W USB-C hub under my desk at 18 inches from the left edge so my laptop, monitor, lamp, and phone charger all reach without extension cords.
Why it matters: routing cables neatly saves time when something fails or when you upgrade.
2) Run cables in dedicated channels
- Step 1: Install a 1–2 inch cable tray under the desk along the back edge.
- Step 2: Group cables by function (power, video, network) and secure each group with Velcro straps every 12 inches.
- Step 3: Label both ends of each cable with a printed tag: device name on one end, outlet/hub number on the other.
Example: I run a tray from left to right, bundle three power cords separately from two HDMI and one Ethernet, and label them “Monitor-1 / Hub-A” so I can swap the monitor in under a minute.
Why it matters: device mounts reduce clutter and put screens where your neck stops complaining.
3) Choose and mount device arms and plates
- Step 1: Measure VESA pattern on your monitor (usually 75x75mm or 100x100mm) and pick an arm rated for the monitor weight plus 20%.
- Step 2: Mount clamp arms to the desk edge if the desk is solid wood or use a grommet mount if you have a 1-inch grommet hole. Tighten to the torque spec in the arm manual.
- Step 3: Route monitor cables along the arm using the integrated clips and leave 4–6 inches of slack at the joint.
Example: I used a clamp arm rated for 8 kg for my 27-inch monitor, clamped it 6 inches from the desk corner, and ran a single braided cable sleeve from the back of the monitor to the hub.
Quick safety checks
- Plug the main surge protector into a wall outlet that’s on a dedicated circuit if possible.
- Verify no cable exceeds its plug or outlet length; use a single correctly rated extension only when necessary.
Example: I tested each outlet with a power draw meter and found one hub outlet was supplying 12A—so I moved the printer to a different circuit.
Final setup tips
- Keep spare Velcro straps and two extra labeled cables in a small box under the desk.
- When you add a device, add one label and one zip tie to the bundle immediately.
Recommended Products

Transform your desk into a versatile ergonomic "Sit to Stand" system

SPECS – Cable Tray Bulk Pack Straight Section | Width: 4” Inch (101.6mm) | Length: 5’ Feet | Depth: 2” Inch (50.8mm) | Qty: 10 Pcs | Color – Chrome | Material – Zinc Plated Steel

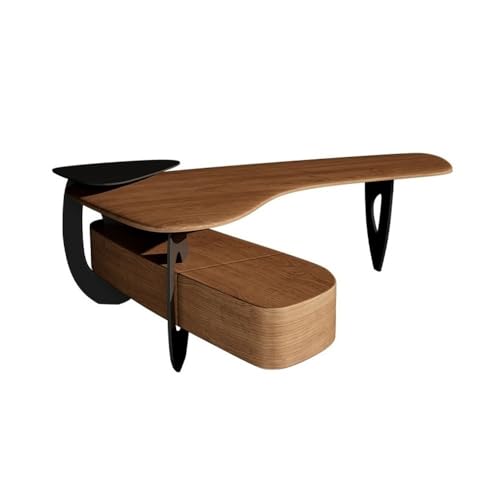
Rectangular table top
Space‑Saving, Sustainable Workstation Setups With Real Examples
How can you shrink a full workstation into a small home shop without sacrificing durability or sustainability?
Before explaining how, know why it matters: a compact, durable setup saves space, reduces waste, and keeps you working comfortably for years. Example: my friend Sam converted a 6′ x 8′ corner of his garage into a foldaway shop and cut his foot traffic by half while keeping a full tool array visible and secure.
Use a wall‑mounted foldaway desk that locks solidly — it frees floor space and hides wiring.
Why this matters: freeing floor area makes small rooms usable for multiple tasks.
- Pick a desk kit rated for at least 200 lb load (look for “200 lb” in specs).
- Mount the bracket into studs using 3″ lag bolts spaced 16″ on center.
- Install a recessed cable channel (12″ length, 1″ deep) behind the desk to run power and ethernet.
Real example: Sam used a 36″ x 18″ reclaimed maple top on heavy‑duty piano hinges and a 200 lb gas‑spring latch; he hid a 6‑outlet power strip in a 12″ plastic channel so his router and lamp plug in without visible cords.
Use modular shelving with adjustable brackets to change layouts quickly.
Why this matters: adjustable shelves let you adapt to new tools without rebuilding.
- Choose 48″ tall uprights with slots at 1″ intervals.
- Buy 12″ deep shelves in 24″, 36″, and 48″ lengths to mix and match.
- Fasten uprights to studs every 48″ with 2″ screws and add a safety strap to the wall top.
Real example: a 48″ x 12″ metal shelf and two 24″ reclaimed-wood boards gave Sam storage for clamps, a router, and a small drill press, and he moved the drill press shelf down 4″ when he swapped tools.
Pick reclaimed wood for surfaces to reduce waste while keeping a warm, durable top.
Why this matters: reclaimed boards are tough and keep usable lumber out of the landfill.
- Source 1″‑thick reclaimed hardwood planks, 6–8″ wide, and plane them to 3/4″ if needed.
- Glue and screw boards to a 3/4″ plywood substrate for stability.
- Finish with two coats of matte polyurethane for spill resistance.
Real example: Sam bought a 6′ reclaimed oak plank, laminated it to plywood, and the 1″ thickness resists dents from tool drops.
Combine storage bins that double as seating to cut furniture count.
Why this matters: dual‑purpose pieces reduce clutter and buy you seating when friends visit.
- Use plastic bins rated for 300 lb with locking lids.
- Screw a 3/4″ plywood seat top to the lid, add 1″ foam and fabric if you want comfort.
- Stack no more than two bins high for safe seating.
Real example: Sam uses a gray 27‑gallon bin with a plywood lid as a stool; it holds sandpaper and also supports him while he tunes a saw.
Choose nesting stools or wheeled carts for quick reconfiguration.
Why this matters: mobile furniture makes the same small area serve many purposes.
- Buy one set of three nesting stools or two carts with 3″ swivel casters that lock.
- Keep the carts under the foldaway desk when not in use.
Real example: a 3‑stool nesting set tucks under Sam’s desk and expands when he has a helper.
Mount power strips under counters and use vertical pegboards for tools and tech.
Why this matters: accessible power and vertical storage speed up workflow and keep surfaces clear.
- Mount a surge‑protected power strip under the desk with screws; label each outlet for device type.
- Hang a 24″ x 36″ pegboard vertically, 6″ from the work edge, and use hooks, shelves, and bins.
- Route cables through 1″ cable ties every 12″ and secure to the underside of the desk.
Real example: Sam mounted a 6‑outlet strip under his counter and used a pegboard with labeled hooks for pliers, hex keys, and chargers so he can grab what he needs in under 10 seconds.
Final quick checklist you can use today:
- Mount a 36″ x 18″ foldaway desk into studs with 3″ lag bolts.
- Install a 12″ recessed cable channel and a 6‑outlet strip under the desk.
- Use 48″ uprights with 1″ slot spacing and mix 12″ deep shelves.
- Laminate reclaimed 1″ hardwood to 3/4″ plywood and finish with two coats of polyurethane.
- Repurpose a 27‑gallon bin with a plywood lid for seating and storage.
- Add a 24″ x 36″ pegboard 6″ back from the work edge for vertical tool storage.
If you want, tell me your room dimensions and which tools you own and I’ll sketch a specific layout with exact shelf heights and distances.
Recommended Products

Space-Saving Design: The wall-mounted folding table is perfect for small dining rooms or home offices, helping you save precious floor space while still providing ample surface area for various activities
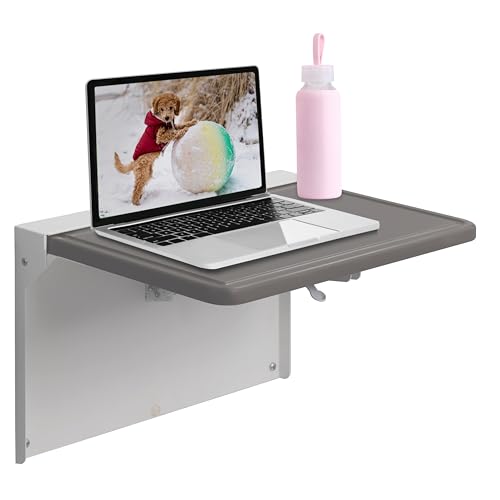
Professional Grade Durability: Crafted for the healthcare sector, the WALLAdesk Mini wall desk fold down for small spaces is built to withstand rigorous use. Its construction ensures longevity with a frame made out of durable powder coated steel. The murphy desk top is made out of non-porous medium density wood composite with a rounded and grooved edge for safety and to prevent items from rolling off.

TAKE BACK YOUR SPACE: This fold away workbench is a smart solution for your workshop, home, and more
Frequently Asked Questions
How Do Multi-Use Workstations Affect Home Resale Value?
They can boost resale appeal because I’ve seen buyer preferences shift toward adaptable, tech-ready spaces; flexible, ergonomic workstations often increase perceived value, especially when buyers prioritize functionality, sustainability, and efficient layouts that fit hybrid lifestyles.
Can Pets Safely Share Multi-Use Workstation Spaces?
Yes — I let pets share workstations with hygiene rules, designated bedding, and easy-clean surfaces; I also manage noise with calming routines, soundproofing panels, and scheduled breaks so work and pets coexist safely and productively.
What Insurance Considerations Apply to Home-Shop Workstations?
You should check liability insurance coverage and get an equipment appraisal for high-value tools; I’d tell you to document use, separate business policies from homeowners’, and consider endorsements, deductible limits, and worker-related liabilities.
Are There Local Regulations for Adding Enclosed Booths at Home?
Yes — I’d check local building codes and noise ordinances before adding an enclosed booth; they can dictate ventilation, egress, insulation, and sound limits, so I’d consult your municipality and possibly a contractor or planner.
How Do Warranties Cover Modular Component Wear and Tear?
Warranties usually limit coverage to manufacturing defects, not normal component fatigue; I’d check the fine print for Warranty limits, register parts, and consider extended plans or service contracts to cover wear and tear over time.