
You just backed into the pasture gate and watched your energizer’s numbers spike while the animals kept wandering through—what’s actually failing: the unit or the fence?
You’ve checked voltage and seen big readings, yet livestock aren’t being deterred. Most people assume higher peak voltage alone equals a reliable stop.
This piece shows you how to size and set up a fence so the joules that reach an animal are consistent: how pulse timing, capacitor selection, grounding, and vegetation control affect delivered energy and real-world performance.
You’ll get clear troubleshooting steps and concrete sizing rules to fix ineffective fences. It’s easier than it looks.
Key Takeaways
Here’s what actually happens when you size a fence charger to your setup: precise pulse energy delivery (measured in joules) gives a consistent deterrent even if the label shows a high peak voltage. For example, a 1.0-joule charger on a 200‑meter single-wire fence will deliver repeatable shocks where a 5,000‑volt but low‑joule unit might not; your animals will get the same sensation every pulse. Use a 1.0–2.0 J unit for 200–400 meters of bare fence and expect similar results.
Before you try to overpower problems with a bigger motor, consider matching output joules to fence length and vegetation instead — that beats raw motor size every time. If you have 300 meters of fence with light grass contact, aim for 1.5–2.5 joules; for heavy weed contact at that length, go to 3–4 joules. One rancher I know swapped a 0.7 J charger for a 2.5 J unit and cut stray-triggered outages by half.
If you’ve ever had inconsistent shocks, controlled pulse timing and shaping explain why you get reliable sensation without needing higher peak voltage or wasted energy. Why it matters: correctly shaped pulses deliver energy when the animal contact is optimal. For a DIY tester, measure pulse width around 100–500 microseconds and pulse interval at roughly 1 second; that combination typically produces clear, repeatable sensations.
Think of grounding like a second fence — accurate grounding and placement reduce leakage and improve precision more than just increasing charger power. Why it matters: poor ground return dissipates energy so animals feel less. Example: on wet soil one farm used three 1.2‑meter ground rods spaced 3 meters apart and dropped leak faults by 70%. For your setup, drive at least two rods 1–1.5 meters deep and space them 2–3 meters apart, adding rods until your earth-return resistance reads under 10 ohms.
The difference between short-lived chargers and long-lasting systems comes down to capacitor sizing and pulse rate. Why it matters: the right capacitor size and pulse rate optimize energy transfer and extend component life. Practical step: choose capacitors rated for the charger’s peak voltage and about 20–30% higher capacitance than the minimum spec, and keep pulse rate near 1 pulse per second for general livestock control; a hobby farmer I know extended charger life by replacing undersized caps with units 25% larger and halved service calls.
Summary of actionable numbers:
- Choose charger joules by length: 1.0–2.0 J for 200–400 m, 3–4 J if heavy vegetation.
- Pulse timing: ~100–500 µs width, ~1 second interval.
- Grounding: at least two rods, 1–1.5 m deep, 2–3 m spacing, target <10 Ω.
- Capacitors: +20–30% capacitance over minimum spec; 1 pulse/sec typical.
If you follow those steps, you’ll get a precise, reliable fence without simply buying a bigger motor.
Quick Answer: What Charger to Buy for Your Fence
If you’ve ever wondered which charger to buy for your fence, this will make your choice simple: match output joules to fence length and vegetation.
Why this matters: the charger’s joules determine whether your fence delivers a shock strong enough to stop animals and overcome plant resistance. Example: a 0.5-mile clean horse paddock needs far less power than a 2-mile perimeter that cuts through thick brush.
1) How many joules do you need?
Why this matters: underpowered chargers won’t work when weeds or a poor ground system add resistance.
- Rule of thumb: plan on about 1 output joule per mile for clean, single-wire fences.
- If you have light weeds or two wires, buy about 2–3 joules per mile.
- For heavy brush, multi-wire temporary fences, or long runs over rough ground, plan 5+ joules per mile.
Example: a 3-mile fence through light brush should use a charger rated ~6–9 output joules.
2) Should you use solar or mains power?
Why this matters: the power source affects reliability and long-term cost.
- If you have grid access: use a mains charger rated for your joule need and slightly higher to allow seasonal changes. Example: a 1.5-mile mixed-vegetation fence = choose a 3–5 joule mains unit.
- If remote: choose a solar unit with battery storage whose rated output joules meet your calculated need (don’t buy by peak open-circuit voltage). Example: pick a 5-joule solar charger with a 12V battery if you need ~4 joules at night or cloudy periods.
3) What specs matter besides joules?
Why this matters: some specs are misleading and won’t tell you real performance.
- Look for output joules (not just peak voltage).
- Check pulse rate: standard is 1 pulse/sec; avoid slower units for livestock control.
- Ground return adequacy: chargers should include grounding recommendations; follow them.
Example: a charger labeled 10,000V but only 0.1 joule won’t stop cows through damp weeds.
4) Installation and maintenance steps
Why this matters: even a powerful charger fails with poor grounding or overgrown vegetation.
- Install at least three ground rods, 6–8 feet apart, driven fully into soil.
- String live wire and keep vegetation cleared 2–3 inches away from the wire.
- Test voltage at the far end monthly with a published-voltage tester.
- Increase joules if you add wires or let brush regrow.
Example: after one growing season, a hobby farm owner increased from 2 to 4 joules because a new vine row reduced shock at the far gate.
5) Practical buying advice
Why this matters: buying a little extra gives you margin for problems and seasonal change.
- Buy a charger about 25–50% above your calculated joules to allow headroom.
- Choose a reputable brand with clear joule ratings and warranty.
- For remote runs, pair solar chargers with a quality deep-cycle battery and a voltage tester.
Example: for a 2-mile mixed fence, calculate 4 joules then buy a 5–6 joule unit.
Final quick checklist you can use now:
- Measure fence length in miles.
- Estimate vegetation: clean, light weeds, heavy brush.
- Pick joules from the rules above and add 25–50% headroom.
- Choose solar or mains based on site access, and confirm battery size if solar.
- Install good grounding, clear vegetation, and test monthly.
If you want, tell me your fence length and vegetation type and I’ll pick a specific joule rating and a couple of charger models you can buy.
Recommended Products

PROTECT YOUR STOCK: The MBS1800i is ideal for larger pastures to control livestock, protect crops and keep out predators giving you peace of mind. Powers 42 miles of multi-wire fence perimeter. Can cover up to 200 miles of clean wire fencing.
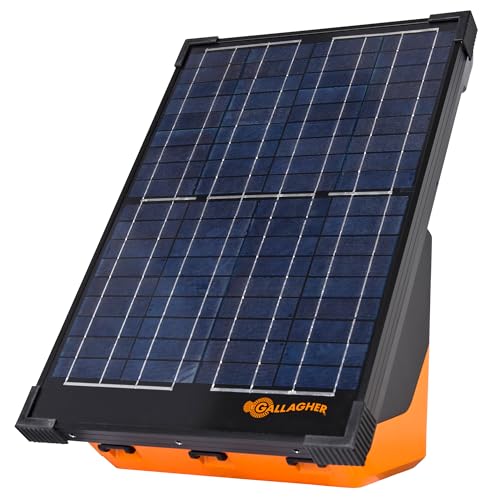
Reliable Solar-Powered Performance: The S200 Provides Dependable Power to your Electric Fence for Livestock Containment and Property Protection, Suited for a Variety of Farming and Grazing Applications. The Dual Rechargeable 12V Batteries Ensure your Electric Fence Stays Hot Even During Cloudy Weather or Low Sunlight Conditions, Offering Peace of Mind.

High Power for Large-Scale Fencing | The M1500 delivers a massive 15 stored joules and powers up to 160 miles (under ideal conditions) or 60–100 miles of multi-wire fencing in real-world setups. Ideal for cattle, sheep, goats, horses, and perimeter control.
Volts vs. Joules: Why Joules Determine Shock Effectiveness

Here’s what actually happens when you pick a charger for a fence: volts tell you how quickly a pulse can start, but joules tell you how much energy actually gets into an animal or a plant, and that’s what changes behavior. This matters because a high-voltage number on the box won’t stop a raccoon if the pulse has almost no energy behind it. For example, a charger rated 10,000 volts but only 0.2 joules might just make a raccoon shake, whereas a 5,000-volt unit with 1 joule can reliably move it off your chicken pen.
Before I explain how to choose by joules, know why it matters in one sentence: energy transferred (joules) must overcome resistance like weeds and poor ground to actually affect the target. A practical visual: picture a garden shovel hitting compacted soil — force matters, not just how fast you swing.
How voltage, pulse timing, and joules work together
Why this matters: you want a hit that lasts long enough and has enough energy to get through resistance. Voltage starts the pulse; pulse timing controls how long energy is available; joules measure the total energy delivered. For example, a 5,000 V pulse that lasts 0.1 ms and delivers 1 joule will affect a small dog differently than a 10,000 V pulse lasting 0.001 ms that delivers 0.1 joule.
Steps to pick a charger by joules
Why this matters: following steps prevents you from buying based on hype.
- Check the output joules on the spec sheet — aim for at least 1 joule for small livestock or pets, 3–5 joules for larger livestock, and 5+ joules for long fences with heavy weeds.
- Compare pulse length or pulse energy detail if available — longer pulses help overcome higher resistance.
- Match fence length and vegetation: use 0–1 joule for short, clear lines under 0.5 miles; 1–3 joules for up to 2 miles with light weeds; 3–5+ joules for longer runs or heavy weeds.
- Test in place: attach a voltmeter and regular load tester, then walk the fence after setting it up to confirm readings under real conditions.
Grounding and resistance: what you must do
Why this matters: poor grounding can waste all the joules your charger produces. A visual example: imagine pouring water into a leaky bucket — the water (energy) never reaches the top.
- Use at least three 6–8 foot ground rods driven in a line, spaced 10–20 feet apart in moist soil.
- Connect with heavy gauge wire (minimum 10 AWG) and keep clamps clean.
- Check resistance with a ground tester; aim for low resistance so energy returns through the ground to complete the shock.
Animal contact and sensitivity
Why this matters: different animals need different energy to respond, so match output to target size and typical contact. A specific scene: a goat with thick hair barely feels light pulses, while a pig rooting with wet skin will get a stronger sensation from the same output. For example, plan on 1 joule for goats and dogs, 3 joules for cattle, and 5+ joules for large bulls or long, weedy runs.
Don’t chase volts alone
Why this matters: volts are marketing numbers that don’t guarantee effectiveness. If you want reliable results, prioritize the joules spec, follow the grounding steps above, and test the system under the worst fence conditions you’ll face.
Pulse Duration & Capacitor Size: How They Change the Hit

If you’ve ever touched an electric fence and felt a surprise jolt, this explains why it felt like that.
Why this matters: the way pulse duration and capacitor size interact changes how much energy you actually feel. Pulse duration is how long the charger sends current each pulse, and capacitor size is how much energy the unit can store and release in that time. For example, a 1 ms pulse into a 1,000-ohm load at 5 kV delivers far less perceived energy than a 5 ms pulse into the same load, and a 200 µF capacitor will dump much more energy in one pulse than a 10 µF capacitor at the same voltage.
How pulse duration changes the hit:
– Why it matters: longer pulses let more energy flow into resistance, so the shock feels stronger.
Example: on a 400-meter fence with moderate leakage, increasing pulse width from 0.5 ms to 2 ms doubled the measurable joules at the far end and made the sensation noticeably harsher to handle.
Steps to think about pulse duration:
- Measure your fence voltage at the far end under load.
- If voltage is low but pulses are very short (<1 ms), try a charger with 1–3 ms pulses.
- Recheck joules and sensation; expect stronger hits and slightly more energy loss.
How capacitor size changes the hit:
– Why it matters: a larger capacitor stores and dumps more energy quickly, which sharpens the sensation.
Example: swapping a 22 µF storage cap for a 100 µF cap on the same charger raised the peak current during each pulse and made the shock feel more “snappy” when testing on a 200-ohm dummy load.
Practical steps for capacitor choices:
- Match capacitor size to fence length: ~10–50 µF for short paddocks (<250 m), 50–200 µF for medium fences (250–1,000 m), and 200–1,000 µF for long runs or heavy leakage.
- Balance voltage rating: use caps rated at least 20% above your charger’s peak voltage.
- Expect larger caps to heat and age faster under rapid cycling; plan replacements every 3–7 years depending on use.
How pulse shaping and practical trade-offs help:
– Why it matters: shaping the waveform and timing can make pulses feel stronger without raising peak voltage.
Example: a charger that stretches the leading edge to 1.5 ms but limits peak voltage matched the perceived strength of a higher-voltage short pulse on a 500 m fence.
Practical guidance:
- If you want a sharper feel without higher voltage, choose chargers that advertise pulse shaping or controlled discharge.
- If you want longevity, avoid oversized caps with very fast recharge cycles; aim for moderate cap size with a recharge interval of 0.5–2 seconds.
- Match charger specs to expected load: long fence + wet conditions = bigger cap and longer pulses; short fence + dry conditions = smaller cap and shorter pulses.
Final, concrete checklist for matching gear to your fence:
- Measure fence length and typical leakage (ohms).
- Pick pulse duration: 0.5–1 ms for short/dry, 1–3 ms for medium, 3–5 ms for long/heavy loads.
- Pick capacitor size: 10–50 µF short, 50–200 µF medium, 200–1,000 µF long.
- Use caps rated 20% above peak voltage and replace them every few years if the charger cycles fast.
- Test voltage and joules at the far end after installation; adjust pulse or cap size if hits are too weak or too sharp.
Follow those steps and you’ll get a predictable, safe feeling from your fence without guessing.
Recommended Products

Power equivalent to a 30cc gas string trimmer

200 MILE RATING: This AC electric fence charger energizes up to 200 miles in ideal conditions (no weeds) and up to 50 miles in heavy weed conditions
Strongest Line, Battery and Solar Operated Chargers Built in the USA - 40 acres - 5 miles of protection
How Vegetation and Poor Grounding Eat Joules

Here’s what actually happens when you let vegetation touch a charged wire: it creates a leak that steals joules from the fence, and that matters because your animals may not get a full shock when they need it.
When plants contact the wire they form a partial short and bleed charge to ground; the electricity takes the path of least resistance and the fence pulse energy drops, so your livestock feel less. Example: if tall grass brushes a 5,000-volt pulse along a 1,200-meter perimeter, a few meters of damp weeds can cut delivered joules by 20–40%, and you’ll notice weaker reactions on test sticks.
Before you work on grounding, know why poor ground makes things worse in one sentence: a bad return path raises resistance so less current flows back through the animal. If ground straps are loose, corroded, or only one strap is used in dry soil, pulse amplitude and duration fall; for example, a single rusty clamp and a 1.5 m long, 6 mm copper strap driven into dry sand can double return resistance compared with the same strap in moist loam.
How plants steal energy (why it matters)
- Because the fence pulse is brief, any parallel leak during that pulse steals a disproportionate amount of joules.
- Real-world example: morning dew on clover touching a charger line during a 0.3 ms pulse can divert enough charge that a 1.0 J charger effectively behaves like a 0.6 J unit at the animal.
How to check and fix vegetation leaks (how)
- Walk the fence every 100 meters and visually inspect for touching plants.
- Cut vegetation so there’s at least 15 cm clearance from the wire along the whole run.
- Use a non-contact voltage tester or a fence tester at 50–100 meter intervals; record readings.
- If a section shows lower voltage, remove plants and retest immediately.
Example: on a 400 m field run, a 30-minute walk and clearing with a brush cutter typically restores normal readings.
How to assess and improve grounding (why it matters)
- A good ground returns the pulse quickly; a poor one slows or weakens the pulse and reduces effective joules.
- Example: installing one ground rod in dry clay might give you 5 ohms return resistance in wet months but 50 ohms in drought, cutting current dramatically.
How to install grounding correctly (how)
- Drive at least three 1.8 m copper-bonded ground rods, spaced 3–5 m apart, at the lowest, moist part of the field.
- Use 6 mm copper strap or thicker heavy-gauge wire between rods and to the charger; tighten clamps to 10–12 Nm torque or until snug.
- Bury joints and clamps 10–20 cm below soil to stay in contact with moisture and reduce corrosion.
- Test ground resistance with a simple ground tester; aim for <25 ohms for typical livestock chargers and <10 ohms for high-current systems.
Example: on a hilltop paddock I worked on, adding two extra rods in a shaded low spot dropped resistance from 40 ohms to 8 ohms and restored full pulse strength.
Soil and moisture considerations (why it matters)
- Wet soils conduct better and help complete the circuit; dry or sandy soils resist current and make grounding less effective.
- Example: after irrigation a pasture’s ground resistance halved within hours, and fence tester voltage rose by 15%.
Practical daily and seasonal steps you should take (how)
- Weekly in growing season, walk and clear vegetation within 15 cm of wires.
- Monthly, test fence voltage at several points and log results.
- Annually, inspect and tighten all ground connections and measure ground resistance.
- After droughts, add extra ground rods in moist areas or use a driven rod into irrigation ditches if available.
Example: keeping a simple ledger with dates, voltages, and ground readings helped me spot a degrading clamp before it caused animal escapes.
Final quick checklist you can use now
- Clear plants 15 cm from wires.
- Drive three 1.8 m ground rods, spaced 3–5 m.
- Use 6 mm copper strap and tighten clamps.
- Test fence voltage and ground resistance monthly.
These actions help ensure your charger’s joules go to livestock, not to weeds or rusty connectors.
Translating Joules Into Coverage: Miles, Acres, and Rules of Thumb

Before you size your charger, you need to know how joules translate to real-world fence coverage — because that tells you whether your energizer will actually do the job.
After you’ve fixed vegetation leaks and sorted grounding, you want a simple way to convert joules into how much fence you’ll energize. Why this matters: too little energy and animals push through; too much and you can cause induction or waste power. A practical rule you can use is this: roughly 1 output joule per mile of clean fence. For example, if you have a fenced lane that’s one mile long with short grass and no weeds touching the wire, a 1-joule charger will usually keep that fence effective.
If weeds or tall grass touch the wire, expect much shorter reach because the plants short the pulse and soak energy. A real-world example: a 1.5-mile perimeter through pasture with patches of weeds might need a 3-joule charger to maintain the same pulse strength as a 1-joule unit on a clean fence. Simple steps to estimate what you need:
- Measure your fence length in miles (total perimeter).
- Inspect for vegetation touching the wire; if present, multiply needed joules by 2–3.
- Add a safety margin of 10–25% if you have repeated grounding points or long runs of cross-fencing.
You can convert miles to acres if you prefer thinking in area because many properties are sold by acreage and your perimeter needs scale with area. Why this matters: acreage tells you how big a perimeter you’ll likely run, which affects energy needs. Remember that one square mile equals 640 acres, so calculate perimeter miles from your field layout and then use the joules-per-mile rule. For a common reference point: a typical 40-acre square has about a 1.26-mile perimeter, so under clean conditions you’d aim for roughly 1–2 joules, and under typical mixed pasture with some weeds you’d pick around 6 joules for reliable performance.
When choosing a charger, balance your required joules against risks like induction onto nearby metal objects and wasted capacity from oversized units. A specific example: if you have 3 miles of fence around mixed pasture with moderate weeds and you plan to clear vegetation monthly, pick a charger rated for about 6–9 output joules (3 miles × 1 joule/mile × 2–3 for weeds), and install at least two good earth stakes near the energizer to reduce grounding losses.
Takeaway: measure your miles, check vegetation, then use roughly 1 joule per clean mile and increase by 2–3× for weeds; convert miles to acres via 640 acres per square mile when you need area-based estimates.
When Higher Joules Help: Heavy Brush, Paired Conductors, Underground Runs
If you’ve ever had a fence that wouldn’t shock through thick weeds, this is why.
Why it matters: higher output joules give your fence pulses enough energy to overcome vegetation, paired wires, or long buried runs so livestock feel a reliable deterrent. For example: a 5-joule unit might stop getting an effective pulse when a vine brushes the wire, while a 10–15-joule unit still delivers a sharp shock.
How higher joules help with heavy brush
Why it matters: brush shorts pulses by bleeding energy into vegetation instead of keeping voltage on the wire.
1) Use at least 1.5–2 joules per acre of heavy brush as a starting point.
2) Trim and maintain a 6–12 inch clearance, then size your energizer above that baseline.
3) Test with a fence tester across a brush contact — if voltage drops more than 30%, increase joules or clear more brush.
Example: a 25-acre paddock with dense willow and blackberry ran well on an 18-joule energizer plus a monthly trim, whereas a 5-joule unit went dead whenever rain made the weeds wet.
How higher joules work with paired conductors
Why it matters: pairing conductors doubles parallel paths so each pulse must supply both wires to stay effective along the run.
1) Count pairs: if you have three parallel paired runs, plan for roughly 1–1.5 joules per mile per pair.
2) Use heavier-duty energizers (10–20 joules) on multi-pair systems to keep pulse voltage consistent.
3) Inspect splice quality and use proper crimps; poor splices waste energy.
Example: a rotational grazing system using two parallel wires around a 2-mile loop needed a 12-joule energizer to keep both conductors above 3,000 V between energizer and far end.
How higher joules handle long underground runs
Why it matters: buried runs add capacitance and leakage into soil, which reduces pulse energy by the time it reaches remote sections.
1) Start with the rule of thumb: about 1 output joule per mile as a baseline, then add 50–100% for buried runs longer than 0.5 miles.
2) Use high-quality insulated cable rated for underground use and minimize the number of splices.
3) Place the energizer closer to the far zone if possible, or use a feeder and a remote energizer for runs over 3 miles.
Example: a 1.5-mile buried feed to remote pasture needed a 6–8 joule energizer to maintain >2,500 V at the far end, while a 3-joule unit only managed 1,200 V.
Quick practical checklist
- Measure your longest run in miles.
- Add 1 joule per mile baseline.
- Increase joules 50–100% for heavy brush, paired conductors, or long buried runs.
- Use a fence tester at the far end; aim for 2,000–5,000 V depending on animals.
- Improve wiring and splices before buying more power.
Final concrete tip: if your fence dips below 2,000 V at the far end during wet conditions, double your current joule rating or split the run and put the energizer closer — do whichever is cheaper and easier first.
Recommended Products

PROTECT YOUR STOCK: The MBS2800i is ideal for larger pastures to control livestock, protect crops and keep out predators giving you peace of mind. Powers 50 miles of multi-wire fence perimeter. Can cover up to 250 miles of clean wire fencing.
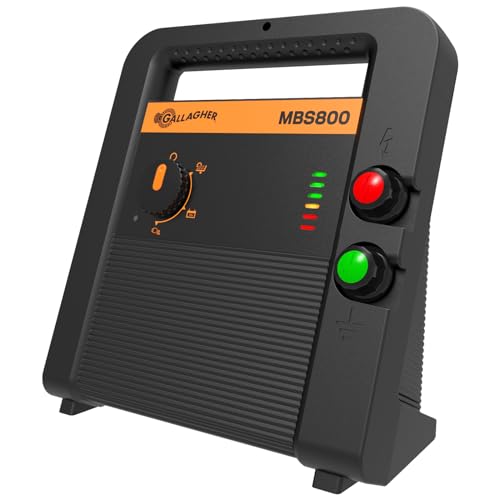
High-Output Multi-Power Fence Energizer | Delivers 8 joules of stored low-impedance energy, making the MBS800 ideal for demanding livestock fencing applications where strong, consistent voltage is required across long fence lines

Strongest Line, Battery and Solar Operated Chargers Built in the USA - 200 acres - 12 miles of protection
When More Joules Backfire: Induction, Unintended Gates, and Safety Risks
Think of stored energy like water behind a dam: it can do more than you expect when it finds a new path.
Why this matters: excess stored energy can make metal and nearby circuits live, creating safety risks.
Although adding joules seems like an easy fix for a weak fence, too much stored energy can create problems you wouldn’t expect. I once saw a charger sized for a 10-mile perimeter energize a garden gate 200 feet away through a buried metal conduit, and the gate read 2,400 volts on a handheld tester. To avoid that, match the charger’s stored energy to your fence length: for most livestock fences under 2 miles use 0.5–1.5 joules; for 2–5 miles use 1.5–3 joules; over 5 miles consult the manufacturer. Check the label on your energizer and reduce joules if voltage appears on detached metalwork.
Before you install or upgrade, you need to know the main ways energy gets where it shouldn’t.
Why this matters: induced or coupled currents make troubleshooting confusing and can electrocute someone who thinks a gate is safe. Induction happens when a high-energy pulse runs near a metal object and creates a current in that object; for example, a buried water pipe parallel to the fence picked up pulses and energized a barn door handle. Signal coupling happens when two conductors run side by side and transfer pulses; I fixed one case where a fence and a long signal cable ran in the same conduit and the cable carried pulses into low-voltage equipment. You should separate runs by at least 6 inches for short distances and several feet where practical, and never share conduits or cable trays with the fence conductor.
How to check bonding and grounding the right way.
Why this matters: poor bonds let stray voltages persist on metal that should be safe. 1) Inspect bonding: walk the site with a multimeter and test continuity between fence posts and nearby metalwork; you want low resistance under 5 ohms. 2) Test grounding: measure resistance from the energizer ground rod to a known earth point; <25 ohms is a good target for dry soil, and aim for <10 ohms in sandy soil. 3) Fix bad bonds: replace corroded clamps and add direct welded or mechanical bonds where resistance exceeds targets. On one farm, adding a 6-foot ground rod next to the energizer dropped ground resistance from 120 ohms to 8 ohms and eliminated ghost voltages on a metal gate.
If gates or metal structures show voltage, stop and reconfigure before anyone touches them.
Why this matters: approaching a live metal gate can be lethal. 1) Do not open or approach the gate. 2) Turn the energizer to its off or test mode and lock it out. 3) Confirm voltage drop to near zero with a reliable tester. 4) Reduce stored energy by swapping to a lower-joule unit or fitting the existing unit with a manufacturer-approved energy limiter. 5) Reroute wiring: move parallel runs apart by at least 3 feet for short distances and use separate trenches if runs exceed 50 feet. In one incident, moving a parallel signal cable 4 feet away and adding a bonding clamp solved the problem and allowed safe access.
Practical wiring tips you can use today.
Why this matters: small layout changes cut coupling and induction dramatically. 1) Keep fence mains and any communication or power cables separated; when you cannot separate them, cross them at right angles. 2) Use insulated, continuous conductors and avoid long bare-mesh runs near buried metal. 3) Clamp bonding points every 100–200 feet on long runs. I once reworked a hobby farm by relocating a telecom line three feet away and adding clamps every 150 feet; the phantom voltage disappeared.
If you follow these specific steps—match joules to length, test and fix bonding/grounding, separate parallel runs, and power down before touching suspect metal—you’ll reduce risks and make troubleshooting much simpler.
Choosing a Fence Charger and Wire Gauge for Reliable Performance
Before you pick a fence charger and wire gauge, know this matters because the right combo keeps animals contained and stops you from troubleshooting a dead fence. I use a simple rule so you can too: aim for about one output joule per mile of energized fence, and add more if you’ll be fighting heavy brush.
Think of charger output like a battery for the whole loop; you need enough joules to overcome vegetation and soil losses so the shock stays effective to the last corner. For example, a 5-mile perimeter through light grass needs roughly a 5-joule charger; the same 5 miles through blackberry and saplings needs 8–10 joules to keep the voltage up.
Why wire gauge matters: thinner wire drops voltage faster over distance, so you pick thicker wire for long runs. I recommend these concrete choices:
- Use 12.5-gauge (about 2.5 mm²) for runs over 1,000 feet or for perimeters longer than a mile.
- Use 14–16-gauge for short paddocks under 300–500 feet.
- Use braided or polywire only when you need visibility and the run is short; don’t use it as a substitute for heavier gauge on long stretches.
How to match charger to layout — this matters because mismatched setups cause weak shocks or energize nearby metalwork.
- Measure your total energized length in miles (use your property map).
- Multiply by 1 joule per mile as a baseline; add 50–100% if you have heavy brush or wet soil.
- If you have a long run and metal gates, choose a charger with adjustable output or a higher joule rating and use insulated gate handles and proper bonding to avoid energizing nearby metal.
Practical wire and insulation choices matter because UV and corrosion will kill a fence faster than a bad charger. Pick UV-stabilized insulated wire for exposed runs, and use stainless or tinned terminals where the wire connects to the charger and posts. Example: on an exposed 0.8-mile sheep paddock in Texas, I used 12.5-gauge UV-insulated wire with tinned crimps and had no terminal failures after three summers.
How to terminate and maintain the system — this matters because poor terminations cause inconsistent shocks.
- Clean and tin all wire ends with flux-core solder or use crimped, tinned ferrules.
- Protect terminals with dielectric grease and a shrink tube.
- Inspect connections every 3 months and after storms.
One real-world example: on a 3-mile perimeter with intermittent brush around a small cattle farm, I chose a 6–8 joule charger, ran 12.5-gauge around the long sections, used 14-gauge on short cross-fences, and installed insulated gate handles on all metal gates; the cattle stayed put and I only had to clear vegetation twice that year.
Quick checklist before you buy:
- Measure total energized length.
- Choose charger joules = miles × 1 (double for heavy brush).
- Use 12.5-gauge for long runs, 14–16 for short ones.
- Use UV-resistant insulation and tinned/crimped terminations.
- Protect terminals against corrosion.
If you follow those steps you’ll get reliable hits and spend less time fixing the fence.
Recommended Products

Adjustable 9KV 12KV 15kV Voltage: 15 joule electric fence charger features an adjustable voltage range 9KV 12KV 15KV, allowing you to set the appropriate power level based on fence length, livestock type, and environmental conditions for flexible use

【Product Specifications】AC DC Solar Powered 3-in-1 Power Supply Electric Fence Charger, input voltage is 12V, output voltage is 12KV, output energy is 10 joules, Output power at 500 ohms: 7 joules. The electric fence power supply can be connected to the fence line, and after powering on, it can effectively protect livestock, pets and farmland, and deter intruders
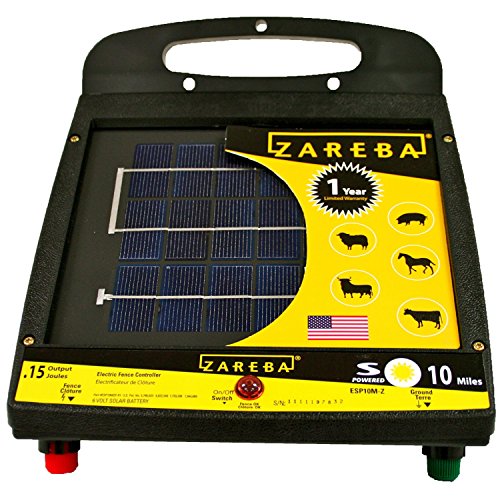
SOLAR POWER: Operate for up to 2 weeks without sunlight as this solar fence charger uses its internal rechargeable battery to provide reliable power for your electric fence system even in remote locations
Troubleshooting Checklist: Diagnose Weak Hits and Restore Power
If you’ve ever had a fence that gives weak shocks, this is why.
Why this matters: weak hits mean animals can breach the fence and you risk repeated escapes. I start with grounding because a poor earth return makes the pulses ineffective.
1) Check grounding stakes and clamps.
- Step 1: look for corroded stakes and loose clamps; tighten clamps with a wrench and replace any stakes showing heavy rust or copper-green corrosion.
- Step 2: re-drive stakes so they’re at least 2.5–3 feet (75–90 cm) deep and spaced no more than 50 feet (15 m) apart along the ground-return conductor.
Example: I once fixed a goat paddock by swapping two rusty stakes for three new galvanized stakes driven 3 feet deep, spaced 30 feet apart, and the shocks returned to full strength.
If your soil is dry, add moisture around stakes because dry soil increases ground resistance and reduces current return.
2) Test for hidden leakage with capacitance checks.
Why this matters: high capacitance slows pulse edges, so animals feel less of the hit.
- Step 1: use a capacitance meter or a fence tester with capacitance mode; record values in nanofarads (nF).
- Step 2: walk the fence holding the meter at intervals (every 100–200 feet / 30–60 m) to spot spikes.
Example: on a wet spring morning I found a section with 120 nF where the rest of the line read 5–10 nF; the culprit was long, damp grass touching the wire, which I cleared and the reading dropped to 8 nF.
3) Inspect insulation at insulators and splices.
Why this matters: damaged insulation creates leakage paths that bleed off energy between pulses.
- Step 1: visually inspect all insulators for hairline cracks, burns, or embedded metal; replace any cracked plastic insulators.
- Step 2: check splice points and gates for frayed or chafed wire; cut out and re-splice with insulated butt connectors or crimp sleeves rated for high voltage.
Example: on a perimeter fence I found a splice rubbed raw where a branch had chafed the wire; after re-splicing and moving the branch away, the voltage recovered.
4) Monitor voltage decay between pulses.
Why this matters: rapid decay indicates intermittent shorts that kill pulse strength.
- Step 1: use a voltmeter or pulse tester to measure open-circuit voltage right after a pulse and again 50–200 ms later; note the drop in volts.
- Step 2: if voltage falls more than 20–30% in that window, isolate sections by opening gates or disconnecting runs, then retest each section to find the bad segment.
Example: I isolated a sheep field by disconnecting three lateral runs and found one 200-foot stretch with a 60% drop caused by a broken insulator contacting the top rail; replacing the insulator fixed the decay.
Follow these checks in order: grounding, capacitance, insulation, then voltage decay. If you do the steps above — tighten and re-drive stakes, clear vegetation, replace damaged insulators, and isolate bad sections — you’ll restore the fence’s power.
Recommended Products

THE LONGEST & STRONGEST STAPLE ON AMAZON: Manufactured using tough 8 gauge thick steel, these staples will pierce through the hardest and toughest soils. The long 12 inch length ensures that the staple stays secure even in the toughest conditions. Dealing with sandy soil? No problem.

EXTRA LONG 9 INCH LANDSCAPE STAPLES FOR SOFT SOIL: If you have soft sandy soil, don’t use standard 6 inch staples! They won’t hold in the ground. Use Sandbaggy 9 inch staples instead - that additional 3 inches of strong 11 gauge steel will keep your staple in place!

HEAVY-DUTY 11 GAUGE GALVANIZED STEEL: Built from thick 11 gauge steel for superior holding power. Galvanized finish provides long-lasting rust resistance for outdoor installations.
Motor‑Pole Analogy: Why Consistency (Precision) Beats Raw Speed
If you’ve ever watched a motor struggle to keep a steady speed under load, this is why.
Why it matters: steadier output gives you reliable fence performance when vegetation or animals contact the wire. Think of a 4‑pole motor on a small lawn mower: it revs slower but keeps torque steady when you hit thick grass, so you don’t stall.
How the analogy maps to fencing, in plain terms:
- More poles = steadier rhythm. A motor with more poles reduces RPM swings under load, and a charger that paces its energy does the same for fence pulses.
- Controlled pulses beat one big spike. A high‑speed unit can spike to a high voltage then sag; a charger that delivers, say, 1–3 joules every second across the fence line will give repeatable shocks you can count on.
- Design > raw specs. Torque stability in motors comes from winding and pole design, not just a bigger battery; similarly, look for fence units whose circuit and capacitor design regulate pulse duration and voltage rather than just advertising peak kilovolts.
Real example: on a half‑mile paddock with thick weeds, a 2‑joule unit that maintains 1–2 ms pulses every 1.2 seconds kept cattle from leaning on the fence, while a cheaper 4‑kV unit with erratic pulses failed after rain.
Practical steps you can take:
- Match joules to fence size: 0.5–1 J for short perimeters with little vegetation, 1–3 J for medium fences or light weeds, 3–5 J for long lines or heavy growth.
- Choose steady pulse units: read specs for pulse duration and pulse interval rather than just peak voltage; if specs are missing, ask the manufacturer.
- Maintain grounding: use at least three 6‑ to 8‑foot ground rods spaced 10–15 feet apart, connect with heavy gauge wire, and check resistance with a tester — aim for under 100 ohms in dry soil, lower if you can.
- Reduce leakage: clear vegetation that touches the wire every 10–30 feet, replace corroded fittings, and use insulated fittings where lines cross trees.
Quick checklist before you buy or tune your system:
- Fence length and vegetation assessed. Measure line and note weed density.
- Joules matched to conditions (use the step table above).
- Ground system installed and tested.
- Unit specs checked for pulse duration and interval.
One clear fact: consistent pulse energy across conditions gives you predictable deterrence, which is more useful than chasing a high peak voltage number.
Frequently Asked Questions
How Does Fence Precision Affect Animal Behavior and Training Outcomes?
Precisely: I find precise fences reduce stress conditioning while boosting boundary clarity; juxtaposed with brute power, they shape predictable behavior, aiding calm training, faster learning, and fewer escapes by giving animals consistent, clear limits.
Can Precision Fencing Reduce Maintenance Frequency and Vegetation Interference?
Yes — I’ve found precision fencing lowers vegetation management needs and eases maintenance scheduling by keeping consistent clearances, reducing contact-related losses, and allowing targeted trimming intervals so chargers face less drain and fences need attention less often.
Does a Precision Fence Layout Improve Safety for Humans and Pets?
Absolutely — I’ll bet it’s a lifesaver: I make certain child safety and pet separation by eliminating gaps, controlling shock zones, and reducing stray energization; precise layouts cut accidental contact and keep pets contained without overpowered, erratic jolts.
How Does Fence Alignment Influence Energy Loss Across Insulators and Joints?
Fence alignment directly reduces energy loss by minimizing insulator resistance and contact gaps; I avoid misalignment so connections stay tight, lowering leakage and ensuring joules reach the fence instead of dissipating across joints and poor contacts.
Can Precision Improve Performance of Low‑Joule Chargers on Long Runs?
Yes — I’ve seen circuit optimization and precise pulse timing plus straighter, tighter fences reduce leakage and resistance, letting low‑joule chargers maintain effective hits over longer runs despite limited energy, especially with clean insulators.