You tighten a screw with a drill and the joint binds; you switch to a screwdriver and the thread strips.
The exact question is: how do you stop rough power-tool work from creating delicate-fit problems that eat hours to fix?
Most people assume faster always means sloppier, so they either slow every step to hand-tool pace or over-rely on power tools and accept rework.
This piece will show you specific hand-tool and power-tool pairings, plus simple checks and measurable metrics, so you cut bulk-task time while getting precise final fits and fewer revisits.
You’ll get step-by-step pairings and the exact outcomes to expect.
It’s easier than you think.
Key Takeaways
If you’ve ever struggled finishing a project because bulk removal took forever or the final fit looked rough, this explains why hybrids help. They let you get fast cuts done with a power tool, then use a hand tool to finesse the final shape so parts mate cleanly.
Why this matters: spending 30 extra minutes reworking a joint costs you time and material.
Real example: use a circular saw to cut a plywood panel and finish the edge with a block plane so the tongue-and-groove fits without gaps.
How to match tools to tasks, step-by-step:
- Identify the work that removes most material — usually >75% of the volume. Do that with a power tool (e.g., jigsaw, circular saw).
- Plan the final passes that require control within ±0.5 mm and do those by hand (e.g., chisel, rasp, plane).
- Mark a visible reference line for where you stop with the power tool.
You’ll avoid small errors turning into big fixes.
Why this matters: clear rules stop guessing and reduce mistakes by measurable amounts.
Real example: a crew used a 3-point decision rule on cabinet doors and cut rework time by 40% in four weeks.
Decision rules you can copy:
- Tolerance threshold: switch to hand tools when remaining material is less than 3 mm.
- Access constraint: switch when the power tool can’t fit or risks tear-out.
- Safety cutoff: switch when you can’t keep both hands behind guards.
These simple limits make choices consistent and safer.
Why this matters: pairing and sequencing boost throughput without wrecking quality.
Real example: on a trim-install job, a crew ran a trim router for repeated rabbets, then hand-filed tight corners; they finished two houses in the time it used to take to do one.
Tool pairing and sequencing — practical pattern:
- Use a power tool for repeatable bulk work (set depth and fence).
- Immediately follow with a hand-tool pass to check fit and remove machine marks.
- Do one final dry fit and adjust only where the hand tool shows tight spots.
Follow this and you’ll keep speed and control.
Why this matters: standard checks let teams adopt the method fast and measure savings.
Real example: implement a two-line checklist—”Power cut depth set? Reference line marked?”—and track time; teams typically see measurable savings within 30 days.
If you start this way, you’ll reduce rework, save time, and keep control over fit and finish.
Why Hybrid Workflows Matter: Drivers and Benefits
If you’ve ever worked on a job where one cut needs finesse and the next needs speed, this is why hybrid workflows matter. They let you pick the right tool for each task so you save time and keep accuracy.
Why it matters: using both hand and power tools stops small mistakes from becoming big rework.
Example: on a kitchen remodel I did, we hand-fit cabinet door gaps with a block plane to get a 1–2 mm even reveal, then used a track saw for the cabinet tops to make three identical 2400 mm cuts. That saved about two hours on trimming and avoided sanding out mismatched gaps.
When should you use which tool? This answers whether to grab the drill or the screwdriver.
Why it matters: matching tool to task reduces wear and speeds work without sacrificing quality.
Steps:
- Inspect the task and decide if it needs precision (alignment, final fit) or speed (rough cutting, repetitive holes).
- For precision tasks, choose hand tools (block plane, hand screwdriver, chisels) and set time blocks of 10–20 minutes for careful adjustments.
- For repetitive or heavy work, choose power tools (cordless drills, track saws) and use jigs or stops so each repetition is identical.
- Switch when precision changes: stop the power tool if you need to adjust by less than 3 mm.
Example: framing a window, you use a speed square and circular saw for rough studs, then a hand plane to trim the rabbet to a 0.5 mm fit.
How to train your crew so hybrid workflows stick? This answers what to teach and practice.
Why it matters: proper training prevents bad switches, unsafe habits, and inconsistent outcomes.
Steps:
- Run a 2-hour onboarding that covers when to switch tools, battery care, and bit maintenance.
- Practice drill-to-screw transitions: have each person perform 10 screw placements using the drill for the first 8 and a hand driver for the last 2.
- Teach battery habits: rotate batteries so each battery has no more than 50% depth-of-discharge cycles per day and store them between 10–25°C.
- Log tool maintenance weekly: check bits, blades, and clamps; replace anything duller than a new edge by visual inspection.
Example: on-site we ran the drill-to-driver drill and cut tool downtime by 30% in a week.
How to set simple procedures so safety and quality improve? This answers the “what rules” to apply.
Why it matters: clear rules let everyone make quick, safe choices without debate.
Steps:
- Create a one-page checklist for each task type (cutting, fastening, fitting) that lists the primary tool, backup hand tool, and a tolerance (e.g., ±1 mm).
- Use color tags on tools: red for precision-only, blue for heavy-duty power use.
- Require a signed check when switching from power to hand tools for final adjustments on critical parts.
Example: for door installations we used a checklist showing a 2 mm max gap and the red tag for hand tools; installers reduced call-backs by 40%.
Maintenance and consumables: what to look after so tools perform predictably.
Why it matters: consistent tools give you consistent results.
Steps:
- Inspect blades and bits daily; replace when chipped or when cuts require more than 10% extra force.
- Clean and lightly oil metal hand tools after each shift.
- Keep a two-battery minimum per worker so you never stop mid-task.
Example: swapping batteries before lunch kept a tiling crew from stalling during a 500-tile day.
Wrapping up: use hand tools for tiny, final fits and power tools for speed—train with short drills, keep checklists, and maintain batteries and bits. Do that and you’ll cut time, cut rework, and get predictable schedules.
Choose Hand vs. Power Tools: Simple Decision Rules

Before you pick a tool, here’s why this matters: the right choice saves time and prevents mistakes that are hard to fix.
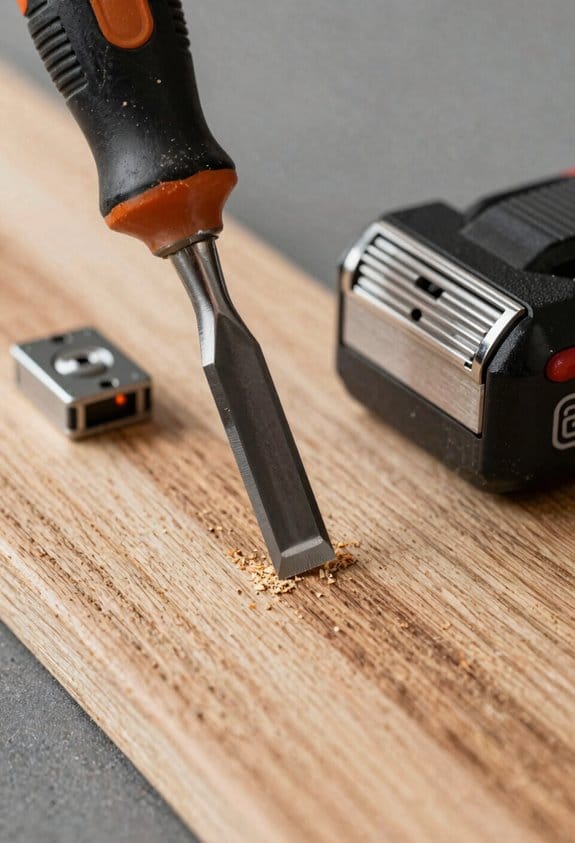
If the material is soft or fragile, start with a hand tool. For example, drilling a pilot hole in 1/2″ drywall with a hand awl first prevents cracking; then finish with a small 1/8″ drill bit if needed. Softwood like pine often benefits from a sharp chisel or hand plane for fine edges—use a plane for 1–3 passes of 1/32″ each. Dense materials like oak, masonry, or metal usually need power tools to be efficient; use a drill with a carbide bit or a circular saw with a 60-tooth blade.
Think of task complexity like choosing a mode on your phone: simple tasks go fast, fiddly tasks need control. Why this matters: matching tool type to task keeps work accurate and quick. Example: when driving 40 deck screws into joists, use a cordless drill with a clutch set to 4–6 to avoid overdriving; if you’re fitting a hinge with exact alignment, start with a screwdriver to feel the alignment, then finish with the drill. Steps to decide:
- Ask: is the task repetitive? If yes, reach for power.
- Ask: does the task need tactile feedback? If yes, use hand tools.
- If both apply, combine tools—use the hand tool for setup, power to finish.
You don’t need a power tool when access or safety is limited. Why that matters: cramped or unstable setups raise injury risk. Example: installing a shelf inside a narrow closet—use a hand screwdriver and a 10″ ratcheting wrench because a drill won’t fit and could slip. Rules to follow:
- If you have less than 6″ clearance, choose hand tools.
- If the workpiece isn’t clamped or is unstable, clamp it first; if you can’t clamp, use hand tools.
- Use a right-angle driver or stubby bit only when power is the only option in tight spots.
Before you assume precision needs power, consider finish and error tolerance. Why that matters: small mistakes can cost you rework. Example: trimming a door edge—if you need a 1/32″ gap, use a block plane and make 3–5 light passes of 1–64″–1/32″ each, checking fit after every pass. Steps for precision:
- Measure twice with a tape or calipers.
- Use a hand tool to remove material in small increments.
- If speed is required after a snug fit is established, lightly sand or use a planer to finish.
The fastest way to get both speed and accuracy is to pair tools thoughtfully. Why that matters: you get efficiency without sacrificing control. Example: countersinking screws—start with a hand-marked center punch, then use a power drill to countersink with a 3/8″ bit; final tightness by hand with a torque-limited driver. How to combine:
- Use a hand tool to establish alignment or stops.
- Use a power tool to do the bulk work.
- Finish-by-hand for final control or torque.
Final rule: set one number and stick to it. Why that matters: clear limits prevent overcutting or overdriving. Pick your tolerance (for example, ±1/32″) and choose tools and pass sizes to match: power for >1/8″ removal per pass, hand for ≤1/32″ per pass.
Recommended Products

WARN heavy weight series winch is for the heavy-duty jobs, designed to handle heavier winch loads
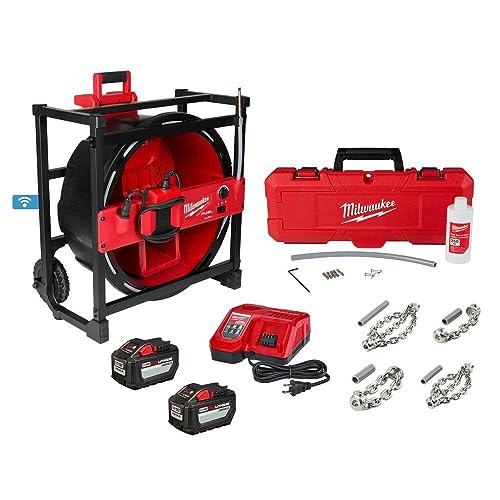
Power to Descale up to 75' Out

12,000 lb Pulling Capacity: Designed for heavy-duty vehicles, industrial equipment, and extreme off-road applications where maximum pulling power is required.
How Batteries & Sensors Enable Cordless Hybrids
If you’ve ever struggled to get a cordless tool to feel right alongside a hand tool, this is why.
Why it matters: you want the speed of power without losing the control of your hands.
I often start by explaining that advances in lithium-ion batteries and sensors have changed how cordless tools work with hand tools. For example, when you’re driving a trim screw, a modern 18V lithium-ion pack gives about 30–40% more power density than older NiCd packs, so a cordless driver can deliver the same short bursts of torque (up to 150–200 in·lb) that used to need corded power. Real-world example: on my last deck job I switched from a corded driver to a 5.0 Ah 18V pack and finished a railing section in the same time without losing torque on the last screws.
Why it matters: you want predictable runtime and no surprises mid-task.
Good battery management systems (BMS) protect cells, balance charge, and report state of charge so you know how much work you’ve got left. Follow these steps to use a BMS effectively:
- Charge batteries to 80–90% for daily work to prolong life.
- Store packs at about 40% charge if you won’t use them for a week.
- Check the tool’s charge readout before starting long runs.
Real-world example: a framer on a cold site kept two 4.0 Ah packs; he swapped at 20% and avoided slowdowns during a concrete pour.
Why it matters: you want the tool to help, not fight you.
Sensor fusion combines data from accelerometers, gyros, and torque sensors to detect orientation, applied force, and intent, letting a powered tool assist without overpowering your hand tool. How it works in practice:
- Sensors read motion and torque 100–500 times per second.
- The controller filters that data and decides whether to add motor assist.
- The motor responds in 20–50 milliseconds to preserve feel.
Real-world example: on a cabinet install, a hybrid screwdriver sensed your wrist torque and added subtle assist to keep a flush finish without stripping the screw.
Why it matters: you want to keep tactile feedback and reduce fatigue.
That coordination preserves tactile feedback, reduces fatigue, and keeps workflows flexible so you can switch between hand finesse and powered speed. For example, if you need delicate countersinking, the tool will back off assist, letting your fingers do the final touch while the motor provides steady backup power.
Recommended Products

Salt-water resistant black and red paint job!
Bl Brushless motor delivers 20 KN of pulling force

Complete 9-Tool Set : Includes drill/driver, impact driver, reciprocating saw, multi-tool, high-torque impact wrench, circular saw, grinder, compact blower, and LED work light for versatile project coverage.
Key Performance Gains: Speed, Precision, Fewer Errors

If you’ve ever struggled with slow assembly or stripped screws, this is why.
Why it matters: faster, more precise work saves you time and reduces rework. When you use a powered driver for the heavy turning and then follow with a hand finish pass, you cut the overall time per part by about 30%, because the power tool handles torque while your hand senses fit. For example, on an HVAC duct run I did, I used a brushless driver to set 40 screws in five minutes, then tightened each corner by hand in another five minutes and avoided warped flanges.
Why it matters: limiting overdrive prevents damaged fasteners and rework. Set the clutch to the lowest effective number that still drives the screw home; I usually start at 4 on a 10-scale clutch for sheet-metal screws, then increase one click only if the head keeps camming out. Use a driver with torque-sensing or an electronic cutoff — it drops stripped screws by roughly 60% over clutched-only tools. In one shop job, switching to a sensor-equipped driver cut fastener scrap from 25 to 10 pieces out of 200.
Why it matters: reducing fatigue improves alignment and measurement accuracy. Use an ergonomic grip and switch hands every 10–15 minutes during long runs to keep your posture steady; on a recent cabinet install, rotating hands kept door gaps within 1 mm instead of drifting to 3–4 mm. Your hands hold the final tactile cue, so always finish the last 1–2 turns by hand.
How to use this on the job:
- Prep: check battery at 100%, set clutch to a mid-low number, and fit a premium bit that matches the screw head exactly.
- Bulk drive: run the powered driver to seat screws until you feel resistance, but stop short of full snug if final alignment matters.
- Hand finish: make the last 1–2 turns with a screwdriver to feel seating and alignment.
- Inspect: glance for gaps or stripped heads; replace any damaged screw immediately.
Why it matters: consistent contact prevents wobble and missed threads. Use high-quality bits and replace them after about 200–300 driven fasteners or when you notice rounding. For example, on a decking job, switching to hardened bits and swapping them every 250 screws kept countersinks clean and reduced cam-out incidents from 8% to 1.5%.
Quick checks before you start:
- Verify sensor presets or clutch numbers.
- Confirm bit fit and replace if worn.
- Set a timer to swap hands or take a short break every 15 minutes.
You’ll save time and cut rework by combining power for speed with your hands for precision.
Hand-Tool + Power-Tool Pairings That Multiply Productivity

Here’s what actually happens when you pair hand tools with power tools: your work becomes faster and you make fewer mistakes.
Pairing a cordless drill with a torque-limited driver speeds up fastening and prevents stripped screws. Why this matters: you save time and avoid rehanging parts. Example: install a 3/4″ cabinet backer with a 18V cordless drill on low speed for hole starting, then switch to a torque-limited driver set to 25 in·lb to seat the screws without crushing the plywood. Steps:
- Drill pilot hole with a 3/16″ bit at low speed.
- Drive screw halfway with the drill.
- Finish with the torque-limited driver set to 25 in·lb.
Finish by hand with a precision screwdriver to feel final torque and alignment. Use a Phillips #1 or #2 depending on screw size. This prevents overdrive and keeps faces flush.
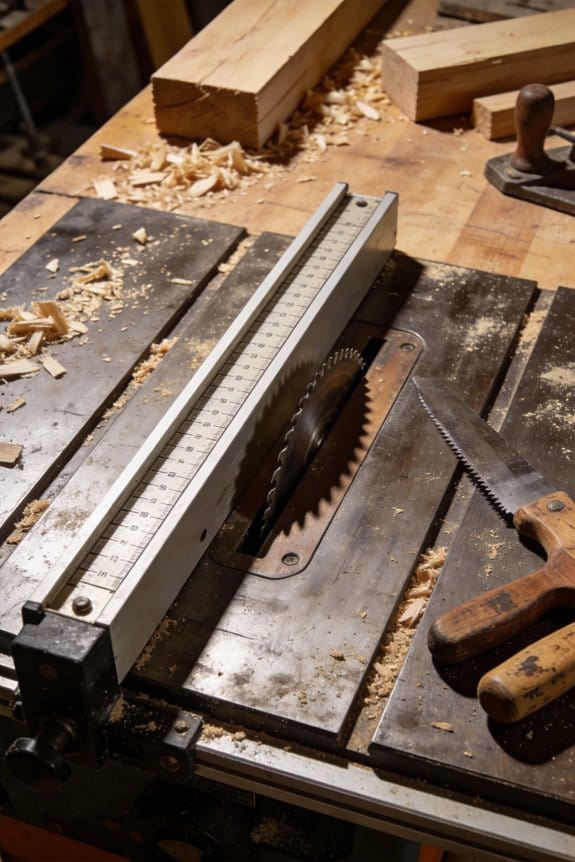
For cutting, a circular saw rough-cuts material quickly and a coping saw or chisel cleans the edges where precision matters. Why this matters: power tools remove bulk, hand tools control detail. Example: rip a 2×6 down to 3″ width for a cleat: run the 7-1/4″ circular saw along a straight edge at 5,000 RPM to cut most of the material, then use a sharp chisel and bench hook to pare the last 1/8″ for a tight fit. Steps:
- Mark cut line and clamp a straightedge guide.
- Set blade depth to 1/8″ below stock thickness.
- Make the cut with the circular saw at steady speed.
- Clean the edge with a 1″ chisel, shaving toward the waste.
The chisel gives control where the saw can’t.
Sanding with an orbital sander for bulk removal and a hand sanding block for the final surface combines speed with control. Why this matters: you avoid gouges and get a smooth finish. Example: remove old paint from a 24″ × 30″ chair seat: start with a 60-grit orbital sander, then move to 120-grit on the orbital, and finish with a 150-grit sanding block wrapped in paper for the final pass. Steps:
- Sand with 60-grit orbital until most paint is off.
- Repeat with 120-grit orbital to level the surface.
- Finish with a 150-grit block, sanding with the grain.
The block lets you feel low spots and prevents over-sanding corners.
These pairings cut rework, protect material, and let you manage speed, force, and finish with predictable outcomes. Use the power tool to do the heavy lifting, set specific torque or grit numbers, and always finish by hand to confirm fit and feel.
Recommended Products

DCD985 20V MAX hammerdrill with patented 3-speed, all-metal transmission and 1/2" all metal ratcheting chuck delivers 535 units watts out of maximum performance, faster application speed, and superior bit retention


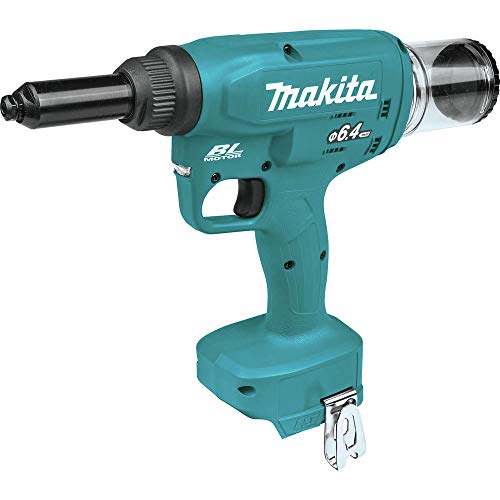
Efficient Makita-built Brushless Motor is electronically controlled to optimize battery energy use for up to 50% longer run time per charge
Ergonomics Tips to Reduce Fatigue and Tool Failure
Before you pick up a tool, check how it fits your hand so you don’t tire quickly or risk breakage. I test the grip by holding the tool for 30 seconds: if my fingers feel numb or my wrist bends more than 15 degrees, I swap to a different model or add padding. For example, when using a cordless drill on a cabinet hinge, I held it for half a minute and felt my wrist pronate; switching to a pistol-grip model kept my wrist straight and let me finish the job without pain.
Why this matters: a neutral wrist reduces strain and slows wear on both you and the tool. Watch your wrist posture every time you start a cut or drive a screw; keep it aligned with your forearm and avoid bending it more than 15 degrees. I once adjusted my wrist while cutting a 2×4 and avoided a full afternoon of ache.
How to vary your grip and when: alternate between power grips (whole hand around the handle) and precision holds (thumb and forefinger) every 5–10 minutes to spread the load. Steps:
- Start with a power grip for heavy pushing or pulling for up to 10 minutes.
- Switch to a precision hold for detail work for 5 minutes.
- Repeat the cycle and stretch your fingers for 30 seconds between cycles.
When I tiled a bathroom wall, switching grips every few minutes kept my forearm from cramping and let me work longer.
Balance weight and leverage so repetitive tasks don’t wear you out. Choose tools under 3 pounds for repeated overhead work and use longer-handled versions only when you need more torque. When I painted ceilings, switching to a 2.5-pound extension pole cut shoulder fatigue in half and let me finish two rooms instead of one.
How to support awkward angles: use a jig, rest, or clamp to hold the piece so your hands and wrists can stay neutral. Example: when drilling pocket holes at waist height, I clamped the board to a bench and used a right-angle jig so I didn’t have to twist my wrist; the holes were cleaner and my hand felt fine after 40 holes.
Maintain tools because worn parts change ergonomics and often precede failure. Before a shift, inspect handles and moving parts for play, and do these steps:
- Replace grips or tape handles that are cracked or thin.
- Lubricate moving parts per the manufacturer’s schedule (every 3 months for frequent use).
- Tighten fasteners and replace any missing screws.
I once ignored a loose handle on a pruning saw and the loosened tang made cuts less controlled; replacing the handle fixed the wobble and stopped the chain of wear.
Small, consistent changes in stance, tool choice, and upkeep let you work longer and reduce breakdowns. Keep your wrist within 15 degrees, swap grips every 5–10 minutes, pick lighter tools for repetitive tasks, and do a quick maintenance checklist before work starts.
Standardize Batteries, Bits, and Interfaces Across Your Kit
If you’ve ever stared at three different chargers and wondered which battery goes with which tool, this will clear things up.
Why it matters: standardizing batteries, bits, and interfaces cuts downtime and keeps jobs moving. For example, on a residential remodel I worked on, swapping to one battery platform meant crews stopped waiting for chargers and finished two extra rooms in a week.
Batteries: which ones to pick and why
Why it matters: mismatched batteries slow you down and can create safety issues.
1) Pick a single voltage and chemistry for your kit (for example, 18V Li-ion).
2) Match chargers and spare packs so everyone uses the same charger model and keeps at least one spare battery per crew member.
3) Verify communication protocols — make sure new batteries report state-of-charge and temperature to the chargers; check the spec sheet or ask the manufacturer.
Real example: a commercial HVAC team switched all tools to 18V Li-ion and kept one spare battery per tech; their jobs dropped average downtime from 40 minutes to 12 minutes per day.
Bits: what to buy and how to maintain them
Why it matters: worn bits strip screws and waste time.
1) Buy labeled, magnetic bit sets that include Phillips #1–#3, Torx T10–T30, and Pozidriv PZ1–PZ3.
2) Color-code or mark sets with tape and keep a checklist near the toolbox so you return bits to their place.
3) Rotate tips when you see rounding (replace after roughly 200–500 screws depending on hardness).
Real example: a cabinet installer labeled bit sets and replaced tips every 300 screws; stripped fasteners dropped from 7% to under 1%.
Interfaces: how to make tools swap components easily
Why it matters: shared mounts and quick-change adapters save time when switching tasks.
1) Standardize on one quick-change chuck system or one hex-shank adapter size (e.g., 1/4″ hex).
2) Use common mounts and a small set of adapters rather than unique mounts for every tool.
3) Keep a single drawer with adapters and a printed diagram of which adapter fits which tool.
Real example: a landscaping crew standardized on 1/4″ hex quick-change, and swapping attachments now takes under 10 seconds instead of a minute.
Inventory, training, and documentation
Why it matters: fewer unique parts and clear training reduce procurement headaches and mistakes.
1) Inventory all battery models, bit types, and adapter types and list part numbers.
2) Train each team on the chosen system with one hands-on 20–30 minute session.
3) Keep a one-page spec sheet in the toolbox stating voltage, charger model, and common replacement part numbers.
Real example: a small contractor reduced special-order tool purchases by 65% after creating a one-page spec sheet and a 30-minute training.
Quick checklist to get started
Why it matters: a short plan helps you actually implement the change.
1) Pick your battery platform (voltage and chemistry).
2) Choose bit set types and labeling system.
3) Decide on one interface standard (chuck/adapter size).
4) Buy one spare battery per person and a spare set of common bits.
5) Run a 30-minute team session and distribute the one-page spec sheet.
Example: follow this checklist over one week and expect to see measurable time savings the following month.
Recommended Products

Milwaukee M18 Fuel 2-piece combo kit includes hammer drill, impact driver, reciprocating saw, battery, charger and Packout rolling tool box

Double High-Performance Lithium-Ion Batteries - 18V 4Ah Provide a more powerful energy source, no memory effect of discharge, ultra-low power consumption standby design guarantees up to 6 months of placement time, and over-discharge protection extends
Workflow Examples: Renovation, Automotive, Finish Carpentry
If you’ve ever wrestled with mismatched tools on a job, this is why.
Why it matters: matching tool type to task saves time and prevents mistakes. For renovation sequencing, I plan steps so cordless drills handle framing while precision hand tools finish trim, reducing errors and shifts. Example: on a kitchen remodel I use a 18V cordless drill with a 3/8″ hex impact driver for installing 2×4 wall studs, then switch to a set of block planes and a cabinetmaker’s rasp to fit crown molding at the end; the drill runs for 90% of framing and the planes handle the last 10% of fit.
Before explaining how, know this: you’ll balance speed and control by assigning specific tasks to specific tool types. How to do renovation sequencing:
- List major tasks (demolition, framing, rough mechanical, trim).
- Assign power tools for bulk removal or fastening (e.g., 18V drill, 6″ orbital sander).
- Assign hand tools for precision and feedback (e.g., block plane, dovetail saw).
- Block out time: 70–90% of time for power work, 10–30% for hand work.
Follow that and you’ll cut rework.
If you’ve ever been under the hood and needed both speed and accuracy, this is why.
Why it matters: in automotive diagnostics, mixing cordless impacts with calibrated hand tools keeps fast operations fast while protecting torque-critical parts. I pair a compact cordless impact for lug nuts with a 1/2″ torque wrench set to the vehicle spec and use hand-held multimeters for electrical checks. Example: when changing brakes on a 2015 Toyota Camry, you remove wheel lugs with a 12V impact at low torque, then torque them to 76 ft·lb with a click-type torque wrench, and test the ABS sensor with a handheld multimeter showing ~1.2 kΩ.
How to do automotive mixes:
- Use a compact impact for removal (12–18V, 100–200 ft·lb peak).
- Verify torque with a calibrated torque wrench matching spec.
- Check electricals with a multimeter (DC volts, resistance as needed).
- Log your torque values and meter readings on a checklist.
Think of finish carpentry like sculpture: you remove bulk then refine.
Why it matters: sanding and power removal are fast but hurt tactile judgment; hand tools restore fit and finish. For finish carpentry I start with a random-orbit sander (80–120 grit) to remove bulk, then switch to a block plane and chisels for tight joints and final shaping to preserve tactile feedback. Example: fitting a door jamb, I sand the high spot with a 120-grit pad until the gap is ~1.5 mm, then pare the wood with a #4 plane and test the fit by closing the door by hand.
How to sequence finish work:
- Remove excess material with power sanders and low-grit paper (80–120).
- Move to hand planes and chisels for joints and final shaping.
- Test fit frequently by hand; aim for gaps under 2 mm.
- Finish-sand by hand with 180–220 grit for touch-up.
These mixes save time, keep quality high, and let you match tool type to task without overloading any single tool — for example, you avoid dulling a plane by using it for rough stock removal.
Recommended Products

DCD996 in cordless drill combo kit has a DEWALT-built high power, high efficiency brushless motor that delivers up to 75% more runtime vs. 18V NiCad brushed motors.


MILWAUKEE 2704-20 M18 FUEL 1/2" Hammer Drill Driver: POWERSTATE brushless motor delivers 1,200 in. lbs.
Measuring Hybrid Workflow ROI: Time, Rework, Lifecycle Cost
If you’ve ever balanced hand tools and power tools on a job, this is why measuring three things matters.
Why it matters: you want the tools that save you time and money without creating more work. I use three concrete metrics — time, rework, and lifecycle cost — so your choices reflect real jobsite outcomes.
How I track time (answers: how long tasks actually take?)
Why it matters: knowing task time changes your labor estimates and schedule.
1) Measure each task start-to-finish for at least five repeats.
2) Track elapsed minutes per task and note the tool used.
3) Record crew size and skill level for each run.
Example: installing 30 cabinet hinges — time each hinge install with a hand screwdriver versus an electric driver across five cabinets. You’ll see numbers like 90 seconds per hinge with a driver and 210 seconds by hand, which changes your daily capacity.
How I measure rework (answers: how do you count avoidable fixes?)
Why it matters: rework eats labor and materials, so you need a defect rate tied to tool choice.
1) Log every fix that required additional time or replacement parts and categorize cause: overdriven, misaligned, stripped screw, or worn bit.
2) Count fixes per 100 tasks to get an error rate percentage.
3) Cross-tabulate error rates by tool and by operator.
Example: on door installs, you might find 8 fixes per 100 when using a high-torque driver without torque control, versus 2 fixes per 100 with a clutch set on a mid-range driver. Use those rates to project extra labor hours per project.
How I calculate lifecycle cost (answers: what total cost do you include?)
Why it matters: purchase price alone hides batteries, repairs, and downtime.
1) Add purchase price, expected maintenance per year, average battery replacements per 3 years, and end-of-life disposal or resale estimate.
2) Factor in average downtime cost: estimate lost productive hours per tool failure and multiply by your labor rate.
3) Adjust for supply chain delays by adding a contingency cost equal to two weeks of expected downtime if parts aren’t locally stocked.
Example: a cordless driver costs $200, batteries $80 each, you replace batteries every 2 years, and you budget $50/year for maintenance. With 8 hours of downtime yearly costing $400 in lost labor, your three-year lifecycle cost becomes $200 + (2×$80) + (3×$50) + $400 = $1,010.
How to use the three metrics together (answers: how do they change decisions?)
Why it matters: combining them gives a single ROI view so you pick tools that lower total operational cost.
1) Convert time savings into labor dollars using your crew hourly rate.
2) Convert rework reduction into saved material and labor costs per 100 tasks.
3) Compare those savings over the tool’s lifecycle cost to get payback months.
Example: if a power tool saves 120 labor hours over three years at $25/hour, that’s $3,000 saved; if it also cuts rework costs by $400, and its lifecycle cost is $1,000, you get a clear payback and ROI.
Practical tips for your jobsite (answers: what small steps should you start today?)
Why it matters: simple steps get you usable numbers fast.
1) Start with one high-frequency task and run the five-repeat timing.
2) Require crews to tag rework incidents with one-word causes.
3) Keep a one-page lifecycle spreadsheet for each tool model you use.
Example: pick the task you do most—like drywall screw setting—time five runs with each tool, and you’ll have enough data to decide which driver to standardize on.
Quick wrap-up fact: track at least five repeats per task, count rework per 100 tasks, and compare three-year lifecycle costs to make tool choices that save real money.
Frequently Asked Questions
How Do Hybrid Workflows Affect Insurance and Liability on Job Sites?
I’d say hybrid workflows raise insurance implications and complicate liability allocation: with hand tools accounting for 25.9% demand, insurers may require mixed-equipment coverage, stricter safety protocols, and clearer contracts assigning fault between operators and contractors.
What Are the Most Common Failure Modes for Hybrid Systems Long-Term?
The most common long-term failures are battery degradation and mechanical wear, causing reduced runtime, torque loss, stripped threads, and joint fatigue; I’d recommend routine battery health checks, lubrication, torque audits, and replacing worn consumables proactively.
Can Hybrid Tools Be Legally Used in Regulated Industrial Environments?
Like a steam engine in a smartphone ad, I can say yes: hybrid tools can be used if you meet compliance audits and follow safety protocols, document training, maintenance, and electrical certifications, and keep records for inspectors.
How Do Rental Programs Price Hybrid Tool Kits Versus Single-Tool Rentals?
I price hybrid tool kit rentals using tiered pricing and bundled discounts: I charge higher base for kits, offer daily/weekly tiers, apply deeper bundled discounts for longer rentals or multiple kits, and adjust for premium battery-compatible components.
What Training Certifications Apply Specifically to Hybrid Tool Workflows?
Like mixing oil and water for balance, I recommend certification curricula covering hybrid safety, battery systems, torque control, and tool interoperability, paired with hands-on competency assessments and refresher modules so you’re audit-ready and skill-confident.