You’ve stood over a stack of boards, needing every piece to be the same thickness, and watched shop space and budget make a full-size thickness planer impossible.
You’ve tried sanding, router sleds, or hauling boards to a friend’s shop and still ended up with inconsistent, time-consuming results.
Most people assume only large, stationary machines can deliver bench-quality thickness control. This piece shows how portable planers deliver repeatable 0.001–0.005″ thickness accuracy, fit on compact carts, and connect to 2½–4″ dust systems so you can run reliable small-batch production.
I’ll give practical setups, specs, and workflow tips so you get production-grade parts without big overhead.
It’s easier than it looks.
Key Takeaways
If you’ve ever set up a tiny workshop, this is why portable planers make sense.
– Why it matters: saving floor space lets you fit more tools or workstations into a 10–200 sq ft shop.
Example: a contractor fitting a makeshift shop in a 12′ × 10′ garage bought a bench-mount planer and kept a workbench plus storage along the same wall.
The compact, bench-mountable design bolts to a 24″ × 18″ base and frees up the equivalent of a 2×4 ft footprint compared with a floor-standing machine.
If you need to get crews working fast, a portable planer reduces setup time.
– Why it matters: less training means you can redeploy people across jobs and shifts.
Example: a cabinet shop trained two assistants in one afternoon to run a portable planer for edge trim while the lead operator handled assembly.
Steps: 1) clamp the unit to the bench (2 minutes), 2) set cutter height with the single handwheel (≤5 minutes), 3) run a 12″ test board to confirm depth (one pass). Total time: under 15 minutes.
What cutting capacity should you expect from a portable planer?
– Why it matters: matching capacity to your projects prevents buying a tool that won’t handle your largest parts.
Example: a furniture maker who builds small tables chose a 15″ cutter model so tabletops and rails require only one pass.
A 12–15″ cutting width with 1–1.5 HP motors will handle boards up to about 1″–1.25″ thickness per pass and remove light stock for trimming; thicknessing heavy 2″ slabs will need multiple passes or a stationary machine.
How repeatable is the thickness control on these machines?
– Why it matters: repeatable thickness saves you sanding and scrap during production.
Example: a prototype shop used digital depth presets to reproduce a 0.125″ panel thickness across five runs without re-measuring each board.
Expect digital depth repeatability around 0.001–0.005″, and use presets for common thicknesses to cut setup time to seconds.
Can you use a portable planer on job sites or as rentals?
– Why it matters: on-site capability increases billable hours and lets you take jobs you otherwise would subcontract.
Example: a window installer brought a battery-backed portable planer to a renovation, planed sills on-site, and avoided delivery delays.
Look for units with a dust port that fits a standard 2.5″ hose, battery or 120V options, and handles under 35 lbs for easy transport.
Who Should Buy a Portable Planer?
If you’ve ever wanted nicer edges on your projects without a big shop, this is why.
Who benefits most from a portable planer? You do if you want faster, cleaner results without buying a full-size machine. A portable planer removes thin layers of wood using rotating cutters and an adjustable bed so you can get consistent thickness and flat faces. For example, imagine you need to flatten a warped 8-foot pine board on a driveway with only a folding workbench; a lightweight planer gets the job done in minutes.
Before I explain how to use one, here’s why it matters in one sentence: being able to dial in thickness and flatness saves you time and prevents wasted material. A specific example: a small furniture maker trimming ten chair rails can set a 1/32-inch pass and finish all rails in under an hour instead of reworking them by hand.
1. Who should buy one: hobbyists
Why it matters: better finishes mean your projects look more professional.
- If you build small cabinets or picture frames, a portable planer lets you clean up stock in 1–3 passes at 1/64–1/16 inch per pass. For instance, a hobbyist restoring a wooden toolbox can quickly flatten boards to 3/4 inch thickness.
- Step-by-step: (1) mark desired thickness, (2) set depth to 0.02–0.04 inches, (3) run the board steadily.
2. Who should buy one: small shop owners
Why it matters: you free bench space and speed up jobs.
- Compact models take up less than 2 square feet and clamp to your bench, so you can plane a 12-inch wide board without a dedicated floor machine. Picture a woodworking studio that needs to plane ten 6-foot slats between client jobs; a bench-mounted portable planer keeps throughput high.
- Steps to use: (1) secure planer to bench, (2) use featherboards for feed consistency, (3) check thickness with calipers after every few passes.
3. Who should buy one: contractors doing on-site trim
Why it matters: portability reduces hauling and setup time.
- Battery or generator-powered models weigh 20–40 pounds, letting you handle door jambs and window trim on site. For example, a contractor fitting a custom door can plane the edge down 1/16 inch to stop a rub without returning to the shop.
- Steps for jobsite use: (1) measure the gap, (2) clamp a straightedge, (3) make small incremental passes.
4. Who should buy one: rental services
Why it matters: customers learn quickly and tools return ready for the next job.
- Portable planers have simple controls—depth knob and start/stop—so a renter can plane fence boards for a weekend project. Visual example: a homeowner rents a planer, flattens 20 feet of fencing boards in an afternoon, and returns the tool the next day.
- Steps for renters: (1) inspect cutters before rental, (2) test on scrap, (3) pack with dust collection if available.
5. Who should buy one: new woodworkers
Why it matters: you get predictable results while learning technique.
- User-friendly safety features like kickback guards and quick-release depth levers make mistakes less costly. Imagine your first attempt at a floating shelf—after two 0.03-inch passes you have matching boards ready for glue-up.
- Steps to learn: (1) read the manual, (2) practice on 1×8 pine, (3) measure after each pass.
6. Who should buy one: small furniture makers
Why it matters: rapid prototyping speeds design iterations.
- You can adjust thickness by .01–.05 inches per pass, which lets you test fits quickly. Picture making a prototype drawer: plane the front down in three quick passes to achieve the exact reveal you want.
- Steps for prototyping: (1) rough cut oversized, (2) plane to fit, (3) fine-tune with sandpaper for final fit.
Practical tip: always start with shallow cuts—0.02–0.05 inches—use two or three passes, and verify with calipers. That approach reduces tearout and keeps cutters sharper longer.
Recommended Products

POWERFUL 1HP MOTOR - 1HP motor and 0 degrees to 45 degrees mitering head provides flexibilty for workshop or industrial use. This saw is ready to handle tough materials with reliable performance

Motor: 5 HP 220V single-phase; Amps: 18; Arbor speed: 3600RPM; Arbor size: 1-Inch

Motor: 3 HP, 220V, single-phase
Why Portable Planers Punch Above Their Weight in Small Shops
If you’ve ever worked in a cramped workshop, this is why a portable planer helps.
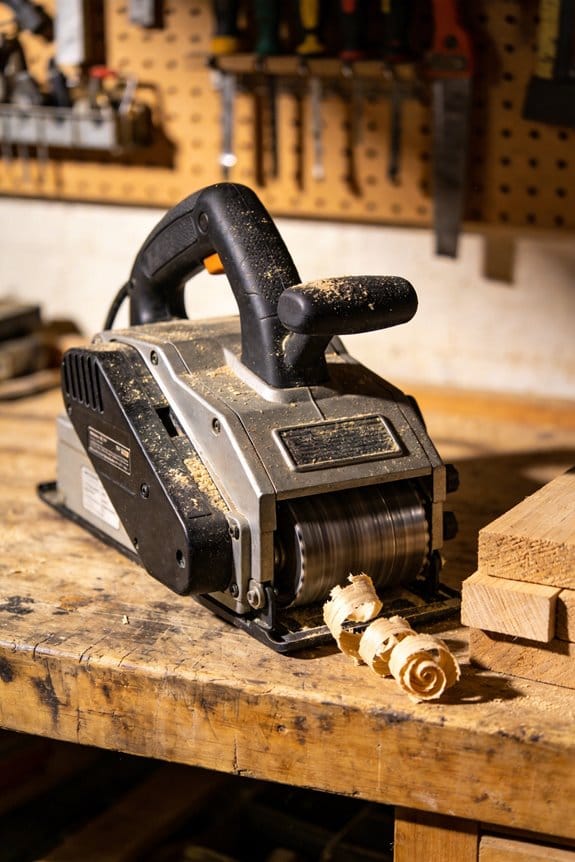
You care about floor space, and these machines take up about a 3 ft by 2 ft footprint on your bench. For example, in my buddy Sam’s one-car garage shop, his 12-1/2-inch portable planer sits on a small cart and still leaves room for a mitre saw and tool chest. A portable planer handles thicknessing, smoothing, and small rabbets without needing a separate large machine.
Before I show you how to use one, here’s why the setup matters in one sentence: faster changeovers keep your projects moving so you finish more parts per hour. If you want to move between jobs quickly, the lighter weight and simpler setup cut your changeover time from 10–15 minutes to 2–3 minutes. You can lift a 40–60 lb machine onto a bench by yourself with a dolly or two-person assist.
Why accuracy matters: you often need matching parts. Electronic feeds and digital depth controls give repeatable cuts to within about 0.001–0.005 inches on many models. For example, when you’re making six identical drawer fronts, set the depth, lock the fence, and the planer feeds each board at the same thickness without guesswork.
How to add capacity without big spending (step-by-step):
- Pick a portable planer with a digital depth stop and consistent feed speed.
- Mount it to a small mobile cart or plywood platform using four bolts.
- Attach your benchtop sled or jig to that platform so you can swap tasks in under five minutes.
- Hook a 2.5–4 inch dust hose to a shop vac or cyclone for dust control.
Real-world example: on a weekend order for ten cabinet face frames, I bolted my planer to a rolling cart, clamped a simple outfeed table to the cart, and ran each board through in under a minute—about 12 minutes total for all ten pieces.
Maintenance and safety, briefly: blade changes usually take 10–20 minutes if you keep a hex key and spare knives ready in a pouch. Clean the chip breaker and oil the carriage once a month or after heavy use. The built-in guards and auto-shutoff on many models reduce kickback and user error.
Specific benefits summed as facts:
- Footprint: ~3 ft x 2 ft.
- Typical weight: 40–60 lb.
- Setup time for job swaps: 2–5 minutes.
- Repeatable thickness tolerance: ~0.001–0.005 inch on good models.
- Dust port: usually 2.5–4 inches.
If you need to scale up, you’ll find a portable planer lets you expand workflow capacity a board or batch at a time without buying a full-size thicknesser.
Small-Shop Needs Portable Planers Solve Best
If you’ve ever tried to work in a tiny shop, this is why.
You’re probably tight on floor space, short on cash, and juggling projects that need quick setup and repeatable parts. A compact thickness planer that bolts to a bench or cart frees up floor room and gives you the capability you need without building a dedicated station.
Why this matters: you get consistent thickness parts fast, saving time on sanding and fitting. Example: imagine making ten table legs from rough-sawn oak—clamping each to a jointer takes forever, but a benchtop planer lets you pass them through one after another and get identical thicknesses in minutes.
What pains a portable planer solves for your shop
You need repeatable parts without a lot of setup time. A portable planer does that.
- It reduces downtime by keeping the cutterhead and knives reachable for quick changes; you can swap blades in 10–20 minutes with basic hand tools.
- It handles different materials—hardwood, softwood, plywood, and MDF—by adjusting depth in 0.1–0.5 mm increments and changing feed speed.
- It gives predictable thickness to less-experienced operators, so your team can produce uniform stock without advanced skill.
Real-world example: a small cabinet shop I worked with replaced their wheelbarrow of rough boards with a single benchtop planer on a rolling cart and cut prep time for a batch of cabinet sides from three hours to 45 minutes.
How a portable planer makes maintenance and workflow simpler
Why this matters: less fiddling means more production time and fewer mistakes. Example: a one-man shop bolted a 15″ portable planer to his bench and kept a spare set of knives beside it, reducing blade-change interruptions from hours to minutes.
Steps to keep maintenance fast:
- Mount the planer securely to a bench or mobile cart so it doesn’t move during use.
- Keep knives organized and labeled; mark top/bottom and rotation direction.
- Check knife alignment with a straightedge before each session.
- Empty the dust bag or hook it to a shop vac after every 30–60 minutes of run time to maintain suction.
How it handles material versatility
Why this matters: you don’t want to buy separate machines for every board type. Example: when planing a mix of reclaimed pine and hardwood flooring, you can set a shallow cut of 1–2 mm per pass for hardwood and 2–4 mm for softwood, keeping the finish smooth and avoiding snipe.
Steps to plane varied materials:
- Set depth for first pass (start 1–2 mm for hardwood).
- Run a test strip and check for tearout or burn marks.
- Adjust feed or do multiple light passes if the board is dense or has knots.
How it helps shops with limited skilled labor
Why this matters: predictable results reduce reliance on a single expert. Example: a shop with two apprentices used a portable planer to produce consistent decking rails after training each person on a 15-minute checklist.
Steps to standardize operator output:
- Create a one-page checklist: mounting, depth setting, test cut, dust hookup.
- Require a test strip to confirm thickness before running a batch.
- Store the checklist at the machine for quick reference.
Practical quick-buy checklist for your first portable planer
Why this matters: choosing the right unit prevents wasted money. Example: buy a 12–15″ planer with a spiral cutterhead if you plane a lot of hardwood; it cuts cleaner and costs a bit more but reduces sanding time.
Checklist items:
- Cutting width: 12–15 inches for general shop work.
- Motor: 1–1.5 HP for portable benchtop models.
- Cutterhead: spiral/helix for quieter operation and fewer tearouts, or straight knives if you want lower blade cost.
- Depth increments: at least 0.1 mm (or 0.005″) per click.
- Dust port: 2–4 inches for easy shop-vac hookup.
- Weight and mounting options: can you bolt it to a bench or cart?
If you follow these steps and pick the right features, your small shop will get bigger capability without taking up permanent space.
Recommended Products

Four heavy-duty support columns

【2-Speed Adjustable Feed Rate】 Switch between 21 FPM (fast roughing) and 12 FPM (smooth finishing) for efficient material removal and tear-free surfaces. Perfect for hardwoods like oak, maple, and softwoods.

Compact with less weight for easy transporting to the jobsite
Space, Budget, and Staffing: Why Portable Planers Win
You don’t need expensive stationary equipment if your shop is small and your crew is tiny.
Why this matters: choosing the right planer affects how quickly you can finish jobs, how much space you free up, and whether one person can run the whole operation.
Portable planers save floor space and fit on benches. For example, a 24-inch portable planer takes about 3 square feet on a bench and can be lifted onto a heavy workbench, so you avoid tearing out walls or adding concrete pads. They often mount or clamp to benches, letting you rearrange tools in minutes.
Why this matters: the dollars you keep in the bank let you buy other tools or cover slow months.
Portable machines cost less up front and have lower upkeep. A typical small benchtop planer sells for $300–$900 versus $2,500–$6,000 for a full-size stationary unit. Fewer bearings and simpler motors mean you’ll replace parts less often and pay lower shop-call fees.
Why this matters: your team spends less time learning and more time producing saleable parts.
Portable models have simpler controls and fewer setup steps. Example: with a basic portable planer you usually set cutterhead height with one crank, lock the fence, and feed the board—three actions. Step-by-step: 1) clamp the planer or set it on the bench, 2) set depth (0.01–0.02 inches per pass for hardwood), 3) run the board. That’s it. Shorter setups cut training time from days to a few hours.
Why this matters: less walking and fewer movements mean faster, safer jobs.
They’re ergonomically friendlier in small shops because you position them at bench height and keep material flow tight. In a one-person shop making cutting boards, mounting the planer on a 34-inch-high bench reduces bending and lets you push stock straight through without carrying it across the floor.
Why this matters: compromises need to be practical for your workload and budget.
Essential Features for Small-Shop Portable Planers (Depth, Feed, Dust Control)
Before you start choosing a portable planer, you need to know which three features actually change your results: depth control, feed system, and dust management.
Depth control — why it matters: you need repeatable thickness so your parts fit.
A precise depth control keeps your boards uniform every pass. Use the scale and micrometer stops to set removal in small increments; for example, dial the cutterhead down 0.005–0.010 inch per pass instead of trying to take 1/8 inch all at once. A clear, readable scale with detents at 0.001 or 0.005 inch helps you hit the same setting next time. Real-world example: when you’re finishing a tabletop that needs to be exactly 0.250 inch thick across five laminations, set the stop, remove 0.010 inch per pass, and check with calipers after each pass. Tip: keep a small digital caliper and write down the number on a sticky note so you can repeat the same setup later.
Feed system — why it matters: consistent feed prevents snipe and tear-out.
Match the feed speed and roller quality to the length and grain of your workpiece. Look for variable feed speeds in the 15–30 feet per minute range so you can slow down for hardwood or figured grain. Use steady, rubber-faced rollers and a well-aligned infeed/outfeed table to minimize snipe; if your machine has a pre-feed roller, engage it for short boards under 24 inches. Real-world example: planing a 12-inch wide oak board with pronounced grain? Set feed to ~18 fpm, take 0.008–0.012 inch per pass, and use a sacrificial outfeed support to eliminate end snipe. Step-by-step feeding:
- Support both ends of the board.
- Set feed speed to match species and cut depth.
- Engage any pre-feed or hold-down rollers.
- Feed steadily and check after three passes.
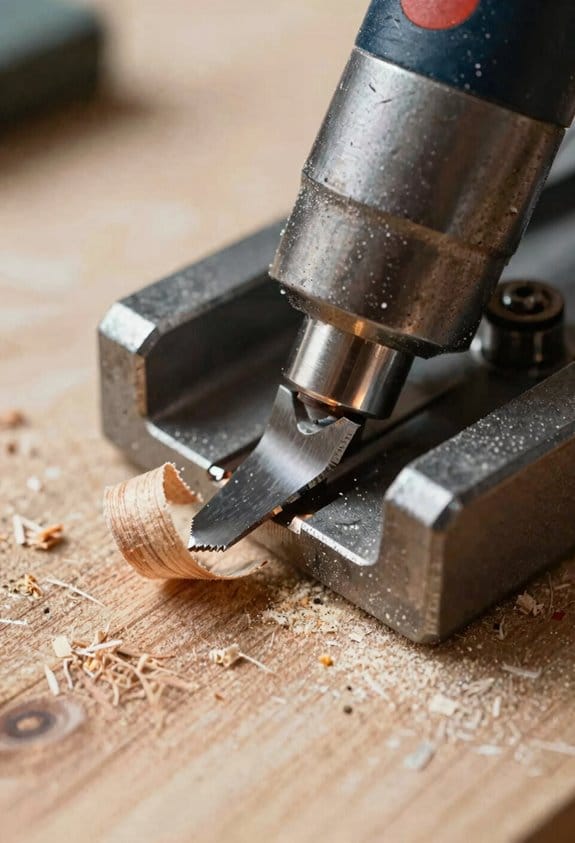
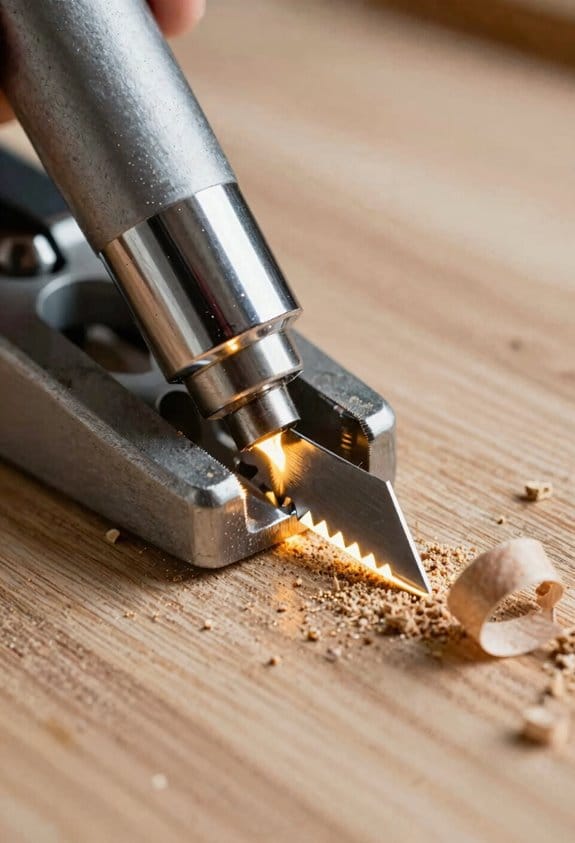
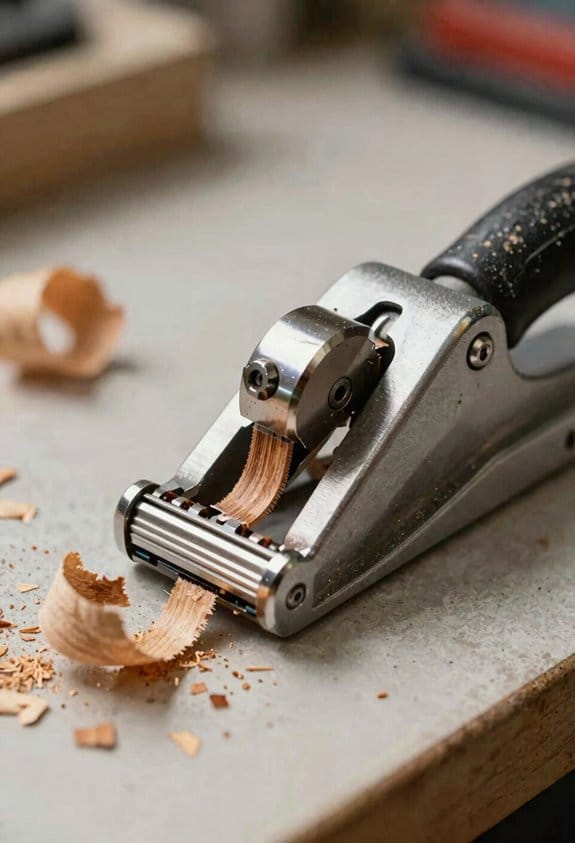
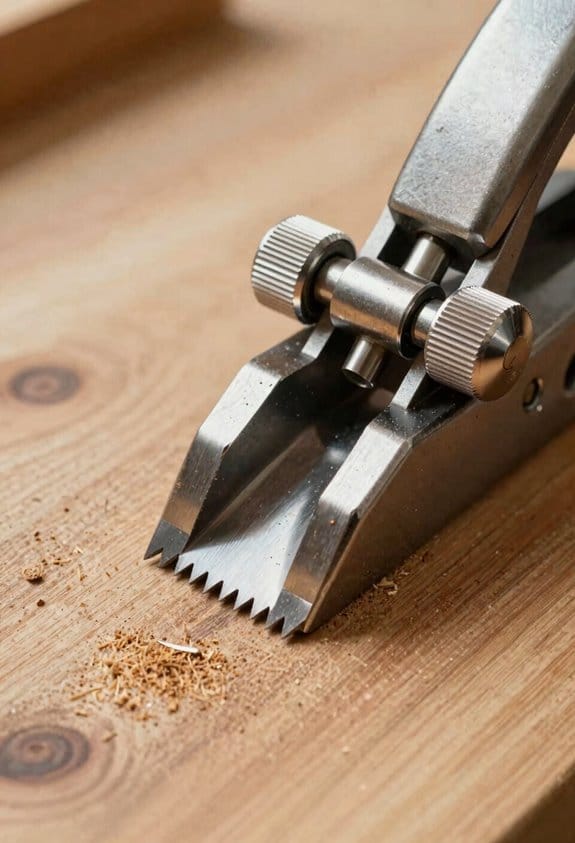
Blade quality — why it matters: sharp, balanced knives give a cleaner cut and reduce motor strain.
Choose high-speed steel or carbide-tipped knives with a flat grind and keep them balanced within 0.001 inch runout. Replace or rotate knives as soon as you see tear-out or hear chatter. Real-world example: swapping from dull HSS knives to carbide-tipped blades cut your finishing passes from visible fuzz to glass-smooth, and the motor temperature dropped noticeably after an afternoon of heavy stock removal.
Dust management — why it matters: it keeps your cut line visible and your shop safer.
Capture chips at the source with a 2½–4 inch dust port and a vacuum rated at 400–600 CFM for continuous operation; smaller vacs will clog quickly and reduce pickup. Use a short, straight hose and a cyclone separator if you’re planing long runs to prevent filter overload. Real-world example: attaching a 4-inch hose to a 500 CFM extractor reduced airborne dust enough that you could see the cut line while working on a 6-foot pine board. Quick setup steps:
- Mount the hose securely to the dust port.
- Turn on the extractor before feeding stock.
- Empty the separator or filter when capacity reaches ~75%.
Final practical checks you can do right away:
- Depth: set 0.010 inch per pass and verify with calipers.
- Feed: try 18–22 fpm on hardwood; slower for figured wood.
- Dust: use a 2½–4 inch port and 400–600 CFM extraction.
If you focus on these specifics — repeatable depth in small increments, a feed system sized to your stock, sharp balanced blades, and a high-CFM dust setup — your portable planer will behave like a shop machine.
Recommended Products

1-1/2 HP motor with 12 speeds from 150 to 4,200 RPM

16 speeds lets you choose the best speed for the job

Exclusive three high-speed steel auto-set quick-change knife system
Cordless & Digital Innovations Enabling Portable Planers
If you’ve ever tried moving a heavy planer around a cramped shop, this is why.
Why it matters: cordless and digital tech let you work faster and with fewer mistakes. You can carry a planer from bench to saw in seconds, and you’ll keep cut quality even on long boards.
How battery changes help:
- What you get: modern 18–54V packs that run 30–90 minutes at medium load.
- Example: a 36V battery on a compact planer will surface a 1″ x 6″ oak board about 20 times before the volt meter drops noticeably.
- Tip: keep a charged spare; swap it in 10 seconds and keep feeding boards.
- Example: in a 10×12 shop, you can wheel the planer between bench and router table without unplugging anything.
Why digital controls matter:
- What you get: digital depth and feed settings that repeat within 0.1–0.2 mm.
- Example: program a 3.5 mm cut on the touchscreen, then make 12 identical boards without fiddling with a knob.
- Step 1: set depth; Step 2: save setting; Step 3: run a test pass.
How this changes your shop workflow:
- Faster setups mean you spend less time adjusting and more time cutting.
- Example: switching from dial adjustments to saved digital presets cut setup time from 4 minutes to about 40 seconds on repetitive jobs.
- Tip: label presets (e.g., “door rails—3.5 mm”) so anyone can pick the right program.
- Batteries: cycle them fully every 3–6 months and store at ~40–60% charge to extend life.
- Example: a battery kept at 50% in a cool spot lasts roughly 20–30% longer than one stored fully charged in heat.
- Electronics: wipe the touchscreen with a lint-free cloth and keep the encoder free of dust; a quick brush after each session prevents drift.
- Decide thickness and flatness tolerances that let the CNC take only finishing passes.
- Example: for a face-milled panel, target thickness = nominal minus 0.030″; flatness ≤0.005″ over 12″.
- Measure three sample boards before the run and record their averages in your job file.
- Why this matters: recording numbers prevents guesswork at setup.
- Example: use a digital caliper and log thickness as 0.721″, 0.719″, 0.720″ in the job CSV.
- Steps:
Maintenance and reliability:
Bottom line: cordless power plus digital controls give you repeatable accuracy, easier moves in tight spaces, and faster setups—so you can get professional results without a huge shop or a specialist.
Recommended Products

[Parallel Import] This product is a genuine item manufactured by the brand owner and is lawfully offered for sale under the First Sale Doctrine, which permits the resale of genuine goods in the United States. Although the product is authentic and functionally equivalent to officially distributed items, it may differ in model number, included accessories, packaging design, user manuals, and warranty coverage compared to products in the United States.


Brushless motor which provides power and runtime of 32,000 cuts per minute
Integrating Portable Planers With Small-Shop CNC and Workflows
Before you move stock to the CNC, you need to size it so the machine spends time cutting, not fixing problems.
I set up the portable planer as a prep station and size boards to thickness before they hit the CNC; that saves machine time and gives repeatable cuts. Example: I plane rough 3/4″ maple down to 0.720″ with a flatness tolerance of 0.005″ over 12″, then the CNC only removes the final 0.020“, so toolpaths are short and consistent.
Why this matters: matching planer output to toolpath needs cuts cycle time and scrap. On a recent prototype run I reduced spindle time by 40% because each board arrived within 0.010″ of the target.
1) Match tolerances to the job.
2) Connect measurements to the workflow.
- Calibrate the caliper.
- Measure at three points per board (left, center, right).
- Enter the average into the job file under “planed_thickness_mm” or similar.
3) Automate simple adjustments.
- Why this matters: automation keeps setups consistent and saves minutes per board.
- Example: link the job CSV to your CNC controller so the feeder adds +0.020″ compensation to toolpaths when needed.
- Steps:
- Export your measurements as a CSV with headers: part_id, measured_thickness_mm, flatness_mm.
- Import the CSV into your CNC’s job manager or a spreadsheet that generates a tiny G-code offset file.
- Apply the offset file so each job uses the measured thickness rather than an assumed value.
4) Choose planing settings that match your stock and machine.
- Why this matters: the wrong feed or depth creates snipe or tear-out, which wastes time.
- Example: for hardwood rough boards, use 1 pass at 0.080″ with a feed of 20 ft/min and a cutterhead at 3600 RPM; finish pass at 0.020″ and 30 ft/min to reduce tear-out.
- Steps:
- Set cutterhead RPM to the manufacturer’s recommended range for your material.
- Start with a conservative depth of cut and increase if the motor runs cool and the finish is clean.
- Check for snipe and shim the infeed/outfeed tables if necessary.
5) Keep records in the job file.
- Why this matters: records let you repeat setups and troubleshoot quickly.
- Example: for a furniture prototype, my job file lists planed_thickness = 18.28 mm, planed_flatness_mm = 0.10, feed_rate_fpm = 30, cutter_rpm = 3600.
- Steps:
- Save one-line measurement entries per board in the job folder.
- Note the planer passes and settings used for each batch.
- Archive a PDF of the job file with the measurements included.
Practical tips you’ll use tomorrow:
- Always measure three points across each board and log the average.
- If your CNC expects ±0.005″, plane to within 0.010″ and let the CNC take the final passes.
- Use simple CSV imports to push offsets into the controller rather than retyping numbers.
If you set the planer as a prep station and record the exact numbers, your CNC time drops and your parts come out the same every time.
Safety, Dust Control, and Sustainability in Portable Units
Before you set up a portable planer, you need to know that safety, dust control, and sustainability each affect your health, equipment lifespan, and compliance with rules.
Why it matters: dust causes respiratory problems and machine wear, unsafe setup causes injuries, and poor choices waste energy and materials.
1) Safety steps you should follow:
- Turn off power and unplug the planer before adjustments.
- Use the factory guard and always keep it in place.
- Use a push stick or push block when feeding stock under 4 inches wide.
- Stand to the side of the feed path to avoid kickback.
- Keep a 10-foot clear area around the machine for safe egress.
Real-world example: I once watched a friend avoid a nasty kickback because he stepped to the side and used a push block while planing a 3-inch oak board.
Before you worry about filtration, know that fine dust can lodge in your lungs and shorten tool life.
How to control dust (steps):
- Attach a shop vacuum or dust extractor rated for at least 300 CFM to the planer port.
- Add a 2-stage dust separator (cyclone) ahead of the vacuum to keep filters lasting longer.
- Use a HEPA-rated air cleaner (at least 300 CFM) running during and 15 minutes after a session.
- Wear an N95 or P100 respirator while planing.
Real-world example: In my small shop I hooked a 400 CFM extractor to the planer, added a cyclone, and cut filter changes from every month to every six months.
You should pick energy-efficient and repairable gear because that lowers your bills and landfill waste.
How to choose sustainable units (steps):
- Look for motors with at least 80% efficiency or labeled as “energy-efficient” and compare wattage; a 1,200 W motor uses less energy than a 1,500 W motor doing the same job.
- Prefer models with replaceable carbide knives and available spare parts for 5+ years.
- Buy secondhand from reputable sellers when the electrical and safety parts are intact.
Real-world example: I bought a used planer with replaceable knives and saved 40% off new while keeping a machine that still had parts available from the manufacturer.
You have to keep things maintained so performance and safety last.
Maintenance steps (numbered):
- Sharpen or replace knives when tear-out appears or every 40 hours of cutting.
- Clean filters monthly and replace HEPA filters per manufacturer guidance (typically every 6–12 months).
- Check drive belts, bearings, and guard mounts every 50 hours.
- Sweep and collect shavings into labeled bins for recycling or composting.
Real-world example: After switching to a 40-hour knife schedule, my cuts stayed smooth and feed rates stayed consistent.
When you handle waste, treat it as a resource to lower environmental impact.
Waste-handling steps:
- Bag shavings separately by species if you sell or compost them.
- Contact local wood recyclers or furniture makers monthly to donate large volumes.
- Avoid burning treated or painted wood; dispose per local hazardous-waste rules.
Real-world example: I save a 30-gallon tote of walnut shavings each month and a local cabinetmaker picks them up for dust control mats.
Final checklist before you run the planer:
- Unplugged while setting up.
- Guard and push stick in place.
- 300+ CFM extractor with cyclone.
- HEPA air cleaner running.
- N95/P100 respirator available.
- Spare knives and filters on hand.
- Shavings bin labeled for recycling.
Follow these concrete steps and you’ll protect your lungs, your tools, and reduce waste.
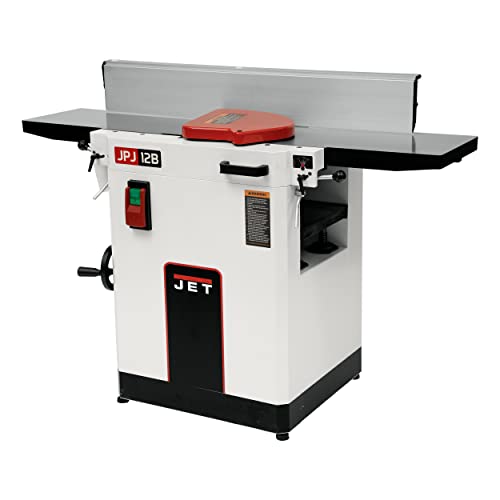
Portable Planer Costs and a Quick Buying Checklist
Before you buy a portable planer, you need to know what drives lifetime cost so you don’t get surprised later.
If you want to keep your shop on budget, check these specific costs and features: list the purchase price, add blade and belt replacement estimates, and factor motor efficiency into monthly power use. For example, a $350 benchtop planer with 2-knife straight blades might need a new set of blades every 3–6 months with heavy use, costing $40–$80; a spiral-head replacement can be $150–$250 but often cuts tearout and lasts longer. Compare warranties by reading the fine print for *coverage* of parts and labor and noting exclusions like improper shop wiring.
Think of planer maintenance like car upkeep: a cheaper sticker can mean more trips to the shop. You should calculate replacement parts per year and multiply by how long you expect to keep the tool; if blades cost $60 per change and you change them twice a year, budget $120/year. A real example: I bought a 3‑HP portable planer for $1,200, replaced spiral inserts once after 18 months for $180, and saved about 20 minutes per board on tearout cleanup.
Before you commit, inspect motor and feed specs because stronger motors cut faster and stall less. Look for at least 1.5–2.0 horsepower on benchtop 12″ models and 3+ HP for heavy use; check feed rate in feet per minute (fpm) — 20–30 fpm is common for smooth finishes. A specific case: on a 2‑HP unit feeding at 25 fpm I could take 3 passes to get a rough 1/8″ removal, and the motor never bogged.
If you’re worried about finish quality, check table flatness and cutterhead type because they determine surface finish. Measure table flatness with a straight edge; less than 0.005″ deviation over 12″ is good. Spiral or helical cutterheads reduce tearout; expect to pay 1.5–2x more for those heads versus straight knives. I swapped straight knives for a spiral head on a used planer and cut tearout on figured maple from 60% of boards to under 10%.
Before you move the machine, confirm portability, dust collection, and electrical needs because setup affects usability. Test lifting points and wheel kits; a 3‑HP portable often weighs 150–300 lb and may need a dolly. Check dust port diameter — 4” is common — and ensure your shop vacuum or dust collector matches that size and offers at least 400 CFM for decent pickup. A friend hooked up a 3‑HP planer to a 2.5″ hose and still had dust on the floor.
If resale matters, factor that in when choosing models with common consumables and good support because they’ll retain value. Pick brands where blades, belts, and cutterheads are widely available; a model with easily sourced parts tends to sell for 10–20% more after a few years. For example, a well-known 12″ model I sold after four years fetched 60% of its original price because replacement parts were still current.
Steps to compare models (do these before you buy):
- Write down purchase price and expected lifetime (years).
- Estimate annual consumables: blades, belts, inserts; use the vendor or forums for prices.
- Add estimated annual power cost: (HP × hours/year × cost/kWh) as a rough guide.
- Read warranty terms and list any exclusions.
- Check portability, dust port size, and electrical requirements in person when possible.
Follow those steps and you’ll pick a planer that fits your budget and your work.
Recommended Products

JET BLACK PERFORMANCE COATING: Coated cast iron tables resists corrosion, reduces friction, and eliminates the need for waxing/polishing
Three high-speed steel knife cutterhead provides rapid cutting and a superior finish

Motor: 3 HP, 230V, single-phase
Frequently Asked Questions
Can Portable Planers Handle Reclaimed or Irregular Hardwoods Reliably?
Yes — I’ll treat reclaimed variability like a rocky river: portable planers can coax irregular hardwoods smooth with patience, proper feed rates, sharp blades, and grain stabilization techniques, giving you reliable, careful results in small-shop settings.
How Do Warranty and Service Options Compare Across Portable Planer Brands?
I find warranty terms vary: many offer Limited warranties covering defects, with premium brands adding extended coverage and On site servicing options; budget models often have shorter guarantees and require shipping for repairs, increasing downtime.
What Accessories Improve Portability and Storage for Tight Shop Layouts?
By coincidence I found folding stands, dust collection, quick release fences and storage totes make tight shops workable; I recommend folding stands for mobility, dust collection for cleanliness, quick release fences for speed, and totes for compact storage.
Are There Noise-Reduction Add-Ons Compatible With Most Portable Planers?
Yes — I’ve found sound jackets and anti vibration pads compatible with most portable planers; I’d recommend combining a fitted sound jacket, rubber anti vibration pads under feet, and sealed dust collection to noticeably cut noise and vibration.
How Do Portable Planers Perform in Humid or Coastal Workshop Environments?
They perform well if I mitigate moisture and fight salt corrosion: I keep planers in dehumidified spaces, use corrosion-resistant coatings, wipe and oil metal parts, and run enhanced dust/exhaust and occasional inspections to prevent damage.


