You bring a chisel to pare a shoulder and the cut catches, tears, or refuses to seat, leaving you puzzled why the joint won’t close. You ask yourself whether it’s your technique, the wood, or the tool that’s at fault.
Most people assume more force or a different angle will fix it, not that the steel itself has become the problem. This piece will show you how a dull, rolled edge causes crushing and chatter, how to inspect an edge and back for those defects, and how to restore a sharp micro‑bevel and strop so joints fit tightly without extra sanding.
Read this and your chisels will cut cleanly and consistently. It’s easier than you think.
Key Takeaways
If you’ve ever pushed a dull chisel into hardwood, this is why.
- Dull chisels crush fibers instead of cutting them, so your joint edges become fuzzy and gaps appear that stop parts from fitting tight; test it on a scrap: if the edge looks like torn cotton after one pare, sharpen the chisel to a 25°–30° bevel and try again.
- When resistance jumps up, you lose control and overshoot your cuts, which ruins alignment; slow your paring, brace the piece with a clamp, and make light passes of 0.5–1.0 mm until you feel the blade glide.
- Rolled or uneven bevels make the chisel contact the wood inconsistently, causing tear‑out and bumpy surfaces; check the bevel on a flat surface — if you see gaps under the blade, flatten it on a 1000–6000 grit stone and rehone.
- Burrs and nicks catch on grain and cause chatter or torn fibers that misalign mating parts; run your thumb gently across the edge (careful) and, if you feel roughness, remove the burr with five light strokes on the strop.
- Constant rework and sanding hide a poor fit and waste tolerances and time; measure the joint gap with feeler gauges or a 0.1 mm shim, then sharpen and pare to fit instead of sanding down a sloppy joint.
What a Dull Chisel Does to the Cut (Visible Effects)
If you’ve ever tried to pare a joint and ended up with a fuzzy, torn edge, this is why.
Why it matters: a ragged cut ruins fit and costs you time sanding and reworking the joint.
Look closely at a cut made with a dull chisel and you’ll see the wood fibers crushed instead of cleanly sliced, producing a ragged surface and visible tear-out along the edge. For example, when I tried fitting a door stile last week, the mating surface had compressed fibers that lifted when I tapped the piece together, leaving a visible gap and rough paint finish. The blade no longer severs cells — it compresses them — so the cut lacks crispness and fits loosened joints poorly.
Before I show how to fix it, note the first visible sign: fiber collapse where crushed strands stay attached and lift out when you remove the chisel. That creates surface fuzz that catches light and paint unevenly. In a bench scrape test, a good edge leaves a flat, glassy shaving; a dull edge leaves torn, stringy material.
Why it matters: dullness forces you to use more pressure and makes control worse.
You should expect more sanding later and tolerances that fail, because dullness makes you push harder and alters your technique. For example, trying to pare a thin rabbit with a dull chisel required me to lean in and push twice as hard, which bent the blade slightly and lifted the part I was trying to keep flat. Dullness reduces control on delicate paring and increases the chance of overshooting a cut.
How to reestablish the edge (do this before you attempt precise joinery): it takes three quick steps.
- Hone the bevel on a 1000–4000 grit stone for 20–60 seconds per side, holding a consistent 25° bevel angle. Use a marker to check the burr.
- Flip and remove the burr with 10–20 strokes on the stone’s flat, then strop the back on a leather strop with compound for 20–40 pulls.
- Test on end grain: you should get a thin, continuous shaving on softwood and a thin curled shaving on hardwood.
A quick example: when I set a 25° angle and stropped 30 pulls, the chisel instantly stopped producing fuzz on a maple test piece and the joint closed without gaps.
If you follow those steps, you’ll stop the fiber collapse and get clean slices that fit tightly.
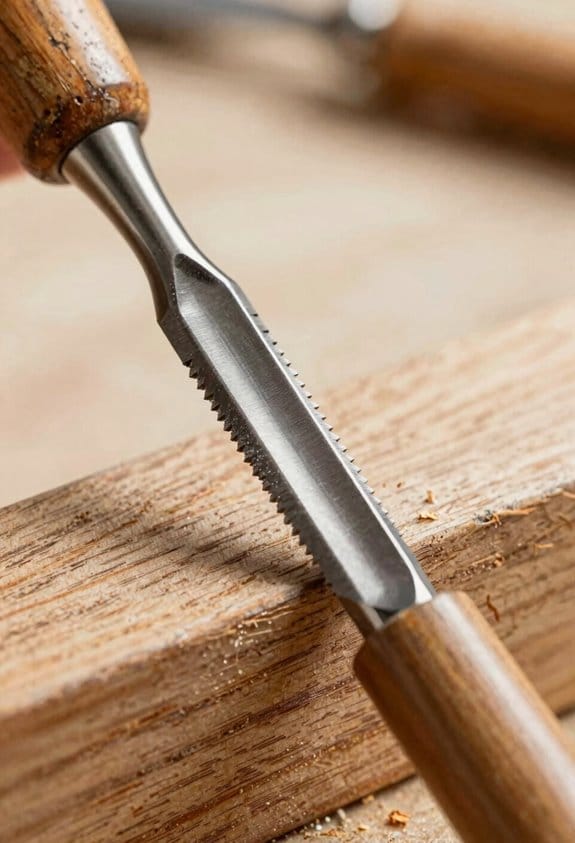
Quick Bench Checks and Fixes to Restore a Chisel
Here’s what actually happens when you check a chisel at the bench: small problems show clear signs and you can fix most of them in 10–30 minutes. Start by looking for a shiny, narrow band along the cutting edge; that means your bevel isn’t making even contact with the workpiece, so the edge will skip or cut inconsistently. Run your thumbnail along the blade to feel for burrs — if you feel a tiny catch, there’s a burr to remove. Example: on a pine board, an uneven bevel leaves tearout along the grain.
Why this matters: a shaky handle ruins control even with a razor edge. Check the handle for looseness or hairline cracks; grab the chisel as you would for a paring cut and wiggle the head. If the handle moves, you won’t be able to cut straight. Example: a loose handle folded into a dovetail causes one side to gouge while the other stays proud.
How to flatten the back (so your edge sits flat) and why you should: a flat back gives you a true cutting bevel. Steps:
- Lay the back flat on a 400–600 grit stone with a little water or oil depending on the stone type.
- Push forward with light pressure for 30–60 strokes, watching for shiny spots to enlarge evenly.
- Switch to 1000–4000 grit and repeat until the whole back shows a uniform sheen.
Example: fixing a chisel used on hardwood maple — removing the tiny hollow on the back stopped the edge from rolling.
How to rehone the bevel and why you must remove metal evenly: an even bevel produces a consistent burr and a predictable edge. Steps:
- Start on a 400–600 grit bevel stone, holding the chisel at the correct angle (commonly 25° for bench chisels, 30° for mortise chisels).
- Make 20–40 strokes with even pressure, then check for a burr along the entire edge by passing your thumbnail gently.
- Move to 1000–4000 grit, repeating until you form a uniform burr and then remove it.
- Finish by stropping 20–40 passes on leather with compound to refine the micro‑edge.
Example: rehoning a chisel before cleaning up a tenon face gave a mirror edge that sliced endgrain cleanly.
When you only need stropping and why that can save time: stropping realigns the micro‑edge without removing metal. Steps:
- Put green or red compound on a leather strop.
- Pull the chisel away from the edge (not toward) for 20–40 strokes at the bevel angle.
- Test on a thin shaving of soft pine; a well‑stropped blade should take a long, continuous shaving.
Example: before fitting a drawer front, a quick strop removed the last fuzz and prevented binding.
Handle and ferrule fixes and why to test before cutting: a secure tang and ferrule transfer force safely and keep the chisel straight. Steps:
- If the ferrule is loose, tap it down squarely with a mallet; if it still moves, heat the ferrule briefly and reseat it or replace it.
- If the tang is loose in the handle, remove the handle and re‑epoxy or replace it; use a 24–48 hour cure epoxy.
- After tightening, make a few test paring cuts on scrap to confirm control.
Example: replacing a split beech handle stopped the chisel from twisting during a stopped groove.
Final quick checklist you can do in 10 minutes:
- Look for shiny bands and thumbnail burrs.
- Grip the handle and check for movement.
- Flatten the back if you see gaps, then rehone through grades until a burr appears.
- Strop if only alignment is needed.
- Tighten or re‑seat ferrule/tang, then test cut on scrap.
Example: this routine turned a dull weekend chisel into a tool that cut through cherry veneer without chipping.
Why Crushed Wood Fibers Cause Tear‑Out and Ragged Joints
If you’ve ever pushed a dull chisel and gotten a scalloped, fuzzy edge, this is why.
Why this matters: crushed fibers make your joint not fit, so glue gaps and misalignment happen.
When the chisel bevel is blunt it compresses the wood fibers at the cutting line instead of shearing them cleanly; that crushed bundle holds together and then tears out ahead of the blade. You’ll see surface cells lift and split, producing scallops and fuzzy edges, and you’ll feel the tool wanting to skid or dive. Example: when you pare the cheek of a tenon on oak with a 30° bevel that’s rounded from use, the edge will push fibers down and the joint face will come out looking like a combed surface.
How to fix it (step‑by‑step):
- Hone your edge to a true 25–30° primary bevel and a 15–20° micro‑bevel, using 4000–8000 grit stones or a leather strop with compound.
- Test on end grain or a scrap piece matching your project wood—cut a shallow shaving about 0.5 mm thick; it should come off in a continuous slice.
- If the shaving tears or the chisel drags, repeat stropping for 10–30 strokes.
- While cutting, support the wood so it can’t flex and take small, controlled passes rather than trying to remove lots at once.
Practical tip: when paring across the grain on soft maple, lower the blade angle slightly and take lighter cuts; that reduces the chance of lifting fibers. You’ll notice both resistance and visible fraying drop when the edge is sharp and your passes are controlled.
How Edge Angle Affects Durability, Accuracy, and How to Hone It
Think of edge angle like the trade-off between a scalpel and a hammer.
Why this matters: the angle you grind affects how long the edge lasts and how accurately it slices in your joinery. For example, when you pare end grain on a dovetail, a 25° edge may slice cleaner but will chip after a few cuts; a 35° edge keeps its form through dozens of pares.
1) How angle changes durability
- A steeper angle resists rolling and chipping because more steel supports the apex. If you bench-chisel through hardwood tenons, a 30–35° bevel stands up to repeated push cuts without deforming. Real-world example: on oak mortising, a 35° micro‑bevel lasted through ten full mortises before noticeable wear.
- A very low angle (20–25°) gives razor-like bite but dulls or chips quickly on cross‑grain or abrasive woods.
2) How angle changes cutting accuracy
- A lower angle slices with less tearout because it parts fibers more cleanly, so your paring cuts look sharper and follow lines better. On a pine sash, a 25° edge produced cleaner, flatter shaving than a 35° edge when paring across the grain.
- A steeper angle can push fibers and cause slightly more tear, but it keeps the tool tracking true under pressure, so your cuts stay straight on long pull or push strokes.
3) What I set on bench chisels and why
Why this matters: the angle you pick determines how predictable your cuts will be at the bench. I usually grind a primary bevel flat, then set a micro‑bevel at 30–35° for general-purpose bench chisels because that range balances sharpness and strength for push cuts and paring. Example: For general joinery I use 32°; for delicate sash work I drop to 28°; for mortising in reclaimed elm I go up to 35°.
4) How to hone that bevel — one practical routine
Why this matters: honing to a consistent angle creates a durable, accurate edge you can trust on the first cut. Example: when I rehoned a chisel for a dovetail session, following these steps brought the edge back to slicing in under 10 minutes.
Steps:
- Lay the chisel flat and flatten the primary bevel on a 220–400 grit stone until the entire bevel shows fresh scratch lines.
- Choose your micro‑bevel angle (e.g., 30–35°) and raise the heel to that angle using a guide or by feel.
- Remove the primary burr by making 8–12 light strokes on a 1000 grit stone, keeping the angle steady until you feel a uniform burr along the opposite edge.
- Remove the burr with 4–6 strokes on a 4000–8000 grit finishing stone, using light pressure and the same angle.
- Strop on leather with jeweler’s rouge for 10–20 passes per side if you want extra polish and bite.
5) Quick tips you can use right now
Why this matters: small choices speed up setup and keep edges reliable. Use these in your next session. Example: before a dovetail day, I set chisels to 28–30° and strop for two minutes; cuts stayed clean all afternoon.
- If you work mostly hardwoods and do heavy chopping, pick 32–35°.
- If you mostly pare softwoods or need super-clean end-grain slices, pick 25–30°.
- Keep one stone at 1000 grit and one at 4000+ grit for fast touch-ups.
Keep the angle consistent and you’ll get repeatable, predictable cuts and fewer surprises at the bench.
Signs Your Chisel Is Dull Before You Start a Joint
Before you touch a joint, you need to know whether your chisel is sharp or not.
Why it matters: a dull chisel makes your cuts wander and wastes time. For example, when you’re paring a 3/8″ tenon cheek to fit, a dull edge will crush the wood instead of shearing cleanly.
1) Look for visual signs
Why it matters: the edge tells you its condition at a glance.
Step 1: Hold the bevel up toward good light and rotate the chisel slowly. If you see a rounded shoulder or a bright, reflective band along the very edge, the bevel has lost its bite. Example: under a workshop lamp a 1/4″ chisel that reflects light like a mirror across the last millimeter is probably rolled and needs honing.
2) Listen while you cut a scrap
Why it matters: sound changes before you feel the problem.
Step 1: Take a 6″ scrap of the same species you’re working with and make a shallow paring cut. A sharp chisel makes a clean, singing note; a dull one makes chatter or a dead thud. Example: when shaving a 1/32″ slice off pine, a sharp 1/2″ chisel will sound high and steady; a dull one sounds ragged.
3) Feel the resistance when paring
Why it matters: increased push means crushed fibers and less control.
Step 1: Pare a thin shaving at a low angle and note how much force you use. If you must push noticeably harder than usual to remove a 0.5–1 mm shaving, the cutting edge is dull. Example: when trimming a 1/8″ shoulder on oak, you should feel the blade glide; if you feel a stuttering grab, stop and hone.
4) Smell for overheating
Why it matters: heat means friction and damaged edge or resin transfer.
Step 1: After a few test cuts, inhale near the work (without getting sawdust in your nose). A faint burnt-resin smell or scorched wood odor after only a few passes indicates excessive friction; sharpen the chisel. Example: if you notice a resinous, sweet-burn smell after three parings on cedar, the edge is overheating from drag.
Quick routine to check every time
Why it matters: a short habit prevents ruined joints and rework.
- Visually inspect under light for a rolled edge (10–20 seconds).
- Pare a 6″ scrap and listen (5–10 seconds).
- Feel resistance on a thin shaving (5–10 seconds).
- If any check flags, hone with a 1000–6000 grit progression until the edge sings again.
Final practical tip: keep a strop or 8000+ grit stone nearby so you can restore the edge in 30–60 seconds and get back to the joint.
How Uneven Sharpening and Backs Steal Precision (And How to Fix Them)
If you’ve ever had a chisel ruin a shoulder fit, this is why.
Why this matters: uneven sharpening or an unflattened back makes your joinery parts not fit, wasting time and material. I check for uneven pressure along the bevel because one high spot will cut more and steer the chisel, producing wander and ragged shoulders. For example, I once leaned a workpiece against the fence, planed a shoulder, and the chisel kept veering right from a single high spot on the bevel — the shoulder ended up stepped and didn’t mate with the mortise.
Why this matters: a crowned back prevents the chisel from seating squarely, so your cuts are shallow or inconsistent and pins won’t line up. A crown is a tiny convex arc near the edge that lifts the edge off the work; I discovered one when my bench chisel left a thin ridge along a cheek instead of a clean, square cut.
How to fix it — 4 clear steps:
- Flatten the back on a coarse stone (100–400 grit) until you see a continuous, polished strip at the edge. Use a sheet of 220–320 sandpaper under the stone so it’s flat. Check progress by laying a feeler thickness of black marker across the back and rubbing it on the stone; the marker should go from edge to heel.
- Move to a medium stone (600–1,000 grit) and remove the coarse scratches until the edge shines evenly. Press with your fingers spaced along the blade so pressure is even; one finger pressed harder creates a new high spot.
- Hone the bevel on progressively finer stones (1,000 → 4,000+ grit) while checking for uneven pressure: hold the chisel at a consistent angle (about 25° for bench chisels), push or pull in controlled strokes, and stop every 10–20 strokes to test. If the chisel steers, you likely have one abrasive side wearing more — correct by equalizing your hand pressure.
- Remove the burr by supporting the chisel flat on a very fine stone or a strop and applying gentle, even strokes until no burr is left. A burr will catch on thumb skin when you slide it gently across the edge.
One concrete check you can do right now:
– Lay the back flat on a glass plate with a little light under one edge; any gap at the edge shows crowning. I fixed a 1 mm gap on an old bevel-edge chisel by resurfacing on 220 grit, then finishing on 1,000 grit, which restored full edge contact.
A few quick tips you’ll use repeatedly:
- Use a marker on the back to see where material is removed. The darkest spot shows the high place.
- Keep stones flat; lap them on a diamond plate occasionally. A warped stone makes everything worse.
- Tape a 25° guide to your stone to learn the angle consistently; you’ll stop guessing.
If you follow those steps, your chisels will seat squarely and cut true, and your shoulders will come out crisp and predictable.
25° Vs 30–35° Bevels: Which to Use for Joinery
If you’ve ever fitted a tight joint and felt the chisel skid or catch, this explains why.
Why it matters: a wrong bevel or back shows up as gaps, tearout, or an edge that folds instead of cutting. I prefer a 30–35° bevel for most joinery because that range balances sharpness and edge strength, and it resists rolling when you pare across difficult grain. For example, when you pare a hardwood tenon cheek on oak, a 30° bevel will cut cleaner with less fiber crush; a 35° bevel will survive heavy chopping when you’re removing waste quickly.
Why it matters: edge angle changes how much force you need and how long the edge lasts. A 30° bevel slices cleaner with less fiber crush and improves engagement on both end grain and long grain, while 35° gives a tougher bevel for heavy chopping or dense hardwoods. Try this: take a scrap maple board and pare a lap joint with a 30° edge—notice the smoother face and fewer torn fibers; then repeat with 35° and expect to apply more force but see less rolling.
Why it matters: finishing the bevel makes fit repeatable and accurate. Do this 3-step routine to finish the edge:
- Set your primary bevel to 30° or 35° on a grinder or stones. Pick 30° for softwoods and fine paring, 35° for hardwoods or heavy chopping.
- Hone a 0.5–1° micro-bevel on a fine stone or strop—this gives immediate sharpness without weakening the main bevel.
- Test on scrap: make five controlled paring passes and adjust the micro-bevel if you see roll or tearout.
Why it matters: matching geometry to task prevents ruined joints and wasted time. For example, when chopping mortises in walnut, use 35° for durability; when shaving dovetail sockets in pine, use 30° for cleaner grain. Remember: shallower angles cut easier but dull faster, and steeper angles hold longer but need more force.
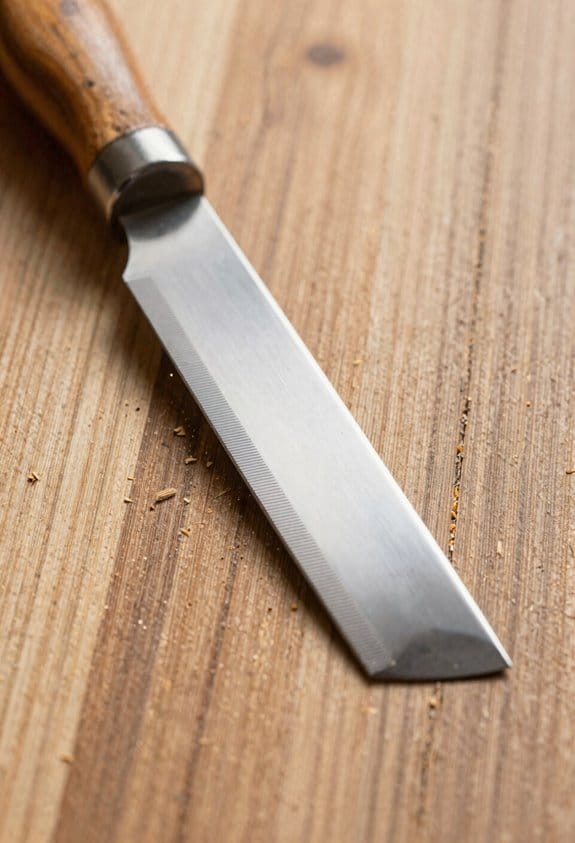
Blunt Chisel Scraping (90° Facets): When and How to Use It
If you’ve ever tried to pare a curve and ended up tearing the wood, this is why.
Why it matters: using a blunt chisel for controlled scraping stops tear-out and gives predictable results when slicing would fail. For example, when refining the inside curve of a mahogany chair arm, a blunt facet removes thin ribbons without catching the grain.
When to choose a blunt (near-90°) facet
Why it matters: the facet changes how the blade contacts fibers, so you pick it when slicing would bite too hard and cause chatter or tear-out. Use it when:
- You’re working across the grain on hardwoods like mahogany, walnut, or oak.
- You’re refining a tight concave curve that sanding can’t reach efficiently.
- Your slicing chisel keeps digging or skiving the workpiece.
Example: on a walnut bowl rim that keeps splintering with a bevel-up slice, switch to the blunt facet to skim off thin, controlled shavings.
How to set up the chisel
Why it matters: the angle and edge condition determine whether the tool scrapes or slices, so setup is the step you won’t want to skip.
- Grind the primary bevel to about 30–35° if you need strength, then flatten the secondary facet so it meets at roughly 85–95° total. This gives a near-90° scraping face.
- Use a flat surface and a coarse stone or grinder to produce a crisp shoulder; stop before you form a micro-bevel.
- Strop lightly on leather with a very light abrasive (green compound) for burr removal only. Don’t aim for a razor edge.
Example: set the primary at 30°, then flatten a 2–3 mm secondary facet so the cutting face reads about 92° across a 1″ width.
How to use it effectively
Why it matters: technique controls how the blade removes material, so small changes in pressure and angle change the cut.
- Hold the chisel more upright than for slicing — around 60–75° from the work surface.
- Use light, even forward pressure and a short pulling stroke (about 1–3″ per pass).
- Work across and then slightly with the grain in thin passes until you reach the profile.
Example: on a curved armrest, take 10–15 short passes with light pressure to knock down high spots, rather than one long heavy cut that tears the fibers.
Edge maintenance and sharpening
Why it matters: you want a predictable shoulder and no nicks, not a hair-thin keen edge, so maintenance is quicker and less fussy.
- Inspect for nicks; remove them with light grinding or a few strokes on a coarse stone.
- Maintain flatness of the facet by re-flattening every few uses, then strop for burnish only.
- Replace full honing only if you switch back to slicing work.
Example: after every 2–3 hours of scraping hardwood, spend 2–5 minutes on a grinder or 400–800 grit stone to touch up the shoulder; strop 10–20 passes afterward.
What to expect from results
Why it matters: knowing the outcome sets your expectations so you stop overworking the piece. A blunt facet gives thin, consistent shavings that refine curves faster than sanding and dramatically reduce tear-out on hardwoods.
Example: a completed mahogany arm profile will require fewer sanding passes and show fewer torn fibers after 30–60 minutes of scraping versus aggressive slicing.
Quick troubleshooting
Why it matters: small issues are fixable without redoing your setup.
- If the chisel bites or snags, increase the facet angle slightly toward 95° or lighten your pressure.
- If it leaves chatter marks, flatten the facet and shorten your stroke length.
- If it gouges, check for nicks and remove them with a stone.
Example: if the chisel digs into an oak edge, stop and take 3–5 strokes on a 400 grit stone to remove a nick, then strop and resume.
Start with these steps and you’ll get controlled, predictable scraping without needing a razor edge.
Shop Routines That Keep Chisels Cutting True Longer
Here’s what actually happens when you skip small chisel care: edges dull faster and you end up regrinding instead of sharpening.
Why it matters: keeping a simple routine saves hours of work and preserves steel life.
1) Wipe blades after use
- Step 1: within 5 minutes of finishing, wipe each blade with a clean shop rag soaked in mineral spirits or denatured alcohol.
- Example: after paring a mahogany hinge mortise, you’ll see tiny dark grit on the rag that would otherwise abrade the bevel.
- Keep a 16 oz spray bottle and a stack of rags by your bench for this.
Why it matters: removing sap and grit prevents micro-scratches that turn into chips.
2) Inspect bevel and back under good light
- Why it matters: spotting nicks early means you can fix them with a few minutes on a stone instead of major reshaping later.
- Step 1: hold the chisel bevel-up to a 500–1,000-lumen LED flashlight at low angle; look for shiny spots on the back or tiny notches on the bevel.
- Example: when you work salvaged oak, the darker shiny line on the back shows a high spot that will skip on end grain.
- If you see a nick larger than 0.5 mm, plan to hone that area.
3) Strop lightly every few uses
- Why it matters: stropping realigns and polishes the edge so you cut longer between hones.
- Step 1: after every 3–6 uses, run the bevel 10–20 strokes on a leather strop charged with green chromium oxide paste (0.5 micron).
- Example: between dovetail pins, a quick 15-stroke strop keeps the chisel shaving paper-thin curls rather than tearing fibers.
- Don’t press hard; use the chisel’s bevel angle as your guide.
4) Hone when stropping won’t restore a burr
- Why it matters: honing removes metal to re-establish geometry so the edge cuts true.
- Step 1: use stones in sequence—start 1,000 grit, move to 4,000, finish at 8,000—keeping the original bevel angle (usually 25–30° for bench chisels).
- Step 2: count strokes: 10–15 light strokes per side on the 1,000, 8–10 on 4,000, and 8–10 on 8,000.
- Example: after flattening a glue joint, a 1,000→8,000 sequence took me 12 minutes to restore a razor edge on a 20 mm chisel.
- Stop when you can feel a consistent burr and then remove the burr with five light strops.
5) Oil ferrules and tools for storage
- Why it matters: small oiling trips rust prevention and keeps wooden handles from cracking.
- Step 1: once a month, apply a thin film of gun oil or 3-in-1 oil to ferrules and a wipe of boiled linseed oil to handles.
- Example: after a rainy woodworking weekend, a quick oiling kept the ferrule from fretting into the handle on an old Stanley chisel.
6) Monitor storage humidity
- Why it matters: high moisture causes rust and pitting that ruin edges beyond repair.
- Step 1: keep chisels in a cabinet at 40–50% relative humidity; use a hygrometer to check.
- Step 2: if humidity climbs above 60%, run a small dehumidifier or add silica gel packs to the drawer.
- Example: storing chisels in a basement at 70% RH led to visible pitting in two months; silica packs cut that risk quickly.
Small, regular care beats infrequent major repairs. Follow these steps and you’ll spend minutes per session maintaining edges instead of hours regrinding them.
Evaluating a New Chisel and Prepping It for Accurate Work
If you’ve ever bought a new chisel, this is why.
Why this matters: a chisel that’s not true will tear wood and give you bad cuts. For example, I once used a shop-new chisel on a cherry board and got ragged tearout because the bevel had a crushed, dull edge.
1) How do you inspect a new chisel?
Why it matters: catching defects early saves time and prevents ruined workpieces. Hold the chisel up to a bright light and look at the bevel and the back for visible flaws. You want to see whether the bevel has uneven grinding, shiny bands, or a crushed edge that indicates shipping dullness. If the bevel looks close to 25 degrees, plan to regrind to a 30-degree primary. That’s a common sensible compromise: sharper than 35° but tougher than 25°. Example: when you line the chisel against a shop light, any narrow bright line across the bevel usually means a high spot you should remove.
Steps:
- Hold the chisel at eye level toward a lamp.
- Rotate slowly and scan for shine bands or a rolled/crushed edge.
- Measure the bevel angle roughly with a bevel gauge or smartphone app; note 25° vs 30°.
2) When should you regrind the bevel?
Why it matters: a wrong bevel angle makes sharpening harder and shortens edge life. If your bevel measures about 25 degrees, regrind to a 30-degree primary; if it’s already 30°, just hone. For example, a 25° factory bevel on a bench chisel will feel sharp but will chip faster when you pare end grain.
Steps:
- Clamp the chisel in a grinder jig or hold flat on a coarse stone.
- Remove just enough metal to change the primary bevel to 30°; aim for a 1–2 mm reduction across the face.
- Keep the grind even; check frequently against a gauge.
3) How do you check and true the back?
Why it matters: a flat back gives you a clean, burr-free edge when you hone. Lay the back flat on a low-grit flat plate or coarse stone and press while sliding 1/4–1/2 inch back and forth; you’re establishing a small flat reference area. Example: if the back is hollow from manufacturing, you’ll see only the outer edges contact the stone; lapping a 1/4–1/2 inch area gives you a reliable spot to form a burr.
Steps:
- Put the chisel flat on a coarse stone or lapping plate.
- Rub in a controlled, short stroke (1/4–1/2 inch) to create a small flat.
- Check with a mirror—if you see full contact on that small area, you’re set.
4) How do you hone and create the micro-bevel?
Why it matters: honing refines the edge for accurate, clean cuts. After the primary bevel and back are set, hone progressively from coarse to fine stones until you raise a burr, then add a 1–2 degree micro-bevel and polish it. For example, when I honed a new chisel on 400, 1000, then 6000 grit stones and finished with a 1° micro-bevel, it sliced thin shavings from poplar without tearout.
Steps:
- Hone across 400, 1000, then 6000 grit (or equivalent) until a burr forms along the back.
- Flip to the back and remove the burr with a few light passes.
- Set the micro-bevel by lifting the angle 1–2° and making 8–12 light strokes on the finest stone.
- Strop the bevel on leather with a strop compound for 20–30 strokes each side.
5) How do you remove burrs and finish the edge?
Why it matters: removing burrs gives you a clean cutting edge and prevents catching. After honing, use your fingernail or a magnifier to check for burrs; strop until nothing catches. Example: a burr left on a chisel turned a clean paring into a ragged gouge on maple; removing it fixed the problem immediately.
Steps:
- Check the edge by dragging your thumb lightly across—don’t press hard.
- Strop both sides until the edge feels smooth and no burr is detectable.
- Test by making a light shaving on scrap wood.
6) How should you prepare the chisel for storage?
Why it matters: a protected edge stays usable and safe longer. Coat the metal lightly with a film of camellia oil or light machine oil, wrap the edge in cloth, and put the chisel in a wooden roll or sleeve to prevent knocks. For example, I store chisels in a felt roll with the edges wrapped; after six months they come out ready to use.
Steps:
- Apply a thin coat of oil to the metal surfaces.
- Wrap the edge in a thin cloth or edge protector.
- Store in a roll or box where the edge won’t meet other tools.
Follow these steps and your new chisel will cut accurately and stay reliable for years.
Frequently Asked Questions
Can a Dull Chisel Damage Delicate Inlay or Veneer Work?
Yes — I’ll say a dull chisel can ruin delicate inlaywork and cause veneer lifting: it crushes fibers, tears edges, forces extra pressure, and makes controlled paring nearly impossible, increasing risk of visible, often irreversible damage.
How Does Steel Type (Carbon Vs Stainless) Affect Edge Retention?
High carbon chisels hold an edge longer and sharpen sharper, but they corrode and chip more; stainless steel resists rust and needs less maintenance but usually sacrifices edge retention—I’m balancing corrosion versus durable sharpness for you.
Can Honing Compounds or Stropping Change Recommended Bevel Angles?
Yes — I reckon strop polish and careful compound selection won’t change bevel geometry, but they’ll finesse the edge: sharper feel, longer bite, and less frequent regrinding, so I often keep recommended angles intact.
Do Ergonomic Handles or Hammer Strikes Influence Chisel Dulling?
Yes — I know handle ergonomics and impact mechanics matter: poor grips or misaligned blows increase edge stress, causing faster dulling and chips, while balanced handles and controlled strikes preserve edges and improve cutting consistency over time.
Is There a Safe Way to Resharpen Chisels Mounted in Handles?
Yes — I do it by removing the chisel from the handle when possible; if not, I use handle mounted sharpening with a secure jig and clamp so I can safely perform securely seated resharpening on stones or strops without risking injury.