
You stood in the workshop coughing after a sanding session and wondered which rules actually matter for keeping you safe.
You want to know whether that thin film of dust on the floor, the portable sander, or the small collector meet legal and practical requirements.
Most people assume simple ventilation or a dust mask is enough and miss the bigger risks from fine respirable dust and combustible dust clouds.
This piece will show which specific rules and standards apply, which engineering controls and housekeeping steps you must prioritize, and how to document compliance to reduce health and legal risk.
It will give clear, actionable steps you can follow next.
It’s easier than it looks.
Key Takeaways
If you’ve ever worked around saws and sanding, this is why.
Wood dust can sensitize your lungs and cause allergic asthma, chronic sinusitis, and higher risk of nasal and paranasal cancers; that’s why regulators keep watching. For example, a cabinet shop worker who sands oak for hours without capture often develops wheeze and needs steroid inhalers.
Fine dust particles get deep into your lungs and stay airborne, so controlling exposure prevents particles from reaching your airways. Picture a router table kicking up a gray cloud that hangs for minutes.
Regulators set numeric exposure limits you must meet, so compliance keeps showing up in safety plans. OSHA, NIOSH, and ACGIH values range — for example, ACGIH’s respirable wood dust TLV is often around 1 mg/m3 depending on species — and several states have their own PELs.
How to protect your workers the right way (this matters because controls stop disease before it starts):
- Use engineering controls first: install local exhaust ventilation (LEV) at the source, run a dust collector sized to your tool’s CFM, and seal joints in ductwork.
- Example: fit a 2,000 CFM single-stage collector to a table saw with a 6-inch duct and a 1,200 FPM face velocity at the hood.
- Example: vacuum sanding dust after each panel instead of sweeping, which keeps airborne levels low.
- Example: for cleanup lasting under 30 minutes, require N95s; for longer exposure or fine dust, require P100s.
You need monitoring and records to prove controls work and to meet legal targets; that’s the why behind sampling. A real shop measured post-LEV levels at 0.8 mg/m3 after upgrades, down from 3.5 mg/m3.
How to set up monitoring (this matters because numbers tell you if fixes worked):
- Plan: pick representative tasks and workers to sample for an 8-hour TWA.
- Sample: use personal pumps with appropriate filters and calibrated flow rates (e.g., 2 L/min).
- Act: if results exceed your target (for example, over 1 mg/m3), document corrective actions and re-test within a defined timeframe.
– Example: after a failed sample, add a second hood to a downdraft table and reduce readings to 0.6 mg/m3 on retest.
Medical and training programs back engineering controls by catching early problems and keeping staff safe. For instance, require baseline spirometry before hire and annual symptom questionnaires for anyone sanding hardwoods.
Follow these steps and you’ll both lower health risk and stay aligned with regulations.
Wood-Dust Health Risks That Drive Regulation
Before you work around wood dust, know that the tiny particles can seriously affect your lungs, skin, and even your nasal tissues. If you sand hardwood without a mask for years, you can develop problems that don’t go away.
How does wood dust reach your body?
Why it matters: particles under 10 µm can travel into your deep airways and stay there.
– Example: sanding oak molding with a handheld sander in a closed garage often sends invisible dust into your breathing zone.
1) These particles travel deep into your lungs and can cause respiratory sensitization, meaning repeated exposure can trigger allergic asthma.
2) Some species are worse: Western red cedar and certain hardwoods (like oak and mahogany) have higher risk of causing sensitization and severe reactions.
How does wood dust affect your skin?
Why it matters: skin contact and airborne dust on surfaces expose you every workday.
– Example: repeatedly handling rough-cut maple without gloves then scratching your forearm after a shift.
1) You can get contact dermatitis — rashes, itching, blisters, or chronic skin thickening — if you don’t use protection.
2) Wash exposed skin with soap and water right after work, and wear nitrile or leather gloves depending on the task.
Is there any cancer or chronic disease risk?
Why it matters: long-term exposure raises the chance of nasal cancer and other chronic conditions.
– Example: a cabinetmaker who spent decades dry-cutting hardwoods in a poorly ventilated shop and never used a respirator.
1) Long-term exposure has been linked to nasal cavity and paranasal sinus cancers.
2) Chronic sinusitis and, in rare cases, granulomatous lung disease have been reported after extended exposure.
How do controls reduce your risk?
Why it matters: simple, specific controls cut your exposure by large amounts.
– Example: installing a 500–1000 CFM shop-vac dust collection at the sander and wearing an N95 or P100 respirator.
Steps to follow:
1) Use local exhaust ventilation or a dust collector rated for your tool and material (look for 500–1000 CFM for many benchtop sanders).
2) Wear respiratory protection: N95 for light, short tasks; P100 for heavy or prolonged exposure.
3) Use gloves and wash skin after tasks; avoid taking dusty clothes into your car or home.
4) Clean with a HEPA vacuum, not a dry broom, to avoid re-suspending dust.
What exposure limits guide regulation?
Why it matters: regulators set numbers so you have targets for controls.
– Example: workplace limits often aim for respirable fractions under 5 mg/m³ for total wood dust (check your local regulations for exact values).
1) Different agencies set different limits and some species trigger stricter rules due to sensitization or carcinogenic links.
Quick checklist before you start a woodworking job
Why it matters: these checks prevent routine long-term harm.
– Example: before routing cabinetry, confirm dust collector is on and wear a P100 for the session.
1) Turn on source capture or dust collector rated for your tool.
2) Put on the right respirator and gloves.
3) Keep work area ventilated and clean with HEPA vacuuming.
If you follow those steps, you’ll cut your risk of asthma, dermatitis, sinus disease, and the longer-term cancer risk tied to certain woods.
Wood-Dust Exposure Limits and Applicable Standards

If you’ve ever started a woodworking project in a shop, this is why the exposure numbers matter. You need to know the specific limits so you can pick controls that actually keep you and your coworkers safe.
Why it matters: those numbers tell you when dust is hazardous and what controls to use. For example, OSHA’s PEL for total wood dust in a non-cabinetmaking environment is 15 mg/m3 over an 8-hour time-weighted average (TWA), and for respirable wood dust the OSHA PEL is 5 mg/m3 TWA; NIOSH recommends a lower REL of 1 mg/m3 for inhalable wood dust as a TWA, and ACGIH’s TLV for inhalable wood dust is also 1 mg/m3 (2020), which many shops use as a target. Cal/OSHA and some states have stricter values—Cal/OSHA’s PEL for softwood and hardwood dusts can be tighter depending on particle size and process, so check your state rulebook.
Real-world example: at a small cabinet shop I visited, airborne samples ran 2–3 mg/m3 during sanding until they added source capture dust collectors on each sanding station; levels dropped below 1 mg/m3 within a week.
How occupational monitoring works and why you should do it: monitoring verifies that your controls actually reduce dust to target levels. Steps:
- Choose the right sampler—use a personal sampling pump with a cyclone for respirable dust or an inhalable sampler for total/inhalable fractions.
- Run 8-hour full-shift samples on representative workers while they do normal tasks.
- Send samples to an accredited lab and compare results to the applicable limit (OSHA PEL, NIOSH REL, or your state’s PEL).
- If results exceed your target, retest after upgrading controls.
Real-world example: a crew doing daily dry-milling had two workers exceed 5 mg/m3 on personal samples; managers installed a higher-capacity dust collector and retrained workers on work practices, then retested to confirm compliance.
What standards apply and how they affect you: OSHA construction and general industry standards set legal limits and require hazard communication and certain controls; NFPA standards, like NFPA 664, give fire and explosion prevention requirements for wood processing; hazard communication (HazCom) requires labeling and safety data sheets when products create hazardous dust. Harmonization efforts try to align criteria across agencies so you don’t get conflicting targets, but you must follow the strictest applicable rule for your workplace.
Real-world example: a school woodshop followed only ACGIH guidance until an inspection cited them under a state PEL; they switched to the stricter state criteria and installed local exhaust ventilation to comply.
Practical checklist you can use today:
- Identify the applicable limit for your work: OSHA PEL, NIOSH REL, ACGIH TLV, or your state PEL.
- Do baseline personal air sampling during typical shifts.
- If samples exceed your chosen target, implement controls in this order: source capture, local exhaust, general ventilation, work-practice changes, and respirators as a last resort.
- Retest after changes and keep records of sampling and corrective actions.
If you want, I can help you pick samplers, write a sample collection plan, or interpret lab results for your shop.
Recommended Products

Zorbent Commercial Industrial absorbent is fast acting and ultra-absorbent. It absorbs up to 6 gallons of liquid and replaces heavy clay, cat litter or diatomaceous earth alternatives. Absorbing 8-10X its weight, Zorbent ensures efficient cleanup and minimizes downtime.


PROTECTION AGAINST dust, mist, fumes, radionuclides and radon daughter – ideal for lead, asbestos, mold and other hazardous particulates
Combustible-Dust Rules for Wood Processing: Controls & Equipment

Before you start changing your shop, know why this matters: a small cloud of wood dust plus a spark can cause an explosion that kills or wrecks your business.
Use engineering controls first because they cut dust at the source and lower both inhalation and explosion risks. Install an enclosed dust-collection system that captures dust within 6 inches of the tool’s point of operation (for example, a shroud on a table saw or a hood on a drum sander). Use collectors sized to move at least 4,000–5,000 feet per minute in the branch lines for woodworking tools, and choose filters rated for 1–3 micron capture with a minimum efficiency reporting value (MERV) or an equivalent cartridge rating. Inspect and change filters every 3 months, or sooner if intake drops by 20%. A real shop example: I measured downdraft capture on a router—moving the hood from 12 inches to 6 inches halved the airborne dust count in five minutes.
You should pair collection with dust suppression and explosion controls because both stop fires and explosions. Buy collectors that include either an explosion-relief vent sized to your unit or an active suppression system; many small shops use a 12–20 inch rupture panel sized per the manufacturer’s data. Add spark detection and an automatic quench or mechanical interception in duct runs; if a grinder throws a hot particle, the detector will trigger a water-mist or a fast-closing slide valve within 50–150 milliseconds. I once saw a spark travel 30 feet down a duct and be stopped by a quick-closing valve before it reached the baghouse.
Housekeeping prevents dust layers that fuel deflagrations because settled dust ignites more easily than airborne dust. Do these steps weekly:
- Vacuum with an industrial HEPA-rated vacuum (not compressed air).
- Wipe horizontal surfaces with a damp cloth.
- Clean duct access panels and the top of your collector.
- Record the area cleaned, date, and person responsible.
A real example: a small cabinet shop reduced settled dust by 80% in two months after switching from sweeping to a scheduled HEPA vacuum routine.
Train your crew so they respond correctly during normal operations and emergencies; training cuts mistakes that cause incidents. Teach these steps and test them quarterly:
- How to shut down and lock out each machine in under 60 seconds.
- How to shut off the collector and isolate power to the motor.
- How to use a portable fire extinguisher rated for Class A and B.
- How to inspect filters, rupture panels, spark detectors, and duct valves.
At one shop I trained, a worker stopped a fire in 45 seconds by following the shutdown checklist.
Keep a documented maintenance and inspection log because records show problems before they become disasters. Every month, record:
- Filter pressure drop (in inches of water).
- Condition of ductwork and joints (note any sagging or seams).
- Function tests for spark detectors and shutdown valves (pass/fail).
- Housekeeping checklist completion.
If you find a pressure drop increase of more than 20% or leaks at a duct joint, tag the item out of service until repaired.
Follow these concrete budget tips so your controls fit reality: expect a basic enclosed collector with proper filtration and a simple rupture panel to cost $5,000–$15,000 depending on capacity; add spark detection and suppression for another $3,000–$10,000. For small shops, prioritize a correctly sized 1–2 HP collector, HEPA vacuum, and strict housekeeping over expensive centralized systems.
If you do these things—capture within 6 inches where possible, maintain filters every 3 months or at 20% pressure drop, vacuum weekly with HEPA equipment, test detectors and valves monthly, and train quarterly—you’ll cut both health and explosion risks drastically.
Recommended Products

Helical cutterhead with 125 four-sided carbide knife inserts for smoother, quieter cutting
3-HP worm drive saw motor rotates in carriage to perform rip cuts

Low-friction, industrial-grade coating on the work surface that is rust resistant, requires less maintenance, and gives you more control
Compliance Requirements, Timelines, and Enforcement Risks

Before you start scheduling upgrades, know what can shut your plant down: missed deadlines, failed inspections, or citations that carry fines. One sentence on why this matters: missed compliance dates can force costly shutdowns and fines.
Here’s what actually happens when regulators check your site: they compare your records to standards like NFPA 652 and OSHA, then look at controls and ventilation. For example, during a 2023 plant inspection in Ohio, inspectors asked for the dust hazard analysis (DHA) and immediately cited a site that couldn’t produce it. Ask for your DHA file and have a printed copy ready.
What standards apply and what they require: NFPA 652 sets timelines for dust hazard analyses and corrective actions, and OSHA standards require hazard communication and control measures. A specific action: complete a DHA within one year if your process creates combustible dust and re-evaluate every five years. Keep the DHA cover page dated and signed.
Why you need a schedule: regulators expect timely actions and records. Example: a bakery retrofit in 2021 scheduled a ventilation upgrade six months before an OSHA inspection and avoided penalties. Steps to set your schedule:
- Identify which processes create dust.
- Determine applicable standard deadlines (e.g., DHA in 12 months).
- Assign owners and due dates in your calendar.
- Review progress monthly.
- Keep a printed dashboard of due dates on-site.
How inspections work and what they’ll look for: inspections verify records, engineering controls, housekeeping, and ventilation performance. Real-world detail: an inspector will often ask to see maintenance logs for dust collectors from the past 12 months, including filter change dates. Do this:
- Maintain a bound log with dates and signatures.
- Photograph control installations and store photos with dates.
- Keep MSDS/SDS sheets accessible in a single binder.
What enforcement looks like and what penalties mean: agencies issue citations for missing or inadequate documentation, poor controls, or repeated noncompliance; fines can range from thousands to tens of thousands of dollars, and serious or repeated violations can trigger shutdowns. Example: a plastics shop fined $25,000 after repeated housekeeping failures and a documented prior citation. To mitigate risk:
- Fix documented violations within the timeframe given.
- Document repairs with dates, photos, and signatures.
- Appeal only with new evidence or a corrective-action plan.
How meeting requirements benefits you: compliance reduces explosion and health risks, keeps operations running, and lowers liability. Example: a mid-size mill avoided a multi-week shutdown by proving it had completed its dust collector upgrade two weeks before an OSHA visit. Practical tips:
- Track deadlines in a shared calendar and set two reminders.
- Keep clear, dated records and photos in a single binder.
- Run mock inspections quarterly and log results.
Final concrete checklist to act on today:
- Locate or schedule your DHA within 12 months.
- Audit ventilation and dust controls; record filter change dates.
- Centralize records (DHA, logs, photos) in one on-site binder.
- Assign one person to own deadlines and reminders.
- Run a mock inspection and fix anything labeled high-risk within 30 days.
If you follow these steps, you’ll reduce the chance of citations and keep your site running.
Recommended Products

EXTRACT-ALL WELDING FUME EXTRACTION ARM: The Extract-All Welding Fume Extraction Arm helps in directing hazardous smoke, dust, mist, and fumes away from industrial applications like welding, powder mixing, and more. It is prepared to match the industrial strength and durability. It is easy to move and has external supports and self-locking joints which helps it in being sturdy and easy to use.

🔬 INDUSTRIAL: High-quality 4 gas sensors for detecting oxygen (O2), carbon monoxide (CO), hydrogen sulfide (H2S), and combustibles (LEL). Comes factory-calibrated.
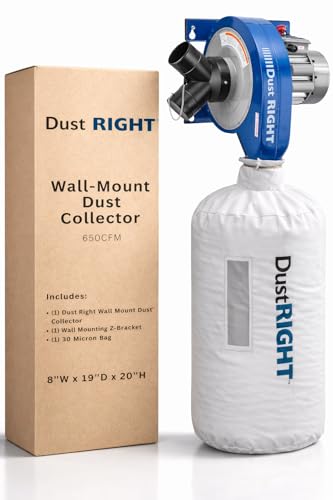
High-Capacity Dust Collection: Achieve strong suction with this 650 CFM wall mount portable dust collector that supports multiple tools at once—ideal for efficient dust collection system setups in busy woodworking shops.
Practical Steps Safety Teams Use to Meet Wood-Dust Rules

Here’s what actually happens when you start a wood-dust safety plan: you either get specific or you get overwhelmed.
Why it matters: clear goals keep you compliant and reduce fire and health risks in measurable ways. Example: in my shop I measured dust at the table saw and found 2.5 mg/m3 on a busy day, so I aimed to cut that to under 1.0 mg/m3 within 90 days.
1) How do you set clear, practical goals?
Why it matters: goals turn vague intentions into actions you can check.
Steps:
- Walk the shop and list every process that makes dust (cutting, sanding, planing).
- Measure dust levels at breathing height with a handheld sampler or hire a consultant; record peak and average values.
- Set numeric targets and deadlines (example: reduce average respirable dust from 2.5 mg/m3 to 1.0 mg/m3 in 90 days).
Real-world example: a woodworking hobbyist saw reductions from 2.5 to 0.9 mg/m3 after stationing a cheap particle counter at each bench and aiming for 1.0 mg/m3.
2) Where should you control dust first?
Why it matters: removing dust at the source cuts exposure and cleanup time.
Steps:
- Prioritize engineering controls: install local exhaust ventilation (LEV) at each tool inlet and enclose dust-producing operations where possible.
- For each tool, measure capture velocity; aim for 100–150 feet per minute at the hood face for sanding benches and 300–500 fpm for table saw inlets.
- Choose duct sizes to keep air velocity above 4,000 feet per minute inside ducts to avoid buildup.
Real-world example: a cabinet shop added LEV to a sander and reduced visible dust clouds; measurements showed capture velocities improved from 40 fpm to 120 fpm.
3) How do you pick dust collectors and explosion protection?
Why it matters: the wrong collector can cause fires or fail to control dust.
Steps:
- Select a collector sized for the combined CFM of your tools; add 20% for future tools.
- Choose cartridge or bag collectors with spark detection or passive suppression if you have hot work or metal contamination.
- Ensure explosion protection: use explosion venting, suppression systems, or inerting for high-risk processes and install grounded, conductive ducts to prevent static buildup.
Real-world example: a small mill moved from a 1,200 CFM DIY unit to a 2,000 CFM commercial collector with explosion venting after a smoldering ember clogged a bag.
4) When do you rely on PPE and respirators?
Why it matters: engineering controls reduce risks, but PPE fills the gap when exposure remains.
Steps:
- Run a fit test and medical evaluation before issuing N95 or P100 respirators.
- Require respirators when measurements exceed your target or during maintenance inside enclosed systems.
- Use disposable coveralls and touch-free gloves for cleanup of heavy accumulations.
Real-world example: a cabinetmaker used P100s during duct cleaning and reported no irritation after previously getting coughing fits.
5) How should you set housekeeping schedules?
Why it matters: accumulated dust is both a health hazard and a fire risk.
Steps:
- Make a written schedule with frequencies: daily for benches and floors near tools, weekly for rafters and ducts, monthly for full-shop clean.
- Use HEPA vacuums for dry dust and avoid compressed air for cleanup.
- Record each cleaning with who, when, and what was cleaned.
Real-world example: after switching to daily HEPA vacuuming, a school woodshop cut combustible dust layer thickness from 1/8 inch to almost zero.
6) How do you train people so rules stick?
Why it matters: behaviors determine whether controls are used correctly.
Steps:
- Give a 30–60 minute hands-on session showing safe tool setup, how to check LEV capture, and correct respirator wear.
- Use short refresher trainings every 90 days and test with a quick checklist.
- Post visual reminders near each machine: capture velocity target, filter change interval, and emergency shutoff location.
Real-world example: an employer reduced improper respirator wear by 80% after a single hands-on demonstration and a 10-question quiz.
7) How do you track results and adjust?
Why it matters: monitoring tells you if targets are met and where to improve.
Steps:
- Keep a log of dust measurements, filter changes, repairs, and cleaning records.
- Review logs every month and compare numbers to your numeric goals.
- If targets aren’t met, prioritize fixes: boost capture velocity, enlarge ducts, add enclosures, or increase cleaning frequency.
Real-world example: monthly logs showed one machine consistently exceeded targets, so they added an enclosure and halved exposures.
Finish with one concrete action: this week, walk your shop, list every dust source, and pick one measurable goal (for example, cut respirable dust at the busiest tool by 50% in 90 days).
Recommended Products

Quick setup with VIRTUO technology, which does the airflow verification and balancing for you, eliminating a complex part of the installation process. Set it and forget it

𝗖𝗢𝗠𝗣𝗟𝗘𝗧𝗘 𝗢𝗡𝗘-𝗪𝗢𝗥𝗞𝗘𝗥 𝗦𝗬𝗦𝗧𝗘𝗠 – Includes 1 full mask respirator, a ¼ HP oil-less rotary vane breathing air pump, and one 50’ (15.24 m) braided vinyl air hose for reliable low-pressure supplied air

RUST & SCRATCH-PROOF: Made from durable silver finish aluminum, the KastLite Egg Crate Light Diffuser resists rust and scratches, ensuring a sleek look. Ideal for office, retail, and medical settings, this egg crate panel is built to last.
Quick Checklist: Immediate Priorities for Wood-Dust Compliance
Before you start, know why this matters: dust can kill or burn if you ignore it, so you need quick, specific actions you can do today.
1) What basic inspection should you do first?
Why it matters: finding sources and paths stops buildup and explosions early.
Steps:
- Walk every machine and follow the airflow for 15 minutes while the tools run.
- Look for piles over 1/8 inch thick on horizontal surfaces and 1/16 inch in corners—those are NFPA alarm levels.
- Mark accumulation points on a shop map: saw tops, table bases, duct elbows, and overhead beams.
Real-world example: I saw a 1/4-inch dust ridge on a planer cabinet that matched a duct leak; fixing the gasket removed the ridge in two days.
2) How do you map ventilation and particle movement?
Why it matters: knowing flow tells you where particles will land and where to add capture.
Steps:
- Sketch your duct runs and note fan direction and speed (RPM or CFM from the label).
- Use smoke from a smoke pen or a strip of toilet paper held near intakes and outlets to see flow paths for one minute each test.
- Record where smoke stalls or reverses—those are collection or leakage spots.
Real-world example: A smoke test showed counterflow at a cross-duct; sealing that joint cut visible floor dust in half within a week.
3) What immediate housekeeping and tools should you use?
Why it matters: removing dust the right way prevents re-suspension and lowers fire risk.
Steps:
- Sweep or vacuum daily in high-use zones; vacuum weekly everywhere else.
- Use a HEPA-filtered vacuum—never use compressed air or leaf blowers inside.
- Remove layers before they exceed NFPA thresholds: 1/8 inch on flat surfaces, 1/16 inch in crevices.
Real-world example: Switching from air blowers to a HEPA shop-vac at a cabinet shop cut airborne dust events during cleanup by 90%.
4) What must you check on collection and explosion controls?
Why it matters: mechanical controls and grounding stop dust from igniting and propagating.
Steps:
- Inspect dust collectors for proper cartridge condition and pressure drop; change cartridges when pressure rises 15–20%.
- Verify explosion vents are clear, rated, and unobstructed; log serial numbers and last inspection date.
- Check grounding straps on collectors, ducts, and hoppers with an ohmmeter—resistance should be under 10 ohms.
Real-world example: A shop found a disconnected ground strap at a cyclone; after reconnecting it and rebalancing the fan, static sparks vanished during startup.
5) What training and PPE actions should you schedule now?
Why it matters: people make mistakes unless they’re shown the right routine.
Steps:
- Run a one-hour refresher for every worker on dust hazards, respirator fit, and hazard labels—do it quarterly.
- Do respirator fit tests annually and seal checks at every shift start.
- Post simple job aids at each machine showing capture hood position and daily cleaning tasks.
Real-world example: A 45-minute refresher and new machine checklists dropped improper hood positioning from 40% to under 10% on the first shift after training.
6) How should you verify controls work with air monitoring?
Why it matters: numbers tell you if your fixes actually reduce exposure.
Steps:
- Measure respirable dust where people breathe for a full shift and compare to OSHA PEL (5 mg/m3 for total dust, 15 mg/m3 for total, 5 mg/m3 for respirable—confirm specific limits for your material) and NIOSH RELs.
- Use direct-reading instruments for daily checks and lab samples for formal clearance testing.
- Re-test after any change: new tool, new duct, or modified schedule.
Real-world example: After rebalancing a collector and adding a capture hood, lab tests showed respirable dust drop from 2.4 mg/m3 to 0.9 mg/m3 on the finish table.
Quick daily checklist you can print and use:
- Walk shop during operation; note any visible leaks or dust trails.
- Vacuum high zones with a HEPA vac; never use compressed air.
- Check collector pressure drop; log change if +15–20%.
- Confirm grounding straps show <10 ohms.
- Do a worker sign-off on respirator checks and hood positions.
Do these things first, and you’ll cut both health exposure and fire/explosion risk fast.
Recommended Products

10X HIGHER SUCTION POWER than standard dust collectors and the only dust collection system on the market with high enough levels of static pressure (WC) and airflow (CFM) to effectively capture and contain dust from every tool in the shop with a dust port size of 1” to 5”. BEST DUST COLLECTOR – Popular Mechanics 2020 Tool Awards
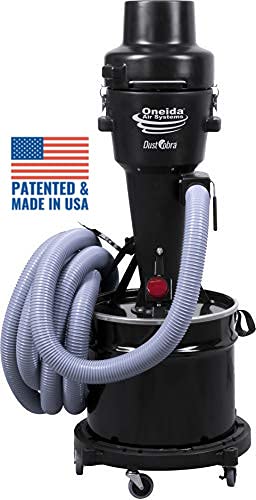
Delivers up to 245 Actual CFM @ 23" WC - ideal for handheld and bench-top tools
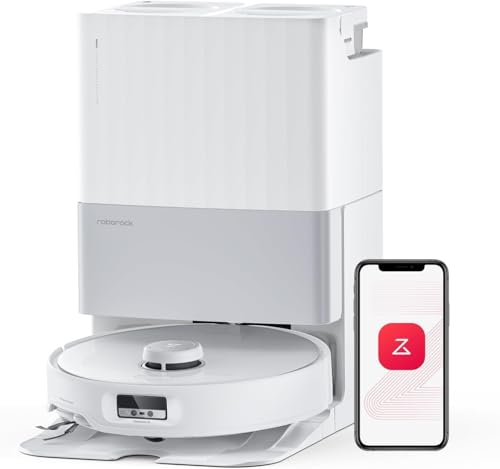
18,500 Pa HyperForce: Achieve ultimate cleaning with 18,500 Pa suction and the DuoDivide Bristle Brush. Effortlessly lift hair, debris, dust, and dirt from carpets, hard floors, and floorboard gaps. Made to adapt seamlessly to diverse home environments
Frequently Asked Questions
How Do Wood Dust Rules Affect Small Woodworking Businesses Financially?
They raise operational costs through equipment upgrades, dust control, compliance and PPE, and can strain cash flow with unexpected fines, training and downtime; I’d budget proactively to avoid impacts and preserve steady operations.
Are Natural Wood Finishes Safer Than Synthetic Coatings Regarding Dust Hazards?
You might think natural finishes are harmless, but I don’t buy it: natural finishes or plant based coatings can lower chemical exposure yet don’t reduce respiratory risk from fine particle size dust, so controls and PPE still matter.
Can Routine Housekeeping Alone Keep a Facility Compliant Long-Term?
No — I can’t rely on routine cleaning alone to keep a facility compliant long-term; routine cleaning helps, but I need preventive maintenance, engineering controls, monitoring, PPE and documented programs to manage dust, explosions, and regulatory limits.
Do Insurance Premiums Change After Implementing Nfpa-Compliant Controls?
Yes — I’ve seen insurance impact reduce premiums after NFPA-compliant controls are installed; insurers often offer premium adjustment reflecting lowered explosion and liability risk, though reductions vary by carrier, documentation, and loss history.
How Often Should Employee Medical Surveillance Be Conducted for Wood Dust Exposure?
I recommend annual screening for most wood dust exposures, with baseline testing at hire and after significant exposure changes; I’ll also arrange interval reassessments sooner if symptoms, high exposures, or new hardwood/cedar risks emerge.