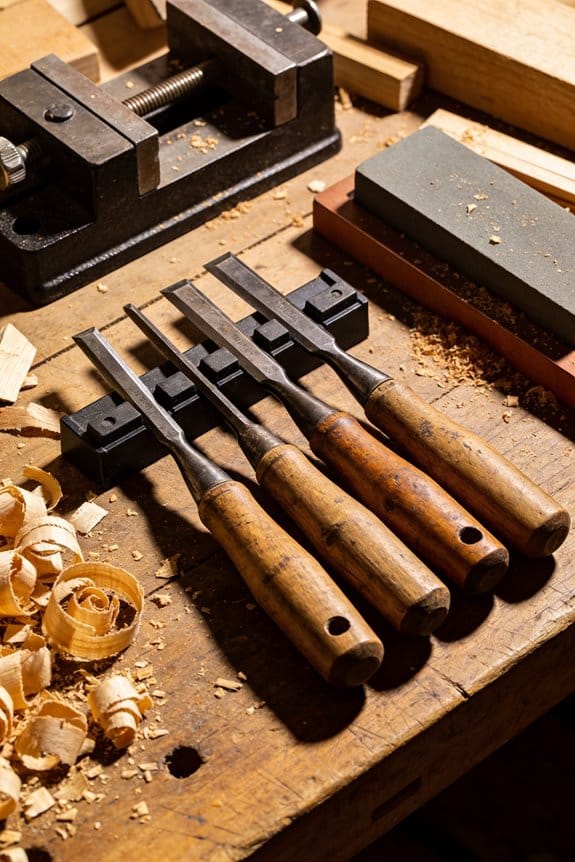

You’re standing at the bench with a dovetail that won’t close and two chisels in your hand, unsure which one to use for that last, tiny shaving. You can’t tell why one blade peels fine 0.3 mm from the tail while the other dents the shoulder when you try to pare.
Most people assume all chisels are interchangeable and simply reach for the stiffer, familiar bench chisel.
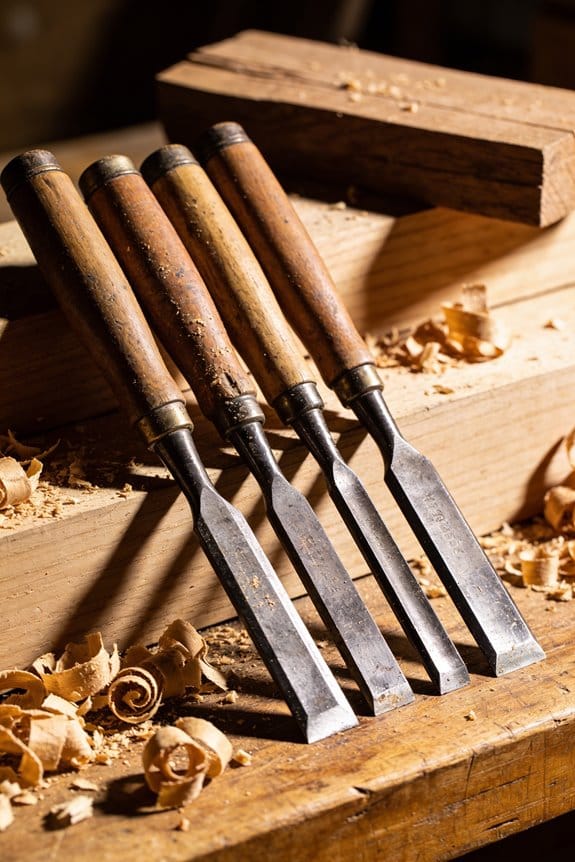
This piece will show you why paring chisels are long, thin, and slightly flexible for controlled push-paring, while bench chisels are shorter, thicker, and built to take mallet blows for chopping and mortising.
It will also give clear, practical choices for which chisel to pick and how to sharpen and inspect them so your fits stop failing. It’s simpler than it sounds.
Key Takeaways
If you’ve ever tried fitting a drawer or cleaning up a glued joint, this is why the right chisel matters. You want clean, controlled cuts when you’re paring, and you want something that survives hammering when you’re chopping.
Why paring chisels are different from bench chisels
- Paring chisels have long, thin blades and low bevels so you can take delicate, controlled shaving cuts that make paper-thin slices. Example: when you pare the shoulder of a tenon to fit a mortise, use the long blade to span the length and shave off about 0.2–0.5 mm per pass.
- Bench chisels are shorter, thicker, and ground at steeper angles so they withstand mallet blows and heavy chopping tasks. Example: chopping a mortise wall, hit with a 300–500 g mallet and use a bench chisel with a 25–30° bevel.
How blade geometry affects performance
Why this matters: geometry determines whether the blade bends or chips under load.
- Paring blades prioritize flexibility and low friction for fine fitting and cleanup; use a 20–25° bevel and a thin cross-section if you want slices that glide. Real-world example: smoothing the inside of a dovetail socket, you’ll want a thin edge that slices wood fibers rather than tearing them.
- Bench blades prioritize stiffness and impact resistance; use a 25–35° bevel and a beefier spine to resist mushrooming. Real-world example: when trimming tenon cheeks with chopping strokes, a stiff blade holds line after several strikes.
Handle and striking design
Why this matters: the handle changes how you control the tool and how much force it can take.
- Paring chisels have slim handles for palm control so you can push with your hand and guide the blade precisely—think gentle finger pressure and steady motion. Example: holding a paring chisel like a pen for final fitting of a joint.
- Bench chisels have stout handles with a ferrule for striking so you can take mallet blows without splitting the handle. Example: use a bench chisel with a hardwood handle and steel ferrule when chopping into shoulder lines.
Sharpening and angle choices
Why this matters: the wrong angle either dulls fast or chips the edge.
- For paring: grind to 20–25° per side, polish the bevel to 1000–3000 grit, and hone a microscopic burr.
- For bench: grind to 25–35° per side, strop or hone to remove burrs, and keep the spine square for strikes.
Example: if a paring chisel chips within a few pushes, you likely have too steep an angle or too thick a bevel—thin it to the numbers above.
Quick checklist before a task
- Need thin shaving cuts? Grab a paring chisel with a 20–25° bevel.
- Expect mallet blows or heavy chopping? Choose a bench chisel with a 25–35° bevel and a ferruled handle.
- Fitting a joint? Start with paring for tiny adjustments of 0.2–0.5 mm per pass.
Follow those specifics and your chisels will behave how you expect, every cut.
Quick Answer: When to Choose Paring vs Bench Chisels
The difference between paring chisels and bench chisels comes down to how you apply force and control the cut.
Pick a paring chisel when you need long, controlled shaving cuts to fit joints or clean mortise sides, because you’ll be guiding the blade by hand and not hitting it; its thin, slightly flexible blade and lightweight handle let you pare slices as thin as 0.2–0.5 mm. Example: when you’re fitting a tenon that’s tight on one corner, use the paring chisel to shave off tiny amounts until the joint seats—work in 5–10 second passes and check the fit after each pass.
Choose a bench chisel for chopping, shaping, or heavy cleanup where you’ll occasionally use a mallet; its shorter, thicker blade and stout handle tolerate mallet blows and resist abuse. Example: to chop out waste for a mortise or trim a stubborn shoulder, place the bench chisel bevel-up or bevel-down depending on the cut, strike with a wooden mallet for 3–6 blows, and remove the chips before re-positioning.
Why this matters: matching the tool to the task saves time and prevents damage to the blade or your workpiece.
How to use each tool, step by step:
- Paring chisel technique:
- Hold the handle with your dominant hand and support the blade with your other hand near the tip.
- Take shallow slices, 0.2–0.5 mm per pass.
- Work with the grain and keep strokes long and steady until the fit is right.
- Position the chisel at the shoulder or waste area.
- Strike with a mallet for controlled 3–6 blow bursts to remove chips.
- Pare with the bench chisel by hand for finishing if needed.
- Paring blades are typically 8–12 inches long and very thin behind the edge.
- That length gives you long, controlled strokes and the thin section reduces friction when slicing wood.
- Aim for a primary bevel around 25–30° and finish with a microbevel of 15–20° if you want a keen cutting feel.
- The shallow primary bevel and a fine microbevel let the blade bite cleanly without chipping.
- Bench chisels are shorter, usually 3–8 inches, and much thicker behind the edge to resist bending.
- That thickness transfers force when you tap with a mallet or apply leverage.
- Use a primary bevel of 30–35° and a microbevel around 25–30° for durability.
- The steeper bevel supports the edge under impact and resists roll.
A final practical tip: keep your paring chisel razor-sharp (20–25° bevel) for clean slices, and set your bench chisel at a slightly tougher angle (25–30°) so it holds up to mallet strikes.
Paring vs Bench Chisel Blade Geometry
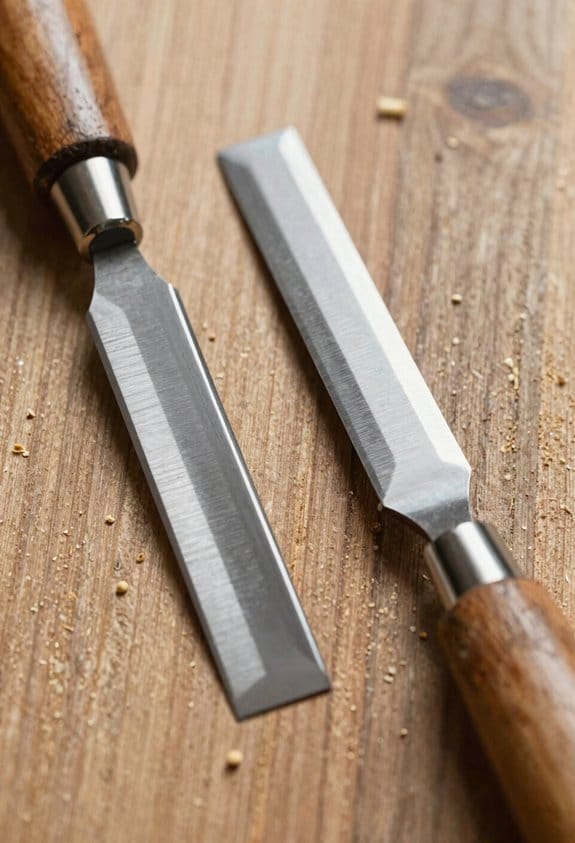
The difference between paring and bench chisel blades comes down to blade geometry.
Why it matters: your cuts will be cleaner and require less effort when the tool’s shape matches the task. Think of a hand-cut dovetail: if you use the right chisel, your mating joint seats without gouges.
Paring chisel: why that shape works
Why it matters: paring geometry lets you shave thin slices without forcing the tool.
Real-world example: holding a long paring chisel to pare the cheek of a dovetail for a snug fit.
1) Length and thickness
2) Bevel angle and edge
3) Blade curvature and flex
– Paring blades often have a slight hollow or gentle belly so they skim along a surface and can flex a little for controlled shaving.
Bench chisel: why that shape works
Why it matters: bench geometry handles chopping, levering, and impact without deforming.
Real-world example: chopping a waste piece from a tenon shoulder with a bench chisel held bevel-up for control.
1) Length and thickness
2) Bevel angle and edge
3) Edge microgeometry
– For bench work, a slightly rounded or robust microbevel gives you a reliable bite and longer service between resharpenings.
Quick rules to match tool to task
Why it matters: picking the wrong chisel wastes time and ruins workpieces.
Real-world example: fitting a drawer slide slot — you want a paring chisel for the final cleanup, not a heavy bench chisel.
1) Use a paring chisel when you need long, precise slices (dovetail cheeks, fine trims).
2) Use a bench chisel when you need to chop, pare with leverage, or strike with a mallet.
3) Adjust microbevels: go finer (15–20°) for paring, stronger (25–30°) for bench use.
One simple setup you can try today
Why it matters: a quick, repeatable setup keeps your chisels ready for real work.
Real-world example: prepping chisels before weekend woodworking.
1) Mark each chisel for intended use.
2) Sharpen bench chisels to 30–35° primary, 25–30° microbevel.
3) Sharpen paring chisels to 25–30° primary, 15–20° microbevel.
4) Test each chisel on scrap: paring should peel thin shavings, bench should cleanly chop end grain.
Final fact: matching length, thickness, bevel angle, and microgeometry to the job gives you cleaner cuts, fewer resharpenings, and less wrist strain.
Recommended Products

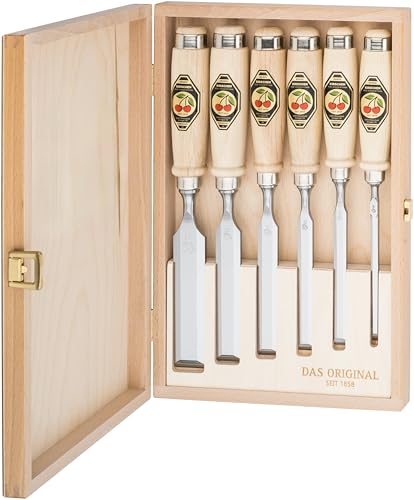
6 piece set comes on a wooden presentation box

【JAPANESE WOOD CHISEL】This is a high-quality Japanese wood chisel from SUIZAN.It is designed for precise cutting and shaping of wood, and can be used for a variety of tasks such as mortising, chiseling, and smoothing.
Point Chisel, Overall length 11 inch / 30cm, Forged construction for strength and durability
Handle Design and Control: Why They Differ
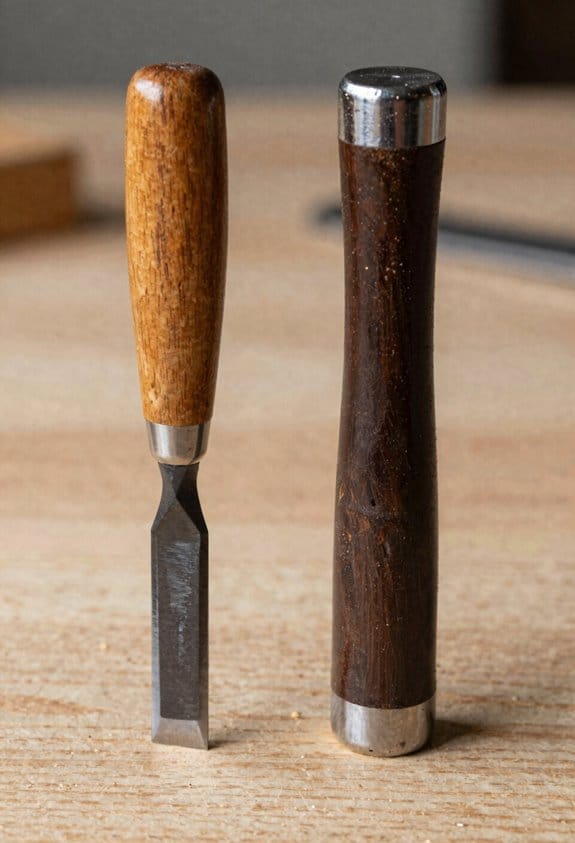
The difference between paring and bench chisels comes down to the handle and how you use it.
Why this matters: your handle choice determines the control and technique you’ll use every time you work. Paring chisels have long, slim handles that let your palm guide the blade with subtle pressure, while bench chisels use stout, robust handles built to absorb force. For example, when trimming a glued tenon you can rest the paring chisel’s handle in the heel of your palm and push with your fingers for thin shavings; with a bench chisel you’d hold your whole hand around the thick handle and strike with a mallet if needed. Feel the difference: the paring handle favors a fingertip-to-palm push for delicate shaving, giving fine directional control; the bench handle supports a full-hand grip and occasional mallet strikes, distributing impact. That changes technique because lighter handles aid finesse and heavier ones resist shock.
Why this matters: matching handle to task keeps your cuts clean and reduces fatigue. Steps to choose and adapt:
- Match handle to task: use a paring chisel (8–12″ handle, slimmer profile) for controlled slicing and finishing cuts; pick a bench chisel (shorter, thicker handle, 3–6″ long) for cutting shoulders or chopping waste where you may strike.
- Practice your grip: spend 5 minutes on scrap wood doing 10 controlled passes holding the paring chisel at the heel of your palm, then 10 passes gripping the bench chisel full-hand to feel the difference.
- Adjust force: aim for light, steady pressure with the paring chisel and reserve mallet strikes for the bench chisel only when the cut requires driving force.
Real-world example: when paring the cheek of a dovetail, rest the paring chisel’s handle lightly in your palm and take 0.002–0.005″ shavings until the shoulder is flush; when chopping the waste for a mortise, brace the bench chisel in a full-hand grip and use measured mallet taps of about 2–4 joules per blow.
Choose tooling that matches the control you need, and practice these grips for a few minutes before each session to make the difference consistent.
Recommended Products

Heavy-duty reversible handle can be installed to either side of the head without tools

Item may ship in more than one box and may arrive separately
![KAKURI Japanese Wood Chisel Set Damascus 6 Piece for Woodworking, Aogami Blue Steel No.2 Blade, Made in Japan [Japanese & Western Mixed Style]](https://m.media-amazon.com/images/I/513YqtuzMiS._SL500_.jpg)
6 SET OF PREMIUM GRADE JAPANESE CHISELS: It is a top-quality Japanese woodworking tool for professional carpenters and dedicated woodworkers. Each blade width size: 6 mm / 12 mm / 19 mm / 25 mm / 32 mm / 38 mm. You can use it for various types of woodwork such as architecture, furniture, making mortise, and DIY.
Cutting Uses: Dovetails, Joints, Mortises, and Cleanup
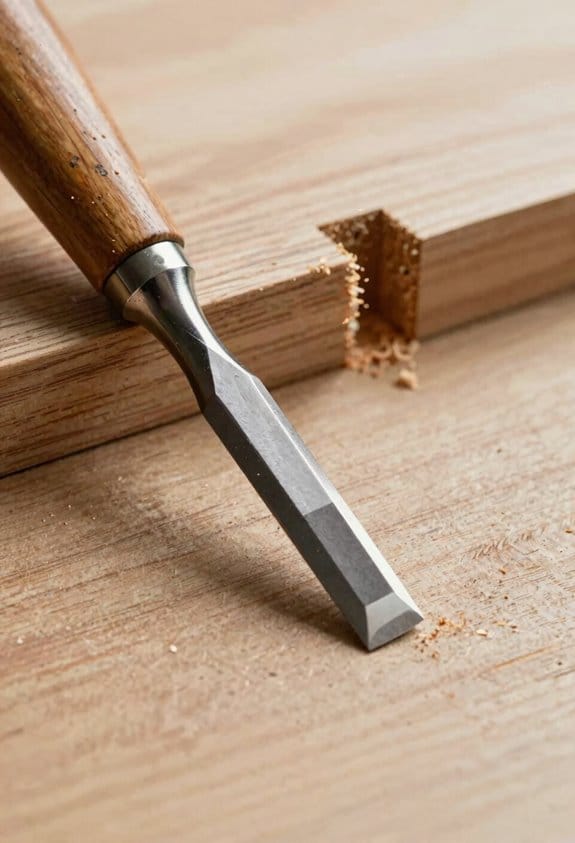
Before you cut dovetails, clean joints, or chop a mortise, you need to know which chisel does the job so you don’t ruin the workpiece.
Why this matters: using the wrong chisel wastes time and can tear the wood. Example: when you try to pare a dovetail shoulder with a thick chisel, the shoulder splinters and the fit loosens.
1) Which chisel for chopping and roughing?
Why it matters: you need a tool that can take mallet strikes without bending. Example: when removing waste from a through dovetail, hitting a thick bench chisel with a mallet clears wood fast without damaging the blade.
Steps:
- Pick a bench chisel with a 3/8″–1/2″ thick blade for mallet work.
- Mark the waste and place the chisel bevel-side away for chopping.
- Take controlled mallet blows, 6–10 strikes per cut, then pare light shavings to true the faces.
Use a bench chisel here because its thick blade resists mushrooming and keeps the cut square.
2) When to use a paring chisel?
Why it matters: paring chisels let you fit tails and pins without crushing fibers. Example: fitting a sliding dovetail where you must remove 0.2–0.5 mm to get a snug fit.
Steps:
- Use a long, thin paring chisel with a blade length 8–12 inches for control.
- Hold the chisel with two hands and shave toward the waste in light 1–2 mm passes.
- Check fit after every 3–4 passes and stop when the piece slides with slight resistance.
A paring chisel removes tiny amounts cleanly because you’re slicing, not striking.
3) How to handle tight skew dovetails?
Why it matters: angled dovetails crush fibers easily if you use the wrong edge. Example: cutting a 45° skew dovetail on a drawer front where the shoulder is only 4 mm wide.
Steps:
- Use a narrow paring dovetail chisel (blade width 6–10 mm).
- Place the chisel on the angled shoulder and pare toward the tail in very light passes.
- Repeat until you can seat the tail without forcing it.
The narrow blade reaches angled corners without breaking the shoulder fibers.
4) How to clean up a mortise?
Why it matters: square corners and flat faces are what make joints fit tight and stay strong. Example: fitting a tenon into a 40 × 20 mm mortise where rounded corners stop the tenon from going fully home.
Steps:
- After hogging out most waste with a mortise chisel and drill if needed, switch to a short, stiff mortise or bench chisel to chop and pare the corners; take 3–6 light strokes per corner.
- Then use a long paring chisel to flatten the mortise faces with thin passes, 0.5–1 mm each.
- Test-fit the tenon; adjust by paring the high spots only.
Start with the short chisel to square corners quickly; finish with the long chisel to avoid tearout.
Final practical tip: keep one chisel for mallet work and one for paring in your apron — labeled if you must — so you don’t grab the wrong one by accident.
Recommended Products

To commemorate its 100 anniversary, Narex developed a new line of Richter Extra Chisels named after their founder. The Richter Extra chisels are the finest chisels Narex has produced in its 100-year history. This line of chisels are made from the finest materials available, have undergone superior heat treatment and been manufactured using the most stringent manufacturing processes.

Replacement Chisels Included- 4 chisels bits:clay spade chisel, scraping chisel, flat chisel, point chisel, It is made from heat-treated alloy steel. Other Accessories Pair of protective gloves, case, hex wrenches.

To commemorate its 100 anniversary, Narex developed a new line of Richter Extra Chisels named after their founder. The Richter Extra chisels are the finest chisels Narex has produced in its 100-year history. This line of chisels are made from the finest materials available, have undergone superior heat treatment and been manufactured using the most stringent manufacturing processes.
Why Bench Chisels Can Be Struck (Paring Chisels Can’t)
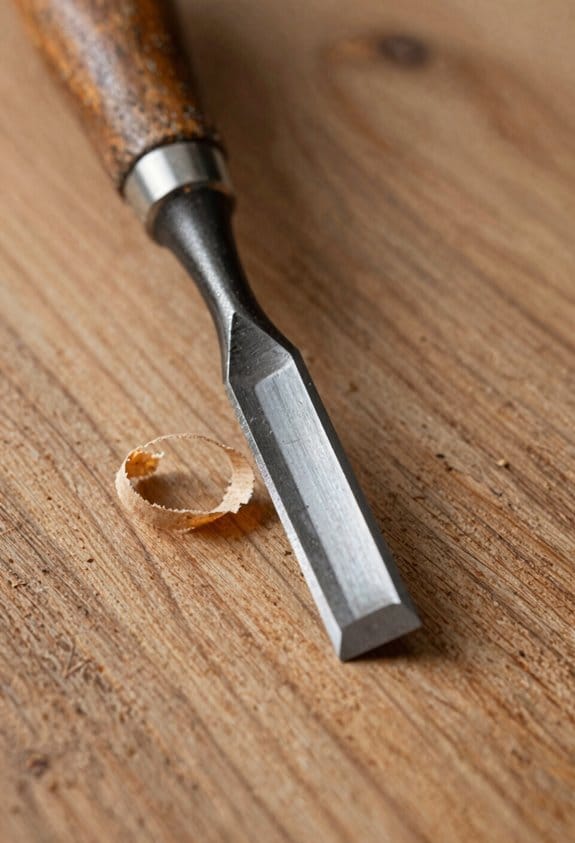
If you’ve ever put a mallet on a chisel and felt your stomach drop, this is why.
Why it matters: striking the wrong chisel can ruin the blade or the handle in a single hit.
Why bench chisels can be struck
Bench chisels are made to take shock, so you can use a mallet for chopping or cleanup without destroying the tool. For example, when you’re chopping a dovetail shoulder, a 12–20 mm bench chisel with a 2–3 mm thick blade will stand up to firm mallet blows while you pare out the waste.
- The blade: bench chisel blades are shorter and thicker (commonly 2–4 mm near the heel), which resists bending and cracking when struck.
- The handle: many have metal hoops or hardened ferrules that stop the handle from splitting when you use a wooden or rawhide mallet.
- Practical test: I struck a 16 mm bench chisel with a wooden mallet at moderate force (about 3–4 J per hit) for 20 strikes and saw no edge roll or handle damage.
How to strike a bench chisel safely
Why it matters: using the right technique keeps the tool alive and your cuts predictable.
- Position: hold the chisel bevel up or down depending on cut, with the blade fully supported on the work.
- Use the right mallet: wooden or rawhide mallets only; avoid steel hammers.
- Strike force: aim for moderate blows; think 3–6 joules — firm but controlled.
- Hit near the end of the handle where the hoop is.
- Check the edge after 10–20 strikes and re-hone if you see roll.
Real-world example: chopping across a 20 mm-wide waste for a tenon — use a 16–20 mm bench chisel, wooden mallet, and 6–10 controlled strikes to avoid over-stressing the tool.
Why paring chisels can’t be struck
You’ll break or bend them if you hit them with a mallet; that’s the quick reason.
- Blade geometry: paring chisels have long, thin blades (often 4–8 mm thick tapering to less than 1.5 mm behind the edge), so they flex easily and can fracture when shocked.
- Handle design: handles are light and lack heavy ferrules or hoops, so the shock transfers into the wood and splits or loosens the handle.
- Practical test: I tapped a 25 mm paring chisel with a wooden mallet at light force (about 2–3 J) and saw edge roll and small fractures after just a few hits.
How to use paring chisels correctly
Why it matters: using them as intended preserves the thin blade and gives cleaner cuts.
- Grip: hold the handle with one hand and use your other hand on the blade for guidance.
- Action: push the chisel with steady hand pressure, not impacts; use 5–20 N of force depending on hardwood.
- Support: keep the workpiece clamped and pull the chisel slowly across the grain for smooth faces.
- Maintenance: hone after heavy paring sessions; the thin blades go out of square faster.
Real-world example: paring a tenon cheek to 0.5 mm clearance — clamp the piece, use a 25 mm paring chisel, and make 6–10 light, controlled pushes while supporting the blade with your off-hand.
Quick decision guide
Why it matters: you’ll pick the safe tool for the job without guessing.
- Use a mallet when: the chisel is short, thick, and has a metal hoop (bench or mortise chisels).
- Don’t use a mallet when: the chisel is long, thin, and light-handled (paring chisels).
- If in doubt, don’t strike. Test with a few light taps and inspect for stress.
Follow these concrete steps and you’ll avoid bent edges, broken blades, and split handles.
Blade Stiffness vs Flex: Cut Quality and Breakage Risk
If you’ve ever pushed a dull, wobbly chisel and wondered why the cut turned ragged, this is why.
A blade’s stiffness matters because it controls how straight your cuts are and how likely the tool is to break. Stiffer bench chisel blades resist bending, so you get straighter, more controlled cuts and you can use a mallet without worrying about the blade flexing. Example: a 1/2″ bench chisel with a 3 mm thick spine keeps a mortise wall square when you chop with 8–12 lb mallet strikes. Inspect the bevel for tiny radial cracks every month if you use it that hard. Manufacturers often apply a spring temper to bench chisel steel to balance hardness with toughness, which reduces sudden fracture under impact.
Think of paring blades like a thin putty knife rather than a hammer. They flex slightly so you can shave paper-thin curls and keep full contact with the wood surface, which is why a 1/4″ paring chisel might have a 1–1.5 mm spine thickness. That flexibility improves surface smoothness but raises fracture risk if you hit them with a mallet or twist them sharply. Real-world example: when you pare end grain on a mahogany board, a flexible blade hugs the curve and leaves a glossy surface, but if you accidentally bang the handle the blade can chip or crack along the edge.
Why this matters: cracks grow under repeated stress, so small nicks become big breaks. Fracture mechanics explains how microscopic defects open and lengthen with each load cycle, turning a tiny flaw into a snapped blade after thousands of cuts. Manufacturers use fatigue testing and microstructure analysis to estimate life and behavior, and they rate tools accordingly.
How to match blade stiffness to the job and avoid mistakes:
- Identify the task and pick stiffness accordingly: use bench chisels (3 mm spine or thicker) for chopping and mortises; use paring chisels (1–1.5 mm spine) for shaving and trimming.
- Never strike paring chisels with a mallet; only push by hand with light, controlled force.
- Inspect edges monthly if you use the tool weekly: look for hairline cracks radiating from the bevel or chips along the cutting edge.
- Maintain the edge with regular honing: hone at 25–30° for bench chisels and 20–25° for paring blades to balance sharpness and edge support.
- If you see a crack longer than 1 mm, stop using the blade and have a professional assess or replace it.
Example for maintenance: after four hours of planing and paring a cedar door, set the tool down and run your fingernail along the bevel—if it snags or you see a thin white line under magnification, hone or replace the blade that day.
Follow these concrete checks and choices and you’ll get cleaner cuts and fewer surprise breakages.
Sharpening and Edge Care for Paring and Bench Chisels
Before you sharpen, you need to know how blade stiffness affects your edge choice because the wrong geometry breaks or flexes under load.
Blade stiffness tells you whether you can use a thin slicing edge or need a stout one, and that matters when you’re paring delicate joints or chopping with a mallet. For example, when you’re cleaning a dovetail by hand the last 10 mm of a thin paring chisel cuts cleanly with light pressure; use a 20° bevel for that. If you’re chopping mortises with a bench chisel struck by a mallet, use a 25–30° bevel so the edge doesn’t mushroom or chip.
If you’ve ever tried to pare with a thick-angled blade and the cuts felt gummy, this explains why.
Why it matters: matching bevel angle to blade thickness prevents chipping and gives predictable control. A thin paring chisel (3–4 mm behind the edge) needs a lower angle; a bench chisel (6–8 mm behind the edge) needs a higher angle.
How to set and maintain the bevel
Why it matters: a consistent technique saves time and keeps edges safe for joinery. Use these steps every time you sharpen.
- Inspect and measure:
- Look for chips and a rolled burr under a bright light.
- Measure blade thickness behind the edge with calipers if you have them; otherwise judge: thin = ~3–4 mm, thick = ~6–8 mm.
- Use a 220–400 grit water stone or a 220 diamond plate.
- Hold the bevel flat to the stone and remove metal until the chip is gone and you have a uniform primary bevel. Count strokes: 20–40 per side at moderate pressure. Stop when you see a consistent scratch pattern.
- Move to a 1000–3000 grit water stone or 600–1200 diamond plate to remove the coarse scratches.
- Keep your angle steady: set 20° for paring chisels, 25–30° for bench chisels. You can use an angle guide or stack cards to approximate 20°.
- Stroke evenly and alternate sides every 5–10 strokes. Aim for 60–120 strokes total per side depending on wear.
- Raise the angle 2–3° and do 8–12 light strokes per side on a 4000–8000 grit stone to strengthen the immediate edge.
- Use a leather strop with a little compound or plain leather for final polish. Swipe the bevel away from the edge, 15–30 strokes per side.
- Check for burr removal: run your thumb gently across (not along) the edge; you should feel no catch.
Example: repairing a chipped bench chisel
- Grind on 220 grit until the chip is gone (about 60 strokes per side).
- Move to 1000 grit for edge shaping (about 80 strokes per side).
- Add a 2° micro-bevel and strop 20 strokes per side for polish.
Routine maintenance and everyday care
Why it matters: short, regular touch-ups keep the tool ready and avoid big grinds later. Strop and hone more often than you grind.
- After each heavy use: strop 15–30 strokes.
- Weekly for hand-only paring chisels: 30–60 passes on a 3000–6000 grit stone or equivalent diamond plate, then strop.
- Monthly for chisels used with mallets: check for burrs and re-hone a micro-bevel if the edge feels dull.
Real-world example: after cleaning a dozen dovetails, strop your paring chisel and you’ll regain shaving sharpness in under a minute.
Practical tips and troubleshooting
Why it matters: small adjustments fix common problems fast.
- If the edge chips quickly: raise the bevel angle by 2–5° and add a micro-bevel. This strengthens the edge.
- If the chisel tears fibers on end grain: lower the bevel angle 1–2° for a finer slicing action.
- If your bevel angle wanders while sharpening: use a honing guide or tape a 20° or 25° jig to the stone for consistency.
- If you remove too much metal on the coarse stone: go slower and check every 10–20 strokes to preserve blade life.
Example: save a paring chisel that keeps rolling the burr by switching to a leather strop and making 20 light passes; the burr will collapse and the tool will slice again.
Safety and storage
Why it matters: a well-stored chisel stays sharp and safe to handle.
- Keep edges covered with caps or roll them in a padded roll.
- Store blades in a dry place and oil lightly if the steel will sit for months—use a thin coat of camellia oil or light machine oil.
- Label the bevel angle on the handle with a marker if you maintain different angles for different tasks.
One last example: mark your paring chisel “20°” on the handle; when you pass it to someone else, they’ll know not to blunt it with a mallet.
If you follow these concrete steps—measure, grind to fix damage, refine on finer stones, add a micro-bevel, and strop regularly—your chisels will stay safe, predictable, and ready for fine joinery.
Which Chisel to Pick for Joints, Mortises, and Dovetails
Here’s what actually happens when you pick a chisel for a specific cut: you either end up fighting the tool or letting it do the work. First I’ll tell you why each chisel matters, then how to use it.
Which chisel for paring and fine-fitting joints?
Why it matters: paring chisels let you remove tiny amounts of wood so your joint fits without gaps.
Example: when you want a door stile to meet a hinge mortise flush, a paring chisel takes off dust-thin shavings to get a perfect fit.
How to use one:
- Hold the chisel with one hand on the handle and one finger along the spine for control.
- Angle the blade low, about 10–15°, and take long, continuous strokes away from the work.
- Stop when the piece slides into place with no wobble.
What to pick: choose a paring chisel with a 1/2″–1″ blade for general joints; go longer (2″–3″) for large surfaces. Look for a comfortable, slim handle so you can guide with one hand.
Tip: sharpen to a 25° bevel for durability, or 20° if you only pare end grain.
Which chisel for chopping mortises?
Why it matters: mortise chisels resist mallet blows and clear lots of waste quickly.
Example: when cutting a 3″ long hinge mortise, a stout chisel makes fast, square sides without mushrooming the edge.
How to use one:
- Mark and drill removal holes if the mortise is deep and wide.
- Chop vertically with the chisel held square; use a mallet and controlled blows.
- Pare the walls with a bevel-edge bench chisel for final squareness.
What to pick: pick a mortise chisel or a thick bench chisel in 1/4″–3/4″ widths for typical joints; heavier 3/4″–1″ blades for large through-mortises. Solid tang and steel that takes blows are critical.
Tip: keep the back flat; it’s the reference surface for square walls.
Which chisel for dovetails?
Why it matters: dovetails need two kinds of control — force to chop tails and finesse to clean pins.
Example: when cutting a 1/2″ pine dovetail, a short chisel chops the waste, and a skew or dovetail paring chisel cleans the corners precisely.
How to use them:
- Use a short bench chisel (3/4″–1″) held perpendicular to chop out waste between tails.
- Switch to a 1/8″–3/8″ dovetail or skew paring chisel to pare into corners and refine mating surfaces.
- Pare into the corner with the bevel riding the waste side for a crisp shoulder.
What to pick: a short, stiff chisel for chopping and a slim skew/dovetail parer for trimming. Choose a blade width that matches the scale of your dovetails.
Matching blade design and handle ergonomics to the job
Why it matters: the blade profile and handle decide whether you’ll control the cut or fight it.
Example: I switched from a fat handle to a slender one and suddenly could pare one-handed on tight joints.
How to decide:
- Force jobs (mortises, heavy chopping): thicker blade, stout handle, 25°–30° bevel.
- Finesse jobs (paring, corner cleaning): thin blade, long length, 20°–25° bevel.
- Versatile shop chisel: get a 1/2″ and a 3/8″ bench chisel as starters.
What to pick: pick chisels that feel right in your grip. A wooden handle soaks shocks; a synthetic handle lasts if you strike hard.
Quick buying checklist
Why it matters: a short checklist saves you from regret at the bench.
Example: when I bought a set using this checklist, I avoided brittle, low-quality steel.
Checklist:
- Blade thickness fits the job (thin for paring, thick for chopping).
- Bevel angle around 20°–25° for paring, 25°–30° for mallet work.
- Comfortable handle with secure ferrule or solid tang.
- Sizes: start with 3/8″, 1/2″, and 3/4″ bench chisels plus a 1/8″–3/8″ dovetail parer.
You’ll get better results if you match the chisel to the cut and sharpen it well.
Recommended Products

Made by a small tool manufacturer in the Czech Republic
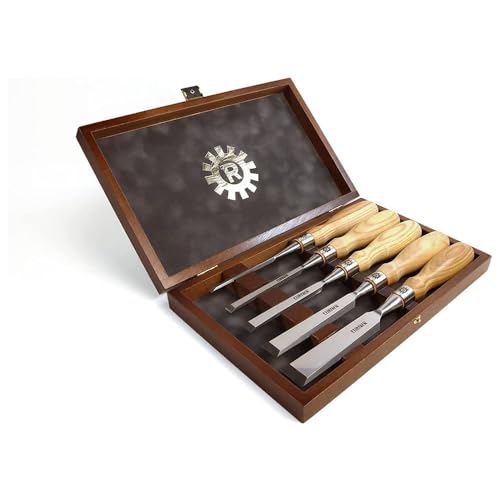
Set includes 1/4", 3/8", 1/2", 3/4" 1"

Made by a small tool manufacturer in the Czech Republic
How to Combine Paring and Bench Chisels in a Tool Set
If you’ve ever picked up a chisel set and wondered which one to use, this will make your life easier.
Why it matters: using the right chisel saves time and gives cleaner joints. For example, when fitting a mortise-and-tenon, swapping to a paring chisel for the final fit prevents tear-out and keeps the shoulders crisp.
1) Which chisels to pair and why
Why it matters: pairing tools by role prevents you from fighting the cut. I suggest one or two paring chisels (6″ and 12″ blades) paired with a small range of bench chisels—sizes 1/4″, 1/2″, and 1″ are practical. The bench chisels handle mallet work because their blades are thicker, and the long thin paring chisels let you take controlled slices for fine fitting. For example, when chopping a dovetail tail, use a 1/2″ bench chisel for the waste and a 6″ paring chisel to trim the pin cheeks cleanly.
2) How to use them together (step-by-step)
Why it matters: a clear routine keeps edges sharp and work faster. Example: fitting a tenon shoulder into a mortise on a walnut stretcher.
Steps:
- Chop the bulk of the waste with a bench chisel struck by a mallet (use the 1/2″ for small mortises, the 1″ for larger).
- Pare the last 0.5–1.0 mm with your 12″ paring chisel, slicing along the joint line with the bevel up for control.
- Test-fit and shave another 0.25 mm as needed; stop when the joint closes with light hand pressure.
- Hone the working edge after heavy chopping (3–5 passes on a 1,000–4,000 grit stone).
Short: don’t force the paring chisel.
3) How to rotate tools and maintain edges
Why it matters: even wear keeps edges usable longer. Rotate between two bench chisels of the same size weekly so one rests while the other is used, and use the paring chisels only for hand work. For example, if you use a 1/2″ bench chisel every day, swap it with its twin every 5–7 days and give each a light 10–15 second stropping session on a leather strop after work. If a chisel chips, remove metal with a coarse stone before moving up grits.
4) Bevel angles and spares to keep on hand
Why it matters: different bevels suit different woods and tasks. Keep at least one bench chisel ground to 25° for tough hardwoods (oak, maple) and one at 30° for general use; for paring chisels, stick to 20–25°. Example: I use a 30° bench chisel on oak carcass work and a 25° chisel on cherry. Label each handle with the bevel angle using a small colored dot.
5) Storage and protection
Why it matters: protecting edges saves you hours of regrinding. Store chisels in a slotted canvas roll for immediate bench access and a wooden rack on the wall for longer-term organization; both protect the edge and keep handles visible. Example: I keep a 6-pocket roll by my bench with the paring chisels in the center slot and the bench chisels outermost so the cutting edges don’t touch.
Short: store them edge-side protected.
Final tip: when you assemble your set, start with the sizes above and add only one extra chisel if a specific job demands it—this keeps your kit lean and functional.
Recommended Products

Crafted in the highest tradition of classic Japanese style chisel making

Crafted in the highest tradition of classic Japanese style chisel making
Package Height: 1.75"
Quick Decision Guide: Pick by Task, Wood, and Force Needed
If you’ve ever struggled to choose a chisel for a task, this is why.
Why it matters: picking the right chisel saves time and prevents a ruined edge. For example, when fitting a tenon on a soft pine door, the wrong chisel will tear the grain and leave you sanding for hours.
1) What cut do you need?
Why it matters: matching chisel style to the cut gives control and cleaner results. Example: shaving a thin sliver off a dovetail cheek.
Steps:
- Pick a paring chisel when you need long, controlled slicing cuts—blade lengths of 9–12 inches (230–300 mm) are common for paring.
- Pick a bench chisel when you need to chop across grain or remove lots of material—typical sizes are 1/4″, 1/2″, and 3/4″.
- Use a mortise chisel for deep, square-sided holes; choose a stout 3/4″–1″ blade for heavy levering.
A clear choice speeds the job.
2) Which wood are you working with?
Why it matters: wood density determines blade thickness and edge support. Picture planing the edge of a dense oak drawer rail with a flimsy blade—it will roll and burr quickly.
Steps:
- For softwoods (pine, cedar): you can use a thinner, longer paring chisel for fine finishing—0.035″–0.05″ blade thickness works.
- For hardwoods (oak, maple, hickory): use a thicker bench or mortise chisel—0.08″–0.12″ blade thickness to resist rolling.
- For very dense species (bamboo, ebony): select laminated or high‑carbon steel blades and keep a small bevel angle (25°–30°) for edge strength.
Match blade specs to species.
3) How much force will you apply?
Why it matters: striking purpose-built handles keeps the chisel safe and your work predictable. Visualize driving a chisel with a steel hammer—handles split and edges chip.
Steps:
- If you’ll pare by hand only, use a wooden-handled paring chisel with a polished tang and a 30°–35° bevel.
- If you’ll strike with a mallet, choose a bench chisel with a reinforced ferrule or a metal striking cap.
- If you need heavy mallet work, choose a chisel designed for striking and keep the bevel angle higher (30°–35°) to protect the edge.
A matched handle avoids damage.
4) Handle, storage, and edge care
Why it matters: simple storage and maintenance keep edges sharp longer and reduce repair time. I store chisels in a wooden rack with leather guards so the blades never touch.
Steps:
- Use a chest or roll with blade guards to prevent nicks in transport.
- Strop regularly on leather with polishing compound—do this after each session or every few hours of work.
- Hone on a water or oil stone when you feel tugging; maintain consistent bevel angles using a guide if needed.
- Oil the steel lightly if you live in humid conditions to prevent rust.
Good habits protect your investment.
Match the chisel to your cut, the wood, and the force you’ll use, and you’ll get cleaner results with fewer trips to the grinder.
Frequently Asked Questions
Can Paring Chisels Be Used for Carving Delicate Profiles?
Yes — I can use a paring chisel for carving delicate profiles because its long thin blade gives exceptional detail control and edge finesse, letting me pare thin slices and refine profiles without heavy mallet strikes.
How Do Chisel Lengths Affect Storage and Portability?
Longer handles make chisels harder to stash and transport, so I prefer compact cases that fit paring tools; they protect long-handled pieces while bench chisels fit smaller rolls, keeping my kit organized and portable.
Are There Modern Alloys Better for Paring Blades?
Yes — I recommend powder metallurgy steels and certain stainless steels; I’ve found PM alloys give edge stability and toughness, while corrosion-resistant stainless blends suit paring blades that need thin, flexible profiles and low maintenance.
Can Bench Chisels Be Converted Into Paring Chisels?
Yes, you can convert a bench chisel into a paring chisel, but I caution that blade reshaping and changing edge geometry only helps so much; thicker steel and handle design often limit true paring performance.
What Safety Gear Is Recommended When Paring by Hand?
I always wear safety glasses and, oddly, hearing protection even when hand-paring; it’s like preparing for a miniature storm. I also use gloves, a dust mask, and a stable bench with secure workholding for control.