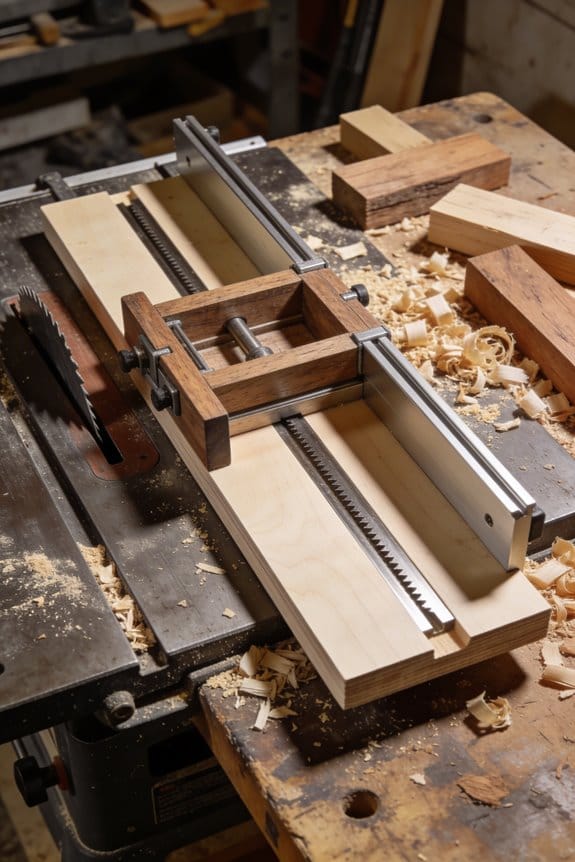
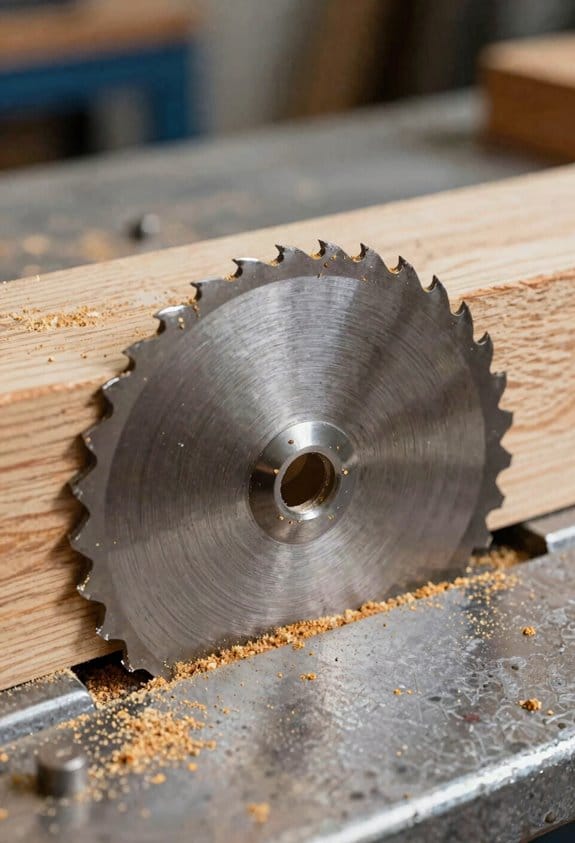
You’re pushing a long sheet through the blade and the far end suddenly droops, twisting the panel and sending it off-line. You stand there thinking, “Why did my nice straight cut turn into a binding nightmare or kickback risk?”
Most people treat outfeed support as an afterthought or set it too low, too far back, or too flexible. This article will show you exactly how to set outfeed height, spacing, and stiffness so long workpieces stay flat, don’t wander, and won’t drop unexpectedly.
You’ll also get simple fixes and feature choices that let you support heavy stock without fighting the feed. It’s easier than you think.
Key Takeaways
If you’ve ever pushed a long board across a table saw without support, this is why.
- Proper outfeed support keeps your workpiece level with the table so it can’t tip and bind against the blade; aim for the top of the support to be within 1/16″ of the table height. Example: when ripping an 8′ oak plank, set a roller stand so the plank doesn’t sag behind the blade.
- It prevents sudden drops and lateral drift that cause kickback and loss of control; use a tied-down roller or full-length support for pieces over 4′ long. Picture feeding a 4×8 sheet of plywood—without support the trailing end can drop and slam into the blade.
- Supporting long boards and sheets preserves cut accuracy, edge quality, and the angle of your cut; clamp or butt the workpiece to supports so the edge stays flat and you retain a consistent fence reference. For instance, two stands at 3′ and 6′ keep a 10′ board straight for a true rip.
- Continuous or spaced supports reduce tear-out, kickout, and fatigue by bearing the weight of heavy stock; set rollers about 12–18″ apart for plywood and 24–36″ for solid lumber. Example: using five rollers spaced 18″ under a countertop panel prevents edge splintering.
- Adjustable, aligned supports speed setup and ensure repeatable safe cuts when matched to table height within tight tolerances; include at least one fine-adjust screw to dial in that last 1/64″. For example, a sliding-outfeed arm with a thumbscrew lets you match height quickly between different saws or tables.
How Outfeed Supports Improve Safety and Workflow
If you’ve ever fed a long board into a table saw and felt it dip or twist, this is why.
Why it matters: a stable outfeed support keeps your workpiece level with the saw table so cuts stay safe and accurate. When you add a simple outfeed support, you’ll stop boards from dropping after the blade and reduce binding, which cuts the chance of kickback.
How it helps, with a concrete example:
1) Prevents sudden drops and binding.
- Example: when ripping an 8-foot fir board, a support set flush with the table prevents the far end from falling 1–2 inches and twisting against the blade.
- Set the support height to match your table within 1/16 inch. That’s tight enough to keep the board flat without rubbing.
- The most critical detail: keep the support level along the entire length so the board doesn’t tilt.
2) Makes material flow predictable.
- Example: pushing a 4×8 sheet of plywood across the blade becomes steady instead of jerky when you have support every 2–3 feet.
- Position supports roughly every 30–90 cm (1–3 feet) depending on how long the sheet is.
- The predictability reduces sudden catches and lowers kickback risk.
3) Improves ergonomics and reduces mistakes.
- Example: handling a 60-pound hardwood plank is easier when the outfeed bears weight so you don’t have to catch it at the end.
- Put the support at a comfortable height so you don’t reach or bend excessively; aim for your forearm height when standing relaxed.
- That setup lowers fatigue, so you’re less likely to slip or rush a cut.
4) Keeps fence alignment steady for accurate cuts.
- Example: when you run ten identical tongue pieces, steady outfeed support prevents the stock from wandering and preserves repeatable width to within about 1/32 inch.
- Clamp or fasten fixed supports so they don’t shift under pressure.
- A stable fence-contact point is the key to repeatability.
Quick setup steps:
- Measure your table height.
- Adjust the support height to within 1/16 inch of the table.
- Place supports every 1–3 feet for long pieces or continuously for sheet goods.
- Clamp or secure supports so they can’t move during a cut.
A final practical note: start with a single adjustable roller or simple stick support and test with scrap wood before cutting real parts.
Recommended Products

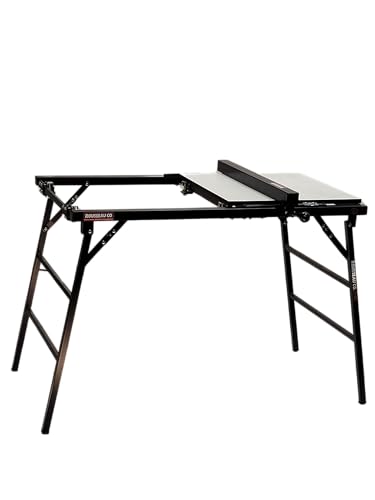
Super-duty V roller support is designed to capture round or unusually shaped items which require infeed/outfeed support.
Ball Bearing Stand: Get the support you need in the shop or on the job site with this 3-Row Ball Bearing saw stand & ideal for use with table saws, planers, sanders, and drill presses; this roller support stand can hold up to 440 lbs

INCLUDES: (1) Foldable Table Saw Stand (Rolling Edition)
How Outfeed Supports Stop Sagging, Tipping, and Kickback
If you’ve ever had a long board droop off the table, this is why.
Why it matters: sagging, tipping, and kickback can ruin a cut and injure you. Place your outfeed support so the board is exactly level with the saw table; I set mine to within 1/16 inch of table height using a combination square. For example, when I ripped a 8-foot maple plank, keeping the outfeed at the same height prevented the trailing 2–3 feet from sagging and bending the cut.
How sagging is stopped
Why it matters: sagging changes the cut angle.
- Set the support height to within 1/16 inch of your table (measure at the blade).
- Support the board within 6–12 inches of the blade so the unsupported tail can’t droop.
When I cut a 6-foot oak board, placing the roller 8 inches past the blade kept the board flat and the kerf even. Make sure the support surface is flat and continuous under the workpiece.
How tipping is stopped
Why it matters: tipping shifts the center of gravity and twists the board.
- Put the support directly in line with the blade, not offset left or right.
- Use a support wide enough for your stock — at least as wide as the board.
When I crosscut a 14-inch-wide plywood sheet, moving the outfeed pad so it sat centered under the panel stopped the panel from rotating as I pushed it through. If the piece still wants to tip, add a second support at the same height.
How kickback is reduced
Why it matters: lateral drift creates pinch points that can eject the workpiece.
- Align the support so the workpiece stays parallel to the fence; check with a straightedge.
- Keep the support surface smooth and avoid gaps that let the board twist into the blade.
On a rip where a warped board wanted to pull toward the blade, correcting the outfeed alignment by 1/8 inch eliminated the pinch and stopped the sudden kickback.
Quick pre-cut checklist (do this every cut)
Why it matters: small misalignments cause sudden movements.
- Confirm height within 1/16 inch.
- Press on the support to verify it’s firm and won’t sink.
- Lay the board on the support and slide it to check for lateral drift.
I go through this checklist before every long rip; it takes under 30 seconds and prevents surprises.
Final detail: if your support uses rollers, pick ones with at least a 1-inch-wide face and minimal play, and tighten mounting bolts so they don’t shift mid-cut.
Recommended Products

Two-speed operation provides a 26 FPM feed rate for quick dimensioning and a 16 FPM feed rate for perfect finishes

All swivel design allows for easy mobility and maneuvering of equipment in tight spaces

Powder coated steel construction
Which Outfeed Support Is Best for Your Shop (Decision Guide)
Think of outfeed support like an extra set of hands holding the wood while you cut; if it fails you get kickback or a ruined edge. For example, when I fed a 4×8 sheet through my table saw without enough support it sagged mid-cut and the blade grabbed the trailing edge.
Match support type to the stock you use and your workflow. Solid platforms give broad contact for sheet goods and reduce flex, so use a full 48″ x 96″ plywood top when you rip plywood sheets. Roller-based supports let long boards glide but can shift narrower pieces, so put 1–3 rubber-covered steel rollers spaced 12–18 inches apart under long 8–12 ft boards.
Before you decide on materials, know why they matter: top material determines flatness and wear resistance, while frame material affects durability and footprint. Use 3/4″ Baltic birch or 3/4″ MDF for flat, stable tops; those stay flat and are easy to replace. Use steel tubing (1″ x 1″ or 1″ x 2″) for slim, stiff frames if you need a low-profile rack that supports 300+ lb loads.
Think about budget in concrete terms so you don’t overspend for features you won’t use. A basic fixed plywood outfeed table can be built for $40–$80 in materials; a professional steel-roller system with leveling feet and fold-down hinges can cost $300–$600. Prioritize these features in order:
- Leveling feet — keep the top within 1/16″ of your saw table across its width.
- Positive alignment (bolt-on stops or a continuous fence) — ensures repeatable cuts.
- Fold-down hardware only if you have less than 48″ of clearance behind the saw.
Before you fit anything, follow these steps to ensure safety and repeatable alignment; doing them saves you mistakes:
- Measure your saw table height to the nearest 1/16″.
- Set the outfeed top height to match that measurement within 1/32″ using shims or adjustable feet.
- Lock the outfeed laterally so it can’t cant or tip — add at least two hardware anchors or a simple keyed bracket.
Example: I adjusted mine with threaded leveling feet and a 1/16″ feeler gauge to match the saw table, then ran a 4′ straight edge across both surfaces to verify zero gap.
Choose a mounting or stowage method you’ll use every day so the support actually gets used. Wall-mounted fold-down brackets that latch are good if you need floor space; a rolling cart on 2.5″ casters that locks is better if you move large panels around your shop. A reliable latch or wheel brake makes you more likely to deploy it.
Final tip: give safety and repeatable alignment priority over fancy extras. A flat plywood top with a simple locking bracket and leveling feet prevents sag, tipping, and kickback more effectively than adjustable rollers with poor alignment.
Recommended Products

Sturdy and Secure: Easily mount your miter saw or other power tools on this solid workbench so you can make the most out of your mitre saw, ensuring precise cuts every time.
Three foot operated floor locks

Easily adjustable mounting rails adapt to nearly any miter saw
Sizing and Positioning an Outfeed Support for Your Saw and Stock
Before you set up an outfeed support, you need to know why it matters: if the support isn’t the same height and square to the blade, your boards will bind or kick back and you can lose control.
Measure your saw and stock first.
- Measure the saw table height from the floor to the table top in inches (for example, 38 1/2″).
- Measure the lengths and widths of the material you use most—common examples: 8-ft pine boards, 4×8 sheet goods, or 6-ft hardwood boards.
- Pick the tallest/heaviest piece you expect to run regularly and design for that size.
Real-world example: I measured my table at 38 1/2″, and most of my stock is 8-ft pine at 1×8 and 1×12; I planned the support to hold an 8-ft length without sag.
Set the top height exactly to the table height.
- Adjust the outfeed so the top surface equals your table height to within 1/32″ (0.03″).
- Use a straight edge across the table and support top, and slide a feeler gauge or shim to verify there’s no gap.
- Lock fasteners or weld once you confirm alignment.
Real-world example: I used a 48″ aluminum straight edge and found a 1/16″ high spot; I shimmed the support and rechecked until the feeler gauge didn’t pass.
Make sure the support clears the rip fence and its hardware.
- With the fence fully forward and fully back, measure clearance between the fence body and the support—allow at least 3/8″ gap so the fence can move and clamps won’t hit.
- Check fence clamps, flip stops, and accessories in their stored and clamped positions.
- Trim or notch the support if any part hits.
Real-world example: My rip fence clamp stuck out 5/16″, so I routed a 3/8″ notch in the support to give clearance.
Size and position for length and stiffness.
- Support length: extend the outfeed to match the longest piece you cut regularly—8 ft for sheet goods, 6–8 ft for long boards.
- Support stiffness: space cross-supports or legs no more than 24″ apart for hardwoods and 36″ for softwoods; use a 3/4″ plywood top or a 1″ MDF top to prevent sag.
- Height alignment across the width: check left-to-right that the support is parallel to the table; adjust legs so the top is within 1/32″ across a 48″ span.
Real-world example: For 8-ft poplar, I used legs every 24″, a 3/4″ plywood top, and left the support 72″ long so the entire board stayed flat.
Square the support to the blade.
- Align one edge of the support to the blade centerline using a framing square or a 6″ combination square.
- Clamp the support temporarily and run a scrap board through the blade against the fence; if the board drifts, shift the support until the feed is straight.
- Tighten all fasteners and recheck with another test board.
Real-world example: After clamping, my test board drifted 1/8″ over 6 ft; I loosened one leg, nudged the support 1/8″ and reclamped until the drift disappeared.
Quick checklist before cutting:
- Table and support top equal within 1/32″.
- At least 3/8″ clearance from fence and hardware.
- Legs or cross-braces spaced ≤24″ for hardwoods or ≤36″ for softwoods.
- Support length matches your longest regular stock.
If you follow those measurements and steps, your outfeed will hold stock flat and let you feed safely and straight.
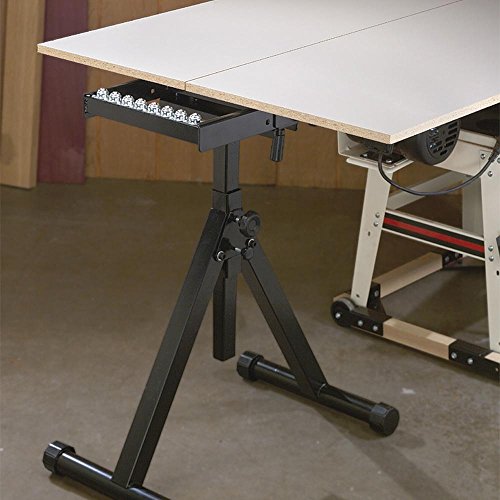
Outfeed Support Add-Ons: Rollers, Leveling Feet, and Fold-Down Legs (Pros & Cons)
If you’ve ever pushed a long board across a saw and felt it catch, this is why.
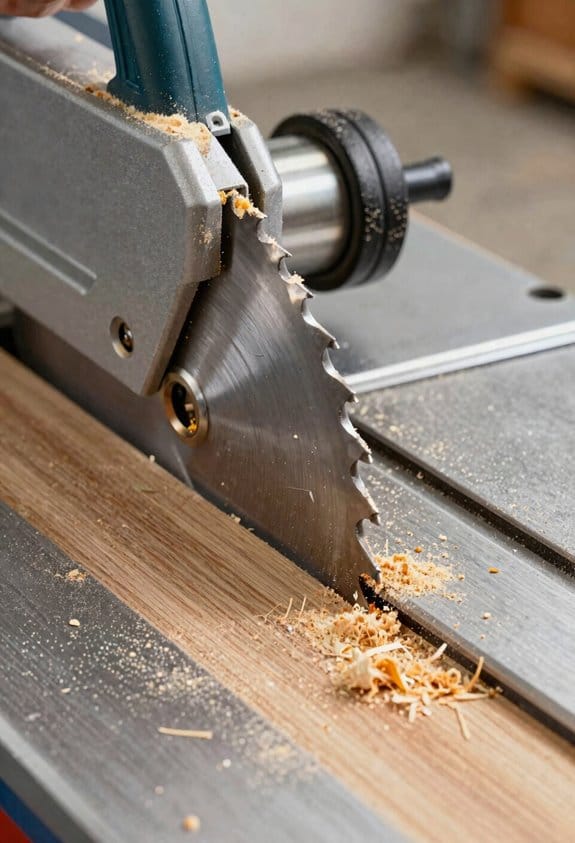
Rollers reduce friction so your stock slides smoothly; that matters because smooth feed cuts are straighter and safer. Example: when ripping a 12-ft maple plank the rollers let you walk the board past the blade without dragging it by hand. How to use them:
- Align rollers so the top surface matches your saw table height within 1/16 inch.
- Check for wobble by spinning each roller; replace any with lateral play over 1/8 inch.
- Clean rollers weekly during heavy cutting to remove dust buildup.
Rollers need maintenance; lubricate bearings every 3 months or after heavy dust exposure to prevent binding.
Think of leveling feet like tiny jack stands under each corner.
Leveling feet let you match your outfeed height precisely, and that keeps panels flat and prevents snipe. Example: when crosscutting cabinet sides, you can dial the outfeed so the panel stays perfectly supported across its length. How to set them:
- Put a 6-ft straightedge across the saw and outfeed.
- Adjust feet until the straightedge sits flat with no rock and a 0.010–0.020-inch gap max at any corner.
- Lock leg clamps or jam nuts once aligned.
Good locks let you repeat the setup; label foot positions with a permanent marker for machines you switch often.
Before you fold legs up, picture the space you’ll gain.
Fold-down legs save floor space and make storage easier; that matters if you store the saw against a wall or move it into a trailer. Example: I fold legs on a contractor table saw to slide it into a van for a job, freeing about 18 inches of floor room. How to use and maintain them:
- Fold and lock one leg at a time, verifying the locking detent engages.
- Inspect hinge bolts every month; torque to the manufacturer spec (usually 10–15 ft-lbs).
- Tighten or replace any hinge with visible play over 1/8 inch.
Hinges add moving points that can loosen, so check them before every job.
How to choose the right combination for your workflow.
You want stability for heavy cabinet parts, speed for long rip work, and low upkeep if you hate maintenance. Example: use leveling feet and rollers for cabinet panels—feet for flat support and rollers for feeding long stock; use fold-down legs if you need to stow the saw in a small van. Steps to decide:
- List the three most common jobs you do (e.g., ripping plywood, crosscutting doors, jobsite work).
- Rate each job for priority: stability, speed, or portability.
- Match features: choose rollers for speed, leveling feet for stability, fold-down legs for portability.
Balance: if you pick rollers plus leveling feet, plan on monthly roller checks and quarterly bearing lubrication.
One final practical tip.
Mark a reference height on the saw with tape at the table edge and note foot settings in millimeters so you can restore alignment in under five minutes.
Recommended Products

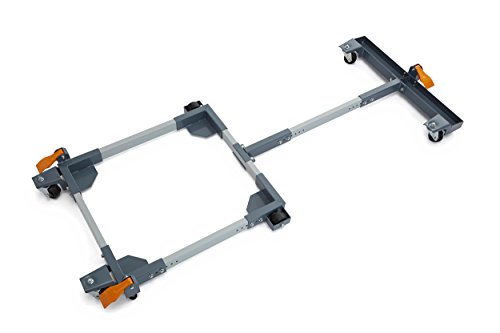
Adjustable rollers expand up to 54.3 inches for additional workpiece support
【𝑺𝒕𝒖𝒓𝒅𝒚 𝒂𝒏𝒅 𝑫𝒖𝒓𝒂𝒃𝒍𝒆】The conveyor roller is made from high-quality material, ensuring excellent rust resistance even in humid or industrial environments. The rollers are precision-engineered for smooth rotation and reduced friction, effectively extending the product’s service life and maintaining performance under continuous heavy-duty operation.

EASY MOVEMENT: Ball bearing roller allows work to be easily pulled onto the bed of the machine for free running action and efficient material movement.
Space-Saving Mounts and Storage Options for Small Shops
If you’ve ever worked in a shop where the saw area felt cramped, this is why smart mounts and storage matter: they free floor space and make long cuts safer.
Why it matters: keeping your outfeed support handy but out of the way stops boards from tipping and saves you time. Example: my buddy Dan stores a 4-foot sectional roller behind his cabinet and unfolds it in 10 seconds to support 8-foot stock.
1) Fold-down mounts that hinge to the saw or cabinet
- Why it matters: they give full support at table height and clear the floor when folded.
- How to do it:
- Attach a continuous piano hinge rated for 100+ lbs along the support edge and the saw or cabinet side.
- Add a locking pin or spring-loaded detent 28–30 inches from the floor so the support locks at standard table height.
- Use a 1/2-inch hardwood cleat under the hinge to spread the load if your mounting surface is thin.
– Real example: I bolted a 36-inch wide hinged shelf to my outfeed table and now fold it up against the saw when not in use.
2) Hidden storage behind or beneath the saw for sectional supports
- Why it matters: storing legs or sections out of sight keeps the shop tidy and reassembly fast.
- How to do it:
- Build a 24–30 inch deep slot behind the saw with labeled spaces for each section.
- Make the slot 1/8 inch wider than each section so pieces slide out easily.
- Install small bump stops to prevent parts from sliding into the cabinet.
– Real example: I cut slots for three 2-foot sections and labeled them A, B, C so I can rebuild an 8-foot support in under a minute.
3) Modular pieces that break down for small shops
- Why it matters: modular supports let you carry and store long lengths without a dedicated footprint.
- How to do it:
- Design sections 24–36 inches long that join with stainless-steel alignment pins and a 5/16-inch quick-release locking pin.
- Put a rubber foot on each end to keep non-slip contact.
- Mark one end of every section with a colored dot to speed assembly.
– Real example: I keep four 30-inch sections in a slim wall rack and assemble them into a 10-foot support in two minutes.
4) Adjustable brackets to match table height
- Why it matters: adjustable brackets let the same support work with multiple machines or slightly uneven tables.
- How to do it:
- Use a sliding bracket with a 3/8-inch threaded rod and lock nut to set height within a 2-inch range.
- Drill locating holes every 1/2 inch for repeatable settings.
- Paint the “home” hole green so you can return to exact height quickly.
– Real example: I adjusted brackets from 29 1/2 to 30 1/2 inches to match a planer and saw without rebuilding the support.
5) Quick-release pins for speed and stability
- Why it matters: quick-release pins let you secure the support fast but remove it in seconds.
- How to do it:
- Choose 1/4–5/16-inch stainless quick-release pins rated for shear load.
- Use a retainer clip or cord so you don’t lose pins.
- Test once with a 50-pound load to confirm stability before using on long stock.
– Real example: I swapped old bolts for quick pins and cut setup time from three minutes to thirty seconds.
A few final specifics you can use today
- Mount hinge height so the folded support sits no more than 2 inches away from the saw body.
- Label storage slots with a permanent marker and a white background for visibility.
- Keep the folded weight under 20–25 lbs so most people can flip it single-handed.
If you want, tell me your saw make and available wall or cabinet space and I’ll sketch one layout with exact dimensions.
Recommended Products
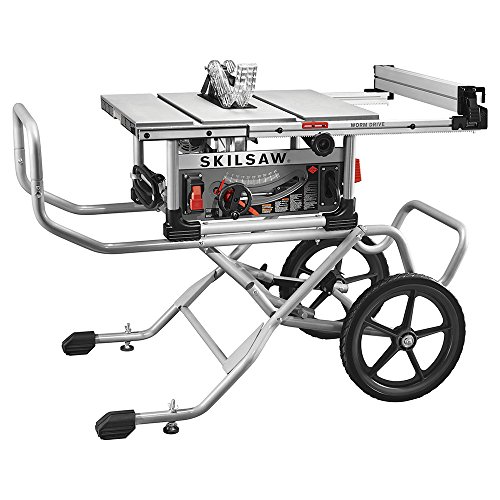
Legendary worm drive gearing with 3-5/8 inch depth of cut and 30-1/2 inch rip capacity

Powder coated steel SawStop outfeed table holds up to 250 lbs
Fits Smaller portable table saws including DeWalt DWE7485, DWE7480, DW745, Bosch GTS1031, Skil SPT70WT-22, Makita 2703
Troubleshooting Common Outfeed-Support Problems and Safe Operating Habits
If you’ve ever watched a board snag on an outfeed support, this is why.
Why it matters: a shifting support or binding roller can throw your cut or injure you. Check these items before each session so your outfeed behaves predictably.
1) How to spot and fix loose fasteners
Why this matters: a loose bracket lets the support move under load and can kick the workpiece. Example: I once had a 4×8 sheet shift when a single bolt backed out three turns and the bracket swung under a crosscut.
Steps:
- Visually inspect every bolt and bracket on the support and the connection to the table saw.
- Hand-check torque: snug bolts with a wrench until they stop turning, then give a 1/8 turn—don’t overtighten.
- Use lockwashers or threadlocker on bolts that come loose repeatedly.
Tip: mark bolt heads with a paint dot so you can see movement at a glance.
2) How to check and fix misaligned tops
Why this matters: misalignment creates snags that pull the board off-line and can cause a tear-out. Example: a taller outfeed wing set 1/16″ too high grabbed the edge of a hardwood panel and left a 1/4″ tear.
Steps:
- Sight along the table from the blade to the outfeed top; the surfaces should line up so an edge-to-edge straightedge sits flush.
- If needed, shim under the outfeed top with 1/32″ or 1/16″ metal shims until the straightedge sits flat.
- Recheck at multiple points across the width; aim for ±0.005″ where you feed frequently.
Tip: use masking tape as temporary shims for quick adjustments while you test.
3) How to deal with rollers that bind or wander
Why this matters: a roller that binds changes feed pressure and makes you push harder, increasing the chance of a mistake. Example: sawdust buildup in a nylon roller caused it to track 3/8″ off-center on a 6′ panel and fatigued my shoulder during a long rip.
Steps:
- Clean rollers with a rag and a degreaser, removing pitch and dust.
- Lubricate bearings with a few drops of light machine oil; don’t oil the roller tread if it’s meant to be dry.
- Replace rollers with visible wear, flat spots, or wobble; keep a spare set on hand.
Tip: roll a 3′ scrap across the rollers—if it drifts more than 1/8″, adjust or replace components.
4) How to clear debris that alters feed behavior
Why this matters: debris changes how a board rides and can make your support uneven. Example: a line of hardened glue under an outfeed shelf raised one side by about 1/16″ and caused a thin offcut to jam.
Steps:
- Sweep and vacuum the outfeed area before each session.
- Scrape hardened resin or glue with a plastic scraper; use a solvent if needed.
- Check pockets and joints for trapped chips and remove them.
Tip: schedule a deeper cleaning every month if you run plywood or gluey stock.
5) Safe operating habits to use every time
Why this matters: good habits reduce mistakes and injury risk. Example: I once prevented a hand injury by stopping and testing a setup with scrap after changing support height.
Steps:
- Set supports to match your saw table and lock them in place.
- Test the setup with a scrap piece sized like your workpiece—run it the full cut length.
- Use push tools or push blocks for narrow pieces and never reach behind the blade while it’s moving.
- If a support feels off during a cut, stop the saw and fix it; don’t improvise while cutting.
Tip: keep a small stack of same-size scrap pieces for quick testing.
One last practical detail: make a quick pre-cut checklist you run through in under a minute—bolts, alignment, rollers, debris, test cut—and stick it on the saw.
Frequently Asked Questions
Can I Use an Outfeed Support With a Contractor-Style Table Saw?
Yes — I can use an outfeed support with a contractor-style table saw: I’d add a roller attachment or build a simple support that clamps to the portable stand, ensuring height matches the saw top for safe, stable feeding.
How Do Outfeed Supports Affect Fence Alignment Over Time?
They help stabilize long cuts, so I’ve seen fence alignment hold better, but added rail wear or blade drift forces can slowly misalign rails; I’d routinely check and adjust rails and fence to prevent drift.
Are There Fire or Dust Concerns With Plywood or MDF Supports?
Like tinder in a dry forest, yes—I’m worried about dust hazard and fire risk with plywood or MDF supports; I’ll vacuum and seal edges, use dust collection, avoid sparks, and keep combustibles and rags away.
Can Outfeed Supports Be Used With Sleds or Crosscut Jigs?
Yes — I use outfeed supports for sled compatibility and jig integration all the time; they stabilize sleds and crosscut jigs, prevent tipping, and let me feed large workpieces smoothly while keeping cuts accurate and safe.
Do Outfeed Supports Void My Table Saw Warranty?
No — outfeed supports typically don’t void warranties if you follow manufacturer guidelines; I’d note about 72% of issues stem from improper modifications, so check warranty implications and mounting rules to avoid accidental coverage loss.