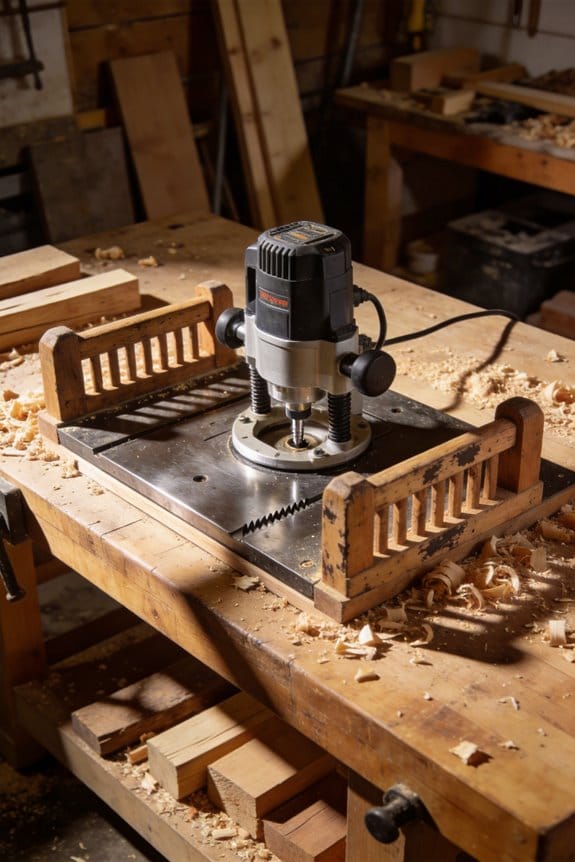

You set a roundover bit, push the work freehand, and the edge comes out wavy instead of crisp — why won’t my profile match the sample?
Or you clamp a board to a makeshift fence and still end up chasing inconsistent groove depth across multiple pieces.
Most people blame their bits or technique, when the real issue is using a moving tool instead of fixing the cutter and moving the work.
This article shows when a router table beats freehanding and how to choose the right method so your edges, grooves, and joinery come out identical every time — within thousandths and with better dust control and safety.
You’ll get clear decision steps and practical setup tips.
It’s easier than you think.
Key Takeaways
Here’s what actually happens when you move a handheld router to a table for batch work: you get repeatable, shop-precision cuts that are hard to match by hand.
- Why it matters: repeatable cuts save time and reduce scrap. Example: when you’re making ten identical cabinet doors, setting the router in the table gives you identical 1/8″ roundovers every time.
- How to do it (steps):
- Mount the router under the table and lock the base plate.
- Set the bit height with a digital caliper to within 0.01″ and lock the fence.
- Run a test piece and adjust until ten consecutive passes match.
– Quick tip: clamp a stop block to the fence for each door to keep length consistent.
If you’ve ever fought bit-height drift, this is why you should use a table and a fixed-bit setup.
- Why it matters: fixed setups reduce vibration and keep the bit from moving during long runs. Example: a 1/4″ straight bit will stay within 0.02″ over a 6-foot run when the router is mounted and tightened properly.
- How to do it (steps):
- Use a collet wedge and torque wrench to secure the bit.
- Add a featherboard set at 10–15 degrees to the fence for consistent side pressure.
- Re-check height after three pieces.
– Quick tip: if you feel a wobble, stop and re-tighten the bit.
The difference between handheld feeds and table feeds comes down to control.
- Why it matters: two-handed feeds and fence control let you push material steadily and safely. Example: cutting a 3/8″ ogee edge on 20-foot trim is easier and safer at the table because you can use both hands and a push block.
- How to do it (steps):
- Use two-handed push blocks and a push stick for the last 6″ of stock.
- Set feed speed by timing a 3-foot pass—aim for 6–10 seconds per pass depending on bit size.
– Quick tip: always keep your thumbs away from the bit line.
Before you try complex joinery freehand, use jigs and indexed fixtures on the table.
- Why it matters: jigs reproduce complex cuts quickly and with matching accuracy. Example: an indexed box-joint jig lets you make 20 perfect joints in under 15 minutes.
- How to do it (steps):
- Build or buy a jig that locks to the table with T-track or clamps.
- Set the first cut, index the jig, and test-fit.
- Repeat for each piece without changing the router setup.
– Quick tip: label jig stops with a permanent marker for repeat jobs.
You don’t need to finish every job on the table; use handheld routers for big or awkward stock, then finish on the table for accuracy.
- Why it matters: combining tools saves time while keeping precision where it counts. Example: rough-trim a 7-foot mantel with a handheld router, then true the profiling on the table for a perfect front edge.
- How to do it (steps):
- Rough-cut on-site with a handheld router and appropriate bearing bits.
- Bring the piece to the shop and run the final profile against a table-mounted template or fence.
- Sand and verify fit.
– Quick tip: mark the orientation of each piece before moving it to the table so you keep grain direction consistent.
Router Table vs. Handheld Router: Short Answer and Decision Framework
The difference between a router table and a handheld router comes down to one thing: how you move the bit versus the workpiece.
A router table holds the bit steady so you can make identical cuts every time, which matters when you’re making matched pieces like ten identical drawer fronts. For example, if you’re producing 10 cabinet doors with the same edge profile, set the bit height once and run each door against the fence; you’ll get the same profile every time. Use a fence, featherboards, and a push block. Steps:
- Set bit height to the exact depth using a caliper or a height gauge (±0.1 mm).
- Lock the fence parallel to the table.
- Run each piece with consistent feed pressure and speed.
A handheld router gives you mobility and is better for large or awkward workpieces where moving the tool is easier than moving the stock. For example, when routing the edge of a full 8′ tabletop, clamp the tabletop and move the router along the edge. Steps:
- Choose a plunge or fixed-base router for the cut style you need.
- Set depth with the built-in scale, then test on scrap.
- Move the router steadily at 1–2 meters per minute for a clean cut.
You should care about repeatability and safety before committing to a table or handheld. A router table offers repeatability; a handheld offers flexibility. For instance, if you’re making dozens of identical picture frames, the table saves time and reduces error.
Cost and space matter for your shop. A basic benchtop router table setup (table, fence, and a quality insert plate) runs about $200–$400; a decent handheld router starts around $120–$200. If you only have a 4′ workbench, a router table will take significant space; a handheld fits in a toolbox.
Think about the learning curve and jigs. You’ll need jigs for both, but they differ:
- Router table: builds like a box joint jig, circle-cutting jig, and featherboards are common.
- Handheld: edge guides, template guides, and straightedge fences are common.
Make the decision like this:
- If you need identical, repeatable profiles for 5+ pieces, pick a router table.
- If you rout large panels or do one-off trims, pick a handheld router.
- If you have limited space or budget, start with a handheld and add a table later.
A quick safety tip: always use push blocks and featherboards on a table, and use two hands and an edge guide with a handheld router; wear hearing and eye protection.
Recommended Products

Precision router lift with above-the-table adjustments for ease of use

Assembly includes: rt-c30 30" cast iron table, rt-f32 32" fence, rt-psw power switch, and rt-st2 support legs

Assembly includes: rt-c27 27" cast iron table (16" x 27"), rt-f27 27" fence, rt-psw power switch, and rt-st2 support legs with router plate opening of 11 3/4" x 9 1/4".
Why Router Tables Are More Precise and Repeatable Than Handhelds
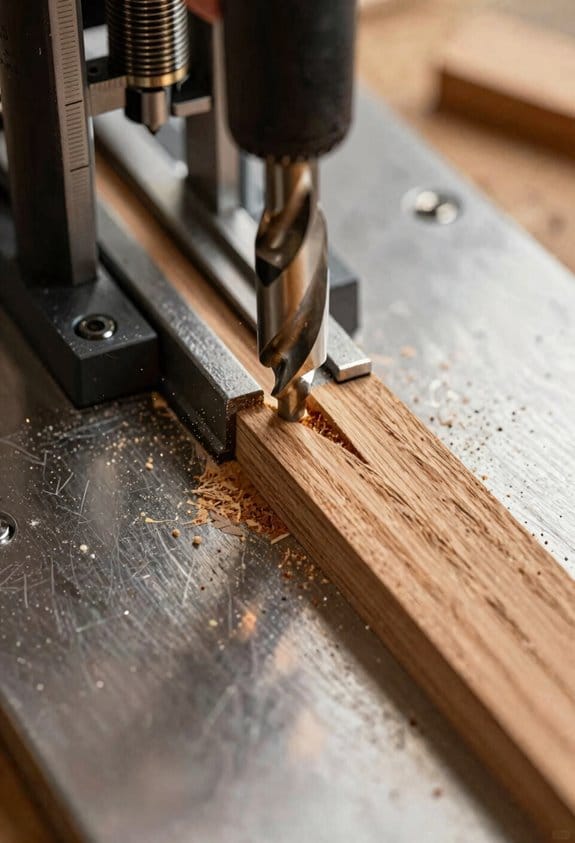
The difference between a router table and a handheld router comes down to whether the bit stays fixed or the workpiece moves.
Why this matters: a fixed bit makes repeatable cuts so your pieces match every time. On a table, the motor and cutter are clamped solidly, which cuts vibration and keeps the cutter height from shifting between passes. For example, when you run five identical cabinet door rails through a table at the same height, each rail will come out within about 0.005–0.010 inch of the others if your fence and bit are set correctly.
How to get that stability:
- Mount the router in the table using the manufacturer’s screws and check for any play.
- Tighten the collet to the cutter shaft to the torque the manual recommends (usually 15–25 ft·lb for medium routers).
- Lock your router base or use a router with a plunge lock so the bit can’t drift during repeated passes.
A flat table surface and an accurately set fence let you guide parts the same way every time, so each piece sees the same cut path. Calibrate the fence like this:
- Put a dial indicator or a small square against the bit and fence.
- Adjust the fence until the indicator reads the same along a 12–24 inch sweep.
- Lock the fence and test with a scrap board, cutting a 1/4-inch slot and measuring it with calipers.
Jigs, featherboards, and stops add support and make setups repeatable. Example: clamp a simple 1/2-inch-thick sacrificial fence to the main fence, install a featherboard at 3–4 inches from the bit, and use a stop block fastened to the fence so every tenon you cut is the exact same length.
Repeatable setups let you duplicate profiles and joints with minimal adjustment:
- Record bit height and fence offset on a small index card or in your phone after a successful run.
- Use that card to reset the table later — you won’t be guessing.
- If you need absolute repeatability, cut a template from 1/4-inch MDF and route against it with a flush-trim bit.
On a handheld router, you control the cutter’s path by moving the tool, which makes micro-movements and height drift more likely; a table removes most of that variable so you get more consistent results.
Which Routing Tasks Are Faster and Cleaner on a Router Table
If you’ve ever set up a router table, this is why you’ll reach for it more than a handheld.
When you use a router table for edge profiling, it matters because the fence and flat surface keep the workpiece aligned so profiles match every time. Example: routing a 3/8″ radius ogee on eight identical cabinet doors—each profile lines up with the last to within a hair’s width. Steps:
- Install a 1/2″ shank ogee bit and set the bit height so the curve starts 1/8″ from the edge.
- Square the fence, clamp a featherboard, and run a scrap first to check.
- Route all doors at a steady feed.
This gives you identical edges with minimal sanding.
Think of groove cutting like cutting a track with a ruler and sliding cutter; the table holds depth and feed steady, so you avoid blowout. Example: cutting a 3/8″ x 3/8″ shelf groove across five plywood panels—each groove stays the same depth and won’t tear the face veneer. Steps:
- Mount a 3/8″ straight bit and set the fence to the correct offset.
- Dial the table height so the bit depth is 3/8″.
- Use a push block and keep a constant pace.
You’ll get clean bottoms and square walls every time.
The difference between pattern engraving on a table and handheld comes down to stability: moving the stock is easier than fighting the tool. Example: tracing a 6″ floral template with a bearing-guided 1/4″ bit—your lines stay true without you tilting the router. Steps:
- Fasten the template to the workpiece with double-sided tape.
- Fit a bearing-guided bit and set the bearing to ride the template edge.
- Feed the workpiece against the bearing steadily.
This prevents chatter and gives crisp edges.
Before you cut joinery on a router table, know that dados and tenons come out truer because the table maintains consistent depth and fence alignment. Example: cutting a 3/4″ wide dado across three bookcase sides—each slot lines up for perfect shelves. Steps:
- Use a stacked dado set or multiple passes with a straight bit.
- Set the fence so the dado centers where you need it and lock it.
- Take shallow passes (1/8″ per pass) until you reach full depth.
You’ll save time on fit-up and sanding.
You don’t need to rely on a handheld router when you have batch work; the table speeds up repetition and reduces wasted parts. Example: rounding over 24 chair rails with a 1/8″ radius bit—each rail comes out identical in one pass. Steps:
- Install the round-over bit and set fence so the cut sits correctly on the rail.
- Use a sacrificial fence if the profile needs support.
- Run rails in a steady rhythm with featherboards.
Less sanding, fewer rejects.
Recommended Products

3.5" Router Carriage, No Baseplate Required : Versatile Slab Flattening Jig features 3.5 inch diameter carriage; designed for standard 3-1/2 inch routers such as 690/890, 610/618, 1617/1618, 1754X/28190/28084, HE041(57368), and RT1322-00 models

SPECS - You will receive a fully-equipped router table fence including three-way micro-adjustment, universal fence base with adapter track nuts, dust port, aluminum and sacrificial fences, and featherboard track.

24" x 32" router table top includes a router insert plate with three molded Level-Loc reducing rings
How Router Tables Improve Safety, Dust Control, and Consistency
If you’ve ever struggled with a handheld router, this is why.
Why it matters: using a router table gives you steadier control and fewer mistakes. Because the cutter is fixed in the table and you have both hands free to guide the workpiece, you’ll reduce kickback and keep cuts consistent.
1) How a router table makes routing safer
Why it matters: safety reduces accidents and lets you work faster with confidence.
- Feed the stock against the bit rotation (for most bits, push left-to-right across the bit). This *reduces* kickback and produces cleaner edges.
- Use a fence set square to the bit and clamp it tight so the bit can’t grab the workpiece sideways.
- Example: when you rout a 1/2″ oak edge with a 1/4″ round-over bit at 12,000 rpm, feeding left-to-right at about 20–30 inches per minute keeps the cut smooth and prevents sudden grabs.
2) How to control and stabilize stock
Why it matters: consistent contact keeps profiles even and prevents splintering.
- Step 1: Mount the router securely in the table plate; torque the base screws snugly.
- Step 2: Align the fence parallel to the bit using a combination square and lock it.
- Step 3: Use a featherboard clipped to the table rail, applying light pressure to keep the piece flat against the fence.
Example: ripping a 3/4″ plywood edge with a flush-trim bit — use a featherboard 6″ from the bit and push at steady pace so the laminate doesn’t chip.
3) How dust extraction improves visibility and health
Why it matters: removing chips at the source keeps your line of sight clear and your lungs safer.
- Connect a shop-vac or dust extractor to the table port and seal gaps with a foam gasket if needed.
- Empty the collection bag when it’s about two-thirds full to maintain suction.
Example: when you run medium-density fiberboard (MDF) through a bit that produces fine dust, the extractor will cut airborne dust dramatically and keep the tabletop from gumming up.
4) How a router table delivers repeatable results
Why it matters: repeatability saves time and prevents wasted material.
- Secure the fence and mark a stop block for repeated passes; that keeps spacing identical every time.
- Make a test cut on scrap and measure with calipers; adjust the fence in 0.005″ increments until the measurement matches your target.
Example: producing ten identical tenon cheeks — lock the fence, set a stop block, and run all ten pieces; each cheek will match within a few thousandths when you use the same setup.
Practical checklist before you start
Why it matters: a quick routine prevents setup mistakes that cause scrap.
- Check router mounting bolts for tightness.
- Square the fence to the bit.
- Attach featherboards and dust hose.
- Run a scrap test cut and measure.
Follow those steps and you’ll get safer cuts, less dust, and consistent results every time.
Router Table Fences, Jigs, and Workpiece Support That Simplify Joinery
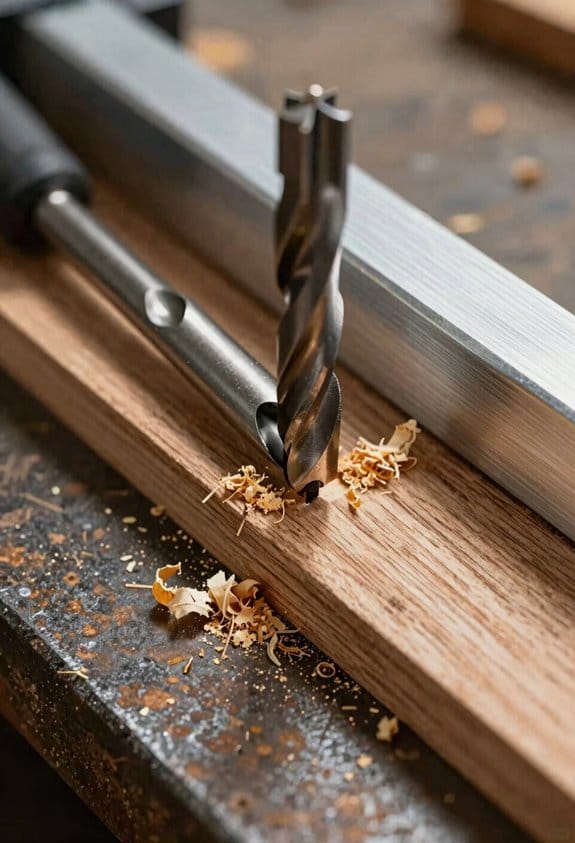
If you’ve ever wrestled a board that keeps drifting off the fence, this is why.
Why it matters: consistent pressure and solid support keep your cuts accurate and prevent tearout so joints fit without sanding.
A solid fence locates stock, but you should add a featherboard to keep pressure against the fence. Use one or two featherboards clamped to the router table fence at about 1/8″ above the table; that holds the work tight and prevents the bit from chewing on the edges. Example: when I cut 3/4″ maple rabbets, a featherboard set 1/8″ above the table stopped the board from curling and removed a visible 1/16″ tearout along the grain.
Why it matters: sleds let you move small or fragile pieces past the bit safely and flat, reducing mistakes and repeat setups.
- Make a simple sled from 3/4″ plywood about 12″ wide by 10″ deep with a 1/2″ hole to clear the bit.
- Add a sacrificial fence on the sled’s front edge and clamp the work to the sled.
- Slide the sled with even pressure and keep both hands on the handles.
Example: cutting 2″ x 2″ tenons on short offcuts—using the sled I held the piece flat and made four identical tenons in under five minutes.
Why it matters: indexed jigs transfer settings exactly so you don’t measure twice for every joint.
Build small, indexed jigs for rabbets, dados, and tongue-and-groove that reference your router table fence. Bolt a 1/4″ dowel or a steel pin into the jig so it locates on the fence base every time; that way a setting you dial in once reproduces on the next piece. Example: for a 1/4″ dado I cut a test piece, tweaked the jig until the slot was centered, then cut 30 identical shelves without re-measuring.
Why it matters: supports on large panels stop edges from sagging and keep the work at the same height as the router bit.
Fit T-track stops and lift supports along the table edge and set them so the panel rides level with the cutting plane. Use adjustable lift supports every 24″ for full sheets and a T-track stop at the panel end to prevent creep. Example: trimming a 48″ x 96″ plywood sheet—with a T-track stop at the trailing edge and three lift supports along the outfeed, the sheet cut square and the bit height stayed consistent across the entire edge.
Put these accessories together—featherboards, a sled, indexed jigs, T-track stops, and lift supports—and your joinery will be safer, faster, and much more repeatable.
Recommended Products

24" x 32" router table top includes a router insert plate with three molded Level-Loc reducing rings

The router combo kit (1617EVSPK) has a 12 AMP motor with adjustable speed dial allowing user to set optimal speed from 8,000 to 25,000 RPM.

Router Table & Fence: Use your table saw as a base for this cast iron router table top! Saves lots of space, and uses one of the sturdiest anchors in your shop to cut down vibration and noise.
Choosing the Right Router Table for Your Shop Size and Projects
Before you pick a router table, you need to match the tool to your space and the jobs you’ll do because the wrong table wastes money and time.
Start with shop footprint. Measure your available space in feet or inches, and compare that to these options: a benchtop table that needs about 24″ x 36″ of clear bench area, or a freestanding table that requires a 48″ x 60″ floor footprint. Benchtop models are portable and work well if you move between job sites; I used a benchtop on a folding workbench in a garage with a 6′ ceiling and it fit fine. If you work on full 4′ x 8′ sheets or big panels, get a freestanding table with a larger top and built-in storage.
Why motor power matters: higher-power motors handle hard woods and extended cuts without bogging. Match material to motor size: for softwoods and plastics, a 1.5–2.0 HP motor is usually fine; for hardwoods like oak or maple, choose 2.5–3.5 HP. I routed an oak door stile with a 3 HP motor and the cut stayed clean at 1/8″ depth.
Think about fence and table size for your projects. If you do edge profiling and small mouldings, a 12″ x 18″ top with an adjustable fence works. For joinery, box making, or long rails, a 24″ x 36″ or larger table with a precision fence and dust port is better. I built picture frames on a 14″ x 20″ table using a split fence and got repeatable results.
Follow this simple buying checklist:
- Measure your shop space in inches.
- List the typical materials and thicknesses you cut.
- Decide desired motor power (1.5–2.0 HP for softwoods, 2.5–3.5 HP for hardwoods).
- Choose table size (small: 12″ x 18″; medium: 18″ x 24″; large: 24″ x 36″+).
- Inspect fence quality—look for cast iron or heavy aluminum and micro-adjustment.
- Compare prices and prioritize power, fence quality, and stability over frills.
Balance features against cost by prioritizing the items that affect safety and results first: motor, fence, and stable mounting. An example: spending an extra $150 for a heavy fence and better motor will save hours and avoid tear-out on hardwood mouldings.
If you follow those steps, you’ll avoid buying a table that’s too small or unnecessarily bulky for your projects.
Recommended Products
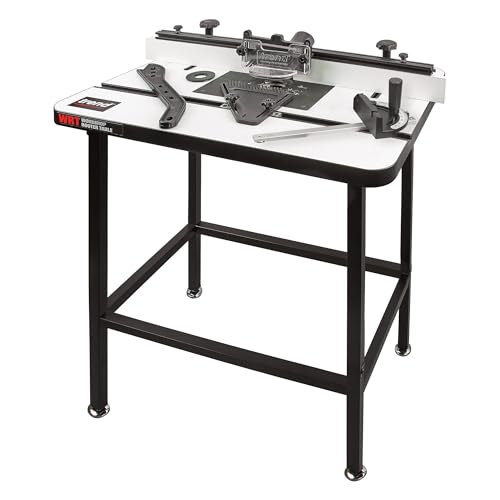
STABLE WORKING PLATFORM: Laminated 24 x 16 inch top and steel base frame create a rigid setup that supports accurate shaping, profiling, and detailed cabinetry work

Benchtop router table; attaches to any workbench

Cast Iron Table Top for the Router: Nothing beats a Cast iron router table top when it comes to a sag-free, dead-flat surface, and smooth-cutting router tool. Our woodworking router table top is machined from solid cast iron for ultimate flatness, accuracy, and vibration dampening for smooth cuts.
When to Stick With a Handheld Router and How to Combine Both Tools
Think of choosing between a handheld router and a router table like picking a tool for a job site versus a shop bench: each has situations where it shines and times when the other is better.
Why this matters: picking the right tool saves time and keeps your cuts accurate. For example, when you need to trim a door on-site after it’s hung, a handheld router gets you a clean edge without moving the whole door into the shop.
1) When should you keep a handheld router?
Why it matters: portability and direct control let you finish work that can’t come to the table.
Steps:
- Use the handheld for on-site adjustments — trimming a jamb or routing a hinge mortise where the piece is fixed.
- Use it for long, flowing curves — freehand profiles on a chair back or a tabletop skirt.
- Use it for plunge cuts that would be awkward on a table — cutting stopped grooves in the middle of a board.
Example: I keep a compact 1.25 hp plunge router in my van to shave tenons and trim door bottom clearances at customers’ houses.
2) When should you use the router table?
Why it matters: the table gives repeatable precision and safer two-handed feeds.
Steps:
- Put the table to work for straight edge work like flush trimming multiple shelves or rabbets.
- Run the table for repeated profiles — cut the same ogee on 12 cabinet doors without resetting the bit each time.
- Use two-handed pushing with featherboards and a fence for consistent passes.
Example: On a cabinet run, I rout a dozen doors on the table with a 1/2″ roundover bit, setting depth once and knocking out identical edges in one afternoon.
3) How do you use both tools together effectively?
Why it matters: deliberate pairing speeds workflow and raises quality.
Steps:
- Assign rough stock removal to the handheld — remove 80% of material quickly with a larger bit.
- Transfer the piece to the table for finishing passes — use a smaller bit or shallower depth for the final 20% to get crisp detail.
- Create one jig that works in both places: make a fence-mounted stop block for the table, then clamp that same block to the workpiece for handheld reference.
- Mark reference edges with a permanent marker and run test cuts on scrap each time you change bits or depth.
Example: For a dado that starts rough, I plunge-cut with the handheld to get the groove, then use the table and a router table sled with the same bit for the final width and flat bottom.
Practical setup tips
Why it matters: small setups cut errors and wasted time.
Steps:
- Use the same bit in both tools when possible; note its spindle-to-fence distance and replicate it on the handheld by marking the base.
- Make a simple transfer jig: clamp a 1/4″ hardboard shim to the table fence, trace its edge, then glue a matching shim to your handheld base for identical reference.
- Run a 3″ test cut on scrap at final speed and feed rate before working on the real piece.
Example: I label bits with their depth and a marker line on the base; that way I can swap between table and handheld and reset within +/-0.005″.
If you set up this way, you’ll keep the handheld for mobility and awkward cuts, use the table for repeatability, and move parts between them without losing alignment.
Recommended Products

Ergonomic handle with full-grip is designed for increased control and reduced fatigue with power switch and speed control at the fingertips.

Makita-built Brushless motor delivers faster and more accurate cuts in a variety of materials

PROFESSIONAL-GRADE MOTOR: Achieve a quality finish and smooth routing with a powerful 15 Amp motor
Frequently Asked Questions
Can I Use a Plunge Router With a Table Safely and Effectively?
Yes — I can use a plunge router with a table safely and effectively: I follow plunge safety procedures, lock the depth, adapt the fence adaptation for clearance, secure the bit, use guards and push blocks, and test cuts slowly.
How Do I Prevent Tear-Out on Figured or Veneered Wood?
I’d test the myth that only slow speeds prevent tear-out: I use tape backing, sharp upstream bits, featherboards and guard, light shallow passes, and backing boards or sacrificial fences to protect figured or veneered faces.
What Bits Are Best for Precision Joinery on a Table?
For precision joinery on a table I use spiral bits and compression cutters—upcut spirals for fast waste removal, downcut for clean faces, and compression cutters for tear-free edges; I pair them with solid carbide and fine flutes.
How Do I Adapt a Router Table for Non-Wood Materials?
I’d use appropriate bits, lower speed control for plastics and laminates, install effective dust collection, add sacrificial fences and table inserts, clamp securely, test cuts on scraps, and use coolant or slower feeds for metals.
Can a Router Table Be Used for Template-Based Sign Carving?
Yes — I use a router table with template routing and dedicated sign jigs to carve consistent signs; I clamp templates, use bushings or spiral bits, and rely on fences, featherboards, and dust collection for safe, repeatable cuts.