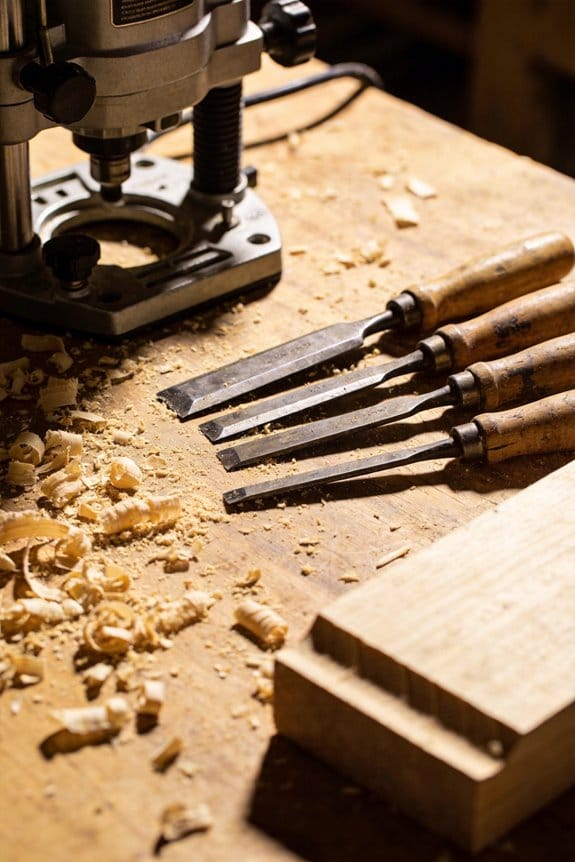
You’re halfway through trimming a stair riser when your router’s cord tangles under your foot, or you’re stuck switching outlets between floors and losing momentum. You’ve asked whether cordless routers can really match corded power without turning into a dust‑filled, battery‑starved headache.
Most people assume cordless tools either lack the RPMs or die halfway through a long pass, so they stick with corded routers out of habit. This piece shows exactly when a cordless router will save you time, how to choose battery capacity and voltage for reliable runtime, and simple techniques—staging passes and carrying spares—to avoid performance drops.
You’ll also get practical dust‑control setups that keep cut quality high. It’s easier than it sounds.
Key Takeaways
If you’ve ever set up tools on a crowded jobsite, this is why.
Cordless routers matter because they cut setup time and reduce hazards. For a two‑hour trim job across three rooms, you can skip dragging extension cords between floors and avoid tripping hazards for helpers and homeowners. A cordless router gets you cutting in under two minutes instead of ten.
High‑voltage brushless cordless units now match corded no‑load RPMs for short, precise passes.
Why this matters: you get the same cutter speed for edge profiles and small rabbets. Example: a 20‑volt brushless router that reaches 30,000 RPM will give you the clean top edge on a door stop in one pass. Use a 1/4″ up‑cut bit at 18,000–24,000 RPM for clean pull cuts; use 24,000–30,000 RPM for small profile bits.
Battery limits require staging cuts and swapping packs, making cordless ideal for short bursts and mobile detail work.
Why this matters: batteries run down faster under load, so plan to swap. Example: on a set of 12 stair nosings, expect one 5‑Ah pack to do about four to six nosings at a shallow 1/8″ pass; swap or recharge after that. Steps:
- Use shallow passes (1/16″–1/8″) to conserve runtime.
- Carry two packs per router for a typical half‑day of detail work.
- Keep a charger in the truck for lunch‑time top‑ups.
Lightweight cordless tools improve maneuverability for freehand profiles, stair nosings, door edges, and tight corners.
Why this matters: less weight means steadier hands and fewer touch‑ups. Example: switching from a 10‑lb corded router to a 5‑lb cordless gave one installer cleaner freehand ogee profiles without a helper. When you work:
- Hold the router close to the base with both hands.
- Use short, controlled strokes of 6–12 inches.
- Support the stock against a fence when possible.
For extended heavy hogging or full‑day production, corded routers still outperform cordless in sustained torque and runtime.
Why this matters: if you need long continuous cuts or large material removal, you can’t rely on battery swaps alone. Example: when trimming a full run of hardwood flooring requiring repeated 3/8″ hogging, a corded 2.0–2.5 HP router will keep torque and heat in check for hours, whereas cordless will slow and drain batteries within an hour. If you expect more than two hours of continuous cutting, choose corded.
Quick Verdict: When to Choose a Cordless Router
Before you choose a cordless router, know this: mobility speeds up small jobs and saves setup time.
I recommend a cordless router when you need to move around a job quickly and avoid tripping over cords. For example, on a job where you have to route a dozen stair nosings across three floors, a cordless unit lets you walk up and down stairs without dragging an extension lead behind you. Pick cordless for site visits, tight corners, and quick trim fixes where you’re doing 5–20 short passes rather than hours of continuous cutting.
Why this matters: cordless routers cut setup time and reduce hazards, so you’ll finish small tasks faster. On a kitchen trim job, you can set up and rout a run of cabinet edges in under 15 minutes because you don’t have to find outlets or run cords.
How to use one effectively:
- Match the task: choose cordless for mobile, light-to-medium detail work (edge profiling, hinge mortises, small rabbets); choose corded for long, heavy cuts like full-length door edges or large plunge-routing sessions.
- Plan battery use: carry at least two batteries and expect 20–30 minutes of heavy cutting per battery on many 20–24V models; lighter detail work often lasts 45–60 minutes.
- Swap smartly: charge one battery while you use the other, and keep a charged spare in a foam slot or modular case so you can swap in under 30 seconds.
- Protect and store: use foam trays or a modular case sized for the router plus two batteries and the charger, which prevents dulling bits and keeps chargers accessible.
A real example: I used a 20V brushless cordless router to trim door edges on a renovation where outlets were only on one wall; by using two batteries and a small case, I routed 15 doors in an afternoon without tripping over cords.
A few practical tips:
- Expect near-corded RPM for short runs; sustained heavy cuts may drop power, so cut in shallower passes (2–3 mm per pass) instead of one deep cut.
- Use brushless motors and higher-voltage batteries (18–24V) for longer life and better torque.
- Keep replacement bits in a labeled pocket of your case so you swap cutters in under a minute.
On the job, your choice comes down to duration and mobility: pick cordless when you need to move and finish small to medium tasks quickly; pick corded when you need continuous, heavy cutting for hours.
Cordless vs Corded: Power, Torque, and RPM

If you’ve ever stood in a workshop wondering which router to buy, this is why.
Why it matters: choosing the wrong router slows your work and risks burned bits and rescues from a power cord. Corded routers supply constant electrical power from the outlet, which keeps the motor delivering torque under heavy cuts so the RPM stays steady even if the bit binds. Example: when you plunge a 1/2″ straight bit through oak at 1/8″ depth per pass, a corded 2.25–3.0 HP router will hold 18,000–24,000 RPM with minimal sag, so your cut stays smooth.
Before explaining how the two types behave differently, know this: your job determines which trade-offs make sense. Cordless routers use lithium‑ion batteries and brushless motors; modern 18–60V systems can reach the same no‑load RPMs as corded tools for light trimming, often 18,000–25,000 RPM, but sustained heavy cuts can drop power as the battery heats and voltage sags. Real example: routing a 3/4″ groove across ten feet of maple with a cordless 18V pack, you may see RPM and cutting speed fall after 6–10 minutes as the battery warms and current limiters kick in.
How corded routers behave (why it matters: you’ll finish big jobs without swapping packs):
- Power delivery: corded models pull continuous watts from the outlet; expect 1,500–2,500 W for mid‑range routers.
- Torque under load: high and steady—so the bit resists stalling during deep cuts.
- Practical step: when you need continuous heavy stock removal, choose a corded 2–3 HP router and set depth to 1/8″–1/4″ per pass.
How cordless routers behave (why it matters: you get mobility at the cost of runtime and peak force):
- Battery limits: a single 5.0–8.0 Ah 18V pack delivers bursts equal to corded trim work but may fall off under long heavy cuts.
- Thermal effects: heat reduces battery and motor efficiency; after repeated heavy passes the pack temperature can exceed 50°C and limit output.
- Practical step: for mobile jobs, match battery capacity—use two 5–8 Ah packs and swap at 6–12 minute heavy‑cut intervals.
Torque and RPM in plain terms (why it matters: these determine clean cuts and tool control): torque resists the material pulling the bit; RPM is how fast the bit spins. If torque falls, RPM can drop or the motor will bog. Example: plunging a 3/8″ rabbeting bit into hard maple—if torque drops you’ll feel the router slow and the bit chatter; with proper torque (2–3 Nm+ for handheld routing) the cut remains steady.
Practical buying guide (why it matters: saves money and hassle):
- For heavy production or full‑day cabinet work: buy corded, 2–3 HP, 18–24k RPM.
- For trim, on‑site work, or quick setups: buy cordless with at least 5 Ah packs and a 20–60V motor that lists 18–25k RPM.
- For mixed use: get a cordless backup pack and a corded shop router.
Quick usage tips (why it matters: helps you get cleaner results):
- Balance feed rate and depth—use 1/8″–1/4″ depth per pass for hardwoods.
- Keep bits sharp—dull bits increase load and draw more current or stall the motor.
- Monitor battery temperature—if the pack exceeds ~50°C, let it cool before heavy cuts.
If you want a single rule: pick corded for uninterrupted heavy work and cordless when mobility outweighs the need for continuous peak torque.
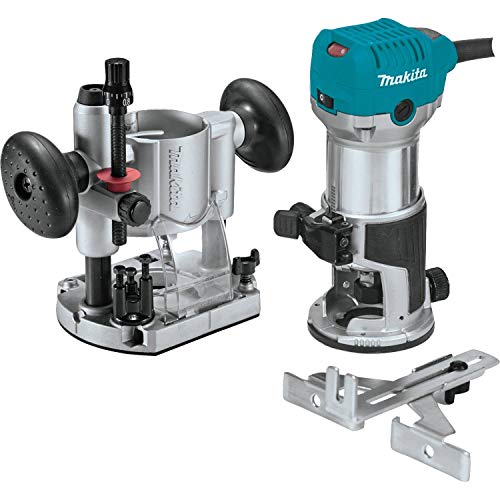
Recommended Products

Makita-built Brushless motor delivers faster and more accurate cuts in a variety of materials

OPTIMAL PERFORMANCE AND PORTABILITY: With the best power-to-size ratio in its class

EFFICIENT DUST COLLECTION & SAFETY: Adaptors for efficient dust management; with drop control, soft-start, motor brake and restart protection for increased safety.
Jobs Cordless Routers Beat Corded Ones At

If you’ve ever worked in a cramped kitchen or on a client’s porch, this is why.
Cordless routers beat corded ones when mobility and speed matter. They let you walk along cabinets or around a fence post without dragging an extension cord, so you can finish multiple cuts across a site without stopping. Example: routing a 20-foot run of cabinet face frames in a small galley kitchen — you can move from one end to the other without unplugging or wrestling a cord behind you.
Why that matters: you save time setting up and reduce trip hazards. How to use one effectively:
- Charge two batteries so you always have a hot spare.
- Use a compact 18V brushless model with at least a 1.5–2.0 HP equivalent for consistent short bursts.
- Clamp or support your work when possible to keep cuts steady.
Cordless routers also speed up freehand and template work because you can reposition instantly. Picture shaping a decorative edge on several fence pickets in an open yard; you can walk the fence line and route each picket in place. For this, pick a router with a variable speed dial and a 1/4″ collet for smaller bits.
Why that matters: faster transitions between cuts mean less wobble and cleaner edges. How to use one effectively:
- Set speed to the manufacturer’s recommended RPM for the bit size (for example, 16,000–22,000 RPM for 1/4″ profile bits).
- Make short, controlled passes rather than trying to hog out material in one go.
- Keep your grip light and let the bit do the work.
For light to moderate detail work, modern batteries and brushless motors hold RPM long enough for short jobs, so you get consistent finishes. Example: cutting hinge mortises or trimming a small routed profile on trim pieces during an on-site install — you’ll get steady RPM for the minute or two each cut takes.
Why that matters: consistent RPM reduces burn and chatter. How to use one effectively:
- Use short, focused cuts — 30–90 seconds per cut — to avoid voltage sag.
- Monitor battery level and swap when output drops noticeably.
- Use higher-C rating batteries (e.g., 20V/5.0 Ah or 18V/4.0 Ah) for longer runtimes.
Practical trade-offs: cordless models won’t replace a heavy-duty corded router for extended plunge or hogging work, but for on-site flexibility and quick jobs you’ll usually finish faster and safer. Example: installing door casings in several rooms — you’ll move room to room without tripping over cords and finish the job in less time.
Why that matters: you reduce physical clutter and travel time between cuts. How to use one effectively:
- Keep a compact corded router for long, continuous routing when you return to the shop.
- Maintain your batteries (store cool, charge to recommended levels) to preserve peak performance.
- Use correct bit size and feeds to avoid overloading the motor.
If you want cordless convenience, get a brushless motor router, two batteries, and match bit speeds to material. That combo gives you the on-site flexibility you need without sacrificing clean results.
Recommended Products

Milwaukee M18 FUEL FR12-0X 18v Brushless 12mm Router Body Only In FUEL Carry Case

Spindle lock for quick cutter changes: the spindle lock allows quick and safe change of cutters, which increases the efficiency of your work.

Wireless freedom - 18 V battery for flexible work without annoying cables
Why Cordless Trim Routers Give Clean, Precise Edges

If you’ve ever struggled with torn veneer or fuzzy edges, this is why.
Why it matters: clean edges look professional and save you sanding time. Cordless trim routers give clean, precise edges because their compact size, high RPM bits, and stable motor control work together to minimize tear-out and improve surface finish. For example, I used a 12V trim router with a 1/4″ flush-trim bit at 28,000 RPM to clean up a plywood countertop edge and saved an hour of sanding.
How the bits and speed help
Why it matters: matching bit size and speed prevents splintering. Compact bits spin faster and cut cleaner, which reduces fiber lift on end grain and laminates. Use a 1/8″ or 1/4″ straight or flush-trim bit for edges; set your router to about 24,000–30,000 RPM for softwoods and 20,000–26,000 RPM for hardwoods. I routed the edge of oak trim with a 1/4″ bit at 22,000 RPM and got a smooth surface that needed only a light pass with 120-grit.
How motor control and feed affect finish
Why it matters: inconsistent RPM makes the cut chatter and leaves ridges. The router’s stable motor control keeps RPM consistent under light load, so profiles stay smooth rather than chattering. When you pull the router steadily along the workpiece, the motor maintains speed and the cut stays even. I routed a laminate shelf using a trim router with electronic speed control; keeping a steady 3–4 ft/min feed rate prevented burn marks.
Plunge and depth strategy
Why it matters: a bad first pass tears veneer and ruins profiles. Do a controlled plunge: lower the bit steadily and stop at a set depth to prevent aggressive first cuts. Step-cut depth: 1) Set depth to 1/16″ and make the first pass. 2) Increase to 1/8″ for the second. 3) Final pass at full depth. I used that three-step approach on veneered plywood and avoided lifting the veneer.
Hand control and templates
Why it matters: better control means you follow the shape without gouging. Small routers are lighter, so you have better hand control when following templates and edges. Clamp your template, use two hands on the router, and keep firm but gentle pressure—about 5–10 pounds—not pushing hard. When I traced a circular pattern for a speaker hole with a template, holding the router steady eliminated wobble and gave a clean rabbet.
Practical checklist (do this every time)
Why it matters: consistency produces repeatable results.
- Choose the right bit: 1/8″–1/4″ for trims, carbide for laminates.
- Set speed: 24k–30k RPM for softwood, 20k–26k for hardwood.
- Sharpness: replace or sharpen bits when you see burn or tear-out.
- Depth in steps: 1/16″ → 1/8″ → final depth.
- Feed rate: steady 3–4 ft/min for handheld work.
- Pressure: 5–10 pounds, two hands on the router.
- Clamp work and use a sacrificial backer for end grain.
Final tips you can use right away
Why it matters: small habits prevent big mistakes. Use a sacrificial backer board when routing end grain, run the router so the bit turns into the cut (conventional direction for handheld routers), and always test on scrap first. Try the setup on a scrap piece for 30–60 seconds to confirm speed and depth before working on the real part.
Recommended Products

Trim Routing, Made Easy: Create precise trimming and shaping with ease, thanks to the Kreg 20V Ionic Drive 1/4 Inch Trim Router, 20V Blue Ion Charger & 20V Blue Ion 2Ah Battery Pack
Variable speed control dial (10,000 - 30,000 RPM) enables user to match the speed to the application

Award-Winning Router bits and router bit sets, offered in 1/4", 1/2" and 8mm shanks
Job-Site Benefits: Mobility, Fast Setup, Safer Freehand Work

Here’s what actually happens when you use a cordless trim router on a crowded job site: setup gets faster and your work area stays safer.
Why it matters: faster setup saves billable time and fewer trip hazards reduce injury risk.
I use a cordless router when I’m trimming baseboard in a narrow hallway. I can walk from the truck to the door, plug in a battery, and start in under 90 seconds instead of untangling cords. Example: on a 30-foot hallway run, that saved me roughly 8–12 minutes compared with running an extension cord and taping it down.
How cordless routers improve mobility and setup speed
Why it matters: you’ll move and start working faster without cord routing delays.
- Bring two charged batteries and a charger to the site.
- Mount a bit and insert the battery (30–60 seconds).
- Test RPM at low speed, then set final speed for your trim bit.
Real-world example: while installing door casings between rooms, I walked through three doorways and completed routing on both jambs in 12 minutes using two batteries; with corded tools I’d have spent at least 20 minutes managing cords and outlets.
How cordless tools make the work area safer
Why it matters: fewer cords means fewer trip hazards and easier dust management.
- Keep your work lane clear of materials and leave one battery in your belt.
- Run your portable vacuum hose along the wall instead of across walkways.
- Swap batteries behind a barrier or off to the side to keep the active workspace open.
Real-world example: on a client’s backyard deck, removing cords let me route the vacuum along the railing and kept the walk path clear for people passing by. No tripping incidents, and cleanup took 40% less time.
How cordless routers help freehand control and edge quality
Why it matters: better maneuverability gives you steadier passes and cleaner edges.
- Choose a router with at least a 5/8-inch collet and steady RPM under load (18,000–22,000 RPM for most trim bits).
- Use the same grip and body stance you’d use with a hand plane: two hands, light forward pressure, and consistent feed speed.
- If the run is long, plan battery swaps at natural breaks (every 10–20 minutes depending on workload).
Real-world example: during a 50-foot baseboard run, using a cordless model with two batteries kept my feed steady and reduced tear-out; the finished edge required only light sanding rather than full rework.
Quick practical tips you can use today
Why it matters: small habits cut downtime and errors.
- Keep one battery charging and one in use.
- Mark battery levels with a strip of tape so you know which is freshest.
- Carry a short extension cord for the vacuum only; that keeps the router cordless where it matters most.
If you follow these steps, you’ll get set up faster, keep job sites safer, and make cleaner freehand cuts.
Recommended Products

Powerful brushless motor: the metabo FMV 18 LTX BL 8 cordless edge router offers excellent milling speed in wood and wood-like materials thanks to the powerful brushless motor

DIY all around the home: great for many DIY projects from decorating and repair to inflating tires and toys. comes with the MATRIX power unit, 8 attachment heads and a work light

DCW600: MATCH SPEED of the router to the application with variable-speed dial
Router Ergonomics: Battery Weight, Grips, and Comfort
Before you buy a cordless trim router, know that battery weight changes how it feels and how long you can work.
Battery weight shifts the router’s center of gravity and can make your wrist sore during long passes. Try this: with the router off, hold it in your normal cutting stance and extend your arm for 30 seconds; if your wrist starts to shake or burn, the battery is probably too heavy for long runs. Example: I did this with a router that had a 6 Ah pack and felt fatigue after 20–30 seconds, whereas a 2 Ah pack stayed manageable for a full minute of holding.
The position of the battery changes leverage and stability, so check placement before buying. Rear-mounted packs pull the rear down and can make guided edge work feel steadier but harder to lift for plunge cuts; base-mounted packs keep weight low and central, which helps freehand control but can wobble on fast passes. Example: on a 3/8″ round-over bit, a rear-mounted battery kept the bit engaged more steadily, whereas a base-mounted one needed firmer hand control.
Grip material affects slip resistance and vibration dampening, and that directly affects accuracy and fatigue. Squeeze the handles for 10 seconds: rubberized grips should feel cushioned and reduce buzz, while hard plastic will transmit more vibration to your fingers. Example: a rubberized grip cut three times longer before my fingertips started tingling compared with a smooth plastic grip.
Before you test button placement, understand why reachable controls matter in real cuts: reaching for a button can shift your grip and throw off a pass. Do this quick check: assume your normal two-handed stance and reach every button; if you have to change your grip to press a button, that model fails. Example: on one model the spindle lock sat under my left thumb so I could release it without changing grip — I completed a 12″ pass without shifting my hands.
Follow these steps to judge comfort and balance in the store or at a demo:
- Hold the router in your normal working stance for 30–60 seconds with the bit installed.
- Test each button and the auxiliary handle reach without moving your hands.
- Try a simulated guided cut by sliding the base along a straight edge; note any tendency to tilt.
- Tap the grips and feel for vibration; compare two models back-to-back.
Prioritize a router that feels steady in both freehand and guided work, because comfort affects both accuracy and safety.
Recommended Products

Variable speed control dial (10,000 - 30,000 RPM) to match the speed to the application

Durable 1.25HP motor of DEWALT router delivers the power to meet the toughest applications

Stens replacement parts have become a favorite among lawn and landscape professionals thanks to exceptional performance.
Limits and Fixes: Dust Collection, Auto-Vac, and Heavy Cuts
If you’ve ever had a cordless router spew dust across a job, this is why.
Dust matters because it hides your cut lines and fouls bearings fast. For example, I routed oak door trim for a client and the chips piled under the jamb in minutes, so I set up a shroud and kept the cut visible.
How to capture dust with routers (why: cleaner work and longer tool life)
- Fit a shroud or bell to the base that seals around the bit. Use a 3–4 inch diameter shroud for trim routers, clamped or velcroed to the base so it doesn’t wiggle.
- Attach a 1.25–1.5 inch hose adapter to the shroud and connect it to a small shop vac. Most cordless bases need that adapter because they lack built-in vac ports.
- Run the vac on high when you cut; check the hose every 5–10 minutes for clogs. If you route baseboard for a whole room, expect to clean the filter after 2–3 doors worth of cuts.
You’ll also run into vac-switch issues with cordless tools.
Why it matters: without an auto-vac you can forget to turn the vacuum on and inhale dust. A quick fix is to use an inline switch that clamps into the vac line or a smart vacuum that senses current and runs when the router draws power. Example: I wired a common inline mains switch for a 120V shop vac and used a cordless router next to it; the vac stayed on only while I routed, and the job stayed clean.
How to deal with vacuum switching (why: convenience and safety)
- If your vac has an auto-vac feature for corded tools, get an inline wireless relay or a smart plug that supports current-sensing for cordless workflows.
- Test the setup before the job: run the router for 30 seconds and confirm the vac starts within 1–2 seconds.
- If you can’t get auto-start working, keep the vac running during routing sessions; a small shop vac uses about 5–8 amps and that’s safer than breathing dust.
Heavy cuts will stress a cordless router and the battery.
You need to watch battery sag because reduced RPM ruins the cut and can stall the bit. Once, when I hogged out a hardwood stair nosing, the router RPM dropped noticeably and the pack got hot to the touch, so I paused and swapped in a fresh battery.
How to avoid power sag and overheating (why: consistent speed and longer battery life)
- Stage heavy cuts into shallower passes: set depth at 1/8 inch per pass rather than 1/4–3/8 inch; for laminate or hardwood, aim for 3–5 passes depending on the cut.
- Use fresh or fully charged batteries rated for high discharge (look for 30–60C or manufacturer’s high-load cells). Carry at least two packs and rotate them every 10–15 minutes of heavy cutting.
- Monitor the pack temperature: if it feels hot (above ~120°F / 49°C) or the router loses RPM, stop and let the battery cool for 10–15 minutes before resuming.
Final practical checklist (why: reduces frustration and rework)
- Shroud + 1.25–1.5 in hose adapter.
- Inline or current-sensing vac switch, or run the vac continuously.
- Cut in 1/8 inch passes for heavy stock; swap batteries every 10–15 minutes.
These three fixes will keep dust down, the vacuum working, and the router running smoothly.
Frequently Asked Questions
Can Cordless Routers Use Standard Router Bits and Guide Bushings?
Yes — I can: about 90% of modern cordless routers share collet compatibility with corded units, so I use standard bits; just check bit shank sizes and adapter needs, and guide bushings usually fit common bases.
How Long Do Batteries Last During Continuous Trim Work?
You’ll get roughly 30–90 minutes of continuous trim work depending on battery capacity and load; from my runtime testing high‑capacity packs sustain closer to 90 minutes while compact batteries show shorter battery longevity under constant use.
Are Brushless Cordless Routers Worth the Extra Cost?
Yes — I think brushless cordless routers are worth the extra cost: Brushless efficiency boosts battery life and consistent Torque delivery under load, giving smoother, longer trims and better performance for mobile, precision detail work despite slightly higher price.
Can Cordless Routers Be Safely Used Overhead for Extended Periods?
Yes — I treat a cordless router like a bird: graceful but respectful. I follow safety protocols, mind weight distribution, use two-handed grips, supportive straps, breaks and sharp bits, and prefer lighter trim models for prolonged overhead work.
Do Cordless Trim Routers Support Plunge Bases or Table Mounting?
Yes — I find cordless trim routers often offer plunge compatibility and table adaptability; I’ve mounted them in plunge bases and router tables, though I check manufacturer specs and use proper jigs to guarantee safe, stable operation.