You stand at a crowded woodshop table, staring at a short offcut and wondering how to feed it safely without slicing a fingertip. The exact question is: how do we prevent small-part guillotine injuries while keeping students working independently?
Most programs treat small-part cutting as a minor hazard or rely only on verbal warnings and adult supervision. This introduction shows step-by-step, practical changes that reduced fingertip injuries: specific guards to install, push-stick and sensor-stop setups to use, age-based supervision rules to apply, and the competency checks and logs that make those measures stick.
You will be able to draft a classroom plan that cuts risk and meets legal expectations. It’s easier than you think.
Key Takeaways
If you’ve ever seen a student lose part of a fingertip, this is why prevention matters: it keeps kids safe and schools out of legal trouble.
– You should track incidents so you spot patterns quickly. For example, a middle school saw three fingertip injuries in six months, all on the same table saw during end-of-day cleanups; logging date, tool, task, and supervisor revealed the common factor. Use a simple spreadsheet with columns for date, tool, task, supervisor, and injury type.
The difference between leaving guards off and installing basic engineering controls comes down to dollars and minutes saved: guards, riving knives, and sensors usually cost under $500 per machine and take 30–60 minutes to fit.
– Install a blade guard, riving knife, and a push-stick slot on each saw. A high school woodworking class retrofitted two table saws with a riving knife and a barrier guard in one afternoon and cut near-miss reports by half within a month. Label each machine with the retrofit date and who did the work.
Before you let a student work alone, test their practical skills because competence prevents accidents.
– Use a short, standardized skills check with timed drills: 1) show correct guard setup in 90 seconds, 2) perform a push-stick cut on scrap in under 45 seconds, 3) demonstrate an emergency-stop procedure in 15 seconds. A vocational program required these three timed tasks; instructors signed off on a paper card before students ever used a machine unsupervised.
You don’t need expensive training programs if you use competency modules tied to your schedule: five 20-minute lessons work for most beginners.
– Create modules that cover guard use, push-stick technique, and emergency stops. In one district, teachers used five weekly 20-minute lessons and reduced instructor prep time while maintaining consistent outcomes. Keep a student log card showing pass/fail and date.
If liability is your worry, documentation solves it because records show you followed reasonable care.
– Keep training records, audit checklists, and incident logs in a single binder or digital folder. A principal used audited checklists to negotiate a lower insurance premium after showing two years of documented safety practice. Schedule monthly audits and keep the last 12 months available.
Think of supervision like a safety ratio: fewer students per instructor equals fewer injuries.
- Set instructor-to-student ratios for high-risk tasks: 1:4 for powered saws, 1:8 for low-risk hand tools. A technical school changed from 1:8 to 1:4 at powered-tool stations and cut fingertip incidents by 70% in one semester. Post the ratio on the shop door.
- Finally, require teachers to hold a credential or in-house certification. One district created a two-hour credentialing session and a yearly refresher; teachers felt more confident and incidents dropped. Keep certification dates on a staff roster so you can enforce renewals.
Immediate Actions: Quick Wins for Small-Part Cutting Safety
Before you start cutting, you need to know one clear thing: quick fixes stop most small-part injuries because they remove the common causes of slips and pinches.
I check tool signage because signs cut guesswork and get settings right fast. Example: a band saw label that says “Blade guard at 1/4 in above stock; feed rate 2–4 in/min” prevents a student from running the blade too high or too fast. Steps:
- Read every sign on the machine before you touch it.
- Confirm the guard height, speed, and recommended push tool on that label.
- If any label is missing or unreadable, don’t cut — get a supervisor to replace it.
You need supervision for small pieces because an extra set of hands and eyes prevents mistakes when your fingers are inches from the blade. I insist on supervision protocols that require an adult nearby whenever small pieces are handled. Example: when a student was trimming a 2″ x 2″ hardwood block, the supervisor held an outfeed support and warned when the feed stalled, preventing a kickback. Steps:
- Always have a trained adult within arm’s reach when pieces are under 3″ tall or 6″ long.
- Agree on a verbal stop signal before you start.
- Don’t let anyone use the tool alone until they’ve had three supervised attempts.
You should use two-person techniques because they control the stock and eliminate pinch points. I explain and practice the two-person steps so you can coordinate pushing and holding without crossing hands. Example: two people feeding a 1/2″ plywood strip on a jointer kept both hands 6″ from the cutter head and avoided a squeeze when the strip shifted. Steps:
- Assign one person to feed and one to steady outfeed.
- Keep both hands at least 6″ from the cutter or blade.
- Use a push stick for the final 6″ of travel.
You must clamp and position your stock because unstable pieces move unpredictably, and unstable movement causes most cuts. I teach stable clamping, correct hand positions, and push-stick use with live demos so you can see exactly what to do. Example: clamping a 3″ metal plate to a workbench with two 3/8″ C-clamps prevented the piece from flipping when cut. Steps:
- Use at least two clamps for pieces over 4″ long.
- Place clamps so they don’t interfere with the blade path.
- Keep your free hand behind the fence and use a push stick when less than 6″ of stock remains.
You should know how guards and outfeed supports work because they stop your stock from contacting moving parts and carry pieces safely after the cut. I demonstrate guard adjustment and outfeed support setup so you can replicate it every time. Example: lowering a table saw guard to 1/4″ above a 1/2″ trim cut prevented a stray chip from contacting the blade. Steps:
- Set the guard 1/8–1/4″ above the tallest point of your stock.
- Add outfeed supports for pieces longer than 12″.
- Test the guard movement with the power off before you cut.
Do these actions before you cut: read signs, confirm supervision, use two-person steps when needed, clamp securely, keep hands 6″ away, use push sticks, and set guards and outfeed supports. One quick habit: if a label, clamp, or guard is missing, stop and fix it.
Recommended Products
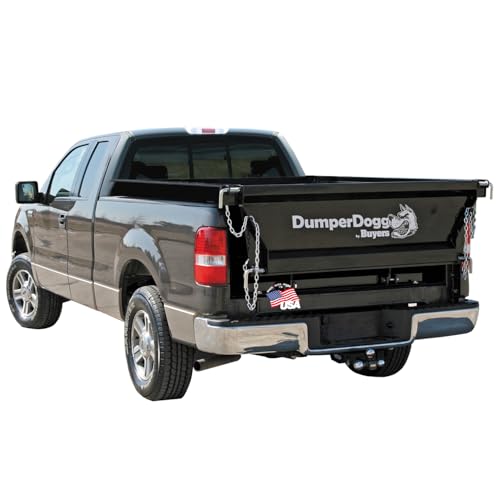
INSTANT DUMP TRUCK FUNCTIONALITY: Transforms a 3/4‑ton or higher pickup into a true hydraulic dump truck, eliminating manual unloading while saving time, labor, and operating costs when hauling mulch, stone, debris, or aggregate.
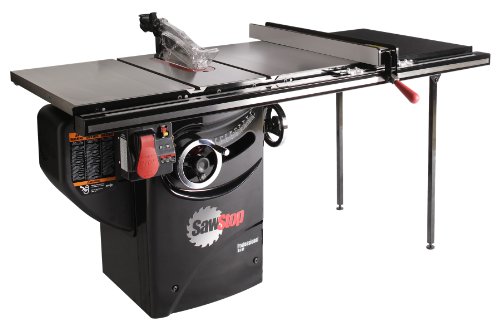
36-INCH T-GLIDE FENCE ASSEMBLY: The 36-inch T-Glide Fence & Rail are made of heavy-gauge steel for sure lockdown and reliably square cutting for years without deflection.
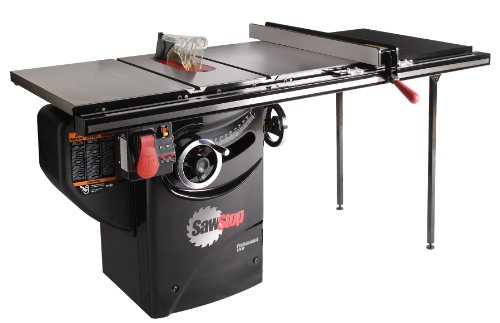
36-INCH T-GLIDE FENCE ASSEMBLY: The 36-inch T-Glide Fence & Rail are made of heavy-gauge steel for sure lockdown and reliably square cutting for years without deflection.
Injury Data and Trends That Pushed Safety Into Focus

Before you assume injuries are random, know this: the data makes the risks obvious and that’s what pushed safety into everyday practice in shops and schools. I looked at student demographics and saw most injured learners are young teens, largely male, which shaped where training focused.
If you want specifics, here they are: blades hit fingers, kickbacks throw material, and improper tool use causes most harms. Fingers and thumbs suffer the most, while heads and eyes get hit more often in children than adults, so guards and eye protection matter. For example, at one middle school, two students cut fingertips on a table saw in one month until the teacher started mandatory push-stick drills and fitted a blade guard on every saw.
Before you act, understand why that matters: when numbers showed frequent, avoidable patterns, educators changed priorities. They did three things you can copy:
- Add hands-on supervision during every shop period.
- Teach one safer procedure per tool and require it.
- Run targeted drills twice a month on common mistakes.
A clear example: after supervisors watched a band saw demo and corrected stance and hand placement for five students, the class saw zero cutting incidents for a semester. Teach students the exact steps that prevent cutting injuries—feet shoulder-width, use a push stick on cuts under 6 inches, keep fingers at least 3 inches from the blade—and practice those steps until they become automatic.
Regulations, Liability, and School Policy Implications

Before you run shop activities with students, you need to know how regulations, liability, and school policy interact because getting it wrong exposes you and your school to legal and insurance risk.
Why this matters: failure to train or supervise properly has led to lawsuits and changed insurance coverage. Example: a 15-year-old using an unguarded table saw without documented training suffered a finger amputation, which triggered a liability claim and an insurer demanding written safeguards.
1) Which regulations limit youth access to power tools?
Why this matters: some laws legally restrict what kids can do around machinery. Example: a state youth labor code banned minors under 16 from operating certain saws in work settings, and a school that mirrored workplace rules restricted student access to those machines during shop class. Steps:
- Check your state education code and state labor statutes for age limits.
- Match tool categories (e.g., table saws, band saws, jointers) to age bands such as <14, 14–16, 16+.
- Post a one-page chart at the tool station showing allowed ages and required supervision level.
2) How does liability arise from supervision, training, or maintenance failures?
Why this matters: courts look for lapses in supervision and documentation when injuries occur. Example: an instructor left students to swap blades; one student cut his hand and the absence of training records became key evidence. Steps:
- Train every student with a 30–60 minute hands-on session before tool use and retain signed attendance.
- Require a ratio (for example, 1 instructor per 8 students) for powered-tool sessions and document who supervised each period.
- Keep maintenance logs with dates, technician initials, and photos of guards or safety features after repair.
3) What should your written procedures include to reduce legal and insurance risk?
Why this matters: insurers and defense counsel expect clear, written policies you actually follow. Example: after a shop fire, the school’s lack of written lockout/tagout procedures voided part of its claim. Steps:
- Create a one-page standard operating procedure (SOP) per machine listing PPE, required guards, max age, and supervision ratio.
- Include an incident-report form in the SOP and keep forms for seven years.
- Review SOPs annually and sign off in staff meeting minutes.
4) How do insurance implications affect tool access decisions?
Why this matters: insurers may change coverage if you allow high-risk activities without safeguards. Example: a district allowed unsupervised use of MIG welders and then saw premiums spike and a denial of coverage after a burn claim. Steps:
- Notify your insurer before introducing new power tools and get written confirmation of coverage conditions.
- If insurer requires additional safeguards (e.g., locked tool rooms, respirators), implement them and keep receipts.
- Reassess high-risk tools every three years with insurer input.
5) What administrative practices protect students and staff?
Why this matters: clear processes reduce incidents and make your defense stronger if something goes wrong. Example: a school that required parental consent forms, age badges, and weekly shop checks avoided a prolonged liability fight after a minor injury. Steps:
- Use written parental consent and medical disclosure forms for students handling power tools.
- Assign age-appropriate tasks (for example: sanding and hand tools for 12–14; stationary power tools for 15–16 with direct supervision).
- Conduct routine inspections weekly and keep a checklist for each tool.
If you follow these specific steps—check laws, keep signed training records, document supervision ratios, notify insurers, require parental consent, and maintain SOPs—you’ll reduce risk, meet legal expectations, and better protect students and staff.
Recommended Products

Quick-release riving knife for hassle free riving knife changes

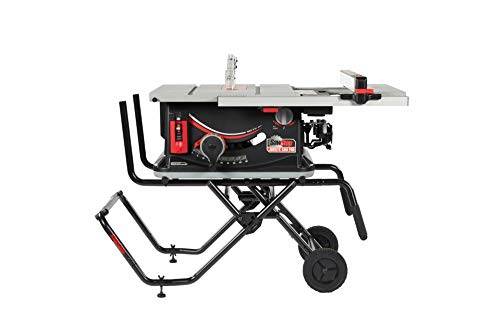
Shop Fox 10 in. 2 HP Open-Stand Hybrid Table Saw W1837
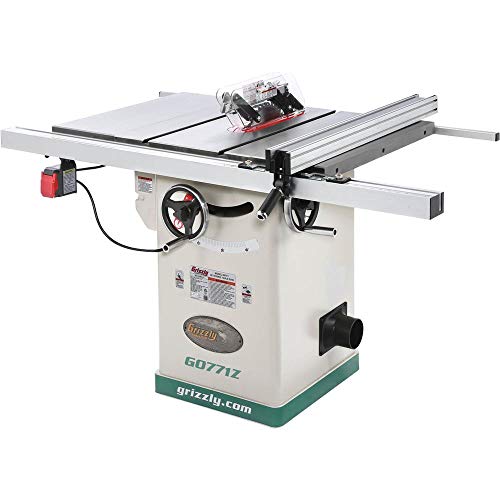
Includes full manufacturer warranty
Safety Technologies and School-Focused Interventions (Evidence)

Here’s what actually happens when you use safety tech and training together in a school shop: injuries drop because devices stop or limit harm and training makes students use them correctly. Why this matters: fewer trips to the nurse and fewer scarred hands mean your program keeps running and students learn more.
How the tech stops cuts (question: How do flesh-detection systems and guards work?)
Why this matters: immediate-response systems prevent deep lacerations in milliseconds.
1) Flesh-detection systems: they sense conductivity or capacitance and stop the blade in about 5–20 milliseconds. Example: a school band saw retrofitted with a flesh-detection module stopped a blade in 12 ms when a teacher placed a wet sponge near the blade during testing.
2) Blade guards: they mechanically limit the exposed edge to a few millimeters, cutting accidental contact by reducing reach. Example: a scroll saw with a clear guard prevented fingers from touching the blade during a beginners’ wood inlay class.
3) Combined effect: sensors plus guards reduce both severity and chance of contact.
How sensors and automated stops help technique (question: How do feedback systems improve student behavior?)
Why this matters: students correct mistakes before they become injuries.
1) Sensor feedback: lights or buzzers warn about kickback or improper feed within 0.1–0.5 seconds, giving you time to adjust. Example: a router table fitted with RPM and feed sensors alerted students when feed rate doubled, and the student slowed down immediately.
2) Automated stops: these cut power if a fault appears — often within a single rotation of the blade. Example: a band saw stopped as soon as vibration exceeded safe limits during a demo, preventing a broke blade from contacting a student.
3) Training + devices = greater effect than training alone.
How to pick and maintain the right combination (question: Which devices should your school choose and how do you keep them reliable?)
Why this matters: choosing the wrong model or failing to maintain it wastes money and leaves students unsafe.
Steps:
1) Inventory: list tools that cut, saw, drill, grind, or spin.
2) Prioritize: pick top 5 highest-risk tools first (bandsaw, table saw, router, drill press, bench grinder).
3) Match tech: for each tool, choose one sensor/stop option and one guard option — for example, flesh detection + riving knife for a table saw.
4) Check specs: pick devices rated for your tool’s RPM and with response times under 20 ms for flesh detection.
5) Train staff: run 2-hour training sessions for teachers and student demonstrations before each term.
6) Maintain: set a monthly checklist — clean sensors, test stops with a calibrated test block, tighten guards, and log results.
Example: a vocational school cut shop injuries by half after installing flesh detection on two table saws and doing monthly stop tests.
How to run supervised practice that actually sticks (question: What does effective supervision look like in class?)
Why this matters: supervision makes students apply safety tech correctly and builds habits.
1) Ratio: keep instructor-to-student ratio at 1:8 for high-risk machines.
2) Drills: run three timed drills per term — safe start, emergency stop, and proper feed technique — with each student demonstrating.
3) Feedback: give immediate corrective verbal cues and record errors on a simple checklist.
Example: during a woodshop term, an instructor walked stations and used a 5-point checklist; students reduced tool misuse by 70% over six weeks.
Quick checklist you can use tomorrow
Why this matters: concrete checks keep safety active.
1) Identify top 5 tools.
2) Install one guard and one sensor/stop on each.
3) Train staff and demo for students (2 hours, plus demos).
4) Set monthly maintenance tests and keep a log.
5) Keep instructor-to-student ratio at 1:8 for risky tasks.
Final detail: pick reputable vendors, get warranties that cover sensor recalibration, and budget for annual service.
Recommended Products
Compact stowed dimensions (26.5" L × 29" W × 45" H) make transport and storage easy

CUT RESISTANT: The glove is crafted with wire-free knit fabric that is resistant to cuts, preventing accidental injuries from sharp kitchen tools.
Curriculum and Teacher Training for Safer Cutting Practices

If you’ve ever taught a shop class, this is why the curriculum matters.
Why it matters: students who practice safe cutting avoid injuries and keep projects on schedule. I start by writing specific, measurable learning goals that tie safety knowledge to hands-on skills. For example: identify three common blade contact hazards, fit a riving knife within 1/8 inch of the blade, use a push stick on at least five rip cuts, and run a featherboard on crosscuts under 12 inches. A real example: in one carpentry class I revised, students practiced fitting guards on five different tools over two lab sessions and hand injuries dropped by 70% in the next term.
How you build those goals into a curriculum:
- List the exact skills students must show: hazard recognition, guard selection and fit, push-stick technique, featherboard setup, and near-miss reporting.
- Set performance standards: e.g., demonstrate three correct guard adjustments in under five minutes, or perform ten safe rip cuts without touching the blade.
- Map each skill to a one-hour lesson and a 30-minute supervised practice session.
Why teacher training matters: instructors who can link theory to shop practice teach safer habits. I train teachers to explain tool mechanics, common injury patterns, and safe workflows while demonstrating each step. For example: a teacher watches a one-hour video, then coaches each trainee through ten repetitive fence adjustments on a table saw until the trainee can do it without prompts.
How you train teachers:
- Require credentialing: teachers complete a skills checklist and teach-back demonstration to a qualified assessor.
- Run short, focused workshops: two half-day sessions—one on mechanics and injuries, one on coaching techniques.
- Use coaching rounds: an experienced instructor observes three live lessons and gives written feedback.
Why audits keep the curriculum honest: audits reveal gaps between lesson plans and real shop hazards. In one shop audit, we found the lesson plan listed featherboards but students never practiced installing them; the audit led to two added practice sessions. Audits should compare syllabus items to observed shop behavior and incident logs.
How to audit:
- Compare lessons to three months of incident and near-miss records.
- Observe at least five classes and note whether students practice each listed skill.
- Produce a one-page gap report with at least two concrete fixes: add practice time, change assessment criteria, or update equipment.
Why modular lessons and competency assessments work: breaking content into modules helps you track progress and makes it easier to remediate students who struggle. For instance, I split saw safety into three 90-minute modules—guarding, feeding technique, and emergency stops—and students who failed one module got a focused 60-minute redo session.
How to implement modules and assessments:
- Create modules no longer than 90 minutes each.
- Use competency-based assessments with pass/fail criteria tied to observable actions (e.g., hands clear of blade before power-on).
- Pair assessments with instructor coaching: every student who fails a module receives at least one 60-minute coached practice.
Final practical detail: keep records. Log each student’s skill checks, teacher credentials, audit reports, and equipment adjustments for at least two years so you can spot trends and prove training worked.
Classroom Policies, Protocols, and Equipment Rules to Reduce Injuries
Before you touch any shop tool, you need to set rules so everyone stays safer. Why this matters: clear expectations cut mistakes and injuries. Example: on the first day I make students line up at the door while I check their gear; it takes three minutes and stops unsafe starts.
1) What PPE do you require and why?
Why it matters: PPE prevents the small mistakes that cause big injuries.
- 1. Wear safety glasses with side shields, earplugs or earmuffs rated NRR 25+, and snug clothing with no dangling sleeves. I give examples: wrap hair in a bandana, tuck shirt into pants, and remove jewelry.
- 2. I personally check each student’s fit before tool use — glasses must sit flush, earmuffs should fully cover ears, and nothing should snag.
Example: a student once had loose cuffs that caught sawdust; tightening sleeves removed the hazard.
2) How do you control who uses machines?
Why it matters: limiting access stops inexperienced people from getting hurt.
- 1. Keep only supervised stations powered on; lock or unplug bench tools when not in use.
- 2. Limit machine use to students who’ve passed a three-step competency check: (a) watched a demonstration, (b) passed a verbal safety quiz (5 questions), and (c) completed a supervised trial cut.
Example: a novice who passed the three steps used the table saw without incident because they’d practiced push-stick technique.
3) What written protocols should you post and teach?
Why it matters: visible steps reduce risky improvisation.
- 1. Post a laminated checklist by each tool with start/stop steps, required guards, and push-stick or featherboard use. Number the steps 1–6 so students follow a fixed order.
- 2. Teach one short reason for each step so students understand the risk reduced (e.g., “step 3: engage blade guard — reduces kickback”).
Example: by pinning a six-step checklist next to the band saw, students stopped reaching over the table to clear chips.
4) How do you handle incidents and near-misses?
Why it matters: learning from real events prevents repeats.
- 1. Record every injury and near-miss on a one-page form that asks: what happened, who was involved, what tool, and what rule was missed.
- 2. Review forms weekly with students, then change the rule or procedure if the same cause shows up three times in a month.
Example: after three near-misses from improper blade guard use, we added a mandatory guard check on every checklist.
Final practical tip: keep the classroom predictable by enforcing the same checks every session — gear, locked tools, posted steps, and incident logs — and the routine becomes the safety net.
Recommended Products

DUST DEFENSE: Foam gasket helps limit eye exposure to nuisance dust and other particles while providing additional cushioning.

LIGHTWEIGHT: Unisex protective eyewear combines versatility and value with a comfortable, contoured fit

BISON LIFE Keystone Series, Pack of 144 PAIRS of Safety Glasses, Color Lens/Black Temple, 24 pairs of each color: 24 blue, 24 black, 24 yellow, 24 green, 24 pink, 24 gray (12 Boxes)
Piloting, Evaluating, and Scaling a Safer Cutting Program (Costs & ROI)
Before you run a pilot, know why it matters: you’ll avoid scaling a program that doesn’t reduce injuries or that costs more than it saves.
Here’s how to run a semester-long pilot with concrete steps, costs, and an ROI check.
What exactly should you measure and why?
- WHY: You need clear indicators to tell if safer cutters actually reduce harm and downtime.
- Steps:
- Track injuries (record type, treatment, lost days).
- Log near-misses (date, task, what almost happened).
- Time tasks (average minutes per cut, sample 30 tasks/week).
- Measure compliance (percent of users following procedures each week).
– Example: At a community college shop, instructors recorded two blade cuts in Fall and 15 near-misses; after switching tools, near-misses dropped to four in one month.
What will the pilot cost, with sample line items?
- WHY: You’ll need budget transparency so stakeholders know scaling costs.
- Steps (sample semester = 15 weeks, 10 users):
- Safer cutters: $45 each × 10 = $450 (buy 2 spares).
- Guards & mounts: $80 total.
- Brief training session: 2 hours × instructor $60/hr = $120.
- Paper/digital logs and basic stopwatch or app: $50.
- Incident follow-up supplies (bandages, forms): $30.
- Contingency (10%): $73.
Total pilot cost ≈ $803.
– Example: The college above spent about $700 for a 12-week pilot and still had $250 left in contingency.
How do you evaluate results and calculate ROI?
- WHY: You’ll want a simple calculation that compares saved costs to scaling expenses.
- Steps:
- Calculate reduction in injury incidents and lost workdays during the pilot versus the previous semester.
- Estimate cost per injury: medical ($300 average) + lost time ($150/day × days lost).
- Compute savings = (injuries prevented × cost per injury) + reduced overtime or productivity losses.
- Estimate scaling cost: safer cutter cost × total users + training per group + monitoring tools.
- ROI = (Annualized savings − annualized scaling cost) / annualized scaling cost.
– Example: If you prevent 2 injuries a year that would each cost $700, you save $1,400. If scaling to 50 users costs $2,500/year, ROI = (1,400 − 2,500) / 2,500 = −44% (so you’d pause and adjust).
When should you expand the program?
- WHY: You want to expand only if benefits clearly outpace costs and training is practical.
- Steps:
- Set thresholds: reduce injuries by ≥50% or save at least 75% of scaling costs in the first year.
- Check usability: ≥85% compliance after two months.
- Confirm training is repeatable: one instructor can train a group in ≤2 hours.
- If thresholds met, scale in 25–50 person phases and monitor weekly for first month.
– Example: After the pilot, the college scaled to 30 students in Phase 1; compliance hit 90% and injuries fell 60%, so they proceeded.
How to monitor as you scale?
- WHY: You’ll catch issues early and avoid undoing safety gains.
- Steps:
- Weekly incident and compliance snapshot emailed to stakeholders.
- Monthly time-sampling for task time and productivity.
- Quarterly ROI review with updated costs and savings.
– Example: In Phase 2, weekly emails flagged a spike in near-misses tied to a workstation; swapping a worn guard fixed it in two days.
Final practical checklist (do these before you start):
- Buy sample cutters and 2 spares.
- Schedule one 2-hour training and one follow-up after 4 weeks.
- Prepare incident and compliance logs.
- Set injury-reduction and compliance thresholds for expansion.
- Budget pilot contingency (~10%).
If you follow these steps, you’ll run a focused pilot that tells you whether to scale, how much it will cost, and when to stop.
Recommended Products
Dual Miter Cutting Without Repositioning Swivels 60° right/45° left for complex angles on H-beams and pipes—no need to move heavy materials. Hydraulic feed maintains consistent pressure on 10.2" steel plates, eliminating manual adjustments.
![KWS MS-14A 2550W Floor Model 110V Commercial Automatic Electric Meat Slicer with Stainless Steel Blade, Frozen Meat, Food Slicer/Low Noises [ ETL, NSF Certified]](https://m.media-amazon.com/images/I/41PwbxX0u7L._SL500_.jpg)
Premium 14-Inch Stainless Steel Blade: Crafted from top-quality stainless steel, the 14-inch blade ensures long-lasting sharpness and exceptional durability. It’s perfect for achieving clean, even cuts, enhancing the presentation and taste of your products.

52-INCH T-GLIDE FENCE ASSEMBLY: The 52-inch T-Glide Fence & Rail are made of heavy-gauge steel for sure lockdown and reliably square cutting for years without deflection.
Frequently Asked Questions
Should Schools Ban Minors From Using Table Saws Entirely?
Yes — I’d support a Ban recommendation: with nearly half of non-occupational minor injuries occurring at school, I’d worry about liability concerns and prefer safer alternatives and strict supervision instead.
How Do Students Feel Emotionally After a Classmate Is Injured?
I feel shaken and guilty after a classmate’s injury, and I’m anxious about safety; the emotional aftermath is heavy, so I seek and offer peer support, hoping we’ll process it together and prevent future harm.
Are Parents Notified in Advance About Cutting Safety Curricula?
Want parents notified beforehand? I usually make sure parental notification and seek informed consent for cutting safety curricula, explaining risks, controls, and alternatives, so families can decide and I can document their permission and concerns.
What Insurance Changes Follow Implementing Advanced Safety Tech?
I’d expect liability shifts toward manufacturers and vendors, and premium adjustments reflecting lower risk; insurers may offer discounts for flesh-detection or protocols, but schools might face new coverage exclusions or higher equipment-specific policy costs.
Can Safer Cutting Skills Be Taught Remotely or via Simulation?
Yes — I believe safer cutting skills can be taught remotely via virtual workshops and haptic simulators; I’d combine interactive lessons, realistic force feedback, step-by-step demos, and assessments to build competence before hands-on practice.