

You sit across from a student staring at a project brief, unable to start because the task feels like one impossible pile.
You catch yourself giving a long checklist and the student still can’t say what to do first.
Most teachers try to teach everything at once, then wonder why learners freeze or fall behind.
This piece will show a step-by-step way to split big projects into short, teachable phases so students master one or two skills at a time and teachers spot who’s stuck early.
You’ll get concrete checkpoints, simple revision routines, and tight rubrics to build confidence and measurable growth.
It’s easier than it looks.
Key Takeaways
If you’ve ever watched students scramble through a project at the last minute, this is why sequencing matters.
– Why it matters: sequencing lowers mental clutter so you can teach skills one at a time and students actually learn them. Example: in a 6-week research project, teach thesis writing in Week 1, source evaluation in Week 2, and outlining in Week 3 so students don’t juggle everything at once.
1) Plan two skills per phase.
2) Share a simple checklist for each week.
3) Ask students to submit just the week’s small product.
Result: clearer learning and fewer frantic nights.
Think of project phases like rungs on a ladder.
– Why it matters: clear phases keep students moving and reveal who needs help early. Example: use a three-phase schedule — Plan (Week 1–2), Draft (Week 3–4), Revise & Present (Week 5–6) — and mark who misses a milestone.
1) Set one milestone each week.
2) Track completion in a shared spreadsheet.
3) Intervene with a 10-minute check-in for anyone behind.
You’ll spot struggles in time to fix them.
Here’s what actually happens when you break tasks into teachable steps.
– Why it matters: gradual release and rehearsable steps build confidence and measurable skill gains. Example: model thesis creation, then do a guided practice with a familiar topic, then assign independent practice on the real topic.
1) Model one task in a 15-minute demo.
2) Coach with a 20-minute group practice.
3) Release for a 30-minute independent attempt.
Students show stronger work and more independence.
Before you assign a long project, set a visible timeline.
– Why it matters: timelines, milestones, and checkpoints make big tasks manageable and improve feedback cycles. Example: post a calendar with due dates, a rubric, and weekly feedback slots; collect drafts at midpoints for comments.
1) Publish a calendar with 6 dates max.
2) Give focused feedback within 48 hours of a checkpoint.
3) Require one revision after feedback.
That creates steady momentum and better formative data.
The difference between one-size-fits-all and equity-focused sequencing comes down to entry points.
– Why it matters: flexible entry, scaffolds, and varied assessments increase access and let students show learning in different ways. Example: offer three ways to demonstrate understanding — written report, video presentation, or annotated infographic — and provide sentence frames or graphic organizers for students who need them.
1) Create 2 scaffold levels for every phase.
2) Offer at least 3 assessment formats.
3) Allow staggered starts within the first two weeks.
Your classroom will include more voices and clearer evidence of growth.
Why Sequencing Boosts Project Learning Outcomes
If you’ve ever stared at a big project and not known where to start, this is why.
Why it matters: sequencing prevents overwhelm so your students actually learn, not just finish tasks.
I break a project into clear phases so each phase teaches one or two skills you want students to master next. For example, in a 6-week multimedia storytelling project I put weeks 1–2 on research and interviewing, week 3 on scripting, week 4 on basic filming techniques, week 5 on editing, and week 6 on peer review and polishing. That schedule keeps the cognitive load low and gives you specific targets for feedback. The result: students can focus on practicing one set of skills at a time instead of juggling everything.
Why it matters: targeted sequencing makes assessment fair and actionable.
How to do it, step-by-step:
- Decide the final product and list five core skills needed to produce it (e.g., research, citation, scripting, filming, editing).
- Group those skills into 3–6 weekly phases, each with a single focus and a 1–2 page checklist students must meet.
- Create a rubric aligned to each phase with 3 success criteria and sample work for each level.
- Schedule a checkpoint at the end of each phase where students submit evidence and get 15–20 minutes of structured feedback.
- Build in one revision cycle per phase so students can apply feedback before moving on.
Real-world example: a teacher I coached used this method for a 4-week science podcast, assigning week 1 for topic selection and interview prep, week 2 for recording a 5–7 minute draft, week 3 for editing to 3–4 minutes, and week 4 for peer review and publishing; as a result, the average rubric score rose from 60% on draft submissions to 82% on final episodes.
Why it matters: early wins build momentum and equity.
Design sequences so initial tasks are simple and quick wins — two short assignments in the first week that each take 20–30 minutes. That builds confidence and increases effort on harder tasks later. If a student struggles, you can offer a one-on-one 10-minute coaching slot after an early checkpoint, which narrows gaps without holding the whole class back.
Why it matters: ordering concepts reduces cognitive load and increases creativity.
When you order lessons from simple to complex, students use working memory for deeper reasoning instead of juggling basics. For instance, teach camera framing and audio basics before asking students to compose multi-shot scenes; then they can focus on storytelling choices rather than technical troubleshooting.
Practical pacing recommendations:
- 3–6 phases total for a semester-length project.
- Limit each phase to one primary skill and one assessment artifact.
- Offer checkpoints every 1–2 weeks with 10–20 minute feedback windows.
- Allow one revision cycle per phase lasting 2–5 days.
Real-world example: for a 10-week design sprint, a principal split the project into five 2-week sprints, each ending with a portfolio piece; teachers reported clearer grading and a 25% increase in completed high-quality work.
Final quick tips:
- Put success criteria on the assignment sheet — bold the one most critical requirement.
- Align grading to phase rubrics, not just the final product.
- Track progress with a simple checklist you and the students update together.
If you set up sequencing this way, projects become more equitable, measurable, and much more likely to produce real learning gains.
Recommended Products

🗣️ Speech and Language Enhancement: Sequence speech cards offer hours of educational fun, enhancing receptive and expressive language, social pragmatics, and sequencing abilities for children.
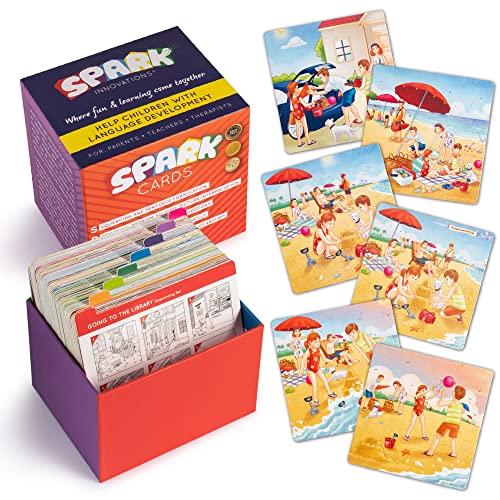
IMPROVES SKILLS Great Sequence Speech Game for children that can be used across multiple settings for hours of Educational Fun While Improving Verbal Communication, Expressive Language Skills, Receptive Language Skills, Social Pragmatic Skills and Proper Sequencing

More than two 20-week semesters covering seven different subjects
Quick-Start Checklist: Plan Your First Project Sequence

Before you start, know why this matters: the final product focuses every choice you make in the sequence.
1) What should students build?
- Pick one clear final artifact (e.g., a 5‑minute short documentary, a 20‑minute podcast episode, or a clickable app prototype).
- Example: assign a 5‑minute documentary about a local small business; students must include two interview clips, B‑roll, and a 30‑second intro title.
- Why this matters: when you pick a specific artifact you can list exactly which skills to teach: interviewing, scripting, recording, editing, or user testing.
2) How do you map skills to a timeline?
- Tell the reader why: a timeline keeps work manageable and shows progress.
- Steps:
- Draft a 6‑week timeline with weekly milestones (Week 1: research and interviews; Week 2: draft script or wireframes; Week 3: rough cut or prototype; Week 4: user testing; Week 5: revisions; Week 6: final polish and presentation).
- For each milestone, list 2–4 concrete tasks and which skill they practice.
– Example: Week 3 rough cut — students deliver a 2‑minute sequence containing at least one interview clip and one B‑roll shot.
3) How do you run the kickoff so students start aligned?
- This matters because misaligned expectations waste class time.
- Steps:
- Run a 20‑minute Kickoff session on Day 1 where you explain roles, deadlines, and grading criteria.
- Give students a one‑page rubric showing what counts as meeting expectations for each skill.
– Example: hand out a rubric where “good” interviewing requires at least three open questions and two follow‑ups.
4) What templates should you provide?
- This matters because templates speed work and reduce confusion.
- Steps:
- Provide Artifact templates: a storyboard template for video, a script template for podcast, and a prototype checklist for design.
- Include required sections and a short example filled in.
– Example: a script template with labeled timestamps, speaker names, and sound cues; include a filled 30‑second intro sample.
5) What mini‑lessons do you schedule?
- This matters because short focused lessons teach the exact techniques students need.
- Steps:
- Plan three 15‑ to 30‑minute mini‑lessons tied to milestones (e.g., interview technique, basic audio editing, and incorporating feedback).
- After each mini‑lesson, give a 10‑minute practice task students must submit that day.
– Example: after the interview lesson, students record a 3‑minute mock interview and upload the clip.
6) How do you monitor progress and revise?
- This matters so you can catch problems early and improve final quality.
- Steps:
- Schedule weekly formative checks: a quick rubric check, a one‑paragraph update, and a 5‑minute peer review.
- Build in two iterative revision cycles with concrete goals (e.g., reduce background noise by 50% or increase prototype usability score to 80%).
– Example: during Week 4 testing, each student team runs a 10‑minute user test with three volunteers and records task completion times.
7) How do you build reflection into the sequence?
- This matters because reflection turns experience into learning.
- Steps:
- Require a one‑page reflection after each major milestone describing one success, one failure, and one next step.
- Grade reflections for completeness, not perfection.
– Example: a student writes they improved mic technique after feedback and will change placement for the next shoot.
Final practical checklist you can print:
- Final artifact and required elements defined.
- 6‑week timeline with weekly milestones.
- 20‑minute Kickoff + one‑page rubric.
- Templates with one filled example each.
- Three mini‑lessons with same‑day practice tasks.
- Weekly formative checks and two revision cycles.
- One‑page reflections after major milestones.
- Concrete acceptance criteria like “5‑minute documentary, 2 interviews, <3 audio dropouts.”
If you follow these steps, your first project sequence will run predictably and finish on time.
Design Project Sequences to Scaffold Skills and Equity

If you’ve ever tried to teach a multi-week project, this is why sequencing matters: it keeps students from getting stuck and helps you spot who needs extra support.
Why it matters: clear sequences let students practice small skills before the big task so everyone’s ready. Example: in a 6-week environmental design project, students first sketch, then test a model, then write a proposal, so you can give targeted feedback at each stage.
1) Map learning targets across the sequence
- Step 1: List 6–8 specific targets (e.g., “create a labeled prototype sketch,” “run a user test with three peers,” “write a 300-word evidence-based claim”).
- Step 2: Put each target on a weekly calendar so each week has 1–2 focused goals.
- Step 3: Share the calendar with students and parents on day one.
Why it matters: breaking complex work into rehearsable steps builds confidence and skill. Example: for a civic action project, week 2 is only about interviewing two community members and recording 5-minute audio clips.
2) Break tasks into rehearsable steps, then practice them
- Step 1: Identify the hard moves (e.g., citing sources, prototype iteration, data interpretation).
- Step 2: Design short rehearsals: 10–15 minute mini-practices you can run in class three times.
- Step 3: Use rubrics that show exactly how you’ll score each rehearsal.
Why it matters: rehearsals reduce anxiety and give you evidence of growth. Example: have students practice a 60-second elevator pitch three times before the final presentation; record one pitch for peer review.
3) Embed Differentiated Scaffolding so support matches readiness
- Step 1: Create three scaffold levels: A (guided), B (prompted), C (independent).
- Step 2: For each learning target, write one success criterion and one tiered prompt per level.
- Step 3: Track which level each student uses and lower scaffolds as they master tasks.
Why it matters: tiered scaffolds prevent boredom and frustration and make expectations clear. Example: for research, Level A gives a source list and citation template, Level B gives source types, Level C asks students to find sources independently.
4) Use gradual release from guided practice to independent work
- Step 1: Start with I-do: model the skill (5–10 minutes).
- Step 2: Move to We-do: coach students through similar tasks (15–20 minutes).
- Step 3: Finish with You-do: assign the independent product and set clear deadlines.
Why it matters: gradual release builds autonomy and measurable skill gains. Example: you model a data chart in week 3, students produce a chart with prompts in week 4, and submit their own analysis in week 5.
5) Run Equity Audits before and after units
- Step 1: Check materials for bias: review 10 representative resources for cultural relevance and language level.
- Step 2: Observe participation: log who speaks and who leads in 3 class sessions.
- Step 3: After the unit, compare submissions by group and adjust next time.
Why it matters: audits reveal access gaps so you can fix them quickly. Example: audit finds texts at a 12th-grade reading level; you replace or adapt three texts to 8th–9th grade readability and add visuals.
6) Adjust entry points, groupings, and assessments when gaps appear
- Step 1: Offer multiple entry tasks (visual, oral, written) for the same target.
- Step 2: Form groups with mixed strengths and rotate roles every week.
- Step 3: Provide alternate assessments (e.g., oral reflection instead of a written essay).
Why it matters: flexible entry and assessments let every student demonstrate learning. Example: a student with language challenges submits a video explanation of their prototype instead of a paper.
End result: you get a coherent project sequence where skills build logically and access widens through targeted scaffolds and periodic equity checks.
Recommended Products

IMPROVES SKILLS Great BASIC Sequence Speech Therapy Toys for children that can be used across multiple settings for hours of Educational Fun While Improving Verbal Communication, Expressive Language Skills, Receptive Language Skills, Social Pragmatic Skills and Proper Sequencing

116 PHOTO SEQUENCING CARDS with current, realistic, and clear sequential photographic images

144 illustrated cards (3¼” x 4¼”) that depict a three-step sequence of 48 different action verbs
Five Practical Sequencing Patterns for PBL (Short and Long Projects)

If you’ve ever run a short class project that went off the rails, this will help.
Rapid Cycle: What is it and when should you use it?
Why it matters: Rapid feedback keeps students focused and improves work quickly.
How to run it:
- Choose a single clear deliverable for the week (e.g., a 3-minute video pitch).
- Break the week into three sprints: Plan (day 1), Build (days 2–3), Revise + Share (days 4–5).
- Use two quick assessments: a peer checklist after the Build sprint and a teacher rubric after Revise.
Real example: In a one-week entrepreneurship challenge, student teams storyboard by noon, film interviews on day 2, edit on day 3, get peer checklists, then present to a panel on day 5.
Tip: Keep each sprint under 48 hours.
Scaffolded Build: How do you support novices so they succeed?
Why it matters: Gradual skill increases prevent overwhelm and build confidence.
How to run it:
- Identify three core skills students need (e.g., research, prototyping, presenting).
- Design three milestones that add one new skill each week or session.
- Require a short artifact at each milestone (one-page research brief; low-fidelity prototype; 5-slide pitch).
Real example: For a community garden project, students first map site conditions, then build a small soil test box, then present a phased planting plan to the principal.
Tip: Give a checklist and model for the first milestone.
Iterative Deepen: How does repetition lead to mastery over time?
Why it matters: Repeating a core task with expanding scope builds real expertise.
How to run it:
- Pick a core task to repeat (e.g., data analysis).
- Run 3–5 cycles where each cycle adds complexity: cycle 1 uses 1 dataset, cycle 2 compares 2 datasets, cycle 3 integrates local interviews.
- After each cycle, students refine the same artifact and document one change they made.
Real example: Over six weeks students analyze traffic data, then add weather data, then interview commuters and update their proposed safety fix.
Tip: Require a one-paragraph reflection after each cycle describing the specific improvement.
Parallel Tracks: When should teams work separately and then combine?
Why it matters: Dividing work lets teams leverage strengths and finish larger projects faster.
How to run it:
- Split the project into 3–5 components that can be worked on in parallel (research, design, testing, outreach).
- Assign small teams to each component with a clear interface document describing inputs/outputs.
- Schedule two integration checkpoints where teams demo and reconcile mismatches.
Real example: For a school recycling system, one team audits waste, another prototypes bins, a third builds student outreach posters, then they test the full system together.
Tip: Use a shared timeline with exact dates for handoffs.
Culminating Showcase: How do you structure public sharing so it matters?
Why it matters: Public presentation raises stakes and clarifies purpose for students.
How to run it:
- Plan the audience and format early (e.g., community leaders, 20-minute poster fair).
- Build three prep steps: draft presentation, rehearsal with peer feedback, final dress rehearsal with tech checks.
- Create simple scoring for the event that ties back to project goals and a short public Q&A slot.
Real example: Students designing a neighborhood safety app present prototypes to local council, answer questions for 10 minutes, and collect contact info for pilots.
Tip: Film the showcase for students who need to review feedback later.
You can mix these patterns depending on time and student experience: use Rapid Cycle inside a Scaffolded Build, or finish any long project with a Culminating Showcase. Pick one pattern to start, run a pilot, and adjust one element (timing, checkpoints, or assessment) next time.
AI Tools and Data Workflows to Monitor Progress and Adapt
If you’ve ever tracked a class project and felt lost, this is why.
Why it matters: you want to spot who’s stuck quickly so projects don’t derail. I use platforms that show real-time analytics—live progress bars, time-on-task per student, and heat maps of obstacles—so I can tell within a day who needs help. For example, in a 10-student design sprint I saw two students’ time-on-task drop by 60% on day three and intervened with a one-on-one check, which got them back on schedule.
How to set up a simple data workflow (do these 4 steps):
- Choose tools and metrics: pick one LMS or project tracker and track 5 things only—task completion, time-on-task, peer feedback count, milestone dates, and self-ratings on a 1–5 scale.
- Standardize collection: require students to submit timestamps and a 100–200 word reflection at each milestone; teachers log interventions with a short tag.
- Clean and sync nightly: run an automated script or built-in export that removes duplicates, fills missing timestamps with the last known status, and pushes results to a shared dashboard by 7 a.m. daily.
- Review cadence: check dashboards three times a week and compare the same five metrics across weeks for patterns.
Why nudges matter: targeted prompts help students re-engage before they fall behind. I program three adaptive nudges based on simple triggers—if task completion is 2+ days late, send a scaffolded checklist; if peer feedback count is zero after a draft, prompt a peer-review swap; if self-rating drops by 2 points, offer a short reteach video. For example, when a student got the checklist, they completed the next task within 24 hours.
Privacy and teacher judgment (your safeguards):
- Limit data fields to what you need and mask names in aggregate views.
- Make indicators transparent: show students how each metric is calculated with one example row.
- Schedule weekly audits: a teacher reviews flagged adaptations before they go live so you keep human judgment in the loop.
Quick example workflow in action: a middle school team misses a milestone on Tuesday; the dashboard flags low time-on-task and zero peer feedback; the system sends the checklist nudge to students and a teacher alert; the teacher reviews the flagged students that afternoon and schedules two 10-minute check-ins for Wednesday morning.
Final practical tips:
- Start with those five metrics only.
- Automate nightly syncing so you don’t work weekends.
- Keep adaptations small: one-line prompts or a 3-step checklist.
Recommended Products

UNBOX AND START LEARNING: Unbox Dash, your robot friend designed for kids aged 6-11, who is ready to provide a STEM advantage right out of the box. Enjoy fun and engaging...
Training Teachers to Plan, Iterate, and Scale Sequences
If you’ve ever started a unit and realized the pacing felt chaotic, this will help.
Why it matters: sequencing lets you control learning so students meet outcomes on time.
1) How do you teach sequence planning as a habit?
– Steps:
- Map three things on one page: outcomes, daily tasks, and assessments.
- Block time: spend 45 minutes creating a 2-week sequence, then 15 minutes tweaking it each week.
- Use a visible tool: a single Google Sheet with one row per lesson and columns for objective, activity, assessment, and exit ticket.
– Example: During onboarding, show a 6th-grade writing sequence with three lessons per week, one mini-lesson, two write/revise sessions, and a Friday formative quiz. It makes pacing visible.
Why it matters: new teachers need templates and low-stakes practice to build confidence.
2) How do you onboard teachers so they actually use the routine?
– Steps:
- Give a template, a filled example, and a 30-minute guided practice session.
- Require one completed 2-week sequence by week two of onboarding.
- Score those sequences with three simple metrics: alignment (yes/no), student-active minutes (number), and an exit-ticket plan (present/absent).
– Example: Pair a new hire with a mentor for a 30-minute walkthrough of their first sequence; the mentor marks the three metrics and models one revision.
Why it matters: coaching turns plans into better lessons through iteration.
3) How do you coach iteratively without overwhelming teachers?
– Steps:
- Observe one lesson every two weeks.
- Give one focused feedback point tied to the sequence (pacing, questioning, or assessment use).
- Ask the teacher to try that one change and collect one piece of student work on it.
– Example: An observer notes that students run out of time during partner work; after the observation, the teacher shortens the activity by three minutes and adds a 60-second timer on the board.
Why it matters: piloting short sequences creates evidence for scaling.
4) How do teams pilot and revise sequences?
– Steps:
- Pilot a 2–3 week sequence in one classroom.
- Collect three samples of student work: pre-assessment, mid-sequence check, and exit ticket.
- Meet for 30 minutes to compare work and agree on two specific revisions.
– Example: A team pilots a math unit on ratios in Ms. Rivera’s class, reviews student work showing weak word-problem skills, and changes two lessons to include daily word-problem modeling.
Why it matters: systems keep improvements consistent across grades.
5) What systems sustain sequencing work?
– Steps:
- Maintain a shared calendar with sequence windows and review meetings.
- Store finalized sequences and student artifacts in a shared drive folder organized by quarter and grade.
- Run a 45-minute review cycle every six weeks to update sequences based on evidence.
– Example: The district calendar shows Quarter 2 review week (Nov 15–19); teams upload artifacts by Nov 12 so the review meeting focuses on evidence rather than searching for documents.
Final practical tip: start small—pick one unit, follow the steps above, and track three metrics for six weeks.
Frequently Asked Questions
How Do Project Sequences Affect Students With IEPS or 504 Plans?
Project sequences help and hinder IEP accommodations and 504 differentiation simultaneously: I adapt pacing, scaffolds, and checkpoints to support access, yet I must balance complexity and time so students aren’t overwhelmed while still progressing toward goals.
What Budget or Resources Are Needed to Sustain Long-Term Sequencing?
You’ll need recurring budgets for staff training, software licenses, and hardware, plus time allocations, coaching, and PD materials; I’d budget for annual license renewals, substitute coverage, and continuous coaching to sustain long-term sequencing.
How Do Sequences Align With Standardized Testing Requirements?
Right off the bat: I keep one foot in both camps by using alignment strategies that map sequences to standards, embedding testing accommodations and practice, so students meet benchmarks without sacrificing deeper project skills.
Can Parents Be Involved in Designing or Assessing Sequences?
Yes — I invite parents to join through Parent workshops and Assessment co design sessions; I’ll guide collaborative sequence planning, share rubrics and tools, and incorporate family insights to strengthen relevance, equity, and student motivation.
What Intellectual Property Issues Arise From Student-Created Project Artifacts?
70% higher completion rates show AI’s impact: I worry copyright ownership of student-created artifacts can be murky, so I recommend clear agreements and licensing options (open, school-held, or student-retained) to prevent future disputes.