
You just spent money on a board only to discover it’s cupped, full of hidden sapwood, or too thin for the parts you planned. Now you’re staring at a project stalled because the stock won’t yield the matching grain and thickness you need. Most woodworkers assume buying surfaced, pre‑cut boards saves time and waste, but that mindset throws away usable material and control.
This piece shows you how to mill and dry rough lumber at home so you can resaw wide boards into multiple usable pieces, plane to the exact thickness you need, and match grain across parts for cleaner joints. You’ll also get practical, safety‑first steps for shop setup, dust control, and drying to keep parts stable. It’s easier than it sounds.
Key Takeaways
Here’s what actually happens when you choose rough lumber over store-bought boards: you get more control, save money, and learn skills that make your finished pieces better.
Why does choosing rough lumber let you match grain and get bookmatched panels?
- Why it matters: matching grain gives you visually seamless surfaces that look like shop-grade furniture.
- How to do it:
- Inspect flitches before buying and pick adjacent slices for matching grain.
- Label faces and ends with chalk or a pencil number so orientation stays consistent.
- Resaw into pairs and surface them the same way.
– Example: buy a 6/4 oak flitch, resaw into two 3/4″ slabs, and flip one to create a bookmatched table top.
Why does resawing and veneering reduce your material costs?
- Why it matters: you can turn an expensive 4/4 or thicker board into multiple usable faces, stretching one board into several surfaces.
- How to do it:
- Measure final thickness needs (e.g., 3/16″ veneer, 3/4″ substrate) before cutting.
- Resaw on a bandsaw with a 3/8″ kerf blade; expect about 1/4″ loss to sawdust per cut.
- Glue veneer to a stable substrate like Baltic birch or MDF using PVA and a caul or vacuum press.
– Example: a single 8/4 walnut board resawn into four 2/4 faces can veneer two furniture tops at a fraction of the cost of thick walnut slabs.
Why can hobbyists mill at home with portable equipment?
- Why it matters: milling at home lets you get species and sizes local stores don’t stock and avoid supply shortages.
- How to do it:
- Rent or buy a portable chainsaw mill or small bandsaw mill; a decent chainsaw mill setup runs $400–$1,200 used.
- Pick a log, set a straight reference board, and take 1–2″ passes until you create a flat slab.
- Move slabs to your shop, sticker and stack them for drying.
– Example: a maple tree in your yard milled into 2″ slabs produces wide boards you won’t find in a big-box store.
Why does learning rough workflows improve your craftsmanship?
- Why it matters: doing the prep work teaches you to control flatness, thickness, and moisture, which prevents warping later.
- How to do it:
- Flatten one face with a jointer or hand planes until you see consistent pencil lines across the face.
- Thickness to final size with a planer or handplanes, leaving 1–2% extra for final sanding.
- Measure moisture content with a meter; aim for 6–8% for indoor furniture in most climates.
– Example: flattening and planing a poplar board yourself eliminated a 1/8″ cup and saved you hours fixing joints later.
Why do DIY milling and handling setups save money and add flexibility?
- Why it matters: you avoid markups on preprocessed lumber and can customize drying and storage.
- How to do it:
- Build a basic dust collection with a shop vac and a cyclone for about $150.
- Create a stickered drying rack with 3/4″ stickers every 12″ and a fan for air circulation.
- Add rolling stands or skids to move heavy slabs safely.
– Example: a home-built drying rack holding ten 8′ slabs prevents congestion in your shop and saves $200–$500 versus professional kiln services.
Final practical tip: start small — mill one log or resaw a single board, stick the pieces properly, and track moisture; you’ll learn faster than you think.
Quick Checklist: Can You Mill Rough Lumber at Home?
Before you mill rough lumber at home, you need to know whether it’s practical and safe for your setup.
Why it matters: milling creates big dust clouds, loud noise, and heavy boards you’ll handle. Start by checking your space and ventilation: you want at least a 20-foot by 15-foot clear area for most small bandsaw or portable sawmill jobs so you can walk around logs and offload boards, and provide at least one wall-mounted 1,000 CFM dust collector or a rated shop vac hooked to the blade guard for extraction. Example: I set up in a 24’×18′ detached garage and installed a 1,200 CFM collector with a 4″ hose to the bandsaw cabinet; that cleared sawdust fast and kept the air breathable.
Why it matters: the mill must match your power supply so it runs reliably and safely. Verify power and equipment ratings by checking the nameplate on the sawmill or bandsaw and your breaker panel; many portable sawmills draw 15–30 amps at 120–240V, while full-size electric bandsaws often need 30+ amps on 240V. Example: when I moved a 3 hp bandsaw into my workshop, I confirmed the shop had a 240V, 30A dedicated circuit and upgraded the wiring to avoid tripping breakers.
Why it matters: safety gear and machine safeguards reduce the chance of severe injury. Review safety considerations in this order: 1) ensure guards and emergency stop switches are installed and function; 2) wear PPE—N95 or P100 respirator, eye protection, hearing protection rated at 30+ dB, and cut-resistant gloves; 3) use push sticks, jigs, and hold-downs to keep hands away from blades. Example: on one job I stopped immediately after testing the e-stop and found a loose guard; tightening it took five minutes and removed a major hazard.
Why it matters: moving logs and boards without a plan causes strains and accidents. Plan material handling by listing steps and matching gear: 1) measure board or log weight (an 8-foot oak slab can weigh 200–300 pounds); 2) use a two-person lift for anything over 50 pounds or employ a log jack, engine hoist, or roller cradle; 3) build or buy a set of sawhorses and a rolling cart to move cut boards. Example: I saved my back by using a small engine hoist to lift a 500-pound log onto my portable mill.
Why it matters: local rules can shut down your setup or cost fines. Check permit requirements and zoning rules: call your city building department and ask about outdoor milling, noise ordinances, and air-quality rules; some towns require a simple temporary use permit for mobile sawmills. Example: a neighbor called code enforcement after a noisy day, and a $75 permit cleared the issue.
Why it matters: drying and time affect whether your milled wood will be usable. Budget time and wood drying needs by estimating that most green hardwoods need 6–12 months of air drying per inch of thickness (for example, a 2″ slab usually needs 12–24 months) or plan to stack with stickers and weigh the cost of a dehumidification kiln if you need faster results. Example: I stickered 1″ poplar boards for a year and tracked moisture to reach 8–10% before finishing.
If you cover those points—space and ventilation, power, safety, handling, permits, and drying—you’ll know whether milling at home is a good, safe project for you.
Why Hobbyists Are Choosing Rough‑Sawn Workflows
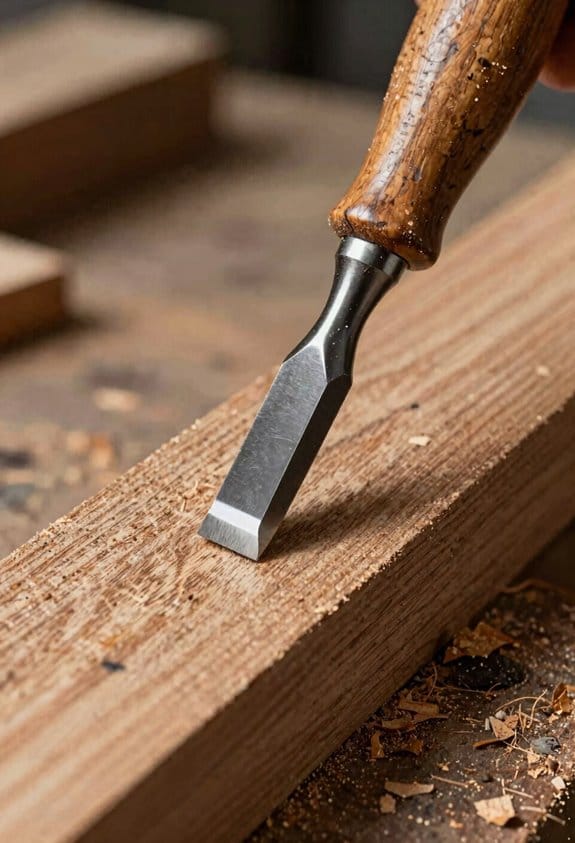
Here’s what actually happens when you pick a rough‑sawn workflow: you get more control over the board’s final look and cost because the lumber arrives thicker with its full bark‑side geometry, so you decide how much to mill away. That matters because you can match grain and thickness precisely, cut less waste, and stretch specialty or reclaimed boards farther.
Why that matters in practice: a 1‑in. thick rough board surfaced to 3/4‑in. yields more usable face than a pre‑surfaced 3/4‑in. board, because you can remove cup and twist while keeping thickness. Example: if you buy a 6/4 walnut board that’s 1.25 in. and you need 3/4 in. blanks, you can mill both faces and still have clean, matched grain for two panels instead of one.
Before you mill, understand these concrete steps so you avoid mistakes. Why this matters: skipping a drying plan or random cuts ruins boards and wastes money.
- Measure moisture with a pin or pinless meter; target 8–10% for indoor furniture.
- Air‑dry stacked with stickers 1 in. thick, sticker every 12–16 in., for roughly 1 year per inch of thickness.
- Plane or join one face and one edge, then resaw or rip to final width, then surface to thickness.
Real example: I air‑dried a 6/4 oak rack with 12 in. stickers, checked every month, and hit 9% after 14 months.
Rough workflows lower energy use and save reclaimed trees, but you need predictable milling steps. Why this matters: a plan turns potential savings into actual yield.
- Start by marking high and low spots and note which face has the best grain.
- Remove twist by surfacing the best face first, then joint one straight edge.
- Rip to width, then surface to final thickness in 1/16‑in. passes to avoid tearout.
Example: when matching bookmatched panels, I surface both faces to the same reference so the matching stays aligned.
You can offset higher per‑board prices because you extract more usable material. Why this matters: more yield equals lower per‑project cost.
- Calculate board yield: multiply usable face area after milling by project needs.
- Compare cost per usable square foot to surfaced boards before buying.
Example: a reclaimed board costing 1.5× the surfaced price produced 1.8× the usable area, so the effective cost dropped.
Practical tips to avoid rookie errors. Why this matters: small habits save time and wood.
- Always sticker and weight boards when drying to reduce cupping.
- Use a straightedge and winding sticks before resawing to decide the best reference face.
- Label faces and ends with chalk so you keep track through milling.
For instance, labeling allowed me to keep a matched pair oriented after a month of drying.
You’ll get predictable results and lower long‑term costs if you plan drying time, basic flattening, and your rip/milling sequence before you buy.
Recommended Products

✔️ NON-DAMAGING METER WITH UNPARALLELED ACCURACY: Say goodbye to uncertainty. Achieve pinpoint accuracy and know the precise moisture level of your wood. Orion’s non-damaging pinless sensor helps you preserve your craftsmanship. Obtain accurate moisture readings without leaving a single mark on your projects.

INFRARED GUIDED MEASUREMENT: Pinpoint hidden issues instantly with the 80x60 Lepton thermal imager that visually guides you to the exact location of potential moisture. Stop guessing where the water is and start seeing temperature patterns that reveal leaks and insulation gaps behind walls and ceilings.

PREVENT MOISTURE PROBLEMS: The Tramex Skipper 5, the updated Skipper Plus, is a non-destructive analog marine moisture meter for instant measuring of moisture hidden in wood & GRP boat hulls, decks & coach roofs, including sandwich or cored structures
Projects That Work Best With Rough Lumber
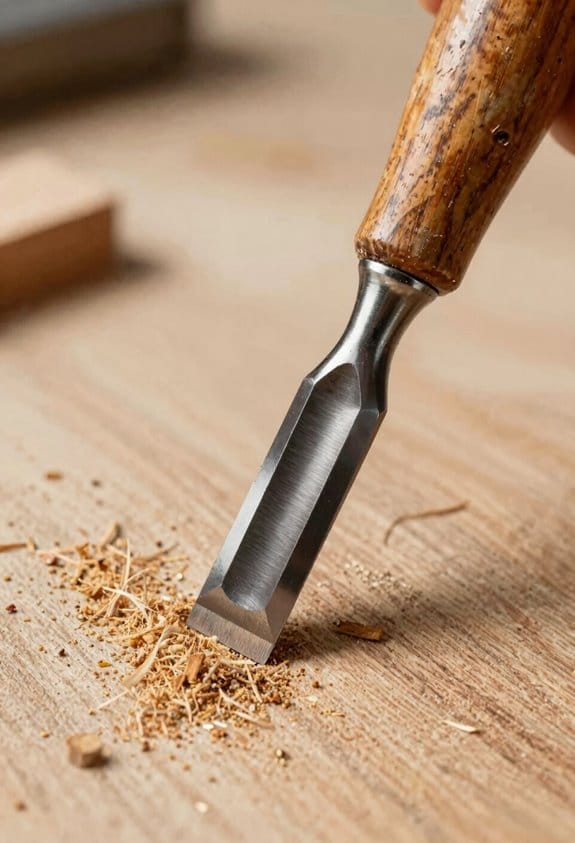
Here’s what actually happens when you choose a project for rough lumber: you get more control over thickness, grain matching and stability, which changes how you mill and assemble the piece.
Why this matters: using rough stock lets you dimension parts and match grain across boards so joints stay tight as the wood moves. Example: I built a 2″ thick maple butcher block by resawing and gluing book-matched boards to get a continuous grain path across the top.
1) Which projects gain most from extra thickness and matched grain?
Why it matters: thicker stock gives you room to dimension parts and cut clean joinery. Example: a workbench top I made started as 4/4 rough oak; I laminated three boards to reach 2″ thickness and routed a 3/4″ thick apron pocket for a tight fit.
Steps:
- Mill one face flat on a jointer.
- rip to width on the table saw.
- plane to final thickness, leaving 1/16″ for finish.
- lay out grain for glue-up before clamping.
2) When should you pick outdoor furniture from rough lumber?
Why it matters: milling rot-resistant species and cutting precise tolerances makes outdoor joints seal and move predictably. Example: I built an outdoor bench from 8/4 ipe, milling off the sapwood and cutting 1/8″ gaps for seasonal movement.
Steps:
- Choose species like ipe, cedar or cypress.
- Mill faces and edges so mating surfaces sit flush.
- Leave 1/8″–3/16″ clearance where boards expand.
- Use stainless fasteners and exterior glue.
3) What small projects benefit from resawing for veneers?
Why it matters: resawing produces matching veneers and lets you get more usable surface from wide stock. Example: I resawed a walnut board to make two 1/8″ mirror-image veneers for a cabinet door.
Steps:
- Mark the centerline of the board.
- Resaw on a bandsaw to within 1/16″.
- flatten each veneer on a sled or with a planer sled.
- Glue onto a stable substrate with epoxy or PVA.
4) How do you plan drying, cut order and joinery to minimize waste?
Why it matters: a plan reduces waste, prevents cupping, and gives predictable movement. Example: for a dining top I stickered boards for a week after milling, then cut ends square and glued in sequence to balance stresses.
Steps:
- Weigh and record initial moisture content.
- sticker boards for 3–7 days after rough milling (longer in humid climates).
- cut parts in this order: ends, long edges, final thickness.
- choose joinery (breadboard ends, biscuits) to control movement.
A few practical numbers to remember: plane to within 1/16″ of final thickness before glue-up, leave 1/8″ expansion gaps outdoors, and resaw veneers to about 1/8″ thickness if you need stable, matchable faces.
Recommended Products

CAPACITY– Top holds up to 1,600 pounds (over a half ton). Ideal for supporting equipment, tools, and materials.

WORKBENCH - AFF's Workbench with 1,300 lb capacity features a spacious work surface and an under bench storage shelf, giving ample room for tools and parts. Ideal for garages, machine shops, assembly plants, and industrial manufacturing facilities

Global Industrial’s Adjustable Height Workbenches create a versatile and adaptable industrial workspace
Tools to Mill Rough Lumber at Home
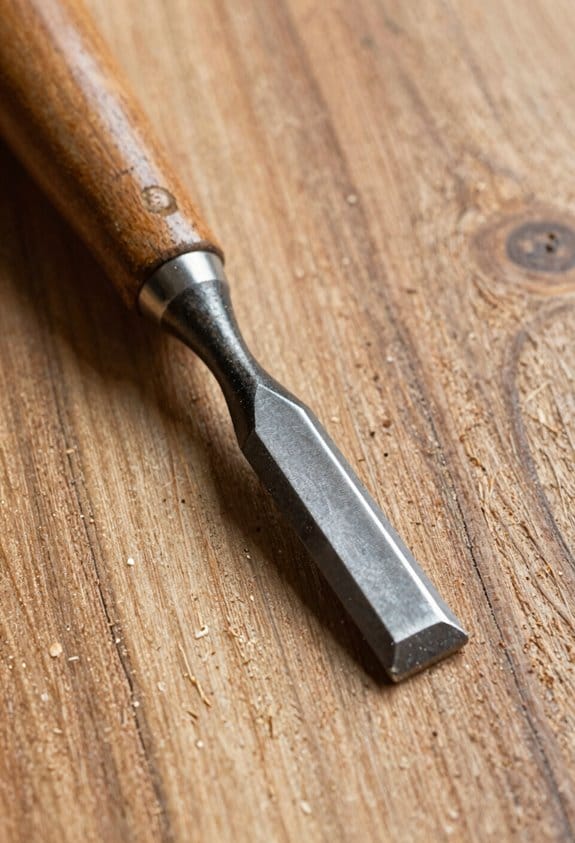
Before you mill rough lumber, know this matters because accurate stock saves time and prevents wasted boards. Think of flattening and thicknessing like prepping a canvas before you paint.
1) What machines do you need to flatten and thickness lumber?
- Use a jointer to make one face flat, then a benchtop planer to make the opposite face parallel. Example: flatten the cupped face with the jointer using 1–2 light passes (about 1/32″ per pass), then run the board through the planer set to remove 1/16″ until the opposite face is parallel. This method gives you boards that stay flat when you cut parts.
- Real-world example: I flattened a 8/4 oak slab by taking two 1/32″ passes on the jointer, then planed down 1/8″ total in two passes on the planer to reach 1″ thickness.
2) How do you handle cutting logs and resawing boards?
- Use a portable bandsaw to cut logs and resaw irregular boards because the blade follows curves and prevents tearout; set the blade speed to about 3,000–4,000 SFM for hardwoods and 1,500–2,500 SFM for softwoods. Example: when resawing a 6″ wide walnut, clamp a sled and run the portable bandsaw slowly to keep the kerf steady, making 1/8″ passes if the blade stalls.
- A table saw is faster for ripping once your stock is flat; use a quality fence and a 40–60 tooth ripping blade for clean results.
3) What other tools make milling easier and safer?
- Add a router for clean edges and profile work, and a drill press for precise, repeatable holes. Example: use a router with a 1/2″ compression bit at 18,000 RPM to cleanly trim a glued-up panel edge.
- Invest in sharp blades, push sticks, featherboards, and a dust collection system rated for at least 700 CFM at the tool to keep your shop safe and accurate.
4) How should you set up workflow and safety?
- Step 1: Flatten one face on the jointer. Step 2: Plane the opposite face parallel. Step 3: True an edge on the jointer. Step 4: Rip to width on the table saw with a good fence. Step 5: Resaw or thickness further with the bandsaw if needed. These steps cut handling time and reduce mistakes.
- Real-world example: I prepped a batch of ten 1×6 clear pine boards by following those five steps; each board took about 6 minutes to go from rough to ready.
Keep your tools sharp, use push devices, and run dust collection every cut.
Recommended Products

Helical cutterhead with 125 four-sided carbide knife inserts for smoother, quieter cutting

Sanding motor speed: 1,725 RPM
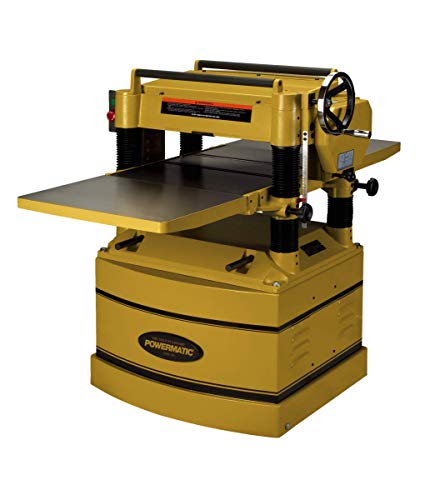
5HP HELICAL CUTTERHEAD - Powerful 5 HP motor with 100 four-sided carbide knife inserts creates smoother, quieter cutting
Moisture: Air‑Dry vs Kiln – Timing Tips
Before you decide whether to air‑dry or kiln‑dry a board, you need to know how moisture affects wood and why your milling choices change drying time.
Why it matters: drying wrong makes boards cup, warp, or crack. I once air‑dried a 2‑inch walnut slab outdoors and it split along the end grain after six months because I skipped end‑sealing — the split was a clear, avoidable failure.
1) How to check initial moisture and why
Why it matters: starting moisture predicts movement as wood stabilizes.
– Step 1: measure with a calibrated moisture meter.
Example: a freshly cut maple log often reads 30–60% MC; furniture stock should be 6–8% for indoor use.
– Step 2: record species, thickness, and grain direction next to the reading.
Example: an 8/4 (2″) oak board with tangential grain at 35% will dry much slower than a 4/4 (1″) board at the same MC.
Tip: if your meter reads above 20%, expect several months of drying for 1″ thickness.
2) Air‑drying: steps and timing
Why it matters: doing air‑drying properly minimizes checking and long wait times.
Example: I air‑dried red oak 1″ boards in a covered shed, stacked for 14 months to reach 8% MC.
Steps:
- Seal ends with wax or anchorseal immediately after milling.
- Stack with stickers every 12–18 inches, aligned vertically.
- Elevate stack off the ground on pallets or concrete blocks.
- Shelter from direct rain and sun, but allow cross‑ventilation (screens or louvered walls work).
Timing guideline: allow roughly one year per inch of thickness as a baseline — so 1″ ≈ 12 months, 2″ ≈ 24 months — adjust with species and local humidity.
Monitor: check a few sample boards with your meter every 2–3 months. If readings stall, improve airflow or reduce stack height.
3) Kiln‑drying: when and how to use it
Why it matters: kiln drying gets boards to target MC faster while reducing surface checks when done right.
Example: to get 8/4 cherry from 40% to 8% I used a conservative schedule: start at 95°F/95% RH for 48 hours, then ramp to 120°F/85% RH over 4 days, holding until core and surface converge.
Steps:
- Use a kiln ramp schedule matched to species and thickness — get one from a kiln manufacturer or wood‑science table.
- Begin with gentle conditions: low temperature and high humidity to equalize moisture.
- Gradually increase temperature and lower humidity as core moisture approaches surface moisture.
- Avoid rapid temperature rises or low humidity early; that causes surface checking.
Monitor and finish: measure core and surface MC; stop when readings are within 2–3% of your target. Drying times vary — a controlled schedule can take days to weeks instead of months.
4) Ongoing monitoring and finishing
Why it matters: you only know a board is ready when readings stop changing.
Example: I let a test board sit 2 weeks after kiln release and retested; its MC shifted 1%, so I delayed final planing for 5 more days.
Steps:
- Remeasure every board type after the main drying cycle.
- Plane, joint, and finish when boards hold target MC ±2%.
- Store finished boards in the environment where they’ll be used for a week to acclimate.
Final practical rules
Why it matters: simple rules prevent big mistakes.
- If you can’t monitor MC, air‑dry thicker material longer.
- If you need speed, use a kiln with a proven ramp schedule and measure often.
- Always seal ends on freshly milled lumber.
That’s the practical path: measure, choose a method, follow specific steps, and confirm with repeat measurements.
Simple Step‑By‑Step: Rough Lumber to Ready Boards
Before you start flattening rough lumber, know why this matters: a flat, straight board stays glued, sands evenly, and looks right in a finished project.
1) Inspect and mark high spots.
- Why: uneven boards waste time at the planer and can wreck joinery.
- Steps:
- Lay the board on a flat workbench and sight down its length to find twist and bow.
- Use winding sticks (two straight 12″ sticks) about 6–8 feet apart to spot twist. If the sticks show different heights, mark the high corner with a pencil.
- Tap the board’s edges; soft, dark areas often mean bark pockets — mark them.
– Example: On a 10-foot Douglas fir beam, using winding sticks showed a clockwise twist; I marked the high corner every 2 feet so I could flatten it from that side.
If you’ve ever stacked lumber and found some boards stayed damp while others dried, this is why sticker spacing matters.
2) Stickering for even drying.
- Why: consistent airflow prevents cupping and mold.
- Steps:
- Use 3/4″ stickers, straight and dry.
- Place stickers every 12–18 inches along the length, aligned vertically so stacks transfer load evenly.
- Keep end sticks flush with board edges and weight the top with a 50–100 lb flat weight for small stacks.
– Example: I dried a stack of 8 twelve-foot planks with stickers at 16″ and a 100 lb plate on top; after three weeks they dried flat with minimal cupping.
You don’t need a jointer if you can make one edge true by hand.
3) Getting one straight edge without a jointer.
- Why: a single true edge is the reference for ripping and glue-ups.
- Steps:
- Clamp a straightedge (a known-straight 6–8 foot aluminum or seasoned board) to the board, leaving the high side exposed.
- Use a high-angle bench plane or a router with a straightedge jig to remove material until the plane rides flat along the straightedge.
- Check with a square; the edge should be within 1/32″ over the board’s length before ripping.
– Example: On a 7-foot pine plank, I clamped an aluminum straightedge and removed 1/16″ of high grain in two passes with a plane, then ripped to width.
Before you feed thin or cupped pieces through a planer, make a sled.
4) Planer sled and thicknessing.
- Why: it prevents the board from rocking and blowing out.
- Steps:
- Build a sled: two flat runners and a sacrificial face sized 2–3″ taller than the board; screw the board to the face with countersunk screws outside the cutter path.
- Take light passes: set the planer for 1/32″–1/16″ per pass.
- After each pass, unclamp and check for flatness; rotate the board if needed to remove high spots evenly.
– Example: I planed an 8-foot walnut board on a sled, taking 1/32″ per pass and needed six passes to reach 3/4″ thickness evenly.
The fastest way to get boards ready is to work in this order: true edge, rip to width, flatten/thickness, crosscut to length.
5) Final ripping, jointing, and crosscutting.
- Why: doing these in the wrong order adds work and risks tear-out.
- Steps:
- Rip to width using the true edge against the fence; leave a few thousandths oversize for final trimming.
- Face-joint with a belt sander or a hand plane if needed to get consistent face grain.
- Crosscut to length on a miter saw or crosscut sled; check square with a combination square and adjust until within 1/32″.
– Example: For a cabinet door set, I ripped multiple stiles to width, planed faces flat, then crosscut all rails to the final length on a crosscut sled to keep every piece identical.
A few practical finishing tips.
- Sand last for final feel, starting with 120 grit and finishing at 180–220 on softwoods and 220–320 on hardwoods.
- Use consistent glue-up clamps and check squareness before glue sets; clamp pressure around 100–150 psi across a joint usually works for hardwood.
- For boards that will be edge-joined, leave them 1/16″ longer than final length until after jointing to allow for final trimming.
If you follow these steps in order and use the measurements given, you’ll save time and avoid common mistakes on your first few boards.
Recommended Products

HEAVY DUTY FIBERGLASS MATERIAL - The heavy duty filament tape product is made of premium fiberglass material, which is extremely strong and durable, resistant to scratches...
Finishes That Work on Rough‑Milled Boards
If you’ve ever picked up a rough‑milled board and tried to finish it, this is why.
Why it matters: rough boards soak up finish unevenly, so your choice and prep determine the final look and durability.
Oil finishes: why and how
Why it matters: oils penetrate the open grain and hide sanding mistakes better than surface finishes.
Example: a rough walnut shelf with gouges still looks warm and consistent after oiling.
How to do it:
- Clean the board: brush off chips, then wipe with a tack cloth.
- Apply tung or boiled linseed oil with a lint‑free rag, working along the grain.
- Wait 20–30 minutes, then wipe off excess.
- Repeat 2–4 coats, waiting 12–24 hours between coats.
Tip: sand only if a raised fiber appears after the first coat — use 120–150 grit by hand.
Use this when you want a natural, forgiving finish.
Grain enhancers and tannin stains: when to use them
Why it matters: these products make figuring and grain pop, which can turn rough lumber into a dramatic feature.
Example: applying a tannin‑rich stain to figured oak brings out cathedral patterns on a console top.
How to do it:
- Test on a scrap from the same board; blot and wipe to gauge color.
- Apply stain with a foam brush or cloth, working in small 2–3 foot sections.
- Wipe off after 1–3 minutes depending on desired intensity.
- Let dry 24 hours before sealing.
Use this sparingly to avoid blotchiness.
Water‑based clears: pros, cons, and technique
Why it matters: they dry fast and smell less, but they can raise the grain on rough boards.
Example: a maple cutting board finished with a water‑based clear needed light sanding between coats to stay smooth.
How to do it:
- Apply a thin coat with a high‑quality synthetic brush or foam pad.
- Wait manufacturer’s time (usually 1–2 hours).
- Lightly sand with 220 grit if the grain raises, then tack off dust.
- Apply 2–4 coats, thinning the first coat 10–20% to improve penetration.
Use this when you need faster turnaround and lower odor.
Wipe‑on polyurethane for extra protection
Why it matters: wipe‑on poly builds a durable, low‑buildup finish without heavy brushing or bubbles.
Example: a rough pine tabletop gets multiple thin wipe‑on poly coats and survives kids’ cups and keys.
How to do it:
- Thin the first coat 10–20% with mineral spirits (oil‑based poly) or water (water‑based poly) to help penetrate.
- Wipe on with a lint‑free rag in long strokes, covering 2–3 square feet at a time.
- Let cure 8–24 hours, then sand very lightly with 320–400 grit.
- Repeat for 3–6 coats, depending on expected wear.
Let it cure fully (often several days) before heavy use.
Quick checklist for finishing rough‑milled boards
Why it matters: a simple routine prevents common problems like blotching and rough topcoats.
Example: finishing a reclaimed fir mantel using this checklist avoided blotches and produced an even sheen.
Checklist:
- Brush and vacuum dust.
- Test product on scrap.
- Thin first coats for better penetration.
- Wait full drying times.
- Lightly sand between coats with high grit.
- Let final coat cure before use.
If you want, tell me which species you’re finishing and what look and durability you want, and I’ll recommend the exact product and a step‑by‑step schedule.
Troubleshooting Warping, Checking, and Fit
If you’ve ever picked up a rough‑milled board and wondered why it doesn’t stay flat, this will clear it up.
Why this matters: fixing the visible warp without finding the cause means it will come back.
I first look for how the grain and moisture are behaving. Check the growth rings: if they curve toward the face, that side will tend to cup; if the rings run unevenly along the length, twist is more likely. Hold the board up to light and feel for soft, damp spots to find moisture pockets. Example: a 1×8 white oak board left upright in a damp garage for a week will often cup toward the outside face because the outer fibers stayed wetter—so you’ll see a concave face within days.
How I prevent and reduce warping:
- Acclimate the boards flat in the room where they’ll be used for at least 72 hours if the humidity difference is moderate, or a week if it’s large.
- Sticker them every 12 inches with 3/8″ sticks so air flows evenly from top to bottom.
- Re‑mill high spots with a planer or jointer; don’t force the board into place. If you remove 1/16″ from the high side you’ll often eliminate a visible cup without losing much material.
Why end‑checks matter: splits at the ends let moisture escape fast and cause stress that ruins long boards.
How to reduce end‑checks:
- Apply an end grain sealer (wax or commercial sealer) within 30 minutes of cutting.
- If you can’t seal, dry the board gradually: stack flat with stickers and let it sit for 1–2 weeks before final milling.
Example: a freshly cut 8-foot pine beam sealed at the ends with paraffin held together through the first month of drying, while the unsealed one split 6–8 inches from each end.
Why fit matters: a tight, square joint gives strength and keeps glue lines invisible.
How I get joints to fit:
- Square your mating faces first using a reference face and a straight edge; clamp the board and plane until the reference face is flat to within 0.005″ over 12″.
- Square an edge against that face so your joint faces align perfectly.
- Test‑fit before glue; press surfaces together and feel for gaps with your fingers.
- If you see small gaps (under 1/32″), plane the mating edge or add a 1/32″ shim and re‑planish the joint; for gaps over 1/16″, recut the joint or replace the piece.
Example: when gluing a tabletop, I clamp two boards dry, mark the gaps with a pencil on the seam, then take a single pass with a shooting board to remove 0.010–0.020″ where needed.
Final tip: if you follow these checks and steps you’ll stop fighting the wood and start working with it.
Best Species & Grades When Rough Stock Is Limited
Here’s what actually happens when you pick wood with limited rough stock: you either run out of width, waste too much, or end up with a finish you didn’t expect — and that ruins timelines and budgets.
Which species and grade should you reach for when rough stock is tight depends on what you need: stability, appearance, or minimal waste. Why this matters: choosing the wrong combination can force extra glue-ups, extra mill work, or a finished piece that looks off. Example: building a painted shaker cabinet door from narrow rough boards and ending up with visible knots that require patching — that costs you hours and material.
If you want painted or budget parts, go with these concrete choices.
- Pick Alder Select or Poplar Clear.
- Both machine easily and let you purchase narrower boards without wasting much.
- Buy boards 6–8% wider than your final dimension to allow for planing and jointing.
Example: for a 14″ drawer front, buy 14.75″–15″ rough width to finish at 14″.
If appearance for stain is the priority, choose these specific options.
- Use Cherry FAS or Walnut #1 for visible, stained work.
- Expect fewer wide boards; plan to edge-glue or use book-matching.
- Order lengths with a 10–15% overage in width so you can select clear faces.
Example: a 24″x48″ table top may need two 12″ boards instead of one 24″ board.
If strength and toughness matter, follow this practical rule.
- Select Ash #2 or Hickory Prime.
- These give you high bending strength while accepting some grading defects like small knots or sap streaks you can trim around.
- Lay out parts to place defects in hidden areas or cut them out and stagger joints.
Example: for a chair rail needing a 1″ x 2″ billet, buy 1.25″ x 2.25″ rough to allow defect removal.
If you need a middle ground for stability and consistent faces, pick these.
- Choose Birch FG or Maple Select.
- They balance stability and good faces, useful when rough lengths and widths are limited.
- Use them for tabletops and cabinet faces where you can glue narrow staves.
Example: a 36″ cabinet face can be made from three 12″ boards instead of a single wide board.
How to decide, step by step.
- Identify the visible surfaces and mark which must be knot-free.
- Measure final dimensions and add 6–15% width overage based on species (6% for poplar/alder, 10–15% for cherry/walnut).
- Reserve stronger species (ash/hickory) for load-bearing parts and accept lower grade for hidden pieces.
- Lay out boards before cutting to place defects in hidden edges or waste.
Example: when making a door, step 1 found one clear face, step 2 added 12% width, step 3 used ash for rails, and step 4 saved the clear face for the panel.
Quick buying cheat-sheet you can use at the yard.
- Painted/budget: Alder Select or Poplar Clear — buy +6–8% width.
- Stained/visible: Cherry FAS or Walnut #1 — buy +10–15% width.
- Strength/load: Ash #2 or Hickory Prime — accept small defects.
- Stable/consistent faces: Birch FG or Maple Select — good for staves.
One final practical tip: when rough stock is limited, always photograph each board and mark grain direction and defects with blue tape before cutting. This prevents surprises and saves at least one replacement purchase.
Where to Source Rough Lumber and Spot Shortages
Before you start shopping, know why a quick supplier map saves you time and money: it prevents wasted trips and surprise costs. I lay out a list of local mills, hardwood dealers, reclaimed-wood yards, and big-box stores before I go anywhere. Example: I called three mills within 50 miles and saved a weekend drive when one confirmed they had rough-sawn 8/4 white oak in stock.
1) Where should you check first?
Why it matters: local mills often have the best prices and you can inspect lumber in person.
Steps:
- Call small sawmills within a 60-mile radius. Ask for species, thickness (4/4, 6/4, 8/4), and whether boards are air-dried or kiln-dried.
- Visit hardwood dealers and ask to see grade samples (FAS, Select). Take a tape measure and sample photos.
- Go to reclaimed-wood yards for beams and wide boards; bring a truck or trailer.
Real example: I found a pallet of 10-foot reclaimed heart pine beams at a salvage yard, beat the listed price by 20% by paying cash.
If mills are low, check salvage yards.
Why it matters: reclaimed stock often costs less when new hardwoods are scarce. I’ve scored 8/4 oak boards here for 30–40% less than new milled boards. Example: a garage roof demo produced 2″ thick heart pine I used for table legs.
2) When should you use online sources?
Why it matters: online vendors fill gaps but can add shipping and delays.
Steps:
- Compare freight by weight and distance — ask sellers for a freight estimate.
- Check tariffs and import origin on exotic species; add 10–20% to costs for unexpected fees.
- Look for sellers offering staged deliveries or pallet quotes to reduce per-board freight.
Real example: When local 8/4 walnut was out, an online specialty dealer shipped a 500-lb pallet for $250 freight; total cost was still 15% higher than local, but it arrived in two weeks.
3) How do you spot shortages early?
Why it matters: spotting trends lets you lock in material before prices jump.
Steps:
- Monitor framing lumber prices weekly — a steady rise often signals wider hardwood pressure.
- Call mills monthly to confirm kiln schedules and stock levels; note any shutdowns.
- Watch local classifieds and contractor forums for beams and offcuts being sold.
Real example: I noticed a mill posting reduced hours and called; they held a small lot of 8/4 maple for me when I offered a $100 deposit.
4) How to keep projects moving when supply is tight?
Why it matters: planning around availability keeps deadlines realistic.
Steps:
- Keep a short supplier list of 3 reliable sources: local mill, salvage yard, online dealer.
- Order critical-length boards first and accept wider thickness ranges (e.g., 6/4 instead of 8/4) when acceptable; plan joinery accordingly.
- Build a 10–15% material buffer for waste and defects.
Real example: I shifted a tabletop design to use matched 6/4 boards plus a 1/4″ veneered edge, avoiding a six-week wait for 8/4.
A few final practical tips: call ahead before hauling, photograph defects on-site, and keep receipts and cut lists so you only buy what you need.
Recommended Products

INCREASED CUT DEPTH & CAPACITY - Extend your circular saw's cut beyond its 2-1/2" reach with Prazi's American Quality Beam Cutter Attachment. Increase your cut reach and depth from 2-1/2" to 12" . On a 45 degree cut, capacity is 8" . Prazi gives your saw more POWER, PRECISION, and CUTTING DEPTH for heavy-duty projects.

A premier hardwood, both in the U.S. and abroad. Widely used in architectural woodworking and furniture manufacture. Highly figured, even more textured than Red Oak and somewhat easier to work. Often, rift-sawn for a straight or "comb" grain effect, or quarter-sawn for a straight grain with highly prominent "flake.".

Frequently Asked Questions
How Does Rough‑Milled Workflow Impact Workshop Air Quality and Dust Control?
Like a sandstorm in a jar, I find rough‑milled work raises airborne particulate loads, so I prioritize ventilation strategies, dust collectors, sealed tools, and PPE to protect lungs and keep my workshop clean and safe.
Can Beginners Safely Sharpen and Maintain Jointer/Planer Blades at Home?
Yes — I believe beginners can safely sharpen and maintain jointer/planer blades at home with beginner sharpening guides, proper PPE, a steady jig, and respect for blade safety, but I’d recommend supervised practice first.
What Are Cost Comparisons Between Rough Lumber and Dimensioned Boards Over Time?
Rough lumber’s upfront cost is lower, but I find lifecycle expenses—material sourcing, tooling, time and waste—mean market trends can flip value; over time dimensioned boards often cost less once you factor labor and equipment.
How Do Rough Workflows Affect Resale Value of Made Pieces?
I think rough workflows can boost resale value when market perception favors authenticity and custom provenance; buyers pay premiums for visible handwork and unique grain, but mass-market shoppers may prefer uniform, lower-cost dimensioned pieces.
Are There Local Regulations for Milling Lumber at Home?
Yes — I check local zoning compliance and noise ordinances before milling at home; I also verify permits, setbacks, and waste disposal rules, and I’ll follow hours and equipment restrictions to avoid fines and neighbor complaints.