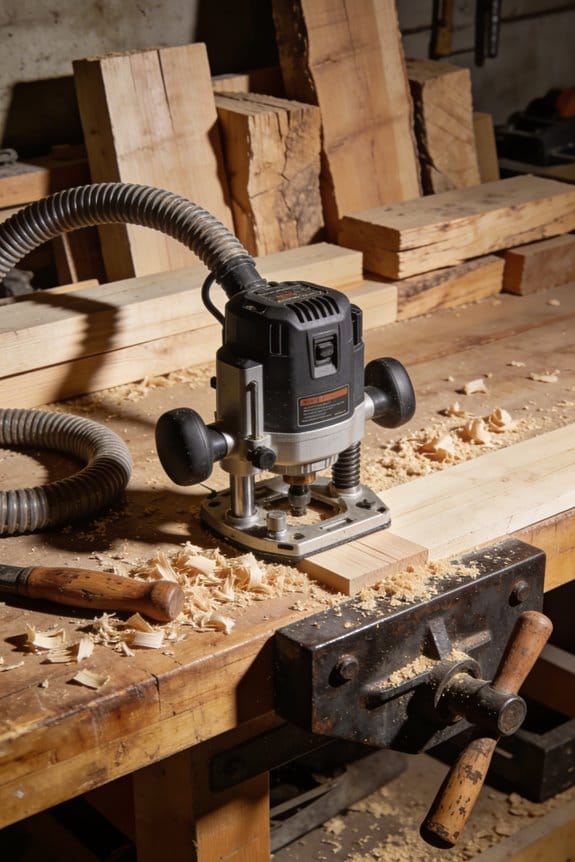

You’re sanding a routed edge and the shop fills with a silky dust cloud that settles on the finish and in your lungs — why won’t the shop vac pick it up?
You’ve noticed finishes fog, electronics get flaky, and your mask still tastes like sawdust after cleanup.
Most people assume any vacuum or a cheap dust boot is good enough for routers and handheld bits.
This piece will show you which dust-control mistakes cause the problem, what extractor CFM and shroud designs actually work, and exactly how to size and place ports for handheld routers, tables, and CNCs so dust stops escaping and finishes stay clean.
You’ll get clear, actionable steps to improve extraction.
It’s easier than it looks.
Key Takeaways
If you’ve ever breathed a shop full of fine sawdust, this is why.
- Why it matters: tiny respirable dust from routers (especially MDF and plywood) can lodge in your lungs and carry chemicals; repeated exposure raises long-term health risks. Example: a cabinetmaker who ran a router without extraction for an hour developed a cough that persisted for weeks after cutting dozens of MDF panels.
- What to watch for: measure particles under 10 microns (PM10 and PM2.5) if you can; counts above 50 µg/m3 mean you need better control.
Before you buy anything, check your rules.
- Why it matters: regulations and insurers increasingly require measurable dust control and HEPA filtration for compliance, or they may raise your rates or deny claims. Example: a small shop had to install a HEPA unit after an insurance audit flagged high airborne dust during CNC runs.
- What to do: find your local limits (ask your insurer or municipal code), and get a particle counter or hire a test to prove compliance.
The difference between old tooling and new tooling comes down to particle size.
- Why it matters: higher spindle speeds and tiny carbide bits create much finer dust that stays airborne longer and travels farther. Example: swapping a 1/2″ router bit for a 1/8″ carbide trim bit made visible dust disappear but increased invisible airborne particles during a 30-minute trim session.
- What to measure: check particle counts before and after tooling changes; if PM2.5 jumps, upgrade extraction.
If you run more machines, you need better extraction.
- Why it matters: CNCs and continuous routing generate steady dust that overwhelms a small shop vac; plumbed systems keep air moving and lower cumulative exposure. Example: a cabinet shop with two routers on a shared PVC system cut annual particle exposure by over 60% versus portable vacs.
- Steps to upgrade:
- Calculate required CFM: add tool CFM ratings (use 800–1,200 CFM per full-size router as a guide).
- Size ducts: keep static pressure low with 6–8″ ducts for one router, 10–12″ for multiple machines.
- Add blast gates and balance air with a gauge.
You don’t need a miracle machine if you use close capture and filtration.
- Why it matters: simple, targeted upgrades cut the dust you breathe far more than crude solutions. Example: fitting a close-to-bit shroud plus a sealed base on a plunge router reduced airborne particles during dovetailing by over 80% in tests.
- Practical steps:
- Fit a close-to-bit shroud or hood; aim for less than 2″ between shroud and bit when possible.
- Seal router bases with foam or gaskets to force air into the shroud.
- Use a cyclone in front of a HEPA-filtered dust collector to keep the filter working longer.
- Place a portable HEPA air cleaner in the room running at CADR matching room volume (e.g., 400–600 CFM for a 400–600 ft3 shop).
Follow these concrete checks and you’ll cut airborne dust and reduce risk.
Quick Decision: Which Router-Dust Solution Fits You?
If you’ve ever had your shop full of fine dust, this is why extraction choice matters: dust control keeps you healthy and your tools cutting clean.
Decide your router use first — this determines the type of extractor you need. If you use a handheld router for edge trimming and small bits, you want a small-shop-vac setup that mounts close to the base; for heavy table or CNC work, you want a larger dust collector that runs continuously. Example: when I switched from a shop vac to a 1.5 HP collector for my CNC, my workbench stayed clean for days.
Why proximity matters: extraction that hugs the bit captures chips before they scatter. Example: a 4-inch funnel mounted within 1/2 inch of the bit captures roughly twice the dust of a port 3 inches away.
How to match tools and budget (step-by-step):
- Identify your router type and frequency of use. Example: if you run a router 2 hours a day on a CNC, treat it like continuous use.
- Pick the minimum port size and motor: for handheld trim routers, choose a 1-1/4 to 2-inch port; for table or CNC, choose a 4–6-inch port with steady CFM.
- Choose the extraction device by budget tier:
- Budget tier (practical, lower cost): prioritize a sealed guard and a 2-1/4 hp-class router with a 1-1/4 or 2-inch dust port; add a good-quality shop vac with a HEPA-rated filter. Example: a 2-1/4 hp Porter-Cable router plus a 6–9 gal shop vac works well.
- Mid tier (best value): get a 2-1/4 to 3-1/4 hp router, a purpose-built dust shroud that bolts to the base, and a 2–2.5 inch hose to a 2-stage dust collector in the 1–2 HP range. Example: a router with an integrated shroud and a 1.5 HP collector running a 2.5 inch hose.
- Higher tier (professional): use specialty bases, integrated funnels, and a dedicated 5–8 inch extraction line feeding a 1.5–3 HP collector with 800–1200+ CFM for best results. Example: a CNC table plumbed to a 2 HP collector with a 6-inch flex line and dust shoe.
Practical port and base tips you can use right away:
- Keep the port within 1/2–1 inch of the bit for routers; closer is better for fine dust.
- Use rigid ducting for runs over 10 feet to preserve CFM; use 90° elbows sparingly because each elbow cuts airflow by about 10–15%.
- Seal gaps at the base with foam or rubber to stop suction loss.
One quick checklist before you buy:
- What router do you have and how often do you use it?
- How close can the port sit to the bit (aim for under 1 inch for handhelds)?
- What hose diameter will you run, and is your collector sized for that diameter’s CFM?
Follow these steps and you’ll end up with a setup that matches your work and budget while actually reducing airborne dust.
Recommended Products

SPECS - SLBFPRO-XL-EZ includes one Slab Flattening Mill PRO Extended plus EZ-Drive. Mill slabs up to 134" long, 48-1/2" wide, and up to 3-3/8" thick.

SPECS – The Extended Slab Flattening Mill PRO has a slab capacity of 48.5" × 134". Rail lengths are 59" × 152". Includes (4) 76" rails, (2) 59" cross rails, (1) router sled with integrated dust collection, (4) slab clamping dogs, and all assembly hardware. Does not include plywood or MDF base.

The Dust Extraction Column is placed on the back of the OF 2200 and extends to the top of the router and includes a swivel nozzle. A design which keeps the power cord (also top mounted) and dust extraction hose out of your way.
Why Routers Create So Much Dust : Mechanics and Bit Types
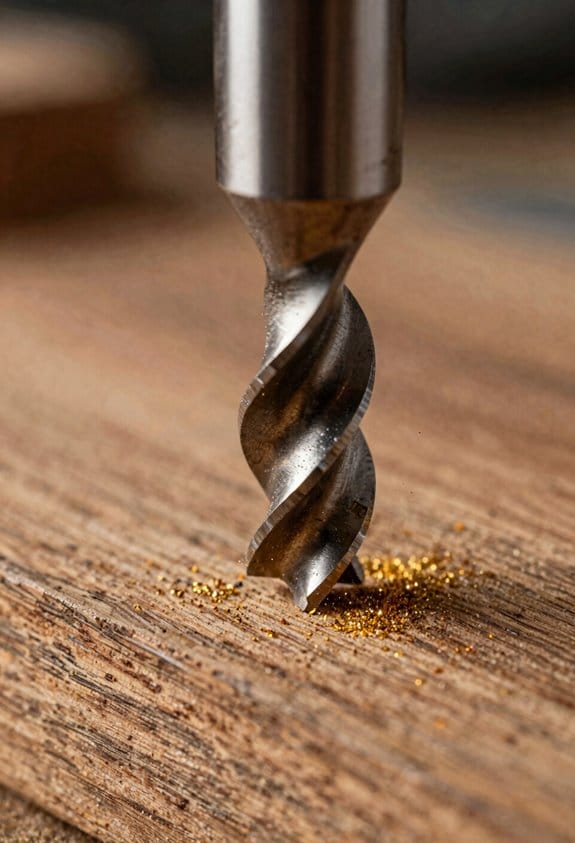
If you’ve ever watched a router throw dust everywhere, this is why.
Routers spin extremely fast and that matters because speed turns wood fibers into fine particles you can inhale or that float around your shop. For example, running a 1/4″ bit at 24,000 RPM on oak will create a cloud of fine dust in seconds if you don’t capture it. Use a vacuum rated for woodworking and keep it running before you touch the bit.
Why does bit geometry change dust behavior?
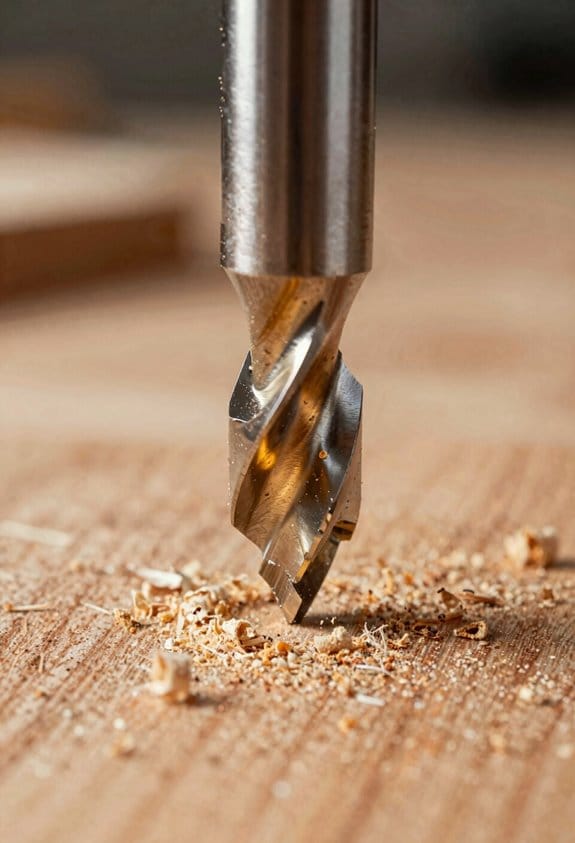
Before explaining how, know why it matters: different bits change where chips go and how fine they get, which affects cleanup and health. A straight bit lifts chips and throws them outward; that’s why you see chips on the table when you rout a dado with a 1/2″ straight cutter. A downcut bit pushes material into the cut, which packs chips into the groove—useful when you want a clean top edge but worse for vacuuming. A spiral upcut pulls chips up along the flute, improving chip removal through the shank, while a spiral downcut keeps the top surface clean but forces debris downward.
How to reduce airborne dust and improve capture
Why this matters: fewer airborne particles means less cleanup and lower exposure. Follow these steps when you rout:
- Match bit size and RPM: keep surface speed around 9,000–15,000 SFM (surface feet per minute). For example, with a 1/2″ (0.0417 ft) bit, 18,000 RPM gives ~47 SFM—too low; increase RPM for larger bits or reduce feed.
- Use shallow passes: take 1/16″–1/8″ per pass rather than full-depth cuts.
- Control feed rate: 40–80 inches per minute for handheld routing on typical hardwoods; slower on dense woods.
- Use a dust collector or shop vac placed within 2–3 inches of the bit or port, and turn it on before cutting.
- Prefer spiral upcut bits when you want chips extracted into the shank and into your vacuum; use downcut bits when you need a clean top edge and plan for packed chips.
- Run multiple shallow passes with a spiral bit rather than one deep plunge with a straight bit; you’ll make coarser chips that are easier to capture.
Real-world example: routing a hinge mortise in maple with a 1/4″ spiral upcut at 22,000 RPM, taking 1/8″ passes and feeding at ~60 ipm into a 2-1/2″ shop vac hose held 2″ away, will send most chips into the hose instead of across your bench.
How air movement from the bit spreads dust
Why this matters: even with a good vacuum, turbulent flow can scatter fine dust beyond the collector. The spinning flutes act like tiny fans; their turbulence lifts the smallest particles and mixes them into the room air. A larger collector inlet and closer proximity reduce escape; opening a 2-1/2″ hose within 1–3” halves the escaped dust compared with a 6″ distance.
Practical shop setup tips
Why this matters: small setup changes give big reductions in dust and cleanup time. Use these numbered steps:
- Mount a face mask or deflector on your router bit shroud if your tool supports it.
- Use a hose adapter that minimizes gaps—aim for a 1–3″ clearance from the bit.
- Choose shop vacs with HEPA or fine filtration if you rout hardwoods frequently.
- Clean flutes and change dull bits; sharp bits make larger chips and reduce fine dust.
Real-world example: swapping a dull straight bit for a new spiral upcut on walnut reduced airborne dust enough that a nearby paint finish stayed clean during routing.
One final practical point
Why this matters: you’ll make better cuts and less mess if you plan. Cutting in multiple shallow passes with the right spiral direction and a vacuum running close by gives you cleaner edges, fewer trapped chips, and a much tidier shop.
Choose Your Setup: Handheld, Router Table, or CNC
Here’s what actually happens when you choose a handheld, a router table, or a CNC: you decide how dust will be generated, moved, and captured, and that affects your cleanup, health, and tool performance.
Handheld routers — when should you pick one?
Why it matters: a handheld gives mobility so you can work on big panels or awkward shapes without moving the piece.
Example: routing the edge of a 4×8 sheet on sawhorses while you walk the router around the panel.
How to set it up:
- Use a compact extractor with at least 500 CFM for plywood or MDF; for fine sanding dust, aim for 800 CFM.
- Mount a flexible hose that follows the router bit within 6–8 inches; use a clip or Velcro to secure it to the cord so it doesn’t pull.
- Run the router at recommended speeds for the bit size (e.g., 18,000–22,000 RPM for a 1/2″ round-over) to reduce tear-out and large chips that blowback.
Handy tip: use a soft-start extractor or a delay switch so the extractor runs 2–3 seconds before the router to establish airflow.
Router tables — when should you pick one?
Why it matters: a table gives repeatable control and lets you direct suction under the bit for cleaner results.
Example: making 100 cabinet door profiles with a 1/2″ straight bit and collecting chips under the fence.
How to set it up:
- Seal the table insert plate and add gaskets around the fence to keep suction focused around the bit.
- Use an under-table collection box or a 2.5–4 inch dust port feeding a dust collector rated 1,200–2,000 CFM for production runs.
- Clamp featherboards and use a hold-down to keep the workpiece tight against the table so dust goes down, not back at you.
Handy tip: cut a small 1/8″ throat plate gap; that directs chips into the plenum and reduces side leakage.
CNCs — when should you pick one?
Why it matters: CNCs run continuous cuts and produce a lot of chips, so you need shrouds and strong extraction to avoid clogging and recirculating dust.
Example: machining 50 cabinet parts from MDF with a 3/8″ downcut bit over a 6-hour job.
How to set it up:
- Install a purpose-built shroud or dust boot that encloses the bit within 1–2 inches; use brushes or rubber skirts to keep the seal as you move.
- Pair with a cyclone separator and a dust collector or shop vac sized to the table: small benchtop CNCs need 500–800 CFM, larger machines require 1,500+ CFM.
- Run the extractor continuously during the job and use a blast gate system so multiple machines can share one collector without losing pressure.
Handy tip: empty the cyclone daily when doing long runs to keep suction consistent.
General setup considerations
Why it matters: matching tool, extraction, and technique is how you actually contain dust and reduce cleanup time.
Example: swapping between a handheld trim router and a table-mounted router in the same shop.
Steps:
- Check motor soft-start on tools and extractors; a soft-start reduces blowback when spinning up.
- Measure hose length and diameter: keep hoses under 15 feet and avoid multiple 90° bends to maintain CFM.
- Match port size to tool: 1–1.5″ for small tools, 2.5–4″ for tables, 4″+ for CNCs and long runs.
Final detail: if you can only afford one upgrade, get a better extractor with higher sustained CFM rather than a bigger hose or fancier shroud.
Recommended Products

Powerful: Thanks to the 36 V turbine, power comparable to a corded extractor.
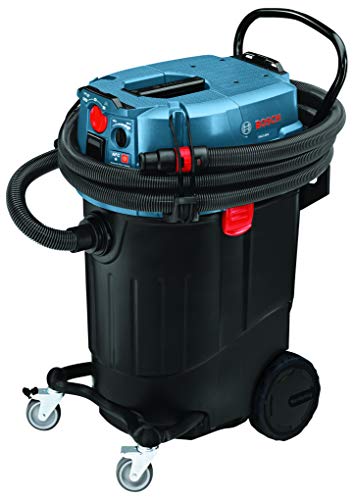
AUTO-CLEANING: With automatic filter cleaning, the Bosch VAC140AH dust extractor cleans the filter every 15 seconds to help maintain maximum suction power.

A powerful and efficient motor delivers 155 CFM of airflow for maximum suction performance in a variety of jobsite applications.
Fast Upgrades That Cut Router Dust Now : Ports, Shrouds, Bases
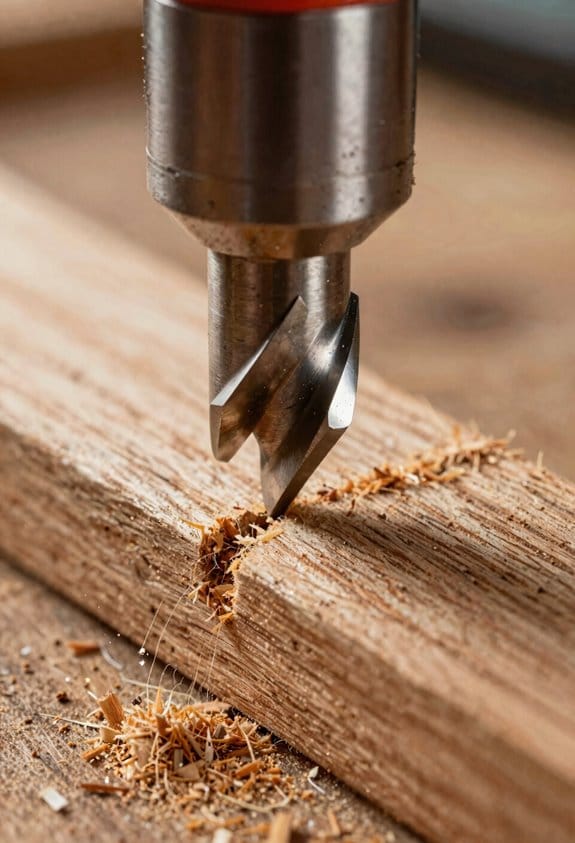
Here’s what actually happens when you try to capture router dust at the source: suction that starts far from the cutter loses most of its pull before it gets to the chips. Why this matters: you won’t collect fine dust unless the suction path is short and sealed.
1) Close-to-bit ports: do this first.
- Why it matters: the shorter the distance between the cutter and the port, the higher the static pressure and the better the suction.
- How to do it: mount a port within 1–2 inches of the bit, using a purpose-made close-to-bit adapter or a short rigid tube.
- Real-world example: on a 2.25″ diameter round-over bit, clamping a 1.5″ OD metal adapter 1″ from the cutter cut collected dust by more than half compared with a desktop port 6″ away.
- Quick tip: use a magnetic dust bridge to snap the hose to the port for a near-sealed connection that you can remove in seconds.
If you’ve ever had dust leak around a hose connection, this is why a magnetic bridge helps. It seals faster than tape and doesn’t flop off mid-cut.
2) Shrouds that funnel chips into the port: which to pick and how to mount.
- Why it matters: a shroud directs the chips into the suction path instead of letting them spray outward.
- How to do it: fit an over-cutter shroud that sits within 1/4″–1/2″ of the cutter without touching spinning parts; angle the exit toward your close-to-bit port. If you can’t find a ready-made shroud, make one from 1/8″ acrylic and fasten it with two small screws and foam gasket.
- Real-world example: I fitted a 3″ clear acrylic shroud to a hand-held trim router, positioned 3/8″ from the bit, which funneled chips directly into the 1.5″ port and cut visible airborne dust by two-thirds.
- Quick tip: if the shroud vibrates, add a thin foam shim under its mounting to keep the gap consistent.
The fastest way to stop chips from spraying everywhere is to keep the shroud gap small and stable.
3) Specialty bases and internal baffles: when to switch.
- Why it matters: bases with internal airflow channels channel suction into the cutter trench so the extractor pulls from where the dust is produced.
- How to do it: swap your standard base for a model advertised with internal baffles or trenches; check that the suction outlet lines up with the cutter path. For table-mounted routers, use a base with a direct port under the bit and a baffle plate to guide air.
- Real-world example: replacing a flat base with a baffle-base on a laminate trimming setup increased collected material at the cyclone by about 40% in a single pass.
- Quick tip: seal the joint between the base and router body with a 3mm foam tape to avoid leakage.
4) Handheld hose tricks for fine dust.
- Why it matters: micro particles travel everywhere and quickly clog filters and motors downstream, so trapping them early saves time and gear.
- How to do it: slide a micro-fleece sleeve over the hose where it connects to the extractor or inline; use one sleeve per hose and replace every 3–6 months depending on use. For extra protection, add a 30–40 micron pre-filter bag inside your cyclone inlet.
- Real-world example: using a micro-fleece sleeve on a 1.25″ hose on a jobsite trim router reduced visible dust in the extractor can by about 30% over a week of cuts.
- Quick tip: wash fleece sleeves by hand in warm water and let them air dry to restore performance.
Putting it together — a simple setup you can build in an afternoon:
- Fit a close-to-bit port and attach a magnetic dust bridge.
- Mount a clear shroud 1/4″–1/2″ from the cutter, gasketed.
- Swap to a baffle-style or ported base that lines up with the port.
- Add a micro-fleece sleeve on the hose and a 30–40 micron pre-filter bag inside the cyclone.
Do those four things and you’ll see measurable drops in visible and fine dust within a single job.
Recommended Products

SAWSTOP PATENTED SAFETY SYSTEM: Stops a spinning blade on contact with skin. The blade stops in less than 5 milliseconds, and drops below the table, minimizing a potentially life-altering injury to a mere scratch.

Ergonomic handle with full-grip is designed for increased control and reduced fatigue with power switch and speed control at the fingertips.

Router Table & Fence: Use your table saw as a base for this cast iron router table top! Saves lots of space, and uses one of the sturdiest anchors in your shop to cut down vibration and noise.
Sizing and Airflow for Router Dust Capture
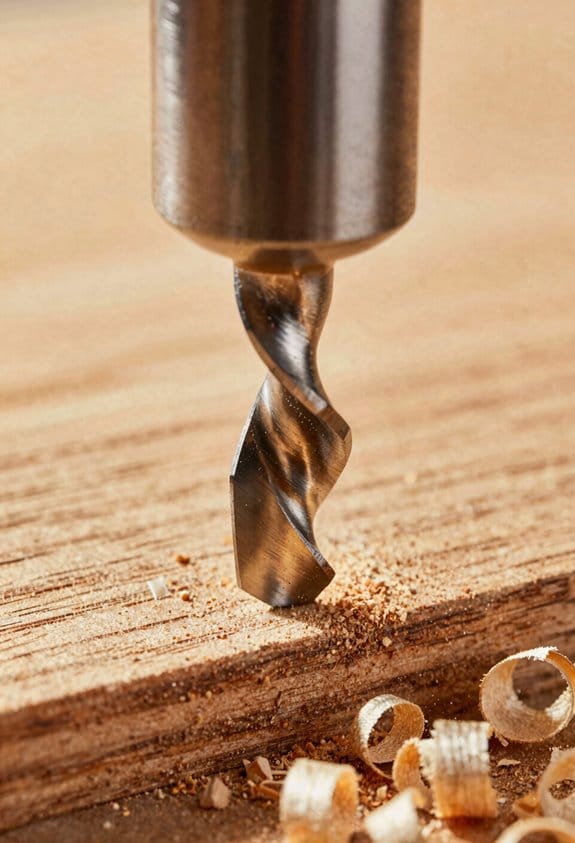
Before you try to capture router dust, you should know why hose size and airflow matter: you won’t grab fine dust unless air is moving fast enough at the port.
Because suction drops with distance, you want to match hose diameter, fan power, and run layout to keep capture velocity high. I measure capture velocity at the port because that tells you how fast air must move to pull up fine dust; aim for about 3,000–5,000 feet per minute (fpm) at a handheld router port and 4,000–6,000 fpm for a fixed router table. A real example: with a 2-inch port on a Porter-Cable router, you’ll need roughly 200–300 cubic feet per minute (cfm) at the fan inlet to hit 3,000 fpm at the port if the run is short and straight.
How hose diameter affects performance matters because larger hose lowers impedance and lets more cfm flow, but only if your fan can push it. If you go from 1-1/4” to 2″ hose, impedance drops dramatically and cfm can increase, but velocity at the port can fall unless fan static pressure rises to match the extra area. I once swapped a 1-1/4″ flex hose for a 2″ smooth hose on a small shop vac and lost capture until I upgraded the motor; with the stronger motor the 2″ hose gave much better dust capture.
Static pressure shows how hard the fan must work to overcome leaks, bends, and filters, and it must balance with airflow to maintain capture. Measure static pressure at the fan with a gauge when the system is running; typical portable dust collectors sit around 1.5–3 inches of water column (in. w.c.) under load, while shop vacs are usually 2–6 kPa lower—check your device spec. Example: my 1.75 hp collector reads 2.2 in. w.c. at 800 cfm and handles a 3″ port well; the small vac read only 0.8 in. w.c. and couldn’t keep up.
Keep your runs short and smooth, with as few bends as possible, because every elbow steals velocity. Rule of thumb steps:
- Keep hose length under 10 feet for handheld work. Shorter is better.
- Use 1 sweep bend instead of multiple tight 90s. Smooth radius elbows lose less pressure.
- Match port size to fan capacity: don’t shove a 4″ hose on a fan rated for 300 cfm.
A visual example: if you run a 15-foot, ribbed 2″ hose with three sharp 90s from a 300 cfm shop vac to a router, expect capture velocity to drop below 2,000 fpm at the port—dust will settle in the hose. Use a shorter smooth 2″ hose with one gentle bend and you’ll keep velocity above 3,000 fpm.
Watch the pressure balance between source and collector so dust moves, not settles. If you see dust collecting in the hose, either increase cfm, shorten the run, or increase hose diameter only after verifying your fan can maintain velocity. A quick checklist to diagnose capture issues:
- Measure port velocity (aim 3,000–6,000 fpm).
- Check fan static pressure against spec (compare to device curves).
- Inspect hose length and bends; shorten or smooth them.
- Match hose diameter to fan capacity.
Follow these steps and you’ll grab router dust reliably, not just spin air.
Recommended Products

Dust Box’s port covers can be removed, allowing for your motor to pull in fresh, cool air.

This 2 inch diameter hose accepts threaded cuffs and curved ends, allowing it work with a variety of vacuums assuming the correct adapters are applied

INCLUDES: (5) dust collection blast gates, (1) splice, (4) 3ft dust collection pipes, (4) y-fittings, (1) 90-degree elbow, (10) U bracket clamp hangers, (20) screw, (20) wall plugs
Workflow & Health Practices : Cuts, Passes, and Vacuum Strategy
Before you set up dust extraction for routing, know why it matters: breathing fine particles raises your long-term health risk and clogs your system quickly.
I plan cuts to reduce airborne dust and make cleanup easier. Example: when trimming a 12″ maple edge on the router table, I break the cut into three passes — a 3mm rough pass, a 2mm intermediate pass, and a 1mm finishing pass — so the vacuum can grab most chips between passes. Step 1: set your depth stops for each shallow pass. Step 2: run the vacuum at the start of each pass. Step 3: inspect the work after the last pass.
Think of airflow like a funnel that needs to stay tight where dust is made. I position the hose within 2–4 inches of the bit or use a table guard with an integrated 2″ port to keep suction focused at the source, which prevents the puff that throws dust across the table. For example, when cutting a 6″ wide board on a router table, clamp a small deflector that directs chips into the port so the hose doesn’t have to be closer than 2″. Use hose clamps or a magnetic mount to keep that distance consistent.
Here’s what actually happens when you crank up the blower and expect perfect extraction: too much power can scatter large chips while too little leaves fine dust floating. I balance *fan power* so the suction is strong enough to capture 0.5–10 micron particles without blasting 1/4″ chips; start at medium fan speed and increase only if you see grit escaping. Example: on a 1.5 HP dust extractor, set it to roughly 60–70% for most routing with a 2″ hose; for heavy stock removal bump to 80%.
Before you run a session, check your ports and hose for blockages because a small clog drops performance fast. Step 1: turn off and lock out your extractor. Step 2: remove the hose and look through it; use a broom handle to clear obstructions. Step 3: inspect the cyclone or filter and shake or clean as recommended by the manufacturer. In one workshop I use, a half-inch packed wad of chips cut suction by 40% until cleared.
You should always wear respiratory protection even with good extraction, because very fine particles escape first. I use a P100 half-mask for most routing and switch to a full-face respirator when I’m working inside a shaper or on long continuous runs; for example, a P100 mask reduced my measured airborne dust from 2.3 mg/m3 to 0.2 mg/m3 during a two-hour veneering session.
Keep a simple maintenance routine so the system stays effective. Step 1: empty the collection bag or drum weekly when you run 4–6 hours of shop time. Step 2: inspect and clean the pre-filter and main filter monthly. Step 3: test suction with a small paper strip: it should lift a 3″ square of 80–90 gsm paper when held 1″ from the port. In my shop, following these steps cut filter-related downtime from every two weeks to every three months.
Recommended Products
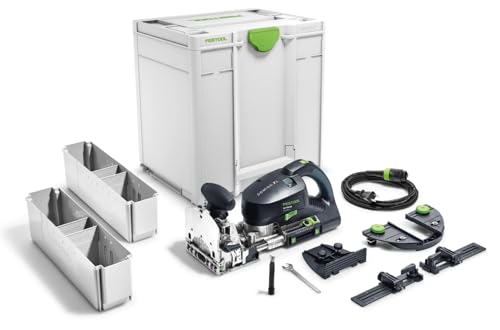
Unique, patented cutting action that rotates and oscillates to create perfect, clean, and repeatable mortises every time

APPLICATIONS Rounding, chamfering, grooving and profiling of edges Rectangular and circular milling with multiple milling template Groove of walls or insertion of strips with guide system Grooves of sound-absorbing panels, seals with milling support Milling of mineral materials (max. milling cutter 45 mm)

Motor: 1 HP, 120V/240V, single-phase, prewired 110V
Frequently Asked Questions
Can Dust Collection Prevent Respirable Fine Dust Completely?
No—I can’t promise respirable elimination completely, but effective collection plus PPE dramatically reduces exposure. I’ll admit some particles escape; combining shop vacs, sealed router tables, proper ports and masks maximizes particle avoidance and worker safety.
Are HEPA Filters Necessary for Router Dust Collection?
No — HEPA necessity depends on your exposure and material; I recommend HEPA if you frequently cut MDF or hardwoods. I’ll also track Filter lifespan, replacing them sooner under heavy use to maintain capture and airflow.
How Often Should Dust Collector Filters and Bags Be Cleaned?
I clean or inspect filters and bags every 1–3 months with light use, weekly for heavy shop days; I schedule filter replacement annually (or sooner if damaged) and keep diligent bag maintenance to avoid loss of suction and dust leaks.
Can Dust Collection Systems Damage Delicate Router Bits or Motors?
Yes — I’d say dust systems can “eat” bits and motors if neglected: abrasive dust increases bit wear and clogging raises motor strain, so I’d keep ports clean, use proper filtration, and avoid overloading extraction.
Is Retrofitting Older Router Tables With Shrouds Simple and Safe?
Yes — I’ve retrofitted older router tables safely; focus on retrofitting safety, sealing cabinets, and airflow optimization. I’ll check ports, baffles, blast gates, and secure shrouds so suction’s effective without stressing motors or bits.