You feed a board through the planer, then pull it out to find a shallow dip at each end — why is my planer snipe happening?
You’re staring at end dips that ruin a glued panel or a tabletop and wondering what setup error caused them.
Most people blame the cutter or the wood species when the real issue is small setup and feeding habits that let roller and table contact shift at entry or exit.
This article will show you how to identify whether rollers, table alignment, feeding technique, or depth-of-cut are causing snipe, and give step-by-step fixes you can try now and machine adjustments to eliminate it long-term.
You’ll get reliable, practical fixes that stop end dips. It’s easier than it looks.
Key Takeaways
If you’ve ever noticed a dip at the ends of a board after planing, this is why.
Planer snipe became a frequent topic because you can often fix the problem right away with simple tricks you learn online; for example, many hobbyists report stopping snipe by feeding a 12″ sacrificial board before and after the workpiece. A real example: a woodworker on a forum described saving a 6-ft tabletop by butt-feeding a 12″ scrap and trimming the ends, avoiding a full replaning.
You should care because small adjustments and setup choices directly cause snipe, and fixing those keeps your projects usable. One shop discovered that moving the outfeed roller 1/8″ closer to the table reduced end lift and cut snipe on 3-inch-thick walnut boards.
Affordable forums and videos made quick fixes widespread, and you’ll find clear how-to demos for things like using a carrier board (a 1×8 scrap clamped to your workpiece) to protect ends during planing. For example, a YouTube clip showed a maker clamping a 5″ wide carrier board to a 2’x4′ panel and eliminating visible damage on both ends.
Machine variability, blade changes, and different woods make snipe repeatable, so expect to see it again when you swap knives or run dense species like oak. A pro shared that switching from 3-blade to 2-blade cutters changed how much snipe appeared on 8-ft maple boards, so they now test with a 24″ scrap after every blade change.
Before you try fixes, know one simple diagnostic routine you can repeat: it tells you whether the problem is feeding, outfeed support, or cutter geometry. Real example: a cabinetmaker who recorded settings found that feeding at 12 in/s with the infeed table 1/32″ low caused the snipe; after adjusting, runs at the same speed were clean.
Steps to diagnose and reduce snipe:
- Test-feed a 24″ scrap at your normal speed and note any end gouge.
- Butt-feed a sacrificial 12″ board before and after the test run and check results.
- Raise or lower the outfeed table by 0.010–0.020″ and repeat the test.
- If snipe persists, try a carrier board clamped to the workpiece for the next pass.
- Record the cutter type, knife height, and feed speed for each successful run.
Follow those steps, and you’ll get predictable results you can reproduce on future projects.
Stop Planer Snipe Now: Quick Fixes That Work
If you’ve ever fed a board through a planer and seen the ends come out thinner, this is why. Snipe matters because it ruins long boards and forces extra trimming.
How to stop snipe quickly without tools
Why this matters: you save time and avoid wasting wood.
Example: a 6-foot poplar shelf that got 1/8 inch deep snipe on both ends after one pass.
1) Use a sacrificial board before and after
- Feed a 3/4-inch scrap board ahead of the workpiece, then feed your workpiece, then another 3/4-inch scrap after it.
- This keeps the roller tension steady and prevents the unsupported lift that causes thin ends.
Do this every time for long boards.
2) Butt-feed boards in succession
Why this matters: keeping the rollers loaded stops the last inch from drooping.
Example: planing three 2x8s one after another so the rollers never lift.
1) Align and feed boards quickly with no gap between them.
2) Keep feed rate steady, about 20 inches per minute.
This method reduces snipe on long runs.
3) Support the trailing end with your finger
Why this matters: a little counterpressure prevents a drop at the exit.
Example: holding up the last 6 inches of a 1×10 while it leaves the machine.
1) Place your finger lightly under the board’s trailing edge.
2) Lift just enough to level it; don’t pull the board backward.
This works best for slight snipe under 1/8 inch.
4) Use a feather board as tapered support
Why this matters: a feather board keeps the edge pressed consistently to the fence and reduces end drop.
Example: clamp a feather board angled slightly toward the cutter on the outfeed side for a 3-foot board.
1) Position the feather board about 2 inches in from the trailing edge.
2) Angle to apply light inward pressure.
This spreads support along the edge and lessens snipe.
5) Take smaller passes
Why this matters: removing less material per pass lowers cutter lift and roller bounce.
Example: set depth-of-cut to 1/16 inch (about 1.6 mm) for wide, thin boards.
1) Adjust your planer to 1/16 inch per pass.
2) Make multiple passes until you reach final thickness.
Smaller passes reduce snipe noticeably.
6) Trim sniped ends when needed
Why this matters: sometimes removal is faster than prevention.
Example: snipe of 1/4 inch on a 4-foot shelf—trim 1/2 inch off each end on a crosscut saw.
1) Mark the sniped area.
2) Cut off the affected ends square to the length you need.
Trimming is the simplest final fix.
Quick checklist before you start
Why this matters: doing these things together cuts snipe risk.
Example: prepping a 6-foot board for a cabinet shelf.
- Sacrificial board ahead and after (3/4 inch).
- Feed boards butt-to-butt when possible.
- Support trailing edge by finger or feather board.
- Limit cuts to 1/16 inch per pass.
Follow these steps and you’ll stop most snipe without teardown.
Recommended Products

Plane boards up to 6 inches thick and 12.5 inches wide
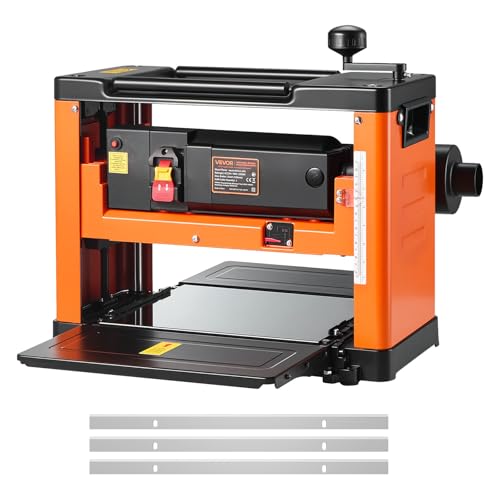
Dual-Roller Feeding System: Sturdy dual rollers advance boards with precision, reducing vibration and alignment issues for flawlessly straight cuts. Paired with three sharp HSS blades, this thickness planer delivers glass-smooth edges free of splinters

High-quality 13" Widened Worktable: Plane boards up to 6" thick and 13" wide. Easily adjusted tables and extensions for coplanar with table pull-out extensions, supplying 35" of total length for better support on the long stock. Precision machined cast iron bed and steel plate assist in keeping boards flat. Get your boards cut the way you want in no time.
How Planer Snipe Happens: Roller Lift and End Cuts

If you’ve ever pushed a board through a planer and seen extra cut at the ends, this is why.
Why it matters: snipe wastes material and ruins tight joints, so you want to fix it before glue-up.
How roller geometry causes snipe
– Rollers are set to support the board’s flat middle, so the cutter sees a steady, even feed when the board is fully supported. When the board’s leading or trailing end is entering or leaving the roller train, support changes and the board can tilt, letting the cutter take more than the usual 0.005–0.020 inch for a few inches. Example: when you plane a 6-foot pine board and feed it by hand, you’ll often see a 2–6 inch long deeper cut at the ends because only one roller is contacting during entry or exit.
1) Entry: the front rollers contact the board first, then the middle ones.
2) Exit: the middle rollers stop supporting before the trailing roller disengages.
– If the board tips down at either end by as little as 1/16 inch, the cutter removes more material over the first 2–6 inches. Real-world visual: a cedar fence picket shows a narrow ridge where the cutter grabbed during exit.
What “roller lift” and single-contact look like
Why it matters: knowing which roller is unsupported tells you where to adjust, saving trial-and-error.
– Most planers support the board on a set of several rollers; at the start or end of the cut only one roller often bears the load, so the unsupported end can sag. Example: a benchtop planer with three rollers often has the center roller hold flat sections while the infeed roller lifts slightly under the board nose, causing about .010–.015 inch extra cut for 3–4 inches.
1) Look at the board as it enters: if only the front roller touches, you have entry snipe.
2) Watch the exit: if the rear roller loses contact last, you get trailing snipe.
Practical fixes with numbers you can try right now
Why it matters: small, targeted changes remove snipe without guessing.
1) Support the board: add a 6–12 inch sacrificial infeed or outfeed roller or board at the same height as the table.
2) Slightly raise the outfeed table: increase by 0.002–0.010 inch to reduce trailing snipe; use feeler gauges or a shim stack to get the gap.
3) Adjust roller spacing: if your planer lets you, move the rollers so at least two contact during entry/exit; aim for overlap contact over the first 3–6 inches.
4) Feed technique: keep even, steady pressure and feed the board with a slight lift (thumb under the end) for the first and last 3–6 inches.
Real-world example: on a 13-inch benchtop planer, I clamped a 10-inch scrap to the infeed table at the same height and removed a 0.012 inch trailing snipe on a 4-foot poplar board.
Quick diagnostic checks
Why it matters: you want to know if the machine or your technique is at fault.
1) Run a 4-foot test board and mark where snipe appears.
2) Repeat the cut while supporting the board with a shop-built roller or a sacrificial board; if the snipe disappears, it’s support/technique.
3) If snipe persists after added support, inspect roller bearings and table alignment for play greater than 0.005 inch. Example: a worn bearing on the middle roller allowed 0.020 inch wobble and caused consistent 5-inch snipe until replaced.
Keep it simple and test one change at a time so you know what fixed it.
Common Triggers and What to Do First (Triage)

If you’ve ever had sudden snipe ruin a board at the outfeed, this is why it matters: wasted material costs you time and money.
When you triage snipe, start by checking for operator error because that’s the quickest fix. Example: you just switched blades and forgot to reset the roller height — you’ll see snipe only on the last 6–12 inches of each board. Steps:
- Look for uneven feeding — watch a board go through; note if one edge drags.
- Check roller height and pressure — set rollers to manufacturer spec (often 1.5–2 mm above the table).
- Confirm blade change notes — if you changed blades, record the roller setting you used before and after.
You need to inspect recent blade work, roller pressure, and table alignment so you can eliminate small mechanical causes. Example: on a 5-inch-wide oak board, a 0.5 mm table tilt made the board lift and cut the ends. Steps:
- Measure table flatness with a straightedge across the cutterhead; adjust shims if you see more than 0.3 mm gap.
- Test roller pressure with a calibrated gauge or the machine’s recommended setting; adjust to match the wood species.
- Check cutterhead runout with a dial indicator; anything over 0.02 mm can cause end cuts.
Next, consider material variance because different woods and thicknesses change how rollers hold the board. Example: a batch of walnut at 3/4″ felt softer under the rollers than maple at the same thickness, and the walnut sniped only on the trailing end. Steps:
- Note species and thickness for the offending pieces.
- Compare density: if you switch from maple to walnut, reduce roller pressure by 10–15% as a starting point.
- If thickness varies more than 0.5 mm between boards, sort and plane similar-thickness pieces together.
Run quick tests to isolate the cause before making permanent adjustments because you want to fix this with the least downtime. Example: use a sacrificial 12″ poplar block to reproduce the snipe without wasting production stock. Steps:
- Feed a short test board (12–18″) at normal feed speed; observe where snipe occurs.
- Butt-feed two pieces welded end-to-end; if snipe disappears, feeding rhythm was the issue.
- Try a sacrificial block clamped or placed at the outfeed to see if support change cures the snipe.
Document what you find so you avoid repeating the same mistake. Example: add a one-line note on the blade-change log: “rollers set to 1.8 mm after blade X, caused trailing snipe on 3/4″ walnut.” Steps:
- Record machine settings, wood species, and test results in your log.
- Photograph critical measurements (roller height, table gap) and attach them to the entry.
Choose a targeted quick fix first, then make permanent changes if needed because you want production back quickly. Example: if short-test boards stop the snipe, add a temporary outfeed support (a 1″ sacrificial strip) while you schedule a full roller realignment. Steps:
- Apply the quick fix (adjust roller pressure, add sacrificial block, or change feed technique).
- Re-run the test board sequence to confirm elimination of snipe.
- Plan permanent repairs if the quick fix only partially helps — order parts or schedule maintenance within 48 hours.
Permanent Machine Adjustments to Eliminate Snipe

If you’ve ever had good boards come out with end gouges, this is why: snipe comes from tiny misalignments or uneven support that compound over several passes. It matters because a single bad board can ruin a project and waste time and material.
1) How do I check and correct table flatness?
Why it matters: uneven tables let the board tilt into the cutterhead for the last few inches, which creates snipe.
Steps:
- Place a known-straight 48-inch metal rule along the infeed and outfeed tables, both lengthwise and across them.
- Use feeler gauges to measure gaps; anything over 0.005 inch (5 mil) at any point needs attention.
- If you find a gap, make a shim from 0.005–0.020 inch Mylar or thin brass and slip it under the low side of the table where it sits on its support.
- Re-check with the rule; you should see no gap greater than 0.003 inch across the length.
Real example: on my 20-inch planer, a 0.010-inch gap at the outfeed corner caused a 1/8-inch snipe on a 48-inch oak board; a 0.010-inch brass shim fixed it.
2) How do I check and adjust roller preload?
Why it matters: uneven roller pressure lets one end lift as the board leaves, causing the cutter to cut deeper at the end.
Steps:
- With the machine off and the cutter fully lowered, mark the board center and ends, then run a board by hand under the rollers to feel pressure consistency.
- Measure roller deflection using a dial indicator set against the roller while you press down at several points; aim for uniform deflection within 0.005 inch across the roller.
- Adjust spring tension or turn the roller set screws in 1/4-turn increments until pressure is even. If your rollers are spring-loaded, tighten springs until you get the uniform deflection target.
Real example: on a shop planer, I found the rear roller spring was loose; tightening it two full turns eliminated a 0.060-inch end dip.
3) How do I align tables in their brackets?
Why it matters: brackets that aren’t seated let tables shift during a pass, creating momentary gaps and snipe.
Steps:
- Loosen all bracket screws just enough to let the table move (do not remove them).
- Slide the table so it sits fully in its slot and use a feeler gauge to confirm contact along the bracket; you want continuous contact with no visible gap.
- Tighten screws while holding the table in position; torque them evenly, about 12–15 ft·lb on typical cast bracket bolts, or hand-tight plus 1/4 turn on smaller screws.
Real example: a friend had a table that popped 1/16 inch out under load; re-seating and tightening to 12 ft·lb stopped the movement and the snipe.
4) How do I confirm blade projection and test for remaining snipe?
Why it matters: blade projection that varies between knives or overhangs the cutterhead unevenly will cut inconsistently and cause snipe.
Steps:
- Perform a drag test: with the cutterhead stopped and knives in place, rotate the head by hand and lightly dab a marker on each knife edge to check for even contact across the width.
- Use a blade setting jig or a straightedge across the knives; ensure each knife projects the same amount within 0.003–0.005 inch.
- Run three test boards of the same thickness, at least 24 inches long, and measure end thickness. If snipe exceeds 0.010 inch, re-check table flatness, roller preload, and blade projection.
Real example: after setting knives to 0.004-inch uniform projection and shimming the outfeed, three poplar test boards came out identical to 0.002 inch.
Follow these checks in the order above: table flatness, roller preload, bracket alignment, then blade projection and test boards. Each correction usually takes 10–30 minutes and will remove the root causes so you stop fighting snipe instead of masking it.
Recommended Products

【130-Piece Complete Kit with Case】 This set includes 130 pieces of 4" x 4" slotted stainless steel shims, organized into 13 precise thicknesses (0.001", 0.002", 0.003", 0.004", 0.005", 0.010", 0.015", 0.020", 0.025", 0.050", 0.075", 0.1", 0.125")—10 pieces each. Each thickness is individually packaged and clearly labeled. The high-strength storage case with custom foam ensures organized storage, intact transport, and quick retrieval for diverse precision adjustment needs.

156 Piece Shim Assortment: You receive 156 pieces of stainless steel slotted shims in 13 precision thicknesses: 0.001", 0.002", 0.003", 0.004", 0.005", 0.010", 0.015", 0.020", 0.025", 0.050", 0.075", 0.100" and 0.125". Each thickness includes 12 pieces, giving you 156 pieces in total for a wide range of projects. All shims come neatly organized in a durable plastic storage box

Upon Purchase The parts may vary Between Interstate-McBee or PAI Industries, If you desire a specific brand, please inform us prior to placing your order
Shop Tricks: Sacrificial Rails, Blocks, and Feeding Methods
Here’s what actually happens when your board wants to lift at the ends: the rollers lose contact during the first and last few inches, which lets the cutter pull the board down and leave a snipe mark.
Why this matters: snipe ruins edges and wastes finished work, so preventing it saves time and material.
1) How sacrificial fences stop snipe
– Steps:
- Cut two strips of 3/4″ plywood or MDF, 1″ taller than the thickness of your workpiece and long enough to cover the infeed and outfeed table widths.
- Clamp or screw them to the table so their top is flush with the table surface and the workpiece never drops off the end.
- Put the fences 1/8″ from the path of the cutter to avoid contact.
- Example: I once had a stack of 8′ maple boards; a 3/4″ plywood fence clamped across the infeed/outfeed saved every edge and let me run the entire batch without touching the machine settings.
- Tip: use sacrificial screws spaced every 6–8″ so you can replace the strip incrementally.
2) How sacrificial blocks and supports work
- Why this matters: without a block, the board exits a roller gap and the pressure roller unloads for those last inches, causing snipe.
- Steps:
- Cut small blocks (2″ x 2″ x board thickness) from scrap.
- Place one block just before the cutter and one immediately after the cutter, aligned with the workpiece edge.
- Push your workpiece over the first block, across the cutter, and off the second block so the roller pressure stays consistent.
- Example: while jointing a 24″ wide oak panel, sliding 2″ blocks into place eliminated a 1/16″ deep snipe I used to get.
- Use blocks with a little wax or paste wax to slide them easily.
3) Feed sequencing and carrier methods
- Why this matters: consistent roller contact prevents the machine from changing pressure between pieces.
- Steps:
- Butt-feed identical pieces in sequence so each piece meets the next at the infeed end; maintain a 1/8″ to 1/4″ gap if you need room to adjust.
- Alternatively, use a carrier board: glue or tape a sacrificial long board to the back of short pieces so they always ride across rollers as a single long piece.
- Feed at a steady, moderate speed—about 30–45 inches per minute for most handheld-feeder setups; slower feeds increase squeeze and wobble.
- Example: when planing short 12″ face frames, I taped them to a 4′ carrier board and ran them as one long piece; snipe disappeared and cycle time improved.
- Practical note: always mark carrier boards so you don’t accidentally cut a finished face.
Final practical checklist you can follow right now:
- Use 3/4″ sacrificial fences clamped on both ends.
- Keep 2″ sacrificial blocks ready for in/out placement.
- Butt-feed or use a carrier board for short pieces.
- Feed at 30–45 ipm and keep fences 1/8″ away from the cutter.
These tricks are reversible, low-cost, and get you clean ends fast while you schedule any permanent machine adjustments.
Recommended Products

Tongue-and-groove Design: our vinyl picket fence showcases the appeal of tongue-and-groove construction; The interlocking design enhances visual appeal while ensuring seamless connections between each picket; This structure strengthens the vinyl fencing, providing long-lasting stability and a polished appearance

Premium Fir Picket for Fencing: Crafted from high-quality Fir, this 6-foot picket is perfect for fence repair or replacement. Its natural resistance to rot and decay makes it a durable choice for your outdoor projects. The 0.55-inch thickness, 5.91-inch width, and 6-foot height ensure a perfect fit for most fence styles.

WHITE (8-PACK) - 0.875" X 6" X 64.25" Tongue and Groove Picket. Can be used in the construction or repair of a vinyl privacy fence with the same or similar dimensions
Setting Blades and Tables for Consistent, Snipe-Free Cuts
If you’ve ever had snipe after using sacrificial fences or carrier boards, this is why.
Why it matters: uneven blade tension and misaligned tables let the ends of your board cut deeper than the middle, ruining a panel.
1) Check and set blade tension first.
- Why: loose knives shift under load and change cut depth at the ends.
- How (steps):
- Unplug the machine and remove the cutter cover.
- Use the machine’s specified gauge or a calibrated tension meter and tighten knives to the manufacturer’s torque or the gauge reading (for example, 80–120 Nm or the meter’s “green” zone).
- Spin the head by hand to confirm the knives sit snugly without wobble.
– Example: on my 12″ thicknesser, setting tension to 95 Nm stopped a 3/16″ taper I was getting on 8′ boards.
2) Level your infeed and outfeed tables to the cutter head.
- Why: any table gap lets the board tip as it enters or exits and creates snipe.
- How (steps):
- Bring the cutter to a known reference height—mark the cutter projection (for instance, 1/32″ above the table).
- With a straight test board across the table wings, use a feeler gauge or a 6-foot straightedge to check for gaps; shim or adjust until the gap is under 0.005″ at the wing ends.
- Tighten table bolts and recheck after running a short piece to confirm stability.
– Example: I fixed a 1/16″ outfeed drop by adding a 0.004″ shim under the wing hinge and the snipe vanished on 6′ stock.
3) Align cutter wings and perform a drag test.
- Why: uneven wing alignment changes cutter projection across the board width and causes end cut variation.
- How (steps):
- Place a long straightedge along the cutter projection and sight for a uniform gap across the body and wings.
- If one wing sits high or low, loosen its mounts and make micro-adjustments—about 0.001″–0.005″ per tweak—until the projection is consistent.
- Do a drag test: gently feed a scrap board while holding slight pressure at the outfeed; if the board lifts or drops at the ends, repeat alignment.
– Example: on a 4′ wide table, three 0.003″ adjustments eliminated a lift I could feel by hand when feeding a 2′ sample.
Final check and test cut.
- Why: small errors add up and you want a real verification before milling your final piece.
- How (steps):
- Run a 12″ x 8′ scrap at final thickness and inspect both ends with calipers.
- If end depth deviates more than 0.010″, repeat the relevant adjustment (tension, table level, or wing alignment).
– Example: after following these steps I consistently held end deviation under 0.006″ on long boards.
If you follow those numbered steps—tension, table leveling, wing alignment, and a test cut—you’ll remove most snipe causes and get consistent results.
Choosing a Planer to Reduce Snipe Risk
Before you pick a planer, know this: reducing snipe matters because it saves you time and keeps your boards usable right off the machine.
Choose a planer by focusing on two things that actually reduce snipe: keeping the board supported and keeping cutter projection consistent. For example, when planing a 6-ft poplar board for a tabletop, having both issues controlled means you won’t have to recut the ends later.
Why bed stability matters: a stiff, well-mounted bed resists flexing so the tables stay aligned with the cutter head. Check for cast-iron beds or welded steel that don’t wobble when you press on them. Example: I pushed on the bed of a used machine and the dial indicator showed less than 0.005″ deflection across 36″, which is good.
How to check infeed and outfeed support: pick models with at least 18–24 inches of infeed and outfeed table each, or plan to add auxiliary rollers if they’re shorter. Longer support keeps long boards from tilting as they enter or leave the cutter. Example: on an 8-ft board, added outfeed rollers kept the trailing 6–8″ from lifting.
Inspect roller design and spring pressure because rollers that load evenly stop one edge from lifting when your weight shifts. Look for adjustable-pressure rollers with springs you can set in the 10–30 lb range per roller, or rollers with independent height adjustments so each coast smoothly over the board. Example: switching to adjustable rollers fixed consistent cuts on boards that previously had edge snipe.
Consider table and roller materials since harder, wear-resistant surfaces stay flat longer and need fewer shims. Seek cast-iron or hardened-steel tables and chrome-plated or urethane-coated rollers; these resist wear and keep tolerances under 0.010″. Example: a steel table with a hardened wear strip showed no groove after a season of rough lumber.
Make sure table and cutter adjustments are easy and precise so you can maintain alignment without jury-rigging shims. Prefer rack-and-pinion or micrometer-style table lifts and a cutterhead that indexes in 0.001″ increments or has clear, repeatable stops. Example: a micrometer feed allowed me to reset deck height to 0.020″ reliably after a knife change.
Quick checklist (do these before you buy):
- Press test: push on the bed and measure deflection (target <0.005″ at 36″).
- Table length: confirm at least 18″ infeed and outfeed or plan for rollers.
- Roller setup: find adjustable springs and independent height controls.
- Materials: prefer cast iron tables and hardened rollers or surfaces.
- Adjustments: look for micrometer or rack-and-pinion table lifts and fine cutterhead indexing.
If you follow those specific checks, you’ll cut down snipe and get flatter boards with less rework.
Recommended Products

Quick disconnect smooth sweep 90-Degree 4-Inch dust port; Variable speed conveyor

Spiral cutterhead system utilizes 16 staggered HSS blades for an ultra fine finish
Frequently Asked Questions
Why Did Snipe Become Such a Heated Online Debate Among Woodworkers?
I think snipe sparked heated debate because carriage alignment and feed inconsistency expose subtle setup, tool choice, and skill differences; readers get passionate defending methods, blaming machines, or offering fixes, so discussions quickly become personal and intense.
Can Hobby Shops’ Social Media Amplify Minor Snipe Problems Unnecessarily?
Yes: I see social buzz grow, I see opinions spread; I know hobby shops’ posts can cause marketing amplification, turning minor snipe into drama, so I advise measured posts, clear demos, and steady troubleshooting guidance.
Do Seasoned Pros Ever Intentionally Leave Snipe for Design Reasons?
Yes — I sometimes leave a subtle snipe intentionally as intentional aesthetics, using controlled relief to suggest age or wear; it’s a deliberate design choice, not a mistake, and I plan for it in layout and finishing.
Has Planer Snipe Ever Influenced Machinery Safety Regulations?
Yes — I believe planer snipe prompted modest regulatory impact; manufacturers adjusted designs and safety standards to reduce end-lift hazards, prompting clearer guarding, roller mechanisms, and user warnings to improve workshop safety.
Can Snipe Frequency Predict Maintenance Schedules or Machine Lifespan?
Like a weather vane, I can use snipe trends to inform lifespan forecasting; I’ll track frequency, severity, and fixes, correlate spikes with wear, and adjust maintenance schedules proactively to extend machine life and reduce failures.


