You’re squinting through a haze at a busy workbench and wondering why everyone coughs after a shift. The exact problem: respirable dust is lingering at the source and scattering light, hurting health and visibility.
Most people assume a single room fan or a general exhaust system is enough to fix it. This short piece will show you how targeted local capture plus high‑efficiency cartridges stop submicron particles, lower deep‑lung exposure and absenteeism, and restore clear sightlines.
It gives specific actions: where to place hoods, which filters to use, and how to monitor performance.
It’s easier than it seems.
Key Takeaways
Think of keeping your shop clean like protecting your lungs and your line of sight.
Why it matters: breathing less dust keeps you healthy and reduces sick days. Effective dust collection removes respirable particles from the air so you don’t inhale them, cutting long-term lung disease risk. Example: on a cabinet shop floor, a table saw with a 2.5-inch dust port hooked to a 1,000 CFM collector captured the majority of fine dust right at the blade, and the crew reported fewer coughs within weeks.
If you’ve ever strained to see a part through haze, this is why local capture matters.
Why it matters: dust in the air creates visual haze that makes precise work harder. Capture hoods placed within 6–12 inches of the source — or use an articulated arm positioned so the hood lip is 3–6 inches from the cut — prevent airborne haze and keep sightlines clear. Example: a metal-fabrication shop added hooded arms at each grinder and reduced visible airborne dust so welders could inspect seams without extra lighting.
Before you pick filters, know what they’ll stop.
Why it matters: fine particles stick to windows and lights, dimming your workspace. Use high-efficiency filters rated MERV 16, HEPA, or nanofiber to trap particles down to 0.3 microns and cut surface film that obscures windows and fixtures. Example: a plant swapped in HEPA cartridges and saw dust buildup on skylights fall by 80% over three months.
Here’s what actually happens when you skip maintenance.
Why it matters: clogged filters and weak fans let dust recirculate and visibility drops. Follow these steps to keep your collector working: 1) Check differential pressure (ΔP) across the filter weekly and record values; 2) Replace or pulse-clean cartridges when ΔP rises 20% above baseline; 3) Inspect hoses, seals, and dampers monthly and repair leaks immediately. Example: a bakery tracked ΔP and caught a failing fan early, avoiding a visibility problem that would’ve closed a production line.
The difference between good and bad hood layout comes down to airflow direction.
Why it matters: a poorly aimed hood can blow dust toward coworkers or spread it across a bench. Place hoods so airflow draws toward the collector and not across other workers; aim intake velocity between 1,500–3,000 feet per minute for grinding and 100–300 fpm for large-area capture like sanding booths. Example: a shop reoriented its sanding booth intake and eliminated a recurring dust cloud that had been drifting into the inspection area.
Quick checklist you can use today:
- Confirm hoods are 3–12 inches from the source depending on tool type.
- Use MERV 16/HEPA or nanofiber filters for fine dust.
- Monitor ΔP weekly and act when it climbs 20% from baseline.
- Aim intake velocities suited to the operation (see above numbers).
If you follow those steps, you’ll breathe better and see better on the job.
How Dust Control Protects Worker Health and Visibility
Here’s what actually happens when dust builds up in your plant: it gets into lungs, clogs filters, and blurs your view of moving parts.
Why this matters: respirable dust under 10 microns reaches deep into the lungs and raises illness and absenteeism. For example, on a sheet-metal line I visited, workers missed days after prolonged exposure to fine metal dust that wasn’t captured at the source.
How dust control protects worker health
Why this matters: lowering airborne respirable particles reduces lung disease risk and keeps more people at work. In one plant I saw, installing source capture cut reported respiratory complaints by 40% in six months.
1) Capture at the source.
- Step 1: Install a local exhaust hood within 6–12 inches of the dust source.
- Step 2: Use ducting sized for 4,000–6,000 fpm (feet per minute) air velocity to prevent settling.
- Step 3: Position the hood so it doesn’t blow dust toward other workers.
Example: a CNC cell with a 10-inch hood placed 8 inches from the cutter reduced visible dust by over half during trials.
How dust control protects visibility and safety
Why this matters: lower airborne dust improves visual contrast so you spot defects and moving parts sooner, preventing accidents. On a conveyor inspection line, removing surface haze let operators find cracked belts that previously blended into the background.
1) Filter and collect effectively.
- Step 1: Use filters rated MERV 13 or higher for general dust, or HEPA when respirable silica or hazardous dust is present.
- Step 2: Choose cartridge filters for dusty, oily environments; pleated bags work for lighter loads.
- Step 3: Replace or pulse-clean before pressure drop hits the manufacturer’s max — typically between 2–4 inches of water gauge.
Example: swapping to MERV 13 cartridges in a food packaging area cut surface film on inspection windows and improved defect detection rates.
Routine maintenance that keeps systems working
Why this matters: neglected collectors let dust re-enter the workplace within weeks. At one plant, a clogged collector blew dust back into the line after only three weeks without maintenance, undoing all prior controls.
1) Scheduled checks and simple measurements.
- Step 1: Inspect collector housings weekly for dust leaks or damaged gaskets.
- Step 2: Log differential pressure across filters daily; act when rise equals 70–80% of the recommended changeout value.
- Step 3: Do a full service (cleaning, gasket replacement, sight-glass check) every 3–6 months depending on load.
Example: a weekly gasket check prevented a fan bypass that would have doubled airborne dust in one shift.
Monitoring and backup protections
Why this matters: monitoring tells you when engineering controls fail so you can protect workers immediately. In one mill, a simple real-time particle counter flagged a surge during a bulk transfer, letting supervisors pause work and correct a clogged duct.
1) Use quantitative and practical monitors.
- Step 1: Install at least one real-time particle counter in high-risk zones and log data hourly.
- Step 2: Periodically do gravimetric sampling (8-hour) to verify exposures against limits like OSHA PELs or your company standard.
- Step 3: Have a written action trigger (e.g., pause work and inspect when short-term spikes exceed 2× baseline).
Example: an hourly logging routine caught a night-shift leak within two hours, preventing an overnight buildup.
Personal protective equipment (when engineering controls fall short)
Why this matters: PPE is the last layer and keeps people safe while you fix controls. On a renovation project, respirators prevented acute exposure while new collectors were installed.
1) Select and use respirators correctly.
- Step 1: Use N95s for non-oily particulates below hazardous thresholds; use P100 cartridges for oil mists or higher-risk dusts.
- Step 2: Fit-test each worker annually and do a user seal check every time they put the respirator on.
- Step 3: Replace disposable masks daily or when soiled; change cartridges per manufacturer or sooner if breathing becomes hard.
Example: after fit-testing and swapping to P100s during a cleanup, workers reported no irritation and no lost time.
Quick checklist you can use today
1) Put a local hood within 6–12 inches of the source.
2) Use MERV 13+ or HEPA filters where respirable dust exists.
3) Log differential pressure daily and change filters at specified limits.
4) Run a particle counter in high-risk areas with hourly logging.
5) Fit-test respirators annually and replace cartridges on schedule.
If you follow those steps, you’ll see clearer sightlines, fewer illnesses, and longer equipment life.
Why Source-Capture Systems Are the First Line of Defense
If you’ve ever watched a workshop fill with dust, this is why.
Why it matters: stopping dust at the source keeps it from reaching your lungs and turning into a long-term health problem. For example, in a small metal fabrication shop I visited, a single source-capture arm cut visible airborne dust by more than half during grinding.
How source-capture systems work and what you’ll see:
- Capture where dust is made. Position a hood 2–6 inches from the workpiece (closer for fine dust, farther for larger chips). That proximity cuts the airflow needed to grab particles and prevents them from spreading.
- Move the air away. The system pulls contaminated air through ducting into a filter cabinet. In the shop example above, the operator routed the duct to a cabinet with a cartridge filter and could see the difference because windows stayed clear.
- Clean and dispose. Filters collect the dust so you can empty a drawer or change a cartridge on a schedule — more on that below.
Why you should use them now:
- They lower respirable dust numbers you can measure with a handheld meter, often by 50% or more when positioned correctly.
- They reduce surface dust that can cause fires; less buildup means fewer hot spots.
- They save cleanup time — crews spend minutes sweeping instead of hours.
How to set them up (step-by-step):
- Pick the right hood for the task: use a flange hood for cutting, a capture-arm hood for grinding, and a downdraft table for sanding.
- Position the hood 2–6 inches from the source; aim the opening toward the dust path.
- Check suction: with a smoke pencil or tissue, you should see consistent pull into the hood.
- Set a filter-change schedule: check cartridges every 1–2 weeks in heavy use, otherwise monthly.
- Train operators: show them how to swing arms, lock hoods, and empty collection trays safely.
Ergonomics and consistent use:
Why it matters: if a system is hard to move, people won’t use it. In that same shop, swapping to a counterbalanced arm increased correct use from 40% to 90% because operators could position it without effort. Make adjustments easy: add counterweights, long handles, or quick-locks so workers can set the hood in one motion.
Maintenance and procedures that keep systems effective:
Why it matters: poor upkeep kills suction and raises risk. Example: a plant stopped inspections and saw dust levels double within a month because clogged filters reduced airflow.
- Inspect suction weekly: look for damaged hoses, loose joints, and clogged pre-filters.
- Record filter changes and airflow readings.
- Keep a simple procedure for emptying dust: use a sealed container and a vacuum-rated tool to avoid re-entrainment.
Compliance and productivity benefits:
Why it matters: properly used systems help you meet exposure limits and keep production steady. You’ll spend less time cleaning, fewer machine stops for visibility issues, and have measurable data to show inspectors.
Final practical tips:
- Mark the correct hood distance on machines with tape.
- Give operators a one-page checklist: position, suction check, filter status, and emptying box.
- Start small: install one capture arm on your worst dust source, measure results, then expand.
If you follow these steps, you’ll control dust where it starts, protect workers’ lungs, and make your shop safer and more efficient.
Recommended Products

EXTRACT-ALL WELDING FUME EXTRACTION ARM: The Extract-All Welding Fume Extraction Arm helps in directing hazardous smoke, dust, mist, and fumes away from industrial applications like welding, powder mixing, and more. It is prepared to match the industrial strength and durability. It is easy to move and has external supports and self-locking joints which helps it in being sturdy and easy to use.

HAIR SALON AIR PURIFIER: Prolonged exposure to high vapor hair products and the variety of harmful chemicals generated by salon treatments can result in an array of respiratory health issues. The key to preventing illness or discomfort is keeping the air in your salon clean. The Extract-All salon pure air fume extraction for hair salons is designed to do all that and more!

【M Class Automatic Filter Clean】The automatic HEPA filter cleaning system is designed to maintain optimal suction performance by periodically cleaning the filter without manual intervention. This system automatically initiates filter cleaning every 20 seconds, preventing dust buildup and ensuring continuous operation, in compliance with OSHA regulations for airborne particulate control in the workplace.
Cartridge Collectors and Nano‑Fiber Filters: What They Do

If you’ve ever worked around a dusty shop, this is why cartridge collectors matter: they take the dust you make and keep it out of your breathing zone so you can see and work safely.
What a cartridge collector is and why it helps
Why this matters: breathing less dust reduces health risk and cleanup time.
A cartridge collector is a metal cabinet that holds replaceable filter cartridges; you connect your dust-producing tool to the inlet and the collector pulls air through the cartridges so particulates stay inside the housing. For example, in a woodworking shop a table saw hooked to a 2,000 CFM collector uses cartridges to keep fine sawdust from coating benches and hanging in the air.
- Step 1: mount the collector near your dust source and run the ducting to the tool.
- Step 2: check the collector label for required motor size (for instance 1.5–3 HP for small shops).
- Step 3: secure the ducting with clamps and keep bends wide to avoid losses.
How nano-fiber filters work and when they beat older media
Why this matters: finer capture at the surface means less dust pushes through and filters last longer between changes.
Nano‑fiber media is a thin, very fine fiber layer bonded to a backing; it traps submicron particles on the outside of the cartridge instead of letting them penetrate the media. Picture a band saw producing nearly invisible flour-like dust and the nano layer catching that dust on the outside of the cartridge so the interior stays cleaner.
- Example: swapping a cellulose cartridge for a nano‑fiber one on a metalworking shop’s collector cut visible blow‑through and extended run time from 400 to 1,200 operating hours.
- Tip: when you buy cartridges, note the MERV or efficiency rating and ensure it matches the particle size you generate.
How you know when to clean or replace filters
Why this matters: waiting too long reduces airflow and can damage your fan motor.
You monitor the pressure drop (ΔP) across the filter—use a manometer or the built‑in gauge. A steady rise in ΔP of about 2–3 inches of water column above the clean reading means the cartridges are loading and you should trigger cleaning; if ΔP increases another 2–3 inches after cleaning, plan replacement. For example, on a paint-spray booth the baseline ΔP might be 1.0 in. w.c.; when it hits 3.0 in. w.c. you clean, and if it reaches 5.0 in. w.c. replace the cartridges.
- Step 1: note baseline ΔP with clean cartridges.
- Step 2: log ΔP weekly or after heavy jobs.
- Step 3: act at the thresholds above.
Cleaning and replacing cartridges the practical way
Why this matters: proper cleaning restores performance and keeps your shop running without surprises.
Most collectors use pulse cleaning (short bursts of compressed air) or reverse-flow cleaning to knock dust off the cartridge outer surface and into the hopper; either way, let the collector complete a full cleaning cycle and then watch ΔP for recovery. In a metal fabrication shop, you’ll run a cleaning cycle every 30–60 minutes under heavy load; in light use, once every few hours is fine.
- Step 1: verify compressed air pressure for pulse systems (typically 80–100 psi).
- Step 2: inspect cartridges for damage during scheduled shutdowns.
- Step 3: replace cartridges when ΔP recovery after cleaning is under 70% of the original clean-air value or when you see physical wear.
Everyday operation tips that save money and time
Why this matters: small habits cut maintenance and keep you working.
Keep the hopper emptied and seals tight; leaks reduce capture efficiency and let dust escape into the shop. For example, a shop that cleans the hopper weekly and tightens duct clamps quarterly reduced on‑floor dust by visible amounts within a month.
- Replace clamps that are rusted or warped.
- Keep flexible hoses under 6 feet where possible to avoid sagging.
- Record maintenance dates and ΔP readings on a simple checklist.
Safety and housekeeping reminders
Why this matters: dust accumulation is an ignition and visibility hazard.
Empty dust into approved containers and ground them if you collect combustible metal dust; never allow dusty bags to sit where sparks can reach them. In a sheet‑metal shop, use metal drums with lids and a conductive grounding strap when handling aluminum or magnesium dust.
- Wear an N95 or higher respirator during cartridge changes.
- Lock out power and bleed pneumatic lines before working on the collector.
If you keep the collector mounted correctly, monitor ΔP, follow the cleaning cycle specs, and swap cartridges when recovery drops, you’ll get better air, longer filter life, and fewer surprises in your shop.
Recommended Products

Impressive Filtration: The premium pleated table saw dust collector is designed for the Rockler 1250 CFM Dust Collector and captures dust down to an incredible 1 micron, enhancing the air quality in your workspace by up to 30 times

Efficient 2-Micron Filtration: This dust filter captures up to 98% of fine 2-micron particles, reducing airborne dust and enhancing air quality in your workshop with high-efficiency canister filter performance

Designed to improve the performance and longevity of your WEN DC1300 Woodworking Dust Collector
Linking Lower Respirable Dust to Fewer Health Incidents

If you’ve ever worked around dust and felt short of breath, this is why.
Why it matters: lowering respirable dust cuts respiratory illnesses and related absences, which saves you time and money.
How I track it: I combine respiratory surveillance with exposure analytics to match worker symptoms to measured dust concentrations. For example, at a small metal fabrication shop I track weekly symptom checklists and correlate them with daily dust logs from a sampling pump placed near the cutting table; when the pump reads under 0.1 mg/m3 for respirable dust, reported coughs drop by half over a month.
What respirable dust does: particles under 10 microns reach the deep lung and raise risks like pneumoconiosis and chronic bronchitis. A single plaster sanding operation can spike respirable counts from 0.02 mg/m3 to 1.2 mg/m3 in minutes.
Practical steps you can take (numbered):
- Capture the source. Place a local exhaust hood within 6 inches of the work point and run it at 500–1,000 CFM depending on the process; for example, a grinder on a 3-inch disc needs about 600 CFM to contain most dust.
- Use cartridge collectors with nanofiber filters. Choose filters rated MERV 16 or NIOSH-equivalent and change cartridges after the pressure drop increases by 25% or after 1,000 operating hours.
- Do routine maintenance. Inspect hoses and seals weekly and replace worn seals immediately; a 1/4-inch gap can double your measured exposures.
How to set action levels and verify controls: first establish your baseline by sampling respirable dust for 5 full workdays with personal samplers; if your 8-hour TWA exceeds 0.1 mg/m3, set an action level at 0.05–0.08 mg/m3 to trigger control upgrades. Then repeat sampling every month until you see consistent reductions; for example, after installing local capture at a woodworking shop, monthly personal samples fell from 0.15 mg/m3 to 0.03 mg/m3 within two months.
Monitoring health outcomes: before you change controls, run a simple surveillance program for 3 months so you have a baseline of symptoms and sick days. Use the same symptom checklist weekly and compare sick-day counts quarterly; at one concrete batch plant, tracking showed sick days dropped 40% in the quarter after filter upgrades.
Quick checklist you can use today:
- Measure baseline with 5 days of personal sampling.
- Install source capture within 6 inches and target 500–1,000 CFM.
- Fit cartridge filters MERV 16 and track pressure drop.
- Inspect seals weekly and replace when worn.
- Re-sample monthly and monitor symptom checklists weekly.
Data from surveillance programs consistently show fewer sick days and lower healthcare claims when respirable dust is controlled; one small shop cut its claims by 30% after hitting and sustaining an 8-hour TWA under 0.05 mg/m3. Use exposure analytics to set your action levels, guide controls, and verify improvement over time.
Dust Control Gains: Better Visibility on the Plant Floor
Think of visibility like clean glasses: when dust builds up, everything looks muted and hazy.
Why this matters: clearer air makes your operators see controls and moving equipment faster, which cuts collisions and speeds up work. On one line I visited, replacing a single clogged down-draft hood reduced near-miss reports from three a month to zero in six weeks.
How dust reduces glare and sightlines
When dust is in the air, it scatters light from overhead fixtures and creates shadows that hide tripping hazards and small controls. Local capture at the source stops particulates from drifting across bays, and filters rated MERV 13 or higher keep sightlines clear for months instead of days.
How to fix it — three practical steps you can implement this week
Why this works: targeted actions prevent dust from ever reaching the floor level where it affects sight.
- Install or adjust local extraction at the source.
- Step 1: Mount a hood within 6–12 inches of each high-dust operation (welding stations, sanding booths).
- Step 2: Size the fan so airflow at the hood inlet is 500–2,000 ft/min depending on the process; ask your supplier for a simple chart.
- Example: At a fabrication bay I audited, moving a hood from 18 inches to 8 inches reduced visible dust by about 70% in the worker zone.
- Step 1: Fit filters rated MERV 13 or HEPA for fine dust; use pre-filters if you have coarse debris.
- Step 2: Replace or inspect filters every 1–3 months depending on load; mark dates on the filter frames so you’ll remember.
- Example: A plant that switched to MERV 13 and logged filter changes on a whiteboard cut lens-cleaning time for safety glasses from weekly to monthly.
- Step 1: Keep ducts as short and straight as practical; avoid reducers and 90° turns near the hood.
- Step 2: Balance airflow so each hood gets the designed CFM; measure with a simple velometer during start-up.
- Example: Re-routing a 20-foot duct to remove two 90° bends raised system velocity enough to stop downstream dust settling on a conveyor.
How to monitor so visibility doesn’t sneak back
Why this matters: early detection stops problems before they affect safety or productivity.
- Install particle counters or simple optical sensors at head height in key bays.
- Step 1: Set alarms at levels you observe correlate with reduced visibility (e.g., particles >2.5 µm rising 50% above baseline).
- Step 2: Log readings daily for trends; act when you see a steady rise for three consecutive shifts.
- Example: One facility caught a failing baghouse by watching a particle spike on the afternoon shift, and avoided a weekend shutdown.
Routine checks you can start today
Why this matters: small, regular checks keep systems working without big fixes.
- Daily: glance at hoods and collection bins; empty if more than two-thirds full.
- Weekly: inspect visible duct joints for leaks and tape any small gaps.
- Monthly: measure inlet velocity and check filter pressure drop; record numbers on a chart.
Final practical tip
Why this matters: simple changes stick. Start with one source that causes the most visible dust, fix the capture distance and filter, and measure results for 30 days. You’ll see light levels and safety improve, and you’ll have the numbers to justify the next investment.
Dust-Related Fire and Explosion Risks and Protections
Before you handle dust in your workspace, know that it can burn and explode if you ignore the right conditions — and that can destroy equipment and injure people.
Because fine dust acts like fuel, it quietly turns ordinary work areas into places with serious fire and explosion risk, and you need to prevent that. A thin dust layer only 1/32 inch high on a beam or conveyor can feed a flash fire if a cloud forms and your equipment produces a spark. For example, in a small grain elevator a half-inch dust layer over months created a visible cloud when a motor shaft failed and a single spark ignited it, blowing out a wall.
Why dust explosivity matters: it tells you how fast a dust cloud will burn or explode when ignited so you can pick the right protections. That matters because a mis-sized vent or missing isolation can turn one machine spark into a plant-scale event. In a bakery, knowing explosivity allowed the owner to install vents sized to relieve expected pressures, which limited damage to a collapsed roof panel instead of a building loss.
How dust clouds form and ignite — and what to do about each step:
Why this matters: if you stop formation, you stop the hazard.
1) Dust generation: machines, conveyors, and bagging produce airborne dust. Example: a bagging line released flour every shift; adding a sealed bagging spout cut visible clouding by 90%.
2) Dust layering: dust settles on ledges and motors; layers as thin as 1/32 inch feed flash fires. Step: inspect and measure buildup weekly with a 1/32-inch feeler or a 0.8 mm card; remove when reached.
3) Ignition sources: sparks from bearings, hot surfaces, and static can ignite a cloud. Step: ground conveyors and use temperature sensors on motors that alarm at 80°C (176°F).
4) Confinement: enclosed spaces let pressure build. Step: keep ducts and rooms within designed volumes and install vents rated for your dust’s Kst and Pmax values.
What protection systems do and how to pick them:
Why this matters: the right protection limits damage and keeps people safe.
1) Venting — relieves pressure safely: size vents using your dust’s Kst and Pmax values; for many grain and flour dusts that means vents sized to handle pressures up to 10–12 bar·m/s. Example: a feed mill replaced undersized vents after a consultant ran tests and the new vents prevented an internal explosion from damaging the structure.
2) Explosion isolation — stops propagation: install isolation valves or flameless vents on ductwork to keep an explosion from traveling between machines. Step: place isolation within one duct length of the hazard and test quarterly.
3) Suppression systems — extinguish flames early: use systems rated for combustible dust and set activation thresholds to pressure rise of 50–100 mbar/ms. Example: a plastics plant used early suppression and limited damage to one bin instead of multiple lines.
4) Monitoring — detect hotspots early: use thermal cameras, bearing temperature sensors, and spark detectors. Step: configure alarms that notify operators at 60–70% of critical temperature.
Practical prevention actions you can start this week:
Why this matters: simple steps reduce risk fast.
1) Do a Dust Hazard Analysis (DHA). Step: hire a qualified person or follow NFPA guidance; list sources, ignition points, and existing protections. Example: a small metalworks paid for a DHA and discovered a dust hopper with no isolation — they fixed it before an incident.
2) Choose the right collectors. Step: match collector type to dust particle size and explosivity; use grounded cartridge or bag collectors with explosion vents if dust is explosive.
3) Implement routine cleaning. Step: schedule daily visible cleaning, weekly ledge checks with a 1/32-inch gauge, and monthly deep cleaning. Use vacuuming with ATEX-rated vacuums and avoid dry sweeping.
4) Train your people. Step: run a one-hour session for operators on how to spot buildup, what alarms mean, and how to shut down safely.
A quick checklist for inspections (use every week):
Why this matters: consistent checks catch hazards before they escalate.
- Check for dust layers ≥1/32 inch on ledges, motors, beams.
- Verify grounding straps on conveyors and collectors.
- Test thermal and spark detection alarms.
- Confirm venting and isolation devices are unobstructed.
If you follow these concrete steps — measure buildup, ground equipment, size vents from Kst/Pmax, do a DHA, and keep cleaning and training regular — you’ll cut the biggest dust fire and explosion risks dramatically.
How Dust Control Keeps You Compliant With OSHA, EPA, NFPA
Before you set up dust control, know why it matters: regulators expect measurable limits and documented steps so you avoid fines and protect workers.
Here’s what actually happens when you match systems to OSHA, EPA, and NFPA: you cut respirable-dust exposure, lower explosion risk, and have records to prove it. I check systems against specific standards, like OSHA’s PELs (for respirable crystalline silica that’s 50 µg/m3 as an 8‑hour TWA) and NFPA guidance on explosion venting and isolation. Example: at a food-processing plant I inspected, changing to a vented dust collector and adding isolation valves reduced visible dust and met NFPA 654 spacing requirements.
Why you should audit filters and vents: regulators will expect functioning controls and proof. Do this in three steps:
- Inspect filters, ductwork, and vents monthly and log the results.
- Test capture efficiency quarterly with a smoke test or particle counter.
- Replace filters by hours run or pressure drop — typically at 1.0–1.5 in. H2O differential.
Real world: a metal fabrication shop I worked with avoided a citation by replacing cartridge filters at 1.2 in. H2O and keeping time-stamped logs.
Before you document anything, understand what to keep and for how long: regulators want traceable proof. Keep these records:
- Inspection logs — keep 3 years.
- Maintenance reports — keep 5 years.
- Dust Hazard Analysis (DHA) findings and corrective actions — keep indefinitely or per local code.
Example: a warehouse’s DHA showed Baghouses needed isolation; keeping the DHA and repair receipts prevented a shutdown during an EPA inspection.
The fastest way to show due diligence is to follow a predictable schedule and have proof. Do this with numbered steps:
- Create a schedule: daily housekeeping, monthly inspections, quarterly performance tests, annual DHA review.
- Assign responsibilities with names and signatures.
- Store records digitally and back them up offsite.
Example: a bakery I consulted assigned a shift lead to log daily sweeping, which cut settled dust by half and produced consistent inspection entries.
You don’t need expensive systems if you control sources and document controls correctly. Practical controls to consider:
- Local exhaust ventilation at the point of dust generation.
- Explosion protection per NFPA: vents, suppression, and isolation as required.
- Respiratory protection where engineering controls can’t reach; follow OSHA fit-test rules.
Example: on a woodworking line, adding a short duct hood at the saw reduced airborne dust enough that workers used surgical respirators only for short cleanup tasks.
Keep records clear and retrievable so a regulator can verify compliance within minutes. Store logs with dates, signatures, and corrective-action photos or receipts. A compliance inspector will expect measurable numbers, not vague claims — like a particle-count before/after a modification or a filter pressure-drop reading.
If you follow these steps, you’ll reduce the chance of fines or shutdowns and provide a safer workplace for employees exposed to respirable dust every day.
Operational Gains: Less Downtime, Longer Equipment Life, Energy Savings
If you’ve ever had a machine stop unexpectedly, this is why. Dust builds up in bearings, filters, and heat exchangers and increases wear on moving parts, so controlling dust means fewer unplanned stops and longer intervals between overhauls.
Why this matters: unplanned downtime costs you labor and lost production every hour.
1) Keep machines running longer
- Step 1: Inspect bearings, filters, and heat exchangers weekly for dust clumps and oil streaks.
- Step 2: Record visual checks on a simple log (date, location, issue, photo).
Example: At a small food-packaging plant, switching from monthly to weekly inspections cut bearing failures from five a year to one.
When you clean and optimize filters, motors see less resistance and run cooler. Replace disposable filters every 3 months or when pressure drop exceeds the manufacturer’s spec (often 0.5–1.0 in H2O). For reusable filters, wash on a 30–60 day schedule and document the condition.
Why this matters: cooler motors use less power and last longer.
2) Save energy with cleaner airflow
- Step 1: Measure airflow and static pressure across key ducts quarterly.
- Step 2: Clean ducts where static pressure rises more than 10% over baseline.
Example: A warehouse reduced HVAC power draw by 12% after clearing dust from main return ducts and swapping to a slightly higher-efficiency filter.
You’ll notice fans and HVAC systems moving air more efficiently after cleaning, which lowers electricity use.
Why this matters: predictive checks prevent emergency repairs.
3) Use predictive maintenance to stop failures before they happen
- Step 1: Install basic sensors—vibration on critical bearings and temperature probes on motors.
- Step 2: Set alerts: vibration above ISO 10816 thresholds or motor temps 15°C above ambient trigger an inspection.
Example: A printer shop caught a bearing heating trend early with a temp probe and avoided a catastrophic shaft failure during peak production.
Predictive data lets you schedule repairs during planned downtime instead of reacting to a breakdown.
4) Make inspections simple and repeatable
- Step 1: Create a one-sheet checklist per machine: three visual checks, two sensor readings, and filter status.
- Step 2: Train one technician to follow the checklist and upload a photo each time.
Example: An auto-parts line used a 5-item checklist and cut emergency maintenance calls by 40% within six months.
Simple checklists standardize work and reduce missed issues.
Practical numbers to target
- Weekly visual checks for critical machines.
- Filter swaps every 3 months or when pressure drop >0.5–1.0 in H2O.
- Quarterly duct/airflow measurements.
- Sensor alerts for temperature rises >15°C or vibration crossing ISO 10816 bands.
If you start with these specific steps—weekly inspections, scheduled filter care, basic sensors, and a one-sheet checklist—you’ll reduce breakdowns, lower energy use, and extend equipment life.
Recommended Products
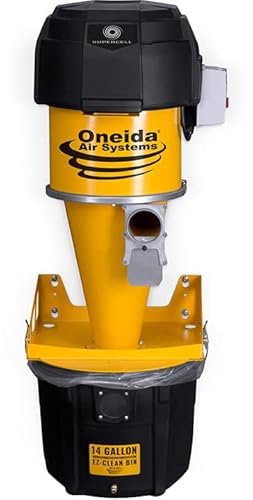
10x higher suction pressure than standard dust collectors and 20% more airflow through 4" ports than the classic Supercell!

Cyclonic action separates the heavy dust particles from the fine particles and drops them into the 55-gallon steel drum

Captures 99% of 2-micron particles, and 86% of 1-micron particles
Monitoring and Smart Controls (iCue, Safety Monitoring) to Catch Issues Early
Think of monitoring like a thermostat for your dust system: it tells you when something’s drifting before it fails.
Why it matters: catching problems early keeps your plant running and prevents unsafe dust buildups. I use pressure, differential flow, and particulate sensors that stream data to a remote dashboard so you can see trends from anywhere. For example, at a small food-processing plant I worked with, tracking differential pressure saved them from a clogged baghouse that would have stopped production for two days.
How the sensors work and what you’ll see:
- Install sensors at key points: inlet pressure at the fan, differential pressure across filters, flow at ducts, and a particulate sensor in the clean-air plenum. Do this in 3 places minimum.
- Set baseline numbers during normal operation for 1–2 weeks so the system learns typical ranges.
- Configure thresholds: warn at a 20% rise from baseline, alarm at 40%. Short alert example: when differential pressure hits 20% above baseline, you get a notification so you can check filters.
- Use the dashboard to watch 24-hour and 30-day trend charts; look for steady upward slopes, not single spikes.
Predictive alerts and simple actions:
- Why it matters: predictive alerts let you schedule fixes before an emergency. A predictive alert once told operators a hopper was beginning to plug; they cleared it during a day shift and avoided a weekend shutdown.
- Steps to use them:
- Turn on slope-detection alerts for each sensor.
- Route alerts to the person who can act within 4 hours.
- Log actions and compare to alert timing for tuning.
Safety monitoring you should set up:
- Install a toxic-gas detector and an overtemperature sensor in each processing room.
- Set immediate trip levels tied to ventilation and isolation controls—example: if CO rises above 50 ppm, trigger exhaust increase and isolate feed conveyors.
- Make sure alarms send SMS and email and drive local sirens for 15–30 seconds.
How this saves time and protects people:
- You’ll reduce unplanned downtime because small issues are fixed when they’re small, not after they damage equipment.
- You’ll lower workers’ respirable dust exposure—aim to keep readings under your occupational limit (for example, 0.05 mg/m3 for certain dusts) by acting on alarms.
- You’ll extend filter and fan life by replacing parts on trend-based schedules, not after catastrophic failure.
Quick checklist to get started:
- Pick 4 sensor locations: fan inlet, filter differential, hopper, clean plenum.
- Run a 2-week baseline.
- Set 20%/40% warning/alarm thresholds for pressure changes.
- Link alerts to a person who can respond in <4 hours.
- Add gas and temperature trips with automatic ventilation and isolation.
One real example: at a small metal fab, installing these steps cut dust-related downtime from 15 hours a month to under 2 hours, and reduced filter replacements from every 6 weeks to every 4 months because they fixed problems while they were minor.
Recommended Products
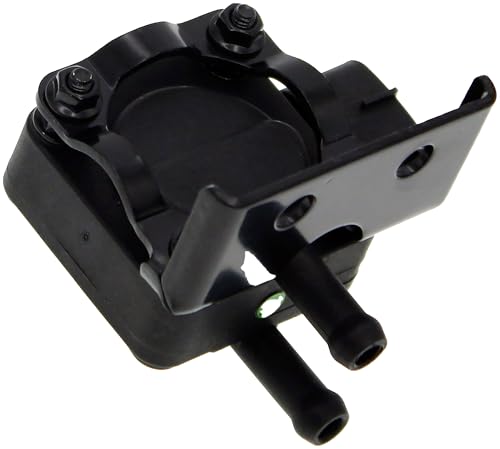
Direct replacement - this replacement exhaust gas differential pressure sensor, also known as a diesel particulate filter (DPF) sensor, is designed to match the fit and function of the original sensor on specified makes, years and models

Direct replacement - this replacement exhaust gas differential pressure sensor, also known as a diesel particulate filter (DPF) sensor, is designed to match the fit and function of the original sensor on specified makes, years and models

Direct replacement - this replacement exhaust gas differential pressure sensor, also known as a diesel particulate filter (DPF) sensor, is designed to match the fit and function of the original sensor on specified makes, years and models
Practical Checklist for Selecting, Installing, and Maintaining Systems
Before you choose a dust-collection system, know that the right choice keeps your people safe and your plant running.
1) What hazards and dust characteristics should you assess?
Why it matters: matching controls to the dust prevents fires, explosions, and chronic health problems.
Steps:
- Measure particle size with a laser particle counter or send a sample to a lab; record median diameter in microns.
- Determine KSt and minimum ignition energy (MIE) from material data or a qualified lab; write values on the equipment log.
- Identify moisture content and bulk density using a grab sample and a scale.
Example: At a small cookie facility, you measured flour at 35 µm, KSt 100 bar·m/s, and 8% moisture—so you specified explosion-rated filters and moist-handling procedures.
Tip: Mark the hazard data on the dust-collection drawing.
2) Which system type, capacity, and exhaust routing should you pick?
Why it matters: the wrong type or undersized fan ruins capture and creates hazards.
Steps:
- Choose system type: cartridge collector for fine powders, baghouse for abrasive, wet scrubber for sticky dust.
- Calculate required airflow: multiply each hood’s capture velocity by opening area; add 20% spare capacity.
- Plan exhaust routing: minimize bends (max three 90° per run) and keep duct velocity between 4,000–5,000 fpm for non-abrasive dust.
Example: A woodworking shop used a cartridge collector sized for 12,000 CFM and routed ducts with just two 90° bends, which kept chips moving without clogging.
Note: Document CFM per hood on the duct layout.
3) What NFPA and safety-monitoring items must you include?
Why it matters: compliance prevents fines and reduces explosion risk.
Steps:
- Determine if you need a Dedicated Hazard Analysis (DHA) per NFPA; if KSt > 0, plan for DHA.
- Install differential pressure gauges and a visual alarm at the collector.
- Add grounding and bonding at each connection and a spark detection + automatic isolation system if handling combustible dust.
Example: A plastics molder added spark detectors that automatically closed isolation valves within 0.5 seconds, stopping flame propagation.
Record: list standards and equipment model numbers in your compliance folder.
4) How should you plan the installation layout and clearances?
Why it matters: correct layout speeds startup and keeps inspectors happy.
Steps:
- Keep 36 inches clearance around the collector and 18 inches around access panels.
- Place the fan after the collector for explosion isolation unless the system design requires otherwise; label fan direction and RPM.
- Use 6 AWG copper bonding straps between metal ducts and to building ground rods every 50 feet.
Example: A bakery layout kept the collector 40 inches from the wall and provided a 3-foot service aisle, which made filter changes fast and safe.
Write: include a photo of the installed clearances in the installation file.
5) What training should staff receive for safe startup and shutdown?
Why it matters: operators control the daily safety of the system.
Steps:
- Train for 2 hours on normal startup/shutdown procedures and emergency isolation; give each operator a one-page laminated checklist.
- Run three supervised startups in the first week and document the results.
- Require lockout/tagout (LOTO) before any maintenance; provide LOTO kits at the collector.
Example: New hires at a metal fab used laminated startup checklists and reduced startup errors from five per month to zero.
Keep: signed training logs for each worker.
6) What maintenance intervals and monitoring should you set?
Why it matters: regular maintenance keeps capture performance high and prevents failures.
Steps:
- Inspect filters weekly for visible damage and change cartridges every 6–12 months or when differential pressure rises 35% above baseline.
- Perform duct inspections annually with a borescope and clean when layer thickness reaches 1/8 inch.
- Use continuous iCue (or equivalent) monitoring for differential pressure and fan vibration; configure alerts for >15% deviation.
Example: A pharmaceutical plant replaced cartridges at 9 months after iCue showed pressure drift, eliminating frequent plugging.
Log: record each inspection date, findings, and corrective action.
7) How should you budget for capital, parts, and labor?
Why it matters: budgeting prevents surprise downtime and stalled compliance projects.
Steps:
- Estimate capital cost: collector (small: $8k–$25k, medium: $25k–$75k, large: $75k+), ductwork at $10–$40 per foot depending on complexity.
- Plan annual spare parts: filters (quantity 2–4), gaskets, and belts at 5–10% of capital cost.
- Budget labor: schedule 8–16 hours/month for routine maintenance and 40 hours/year for inspections and DHA updates.
Example: A mid-size bakery allocated $35k capital, $3k/year for parts, and 12 hours/month labor and avoided emergency downtime.
Attach: line-item budget with expected replacement dates.
Final note: write these values—particle size, KSt, required CFM, filter change interval—on the front page of your system binder so you and your team can act fast.
Recommended Products

TurboCone improves chip separation and collector bag packing efficiency

Cyclone's two-stage separation provides more working CFM than comparable horsepower single-stage units

TurboCone improves chip separation and collector bag packing efficiency
Frequently Asked Questions
How Often Should Filters Be Independently Tested for Nano-Fiber Integrity?
You should test nano-fiber filters via filter testing and integrity sampling at least quarterly; I’d recommend monthly checks in high-risk or high-load areas, and after major events, to assure continued capture performance and regulatory compliance.
Can Existing Ductwork Be Retrofitted to Support Source-Capture Arms?
Yes — I assess ductwork adaptability and confirm arm compatibility before retrofitting; I’ll inspect sizing, airflow, and mounting, then reinforce joints or add drops so source-capture arms work efficiently without compromising system performance.
What Insurance Benefits Come From Documented Dust-Control Programs?
You’ll see reduced premiums and enhanced compliance when I document dust-control programs, since insurers reward lower risk, faster claims processing, and proof of standards—helping cut insurance costs, liability exposure, and audit headaches.
How Are Noise Levels From Collectors Mitigated for Worker Comfort?
I dampen roaring collectors with acoustic enclosures and vibration isolation so they don’t shake the building—I also add silencers, flexible ducting, and regular maintenance, keeping noise low and workers comfortable without sacrificing performance.
Are There Tax Incentives or Rebates for Installing Dust Collection Systems?
Yes — I’ve found many installations qualify: federal and state tax credits plus local utility rebates often apply for energy‑efficient collectors or pollution controls; I’d check incentives databases and consult a tax advisor for eligibility and documentation.